Feeds:
Posts
Comments

Posts Tagged ‘Root’

Dec Winter Veggies Colander Flowers Dan Boekelheide

A misty morning at the garden….

We in SoCal are so fortunate that we can plant heartily in ‘Winter!’ Brassicas and Peas are the main story. What I call the ‘littles’ are the understory! Lettuces, root crops like beets, parsnips, turnips, Daikon radish. Smellies like onions and garlic, cilantro and arugula, and herbs like Rosemary and others, protect your garden from certain pests, and make your garden oh so fragrant and your meals so tasty!

If you already have these going, plant your last rounds now so waiting for their harvest doesn’t interfere with earliest spring plantings.

Well, there are several important events in December, LOL.

  1. First is being sure everyone who knows you, knows what is on your holiday garden wish list!
  2. Plan your spring garden, get catalogs, and order seeds NOW – for the entire year to come!
  3. Maintain your garden, keep up with SoCal winter harvesting, enjoy your bounty, try some new recipes!
  4. If you wish, plant your last round of winter plants, succession planting – know that if they come in late they may interfere with earliest spring planting space. Place them carefully so tall early spring plants can be installed on time. Or leave those spots open. ‘Open’ might mean just putting some lettuces there.

Harvest Brassicas of all sorts! The big ones, broccoli, cauliflower and if you live in a good chill area Brussels sprouts, have grown big enough now and your earliest varieties are producing handsomely. Harvest your brocs and caulies while the heads are still tight. If you miss that, harvest asap, even the flowers and flower stalks are edible! After you take the main broccoli head, let your plant continue to grow so it will produce smaller side shoots. Some varieties produce large 3 to 4″ mini brocs and later, smaller salad size ones right on through summer! Cauliflowers are a onetime harvest though you can keep eating the greens. To replace them, you might choose to pop in some beautiful chard, a potato patch, or quick growing mini cabbages in the large open spots that become available. Some cabbages, especially the mini and early varieties, are now headed tightly and ready to eat – slaw, steamed, dropped into soups and cold weather stews. You can still replant them with mini cabbies if you love them!

Deliciously fresh and nutritious winter heading lettuces, kale, celery, bok choy, cilantro, arugula and all manner of cut and come agains are in! Table onions scallions, chives and leeks can be snipped or cut off about 2″ above the ground and let to grow back 3 to 4 times! Do the same but at about 3″ with cilantro and arugula. Let some of your cilantro and arugula grow out for flowers to bring the bees, make seeds for the birds and for you to plant more! The simplest way is to scatter some of the seeds where they are needed and let them come up at will!

Winter brings a lot of tasty Root crops. Winter Cylindra Beets are colorful, and have cut and come again leaves too! Long winter radishes like Daikons are spicy! Carrots are splendid to eat at the garden, share with your kids, pup, bunnies, shred into salads, add to winter soups, stews and stir frys. Slice/chop/stick and freeze for later! Grow some Parsnips too! Turnips have so unique a flavor you might want to eat them separately to just enjoy that flavor.

Harvest peas when they get to the size you want them, and be prompt with that harvesting to keep them coming! Plant more rounds if you love peas!

MAINTAINING

Sidedressing is like snacking. Some of your heavy leaf producers and big bodied Brassicas, may need a feeding now and again or just when they start to fruit. If they slow down, or just don’t look perky, slip them a liquid feed out to their dripline, or cultivate in a wee bit of blood meal. Get your long spouted watering can nozzle under those low cabbage leaves. Lettuces love manures. Compost and manure teas, fish emulsion (when there are no digging predators), powdered box ferts, are all good. Winter feeds need to be easy for your plant to take up. Use ½ the strength of your summer feedings. Slow release is a wise consideration. An excellent way to get feeds to the roots is to push in a spade fork no more than 6″ deep. Push it in vertically (so as not to break the main tap roots), wiggle it back and forth just a bit, remove the fork, pour your foods into the holes, close ’em back up. Soil organisms will get right to work, your plant will stay healthy and be quite productive! Worm castings, though not food, work wonders with immunity, soil conditioning and help germination! Mix some in with your liquid feeds you pour around your plant.

The exceptions are carrots, peas and favas. Carrots get hairy and will fork with too much food! Over watering or uneven watering makes them split and misshapen. Your peas and favas are busy gathering Nitrogen from the air, feeding themselves. If they yellow or look peaked, give them a bit, just a sprinkle or two, of blood meal for quick uptake.

A mini task is to keep covering the shoulders of carrots, beets, radishes, parsnips and turnips. They substantially push right up above ground as they grow. Planting their seeds deeper doesn’t compensate. It’s the nature of the veggie! Never hurts to put a handy little pile of extra soil near where you plant them, or plant them in a low sloped trench. When they need covering, pull the sides of the trench down to cover them. Uncovered shoulders look dry, are tough, sometimes bitter, and need peeling before cooking. Uncovered carrot shoulders don’t ripen but stay green, just like exposed parts of potatoes turn green. The green on potatoes is slightly poisonous, not enough to do harm, but it doesn’t look good.

Watering is important even in cool weather. Also, some plants simply like being moist ie chard, lettuce and short rooted peas, beets. No swimming, just moist. Finger check your soil after rains to see if your soil is moist at least 2″ deep. Sometimes it is rain moistened only 1/4″ deep, needs more water! Also, be careful of too much water, that makes for an aphid tasty soft plant. Watch WEATHER reports in case of freezes, heavy winds, rain. Before weather, stake and tie plants that need support. After strong winds check everybody right away to see if any plants need help. See more about rainy days!

Santa Barbara’s average First Frost (fall) date AT THE AIRPORT is December 19, Last Frost (spring) date is (was?) January 22. That can vary from the coastal areas to the foothills, and our climate is changing generally to warmer, so these dates may not be viable guides much longer, if even now. And remember, these are average dates! See great tips – Protect Your Veggies from Freezing

Except for erosion control, in winter, we pull mulch back to let the soil warm up during the short winter days. The only areas we mulch are around lettuces and chard to keep mud splash off the leaves. Also, it’s good to remove pest habitat, let the soil dry a bit between rains to kill off wilts fungi. Bag up, or pile and cover, clean uninfested summer straw, mulches, to use as compost pile layers during winter. Do not keep straw from areas where there have been infestations.

Pests & Diseases, Prevention and removal! Keep an eye out for pests and diseases and take quick action! 

BEFORE you put in seeds, sprinkle a bit of Sluggo type stuff around at least two times (to kill the generations) to keep snails and slugs from vanishing upcoming seedlings overnight, making you think they never came up! No, they didn’t let you down. Killing off the creatures ahead of time saves the babies. It stops new transplants from being seriously damaged or entirely eaten while they are small. Do this a few times, to knock off the generations, and there will be no tiny vegetarian predators for a while.

Don’t lose your crops to birds! There is less food for them in winter, and, often, little rain, so they resort to eating tender juicy veggie leaves. Buy pre made covers, or get clever and cover seeded rows with DIY small openings wire tunnels or a patch cover bent that has sides bent to the ground to keep birds from pecking at little leaves or from plucking tiny seedlings right out of the ground! You can also use small plastic bottle sections to make mini sleeves that birds won’t go down into. Or for baby lettuces, make large plastic bottle cloches, though wire covers let more light in and water through! Bird netting is inexpensive, tears easily, but is good to stretch over peas on a trellis. See more about bird, animal and insect above ground protection covers!

Pests Birds Aviary Wire Cloches
Seedlings Cover Birds Bottles WireSeedlings Baby Lettuce Plastic Bottle Cloche
A common pest of Brassicas is the larvae of the pretty little Cabbage White Butterfly, Pieris rapae. The green Cabbage Worm, caterpillar, chews large, irregular holes in the leaves. They blend so well you can easily miss seeing them on the undersides of leaves. Per Natural Planet: ‘They lay up to 200 tiny yellow eggs that hatch in 7 or more days. The larvae feed heavily for 15 or more days. There are 3 to 5 overlapping generations each year, as many as 8 in warmer areas. They bore into the center of cabbage heads contaminating them with its fecal pellets. The dark-green pellets can also be found in the crook of leaves near the stem.’ See here for some terrific natural ideas on what to do!

Chard and beets get Leafminers. Where they have eaten looks terrible but the good part of the leaves is perfectly safe to eat. Plant chard so mature leaves don’t touch, or best of all, in different places around your garden, not in rows or clusters. Thin your plants so they have room. Harvest leaves that might touch first. Remove infested leaves immediately to reduce spread! Beets are not a permanent crop, so they are planted closely. Simply harvest them at their leaves’ prime – ahead of the Leafminers.

A typical disease is Powdery mildew. Plant leaving plenty of space for air circulation, water early in the day so they dry before evening. For mildew apply your baking soda mix. The best combo is 1 regular Aspirin, a 1/4 cup nonfat powdered milk, heaping tablespoon of baking soda, a teaspoon liquid dish soap per gallon/watering can. Before sunrise drench under and upper sides of the foliage of young plants to get them off to a great start! It takes only an hour for the mix to be absorbed! Do this the same or next day if transplanting. Reapply every 10 days or so, and after significant rains. Prevention is so much better than after mildew has set in. See Aspirin Solution. Hose away aphids and whiteflies, mildew. Remove yellowing Brassica leaves. Yellow attracts whiteflies. In general, plant further apart for air circulation, water and feed just a little less to let those leaves harden up a bit. Soft fat leaves are an invitation to aphids and mildew!

Do not compost diseased or infested leaves or plants. Don’t put them in green waste. Put them in the trash. Wash your hands and clippers before you go to other plants.

Windy days are prime time to gather leaves to add to compost or process for Leaf Mold, Mulch or Compost! Leaf Mold is low in nutrients, but makes a superb soil improver, conditioner for vegetable and flower beds. Leaf mulch is free for the making! Leaf Compost processes faster when made the right way! See more!

PLANT JUDICIOUSLY NOW

Per square foot, fast growing cut-and-come-again Lettuce, Chard and Kale are by far the top winter producers! Plant more big plants like brocs and cauliflower, but remember, with cooler weather, they will grow more slowly. That may interfere with early spring plantings in March. Allow enough time to let added compost, manures, worm castings and Sphagnum peat moss (increases water holding capacity) become part of the soil organism community. If you do plant more now, better to get transplants if you can, and shave six weeks of their needed growing time to maturity. Select faster maturing varieties now.

As lettuces tire, and other plants like carrots and beets are removed, add more of them and any ‘littles’ you love on the sunny side and between the big plants. If the littles need more sun, remove large lower leaves of the big plants. Mild tasting littles include bok choy, kohlrabi, garden purslane, arugula, mizuna, watercress, young parsnips and turnips, Daikon winter radishes, and Napa cabbage. For a little more spice, go for those dark green kales, mustard, rutabaga and turnip greens! Try some culinary dandelions for super nutrition! These are plants that will take you through February, March and leave enough time to add compost and to let sit until major spring planting begins in April.

Believe me, you are going to get spring planting fever along about March, so plan ahead for it!!! Start seeds indoors the first three weeks of January for early March plantings! Choose varieties that are cold tolerant and are early maturers for the soonest table eats!

If you have enough seeds, over planting is fair game! Thin your beets, carrots, chard, kale, mustard, turnips. Take out the smaller, weaker plants. They are great in your salads along with small tender Brassica leaves. Plant patches of Mizuna and mow it!

Remember your winter companion planting tips:

  1. Carrots enhance peas, onion family stunts peas
  2. Carrots thrive when Cilantro, Chamomile (a spring/summer plant), Marigold are planted with them.
  3. Onions, leeks and chives help repel the carrot root fly. But remember you can’t put the onion family near peas!
  4. Lettuces repel cabbage white butterflies. Plant them generously among your Brassicas.
  5. Cilantro enhances Brassicas – broccoli, cauliflower, Brussels sprouts, kale and repels aphids on them!

Besides beautiful bareroot roses, decide now where you will be buying any January bareroot veggies you want! Consider: grape vines; artichokes; short-day (sweet) globe onions; strawberries; cane berries such as raspberries (get low-chill types); low-chill blueberries; and rhubarb (be cautious where you plant it, it can be poisonous to humans – children, dogs and chickens), asparagus, and horseradish. Artichoke pups need 3’ to 4’ space, 6′ to 8′ is more a reality! They are hefty growers and live 10 years! If you keep them watered, and there is enough space, they are a great street strip survivor plant!

SPRING PREPS

Seeds for Spring & Summer planting! Perfect time to sit with seed catalogs, do online research. Get your summer garden layout in mind. First choose what is good for your excellent health! Next might be how much plant you get per square foot if you have limited space and want to feed several people. When we are in drought conditions, water could be a strong consideration ~ choose heat and drought tolerant varieties. Always look for disease and pest resistance. Get some early varieties, for earliest harvests along with later maturing varieties for a continuous table supply. Earlier variety fruits are generally smaller, but what a treat! Cherry tomatoes come in first. Place your order for the entire year, while seeds are still available.

One of the more unusual spring preps is Cold Stratification for Some of Your Seeds! Seed packs don’t tell you the seeds need it, so you have to know on your own. In nature, as seeds fall to the ground, they overwinter there, sometimes under the snow! Yet they come up perfectly when conditions are right! You can either let that happen, they are the ones we refer to as ‘self seeding’ plants, or put them in the fridge/freezer. Each plant that needs it has specific differences. Some need literally months of chill, others a short time.

Sadly, due to the virus,the Santa Barbara’s 13th Annual Seed Swap is not appearing to be happening in Jan 2021. But do get your seeds ready to share, and prepare your ‘shopping’ list just in case! Remember, a Seed Swap is a random affair. Get your standby favorites from those reliable catalogs. Use Seed Swaps as fun backup source, new things to try, and most importantly, for local seeds. The last Saturday of January every year is National Seed Swap Day! Look in your area for an event, and if you don’t find one, collaborate with your local garden clubs or permaculture group to get one going if you have an appropriate location for safe distancing! If your climate is warm enough, holding it outdoors may work.

For help making your seed decisions see:

Summer Lettuce Varieties: In summer you want a stronger lettuce, heat tolerant & slow bolting, tip burn resistance! Lettuce Leaf Red Sails is a beauty. Jericho Romaine from Israel has become the classic summer romaine for warm regions. Sierra, Nevada. Parris Island is slow bolting. Green Towers Romaine tolerates moderate summer heat and has some resistance to tip burn and bolting. Green Star is phenomenal! Super productive, tolerance to hot weather, bolting, and tipburn, so it can be grown all season. High resistance to downy mildew. Black Seeded Simpson. And there are more – try several!

Definitely start building compost for spring planting. You could plant green manure where you will grow heavy summer feeders like tomatoes, potatoes, eggplants, peppers, chilis, squash, pumpkins, cucumbers, melons, and corn; hungry stalk vegetables like celery, fennel, rhubarb, and artichokes; or continually producing green, leafy vegetables like lettuce, spinach, Swiss chard, or strawberries. Or plant it if you want a break! Just lay in some green manure seed mix – vetch, bell beans, Austrian peas and oats. In Santa Barbara area get the Harmony mix and inoculant at Island Seed & Feed. Let it grow two to three months to bloom stage. Chop down, chop up and let it lie on the surface about 2 weeks, keeping it moist. Add any amendments you want – additional manure, compost, and turn under. Let it sit two weeks to two months. Your choice. Let the herds of soil organisms do their work! I usually do about 3 weeks. OR, lay on as many layers of compost material as you can get for an up to 18″ deep area where you will be planting. Put in some surface feeding red wriggler worms. The BEST soil enhancer and you will have a tasty raised bed!

WINTER VEGGIES STORAGE

This is such a great post by Anthony Reyes at FarmScape Gardens, here is the link! Winter Vegetable Storage, Part 2

For veggies in your kitchen, here is the UCDavis Quick Guide to Fruits & Vegetables Storage:

Storage Refrigerator Counter Fruits Vegetables

Birds and Bees! Plant wildflowers seed now to take advantage of winter rains for early spring flowers! Germination in cooler weather takes longer, so don’t let the bed dry out between rains. If you have space, make habitat for beneficial insects, birds and animals too! Start building now to put your solitary bee home up for wild bees in March or early April! If you already have one, clean it, and if you have an owl house, now is the time to clean it out too. Depending on where you live they are usually empty from Halloween until early December! Nesting site selection starts in January, so build yours and get it up as soon as you can!

Wonderful Gardener Style Holiday Gifts!

Please be generous with your time these holidays. Rather than just serving food, maybe show someone how to grow veggies, give them seeds with instructions, give them and the kids a tour of your garden – eat carrots together!

Layer up, enjoy these crisp days. Let the wind clear your Spirit, the rain cleanse and soften your Soul.

Happy Gardening and Happy Winter Solstice!

Updated Annually


November images images from Rancheria Community Garden, Santa Barbara CA! Almost always there are surprises and this time is no different!

Check out the entire December Newsletter!

Back to top


Love your Mother! Plant bird & bee food! Think grey water! Grow organic! Bless you for being such a wonderful Earth Steward!

The Green Bean Connection started as correspondence for the Santa Barbara CA USA Pilgrim Terrace Community Garden. All three of Santa Barbara’s community gardens are very coastal. During late spring/summer we are often in a fog belt/marine layer most years, locally referred to as the May grays, June glooms and August fogusts. Keep that in mind compared to the microclimate niche where your veggie garden is.

Read Full Post »

Super LoCal Nutritious Lacinato Kale aka Tuscan, Black or Dinosaur

Elegant, nutritious Nero di Toscana Lacinato Kale aka Tuscan, Black or Dinosaur. 

Delicious winter garden harvests continue! You may not feel like eating as many salads in this cooler time, but veggie soups and stews are super nutritious and great for sharing!

Keep an eye on weather reports! We are still in the frost – freeze time in Santa Barbara until the last average frost date January 22 – measured at the airport. Have old sheets, light blankets, old towels handy. If a freeze is predicted, for small plants, like tender lettuces, just lay tomato cages on their sides and put your coverings over them. Secure coverings well so wind doesn’t blow them around and damage your plants or leave them uncovered. Remove them when the sun comes out! No cooking your plants before their time! Dates vary from the coastal areas to the foothills, and our climate is changing generally to warmer, so these dates may not be viable guides much longer, if even now. Find out the frost dates for your Zip Code! See the details – Protect Your Veggies from Freezing!

Be sure your caged, trellised and tall plants are secure before and after the winds of rains. Afterwards, stake any plants that have toppled, check your trellised plants, restore berms. Harvest what can’t be saved.

After rains there are weeds! It’s time for that Hula hoe! Weed, weed, weed! Do it before the roots get bigger and you lose your soil when you pull them out. Weed before taproots get deep and hard to remove. Get those clover roots out all the way down and before grass makes its frilly little seed heads. FIRST, remove any weed that is flowering, soon to make seeds! Anything that is not seeding, healthy and not pest infested, may be cold composted, or you can use them as mulch where there is bare ground not in your garden.

Time to check beds and berms! Install trenches to capture rainwater. Mulch to prevent erosion and soil splash on leafy greens. Add soil on carrot, turnip and beet shoulders and exposed potato bodies. See Rainy Day Tactics for Spectacular Veggies! After a rain, do the finger-in-the-soil check to be sure your plants are getting enough water. A light rain may not be nearly enough…

Once the weeds are out, if the area is clear, you have choices to make. Plant very last rounds of favorite winter plants or start prepping soil for spring planting!

January Plantings  If you love your winter crops, and aren’t necessarily in a rush to do spring/summer, amend your soil immediately and plant one more round, from transplants if you can get them or the starts you have begun on your own, seeds if you must. See December for tips on what to plant. In cooler January weather, plantings will start slowly, but they will mature faster than usual as days get longer. Most January plantings will be coming in March, April. That’s still in good time for soil preps in April for April/May plantings. In April/May there is less fungi in the soil, so plants that are fungi susceptible get a better start – mainly that would be wilt susceptible tomatoes.

Plant MORE of these delicious morsels now! Arugula, beets, brocs, Brussels sprouts if you get winter chill (there are some new purple ones on the market!!!), bunch onions, cabbage, carrots, cauliflower, celery, chard, culinary dandelions, garden purslane, kale, kohlrabi, head and leaf lettuces, Mesclun, parsnips, peas, potatoes, radishes – especially daikons, and turnips! Scatter your Breadseed Poppy seeds for gorgeous April, May blooms! Select a place to plant a bee bringing Borage right in the center of a circle of plants so it can serve them all! Give it plenty of room and place it so it won’t shade out shorter spring plants you will be growing.

If you would like some tender little snacking carrots, quick growers to show the kids, or minis for your pup, try early Adelaides from Johnny’s Selected Seeds! They say ‘True baby carrots. Unlike most “baby carrots,” which are harvested at an immature stage before properly filling out, Adelaide is a true baby, meaning it has an early maturity and forms a blunt root tip at 3–4″ long.’ Only 50 days! See all about Carrots!

For us SoCal gardeners, besides beautiful bareroot roses, this month is bareroot veggies time! They don’t have soil on their roots, so plant immediately or keep them moist! Grape vines; artichokes; short-day (sweet) globe onions; strawberries; cane berries such as raspberries (get low-chill types); low-chill blueberries; and rhubarb, asparagus, and horseradish. Bare root planting is strictly a JANUARY thing. February is too late. Many bareroot veggies are highly sought after, so keep checking their arrival date, then when they arrive, drop everything and go get them!

Continue to make the most of winter companion planting! Carrots enhance peas, onion family stunts peas. Cilantro enhances Brassicas and repels aphids on them! Lettuce repels Cabbage moths. Onions, leeks and chives help repel the carrot root fly. Carrots thrive when Cilantro, Chamomile, Marigold are planted with them. Companion planting is also a size strategy. Keep planting smaller plants, especially lettuce, on the sunny under sides of Brassicas! Take off a couple lower leaves to let more sunlight in. Under Brassicas, plant lettuce from transplants, not seeds, since Brassicas are allelopathic, makes biochemicals that inhibit small seeds like lettuce from germinating.

Planting summer crops early isn’t always a gain. Even if the plant lives, some won’t produce fruit until they have enough hours of sun, and for some, warmth including day/night and/or ground temps. And some plants set in too early will never produce. That waiting time for enough sun, enough warmth, interrupts the plant’s natural cycle and the production window is lost. If you take that chance and it doesn’t work, pull and replant. No amount of waiting will do the job.

Peppers are a classic example. For some gardeners peppers take forever…………. For others the standard couple of weeks and seeds are seedlings! If you have experience, you probably know which it is for you. A lot of Latinos start their peppers in January and let them grow slowly until April. If you plant from transplants, I would not try for an early start. Peppers just don’t like cold feet. Whenever you start, plant two rounds, two to three weeks apart. That way you have a better chance of hitting the magic window! Soil Temps are critical for root function. Peppers need 60 degrees + for happiness. A gardeners’ soil thermometer is an inexpensive handy little tool to own.

You can use area that becomes open for temporary plants. Put in quickie leaf crops like lettuces, arugula, bok choy, spinach, chard, kale, until it’s the right time to plant heat lovers. These quickie plants can be removed at any time and you still shall have had lush harvests. Hardly anyone can resist planting early tomatoes, February, March! Another strategy is plant your leafies to one side, leaving room to plant your toms where the toms would be planted if the leafy plants weren’t there. Plant tomatoes on the sunny sides of the leafies so the baby transplants/seedlings, get plenty of sun for a good start! When your big plants get big enough, remove lower leaves that shade your leafies. That way you have table food and your heart is happy too! Depending on how big your open area is, you can also plant your leafies in zig zags then add the permanent heat lovers inside the ‘V’ areas. As soon as possible plant companion plants for the heat lovers you will be growing in each area.

Choose early cold tolerant tomato varieties. Ones with northern names, in SoCal that could be Oregon Spring, or Siberian. Stupice from Czechoslovakia is very early! Bellstar, from Ontario Canada, is larger and earlier than other plum tomatoes. Early Girl is a favorite! And SunGold cherry tomatoes are almost always a winner! Cherry toms are small and will ripen when other tomatoes just stay green for the longest!

Summer Garden Design is important right now! You can do diagrams on paper or just give it a good think to see if there are any changes this year, and carry it in your head. That layout is what you need to make your seed list! Seeds from catalogs, seeds from the Santa Barbara Jan 26 Seed Swap! The Seed Swap is free, fun and random, a good way to try plants you might have never considered, and they are adapted to your area! Catalogs give you the best selection and of plants your nursery doesn’t carry or isn’t able to get. Check for drought and heat tolerant varieties or look in dry or humid southern states that match your eco niche or world areas that have heat tolerant desert low-water-needs plants and order up! The seeds of these types may need to be planted deeper and earlier than more local plants for moisture they need. They may mature earlier. Be prepared to do second plantings if needed and use a little water. See Choosing Seeds: Catalogs to Seed Swaps! Smart Design for Your Spring & Summer Garden, Seed Selection! See also some of the bigger long term choices planning and designing your garden.

Before you opt out of planting tomatoes and/or cucumbers due to Fusarium and Verticillium wilts, see more wilt prevention tips! See also Wilts & Cucumber Beetles, Tomatoes & Cukes! for special planting details for successful results!

Later January is time to sow seeds indoors for mid to late March early plantings. If you will be doing succession plantings, sow your seeds in succession, like every 2, 3, 4 weeks depending on which plant it is and how many you need. If those fail, it’s to the nursery you go for transplants! Avoid box stores that bring plants from elsewhere that may not be timely for your area, may be infested or sick. If you do buy there, check them carefully. This is very important in a community garden where pests and diseases can spread quickly. Select local nurseries that order conscientiously for local timing, that try to get quality plants for us. You may pay a tad more, but it is worth it not to lose a plant or infest/infect others. Local people live here and they have your interests at heart since they want your repeat business. Also, they can answer your questions. Establish a good relationship. At the Farmers Market, check with local farmers to see what they plant when. Some feed stores are agriculturally inclined.

Check out Seed Soaking/Presprouting Tips & Ideas! If seeds and tending seedlings aren’t for you, wait and get transplants and pop them right in the ground per their right times! No fuss, no muss.

Prevention  A typical disease is Powdery mildew. Plant leaving plenty of space for air circulation. Apply your baking soda mix. Drench under and upper sides of the foliage of young plants to get them off to a great start! Do this the same or next day if transplanting. A super combo is 1 regular Aspirin dissolved, a 1/4 cup nonfat powdered milk, heaping tablespoon of baking soda, a half teaspoon liquid dish soap per gallon/watering can. Reapply every 10 days or so, and after significant rains. Prevention is so much better than after mildew has set in. See Aspirin Solution. See IPM

Standard Winter Garden Veggie Predators Keep a keen watch for pests and diseases and take quick action!

  • Gophers Put in wire protective baskets or barriers, especially now while the soil is softer after the rains. If you see a fresh mound, trap immediately.
  • Aphids  Watch for leaves unnaturally curled along the length of the leaf, particularly broccolis, cauliflowers, kale, cabbages. Squish or wash any or the colony away immediately, and keep doing it for a few days to catch the ones you missed. Check the new growth tiny leaves at center top. power spray to remove any aphids there. If that doesn’t work to your satisfaction, get in there with a spray bottle of your favorite mix. I use half and half water and alcohol plus wee bit of liquid dish soap as a surfactant. Remove hopelessly infested leaves. After that, water less and give it less food so plant leaves will be less tender and inviting.
  • White flies  Flush away, especially under the leaves. They are attracted to yellow, so keep  those Brassica yellowing, yellowed leaves removed pronto. Again, a little less water and food. Gently and shallowly dig in an inch or so of worm castings in a ‘V’ shape from the stem out to the drip line. Disturb as few of the surface area feeder roots as possible.
  • Leafminers  Keep watch on your chard and beet leaves. Pull away those blotchy sections the leafminers make; immediately remove whole leaves that are too funky for rescue. Harvest the bigger outer lower leaves more often to stay ahead of the miners. See Leafminers IPM
  • Slugs, Snails BEFORE you put in seeds, transplants, sprinkle a bit of Sluggo type stuff around to keep snails and slugs from seriously damaging or disappearing tiny seedlings or transplants while they are small. Do it twice to kill off the generations. That keeps the creatures from mowing seedlings overnight, making you think they never came up! If you notice tiny children snails or slime trails, lay down another couple rounds.

If you need more robust soil, do something absolutely yummy with it! This is perfect timing to put in some green manure aka cover crop for April plantings. Depending on the type of plants you choose for your green manure, allow +/- 3.5 months for the process. If you want the earliest planting time for spring, plant ASAP! See Living Mulch! Put it where you will plant heavy summer feeders – tomatoes, potatoes, eggplants, peppers, chilis, squash, pumpkins, cucumbers, melons, and corn; hungry stalk vegetables like celery, fennel, rhubarb, and artichokes; or continually producing green, leafy vegetables like lettuce, spinach, Swiss chard. Or you can ‘rest’ an area by covering it with a good 6 to 18″ deep mulch/manure/straw/compost mix and any other amendments that will help the plants you will grow there! Keep it moist and it will flatten down, make a great low raised bed, in no time at all! Simply let the herds of soil organisms do their work over winter. That’s called sheet composting, sheet mulching or composting in place – no turning or having to move it when it’s finished. If you are vermicomposting, have worms, add a few handfuls to speed up and enrich the process. Come spring you will have rich nutritious soil for no work at all!

COMPOST always! Soil building is the single-most important thing you can do for your garden. Compost is easy to make, and if you make it, you know what’s in it, 100% organic! Added to your soil, made or purchased, it increases water holding capacity, is nutritious, soil organisms flourish, it helps with immunity, your soil lives and breathes! It feeds slowly, just perfectly! Make it HOT, Cold, or In place! Full sun is best, most active and quick! Dry is dead, so be sure it is always slightly moist.

Sidedressing Hardworking leaf producers and big bodied Brassicas, may need a feeding now. Heading is your cue to help them along. If they slow down, or just don’t look perky, slip them a liquid feed that quickly waters into the root zone. Get your nozzle under low cabbage leaves and feed/water out to the drip line. Lettuces love manures. Compost and manure teas, fish emulsion (when there are no digging predators like skunks), pretty powdered box ferts, are all good, easy for your plants to take up in cooler weather. Use ½ the strength of your summer feedings. Slow release alfalfa pellets are a wise consideration. Worm castings, though not food, work wonders! Also, be careful of ‘too much’ fertilizer, too much water, that makes for an aphid tasty soft plant. That said, another way to get goodness to the roots is push in a spade fork vertically about 6″ or less deep, wiggle it back and forth, remove the fork, pour your foods into the holes, close ’em back up. Soil organisms will get right to work, your plant will stay healthy and be quite productive!

Especially feed your cabbages, lightly, time to time, because they are making leaf after leaf, dense heads, working hard. I often see kales lose their perk. You would too if someone kept pulling your leaves off and never fed you. Feed them too, please, while feeding your cabbages.

It’s a New Year! Some of you will make serious gardening resolutions, others will take it as it comes, one day at a time as usual. But I do recommend you secure your seeds for the year ahead! Some are now less plentiful with droughts, fires and floods, GMO threats, new laws. Recently much needed seed banks, libraries have sprung up. We want to use our seeds with reverence and seed save our best as they adapt to different climate change conditions, assure their goodness for future generations. At Seed Swaps, take only what you need. If many people grow them, there will be more adapted to our localities. Before there were seed shops, seeds were often used as money. They are as precious today as they have always been, maybe even more so.

Happy New Year Gardening and Feasting!

Updated annually 


Please enjoy these December images at Santa Barbara CA’s Rancheria Community Garden!

Check out the entire January Newsletter!

It includes more about soil, unique veggies like Tomatillos and Long Beans! You might like to try them this summer! Also there are some important upcoming garden events!


The Green Bean Connection started as correspondence for the Santa Barbara CA USA Pilgrim Terrace Community Garden. All three of Santa Barbara’s community gardens are very coastal. During late spring/summer we are often in a fog belt/marine layer most years, locally referred to as the May grays, June glooms and August fogusts. Keep that in mind compared to the microclimate niche where your veggie garden is. Bless you for being such a wonderful Earth Steward!

Love your Mother! Plant bird & bee food! Think grey water! Grow organic! Bless you for being such a wonderful Earth Steward!

Feeling inspired? Get the word out! Sharing is caring ~

Read Full Post »

Super LoCal Nutritious Lacinato Kale aka Tuscan, Black or Dinosaur

Elegant, nutritious Nero di Toscana Lacinato Kale aka Tuscan, Black or Dinosaur. 

Delicious winter garden harvests continue! You may not feel like eating as many salads in this cooler time, but veggie soups and stews are super nutritious and great for sharing!

Keep an eye on weather reports! We are still in the frost – freeze time in Santa Barbara until the last average frost date January 22 – measured at the airport. Have old sheets, light blankets, old towels handy. If a freeze is predicted, for small plants, like tender lettuces, just lay tomato cages on their sides and put your coverings over them. Secure coverings well so wind doesn’t blow them around and damage your plants or leave them uncovered. Remove them when the sun comes out! No cooking your plants before their time! Dates vary from the coastal areas to the foothills, and our climate is changing generally to warmer, so these dates may not be viable guides much longer, if even now. Find out the frost dates for your Zip Code! See the details – Protect Your Veggies from Freezing!

Be sure your caged, trellised and tall plants are secure before winds and rains. Afterwards, stake any plants that have toppled, check your trellised plants. Harvest what can’t be saved.

After rains there are weeds! It’s time for that Hula hoe! Weed, weed, weed! Do it before the roots get bigger and you lose your soil when you pull them out. Weed before taproots get deep and hard to remove. Get those clover roots out all the way down and before grass makes its frilly little seed heads. FIRST, remove any weed that is flowering, making seeds soon! Anything that is not seeding, healthy and not pest infested, may be cold composted, or you can use them as mulch where there is bare ground not in your garden.

Time to check beds and berms! Install trenches to capture rainwater. Mulch to prevent erosion and soil splash on leafy greens. Add soil on carrot, turnip and beet shoulders and exposed potato bodies. See Rainy Day Tactics for Spectacular Veggies! After a rain, do the finger-in-the-soil check to be sure your plants are getting enough water. A light rain may not be nearly enough…

Once the weeds are out, you have choices to make. Plant very last rounds of winter plants or start making soil for spring planting!

January Plantings If you love your winter crops, and aren’t necessarily in a rush to do spring/summer, amend your soil immediately and plant one more round, from transplants if you can get them or the starts you have begun on your own, seeds if you must. See December for tips on what to plant. In cooler January weather, plantings will start slowly, but they will mature faster than usual as days get longer. Most January plantings will be coming in March, April. That’s still in good time for soil preps in April for April/May plantings. In April/May there is less fungi in the soil, so plants that are fungi susceptible get a better start – mainly that would be wilt susceptible tomatoes.

Plant MORE of these delicious morsels now! Arugula, beets, brocs, Brussels sprouts if you get winter chill (there are some new purple ones on the market!!!), bunch onions, cabbage, carrots, cauliflower, celery, chard, culinary dandelions, garden purslane, kale, kohlrabi, head and leaf lettuces, Mesclun, parsnips, peas, potatoes, radishes – especially daikons, and turnips!

If you would like some tender little snacking carrots, quick growers to show the kids, or minis for your pup, try early Adelaides from Johnny’s Selected Seeds! They say ‘True baby carrots. Unlike most “baby carrots,” which are harvested at an immature stage before properly filling out, Adelaide is a true baby, meaning it has an early maturity and forms a blunt root tip at 3–4″ long.’ Only 50 days! See all about Carrots!

For us SoCal gardeners, besides beautiful bareroot roses, this month is bareroot veggies time! They don’t have soil on their roots, so plant immediately or keep them moist! Grape vines; artichokes; short-day (sweet) globe onions; strawberries; cane berries such as raspberries (get low-chill types); low-chill blueberries; and rhubarb, asparagus, and horseradish. Bare root planting is strictly a JANUARY thing. February is too late. Many bareroot veggies are highly sought after, so keep checking their arrival date, then when they arrive, drop everything and go get them!

Continue to make the most of winter companion planting! Carrots enhance peas, onion family stunts peas. Cilantro enhances Brassicas and repels aphids on them! Lettuce repels Cabbage moths. Onions, leeks and chives help repel the carrot root fly. Carrots thrive when Cilantro, Chamomile, Marigold are planted with them. Companion planting is also a size strategy. Keep planting smaller plants, especially lettuce, on the sunny under sides of Brassicas! Take off a couple lower leaves to let more sunlight in. Under Brassicas, plant lettuce from transplants since Brassicas are a bit allelopathic, makes biochemicals that inhibit small seeds like lettuce from germinating.

Planting summer crops early isn’t always a gain. Even if the plant lives, some won’t produce fruit until they have enough hours of sun, and for some, warmth including day/night and/or ground temps. And some plants set in too early will never produce. That waiting time for enough sun, enough warmth, interrupts the plant’s natural cycle and the production window is lost. If you take that chance and it doesn’t work, pull and replant. No amount of waiting will do the job.

Peppers are a classic example. For some gardeners peppers take forever…………. For others the standard couple of weeks and seeds are seedlings! If you have experience, you probably know which it is for you. A lot of Latinos start their peppers in January and let them grow slowly until April. If you plant from transplants, I would not try for an early start. Peppers just don’t like cold feet. Whenever you start, plant two rounds, two to three weeks apart. That way you have a better chance of hitting the magic window! Soil Temps are critical for root function. Peppers need 60 degrees + for happiness. A gardeners’ soil thermometer is an inexpensive handy little tool to own.

You can use area that becomes open for temporary plants. Put in quickie leaf crops like lettuces, arugula, bok choy, spinach, chard, kale, until it’s the right time to plant heat lovers. These quickie plants can be removed at any time and you still shall have had lush harvests. Hardly anyone can resist planting early tomatoes, February, March! Another strategy is plant your leafies to one side, leaving room to plant your toms where the toms would be planted if the leafy plants weren’t there. Plant tomatoes on the sunny sides of the leafies so the baby transplants/seedlings, get plenty of sun for a good start! When your big plants get big enough, remove lower leaves that shade your leafies. That way you have table food and your heart is happy too! Depending on how big your open area is, you can also plant your leafies in zig zags then add the permanent heat lovers inside the ‘V’ areas. As soon as possible plant companion plants for the heat lovers you will be growing in each area.

Choose early cold tolerant tomato varieties. Ones with northern names, in SoCal that could be Oregon Spring, or Siberian. Stupice from Czechoslovakia is very early! Bellstar, from Ontario Canada, is larger and earlier than other plum tomatoes. Early Girl is a favorite! And SunGold cherry tomatoes are almost always a winner! Cherry toms are small and will ripen when other tomatoes just stay green for the longest!

Summer Garden Design is important right now! You can do diagrams on paper or just give it a good think to see if there are any changes this year, and carry it in your head. That layout is what you need to make your seed list! Seeds from catalogs, seeds from the Santa Barbara Jan 27 Seed Swap! The Seed Swap is free, fun and random, a good way to try plants you might have never considered, and they are adapted to your area! Catalogs give you the best selection and of plants your nursery doesn’t carry or isn’t able to get. Check for drought and heat tolerant varieties or look in dry or humid southern states that match your eco niche or world areas that have heat tolerant desert low-water-needs plants and order up! The seeds of these types may need to be planted deeper and earlier than more local plants for moisture they need. They may mature earlier. Be prepared to do second plantings if needed and use a little water. See Choosing Seeds: Catalogs to Seed Swaps!

Before you opt out of planting tomatoes and/or cucumbers due to Fusarium and Verticillium wilts, check out this special guide for successful results! Get resistant varieties and there are special planting and care techniques that work!

Later January is time to sow seeds indoors for mid to late March early plantings. If you will be doing succession plantings, sow your seeds in succession, like every 2, 3, 4 weeks depending on which plant it is and how many you need. If those fail, it’s to the nursery you go for transplants! Avoid box stores that bring plants from elsewhere that may not be timely for your area, may be infested or sick. Check them carefully. This is very important in a community garden where pests and diseases can spread quickly. Select local nurseries that order conscientiously for local timing and try to get quality plants for us. You may pay a tad more, but it is worth it. Local people live here and they have your interests at heart since they want your repeat business. Also, they can answer your questions. Establish a good relationship. At the Farmers Market, check with local farmers to see what they plant when. Some feed stores are agriculturally inclined.

Check out  Seed Soaking/Presprouting Tips & Ideas! If seeds and tending seedlings aren’t for you, wait and get transplants and pop them right in the ground per their right times! No fuss, no muss.

Prevention  A typical disease is Powdery mildew. Plant leaving plenty of space for air circulation. Apply your baking soda mix. Drench under and upper sides of the foliage of young plants to get them off to a great start! Do this the same or next day if transplanting. A super combo is 1 regular Aspirin dissolved, a 1/4 cup nonfat powdered milk, heaping tablespoon of baking soda, a half teaspoon liquid dish soap per gallon/watering can. Reapply every 10 days or so, and after significant rains. Prevention is so much better than after mildew has set in. See Aspirin Solution.

Standard Winter Garden Veggie Predators Keep a keen watch for pests and diseases and take quick action!

  • Gophers  You can still put in wire protective baskets or barriers, especially now while the soil is softer after the rains. If you see a fresh mound, trap immediately.
  • Aphids  Watch for leaves unnaturally curled along the length of the leaf, particularly broccolis, cauliflowers, kale, cabbages. Squish or wash any or the colony away immediately, and keep doing it for a few days to catch the ones you missed. Check the new growth tiny leaves at center top. power spray to remove any aphids there. Remove hopelessly infested leaves. After that, water less and give it less food so plant leaves will be less tender and inviting.
  • White flies  Flush away, especially under the leaves. They are attracted to yellow, so keep  those Brassica yellowing, yellowed leaves removed pronto. Again, a little less water. Gently and shallowly dig in an inch or so of worm castings out to the drip line. Disturb as few of the surface area feeder roots as possible.
  • Leafminers  Keep watch on your chard and beet leaves. Pull away those blotchy sections the leafminers make; immediately remove whole leaves that are too funky for rescue. Harvest the bigger outer lower leaves more often to stay ahead of the miners, especially the leaves that touch another plant. If necessary, thin crowded plants. Water and feed just a little less to make those leaves less inviting. Plant so mature leaves don’t touch or deliberately over plant then thin for earlier eating and more crop! Rather than row plant, interplant here and there. Biodiversity.
  • Slugs, Snails BEFORE you put in new transplants, sprinkle a bit of Sluggo type stuff around to keep snails and slugs from seriously damaging or disappearing tiny seedlings or transplants while they are small. Do it twice to kill off the generations. That keeps the creatures from mowing seedlings overnight, making you think they never came up! If you notice tiny children snails or slime trails, lay down another couple rounds.

If you need more robust soil, do something absolutely yummy with it! This is perfect timing to put in some green manure aka cover crop for April plantings. Depending on the type of plants you choose for your green manure, allow +/- 3.5 months for the process. If you want the earliest planting time for spring, plant ASAP! See Living Mulch! Put it where you will plant heavy summer feeders – tomatoes, potatoes, eggplants, peppers, chilis, squash, pumpkins, cucumbers, melons, and corn; hungry stalk vegetables like celery, fennel, rhubarb, and artichokes; or continually producing green, leafy vegetables like lettuce, spinach, Swiss chard. Or you can ‘rest’ an area by covering it with a good 6″ to a foot deep of mulch/straw! Keep it moist and it will flatten down in no time at all! Simply let the herds of soil organisms do their work over winter. That’s called sheet composting, sheet mulching or composting in place – no turning or having to move it when it’s finished. If you are vermicomposting, have worms, add a few handfuls to speed up and enrich the process. Come spring you will have rich nutritious soil for no work at all!

COMPOST always! Soil building is the single-most important thing you can do for your garden. Compost is easy to make, and if you make it, you know what’s in it! Added to your soil, made or purchased, it increases water holding capacity, is nutritious, soil organisms flourish, it helps with immunity, your soil lives and breathes! It feeds just perfectly! Make it HOT, Cold, or In place! Dry is dead, so be sure it is always slightly moist.

Sidedressing Hardworking leaf producers and big bodied Brassicas, may need a feeding now. Heading is your cue to help them along. If they slow down, or just don’t look perky, slip them a liquid feed that quickly waters into the root zone. Stinky fish/kelp is easy for them to uptake in cooler weather. Get your nozzle under low cabbage leaves and feed/water out to the drip line. Lettuces love manures. Compost and manure teas, fish emulsion (when there are no digging predators like skunks), pretty powdered box ferts, are all good. Use ½ the strength of your summer feedings. Slow release alfalfa pellets are a wise consideration. Worm castings, though not food, work wonders! Also, be careful of ‘too much’ fertilizer, too much water, that makes for an aphid tasty soft plant. That said, another way to get goodness to the roots is push in a spade fork vertically about 6″ or less deep, wiggle it back and forth, remove the fork, pour your foods into the holes, close ’em back up. Soil organisms will get right to work, your plant will stay healthy and be quite productive!

Especially feed your cabbages, lightly, time to time, because they are making leaf after leaf, dense heads, working hard. I often see kales lose their perk. You would too if someone kept pulling your leaves off and never fed you. Feed them too, please, while feeding your cabbages.

It’s a New Year! Some of you will make serious gardening resolutions, others will take it as it comes, one day at a time as usual. But I do recommend you secure your seeds for the year ahead! Some are now less plentiful with droughts, fires and floods, GMO threats, new laws. Recently much needed seed banks, libraries have sprung up. We want to use our seeds with reverence and seed save our best as they adapt to different climate change conditions, assure their goodness for future generations. At Seed Swaps, take only what you need. If many people grow them, there will be more adapted to our localities. Before there were seed shops, seeds were often used as money. They are as precious today as they have always been, maybe even more so.

Happy New Year Gardening and Feasting!


See the entire January Newsletter:x

January ~ Winter Harvests, Soil, Planning Your New Year! 

Borage, StarFlower, is Such a Winter Spring Beauty!
Soil for Seed Starting! In the Ground, DIY, Pre-made
Make Soil for Spring Planting – Amendments, Castings, Teas!.
Upcoming Gardener
.
Events! Not to miss the January Santa Barbara Seed Swap! Permaculture Design Course at SBCC, US Compost Council Annual Conference, Earth Day, the International Permaculture Conference, IPC 2020 Argentina!
.
Subscribe to Green Bean Connection Monthly Newsletter!

2019 Might bring some new tools into your garden life! Take a mosey through these images of exciting events, seasonal changes, tools of the times! Some are pretty plain, some are delightful, exciting, heroic, some useful, some give insights. The Tools images are informative and in situ from April 2011 to current time at Pilgrim Terrace and Rancheria Community Gardens, Santa Barbara CA. Tools of the Trade images

December images! Last of 2018 images at two of Santa Barbara’s community gardens, Rancheria and Pilgrim Terrace. See lovely flowers, cheddar cauliflower, a handsome potato fork!
.

The Green Bean Connection started as correspondence for the Santa Barbara CA USA Pilgrim Terrace Community Garden. All three of Santa Barbara’s community gardens are very coastal. During late spring/summer we are often in a fog belt/marine layer most years, locally referred to as the May grays, June glooms and August fogusts. Keep that in mind compared to the microclimate niche where your veggie garden is.

Love your Mother! Plant bird & bee food! Think grey water! Grow organic! Bless you for being such a wonderful Earth Steward!

Read Full Post »

Dec Winter Veggies Colander Flowers Dan Boekelheide

A misty morning at the garden….

Well, there are several important events in December, LOL.

  1. First is being sure everyone who knows you knows what is on your holiday garden wish list!
  2. Plan your spring garden, get catalogs, and order seeds NOW!
  3. Maintain your garden, keep up with SoCal winter harvesting, enjoy your bounty, try some new recipes!
  4. If you wish, plant your last round of winter plants – know that if they come in late they may interfere with earliest spring planting space. Place them carefully so tall early spring plants can be installed on time. Or leave those spots open.

Harvest Brassicas of all sorts! The big ones, broccoli, cauliflower and if you live in a good chill area, Brussels sprouts, have grown big enough now and your earliest varieties are producing handsomely. Harvest your brocs and caulies while the heads are still tight. If you miss that, harvest asap, even the flowers and flower stalks are edible! After you take the main broccoli head, let your plant continue to grow so it will produce smaller side shoots. Some varieties produce large 3 to 4″ mini brocs and later, smaller salad size ones right on through summer! Cauliflowers are a one time harvest though you can keep eating the greens. To replace them, you might choose to pop in some beautiful chard, a potato patch, or quick growing mini cabbages in the large open spots that become available. Some cabbages, especially the mini and early varieties, are now headed tightly and ready to eat – slaw, steamed, dropped into soups and cold weather stews. You can still replant them  with mini cabbies if you love them!

Deliciously fresh and nutritious winter heading lettuces, kale, celery, bok choy, cilantro, arugula and all manner of cut and come agains are in! Table onions scallions, chives and leeks can be snipped or cut off about 2″ above the ground and let to grow back 3 to 4 times! Do the same but at about 3″ with cilantro and arugula. Let some of your cilantro and arugula grow out for flowers to bring the bees, seeds for the birds and for you to plant more!

Winter brings a lot of tasty Root crops. Winter Cylindra Beets are colorful, and have cut and come again leaves too! Long winter radishes like Daikons are spicy! Carrots are splendid to eat at the garden, share with your pup, bunnies, shred into salads, add to winter soups and stews, slice/chop/stick and freeze for later! Grow some Parsnips too! Turnips have so unique a flavor you might want to eat them separately to just enjoy that flavor.

Harvest peas when they get to the size you want them, and be prompt with that harvesting to keep them coming! Plant more rounds if you love peas!

MAINTAINING

Sidedressing is like snacking. Some of your heavy leaf producers and big bodied Brassicas, may need a feeding now and again or just when they start to fruit. If they slow down, or just don’t look perky, slip them a liquid feed out to their dripline, or cultivate in a wee bit of blood meal. Get your long spouted watering can nozzle under those low cabbage leaves. Lettuces love manures. Compost and manure teas, fish emulsion (when there are no digging predators), powdered box ferts, are all good. Winter feeds need to be easy for your plant to take up. Use ½ the strength of your summer feedings. Slow release is a wise consideration. An excellent way to get feeds to the roots is to push in a spade fork no more than 6″ deep. Push it in vertically (so as not to break the main tap roots), wiggle it back and forth just a bit, remove the fork, pour your foods into the holes, close ’em back up. Soil organisms will get right to work, your plant will stay healthy and be quite productive! Worm castings, though not food, work wonders with immunity, soil conditioning and help germination! Mix some in with your liquid feeds you pour around your plant.

The exceptions are carrots, peas and favas. Carrots get hairy and will fork with too much food! Over watering or uneven watering makes them split and misshapen. Your peas and favas are busy gathering Nitrogen from the air, feeding themselves.

A mini task is to keep covering the shoulders of carrots, beets, radishes, parsnips and turnips. They substantially push right up above ground as they grow. Planting their seeds deeper doesn’t compensate. It’s the nature of the veggie! Never hurts to put a handy little pile of extra soil near where you plant them, or plant them in a low sloped trench. When they need covering, pull the sides of the trench down to cover them. Uncovered shoulders look dry, are tough, sometimes bitter, and need peeling before cooking. Uncovered carrot shoulders don’t ripen but stay green, just like exposed parts of potatoes turn green. The green on potatoes is slightly poisonous, not enough to do harm, but it doesn’t look good.

Watering is important even in cool weather. Also, some plants simply like being moist ie chard, lettuce and short rooted peas, beets. No swimming, just moist. Finger check your soil after rains to see if your soil is moist at least 2″ deep. Sometimes it is moistened only 1/4″ deep, needs more water! Also, be careful of too much water, that makes for an aphid tasty soft plant. Watch WEATHER reports in case of freezes, heavy winds, rain. Before weather, stake and tie plants that need support. After strong winds check everybody right away to see if any plants need help. See more about rainy days!

Santa Barbara’s average First Frost (fall) date AT THE AIRPORT is December 19, Last Frost (spring) date is (was?) January 22. That can vary from the coastal areas to the foothills, and our climate is changing generally to warmer, so these dates may not be viable guides much longer, if even now. And remember, these are average dates! See great tips – Protect Your Veggies from Freezing

Except for erosion control, in winter, we pull mulch back to let the soil warm up during the short winter days. The only areas we mulch are around lettuces and chard to keep mud splash off the leaves. Also, it’s good to remove pest habitat, let the soil dry a bit between rains to kill off wilts fungi. Bag up, or pile and cover, clean uninfested summer straw, mulches, to use as compost pile layers during winter. Do not keep straw from areas where there have been infestations.

BEFORE you put in seeds, sprinkle a bit of Sluggo type stuff around at least two times (to kill the generations) to keep snails and slugs from vanishing upcoming seedlings overnight, making you think they never came up! No, they didn’t let you down. Killing off the creatures ahead of time saves the babies. It stops new transplants from being seriously damaged or entirely eaten while they are small. Do this a few times, to knock off the generations, and there will be no tiny vegetarian predators for a while.

Don’t lose your crops to birds! There is less food for them in winter, and, often, little rain, so they resort to eating tender juicy veggie leaves. Buy pre made covers, or get clever and cover seeded rows with DIY small openings wire tunnels or a patch cover bent that has sides bent to the ground to keep birds from pecking at little leaves or from plucking tiny seedlings right out of the ground! You can also use small plastic bottle sections to make mini sleeves that birds won’t go down into. Or for baby lettuces, make large plastic bottle self watering cloches though wire covers let more light in and water through! Bird netting is inexpensive, tears easily, but is good to stretch over peas on a trellis.

Pests Birds Aviary Wire Cloches
Seedlings Cover Birds Bottles WireSeedlings Baby Lettuce Plastic Bottle Cloche
Seedlings Protection Bent Wire Row Cover

Prevention and removal! Keep an eye out for pests and diseases and take quick action! A typical disease is Powdery mildew. Plant leaving plenty of space for air circulation, water early in the day so they dry before evening. For mildew apply your baking soda mix. The best combo is 1 regular Aspirin, a 1/4 cup nonfat powdered milk, heaping tablespoon of baking soda, a teaspoon liquid dish soap per gallon/watering can. Before sunrise drench under and upper sides of the foliage of young plants to get them off to a great start! It takes only an hour for the mix to be absorbed! Do this the same or next day if transplanting. Reapply every 10 days or so, and after significant rains. Prevention is so much better than after mildew has set in. See Aspirin Solution. Hose away aphids and whiteflies, mildew. Remove yellowing Brassica leaves. Yellow attracts whiteflies. In general, plant further apart for air circulation, water and feed just a little less to let those leaves harden up a bit. Soft fat leaves are an invitation to aphids and mildew!

Chard and beets get Leafminers. Where they have eaten looks terrible but the good part of the leaves is perfectly safe to eat. Plant chard so mature leaves don’t touch, or best of all, in different places around your garden, not in rows or clusters. Thin your plants so they have room. Harvest leaves that might touch first. Remove infested leaves immediately to reduce spread! Beets are not a permanent crop, so they are planted closely. Simply harvest them at their leaves’ prime – ahead of the Leafminers.

Do not compost diseased or infested leaves or plants.

Windy days are prime time to gather leaves to add to compost or process for Leaf Mold, Mulch or Compost! Leaf Mold is low in nutrients, but makes a superb soil improver, conditioner for vegetable and flower beds. Leaf mulch is free for the making! Leaf Compost processes faster when made the right way! See more!

PLANT JUDICIOUSLY NOW

Per square foot, fast growing cut-and-come-again Lettuce, Chard and Kale are by far the top winter producers! Plant more big plants like brocs and cauliflower, but remember, with cooler weather, they will grow more slowly. That may interfere with early spring plantings in March because you will need time to let added compost, manures, worm castings and Sphagnum peat moss (increases water holding capacity) become part of the soil organism community. If you do plant them, better to get transplants if you can, and shave six weeks off their needed growing time to maturity. Select faster maturing varieties now.

As lettuces tire, and other plants like carrots and beets are removed, add more of them and any ‘littles’ you love on the sunny side and between the big plants. If they need more sun, remove large lower leaves of the big plants. Mild tasting littles include bok choy, kohlrabi, garden purslane, arugula, mizuna, watercress, young parsnips and turnips, Daikon winter radishes, and Napa cabbage. For a little more spice, go for those dark green kales, mustard, rutabaga and turnip greens! Try some culinary dandelions for super nutrition! These are plants that will take you through February, March and leave enough time to add compost and to let sit until major spring planting begins in April.

Believe me, you are going to get spring planting fever along about March, so plan ahead for it!!! Start seeds indoors the first three weeks of January for early March plantings! Choose varieties that are cold tolerant and are early maturers for the soonest table eats!

If you have enough seeds, over planting is fair game! Thin your beets, carrots, chard, kale, mustard, turnips. Take out the smaller, weaker plants. They are great in your salads along with small tender Brassica leaves. Plant patches of Mizuna and mow it!

Remember your winter companion planting tips:

  1. Carrots enhance peas, onion family stunts peas
  2. Carrots thrive when Cilantro, Chamomile, Marigold are planted with them.
  3. Onions, leeks and chives help repel the carrot root fly. But remember you can’t put the onion family near peas!
  4. Lettuces repel cabbage butterflies
  5. Cilantro enhances Brassicas – broccoli, cauliflower, Brussels Sprouts, kale and repels aphids on them!

Besides beautiful bareroot roses, decide now where you will be buying any January bareroot veggies you want! Consider: grape vines; artichokes; short-day (sweet) globe onions; strawberries; cane berries such as raspberries (get low-chill types); low-chill blueberries; and rhubarb (be cautious where you plant it, it can be poisonous to humans – children, dogs and chickens), asparagus, and horseradish. Artichoke pups need 3’ to 4’ space, 6′ is more a reality! They are hefty growers and live 10 years! If you keep them watered, and there is enough space, they are a great street strip plant!

SPRING PREPS

Seeds for Spring & Summer planting! Perfect time to sit with seed catalogs, do online research. Get your summer garden layout in mind. First choose what is good for your excellent health! Next might be how much harvest you get per square foot your plant takes up if you have limited space and want to feed several people. Since we are in drought conditions, water could be a strong consideration ~ choose heat and drought tolerant varieties. Get some early varieties, for earliest harvests along with later maturing varieties for a continuous table supply. Earlier variety fruits are generally smaller, but Yum! Cherry tomatoes come in first. Place your order for the entire year, while seeds are still available. The Santa Barbara Seed Swap is Jan 27, very soon! Get your seeds ready to share, and prepare your ‘shopping’ list! Remember, a Seed Swap is a random affair. Get your standby favorites from those reliable catalogs. Use Seed Swaps as fun backup source and for local seeds.

See Choosing Seeds: Catalogs to Seed Swaps!
See also Smart Design for Your Spring & Summer Garden, Seed Selection!

Delicious choices to consider:  Perennial  Heat & Drought Tolerant – per Southern Exposure ~

Summer Lettuce Varieties: In summer you want a stronger lettuce, heat tolerant & slow bolting! Lettuce Leaf Red Sails is a beauty. Jericho Romaine from Israel has become the classic summer romaine for warm regions. Sierra, Nevada. Parris Island is slow bolting. Green Towers Romaine tolerates moderate summer heat and has some resistance to tip burn and bolting. Black Seeded Simpson. And there are more – try several!

Definitely start building compost for spring planting. You could plant green manure where you will grow heavy summer feeders like tomatoes, potatoes, eggplants, peppers, chilis, squash, pumpkins, cucumbers, melons, and corn; hungry stalk vegetables like celery, fennel, rhubarb, and artichokes; or continually producing green, leafy vegetables like lettuce, spinach, Swiss chard, strawberries. Or plant it if you want a break! Just lay in some green manure seed mix – vetch, bell beans, Austrian peas and oats. In Santa Barbara area get the mix and inoculant at Island Seed & Feed. Let it grow two to three months to bloom stage. Chop down, chop up and let it lie on the surface about 2 weeks, keeping it moist. Add any amendments you want – additional manure, compost, and turn under. Let it sit two weeks to two months. Your choice. Let the herds of soil organisms do their work! I usually do about 3 weeks. OR, lay on as many layers of compost material as you can get for an up to 18″ deep area where you will be planting. Put in some surface feeding red wiggler worms. The BEST soil enhancer and you will have a raised bed!

WINTER VEGGIES STORAGE

This is such a great post by Anthony Reyes at FarmScape Gardens, here is the link! Winter Vegetable Storage, Part 2

For veggies in your kitchen, here is the UCDavis Quick Guide to Fruits & Vegetables Storage:

Storage Refrigerator Counter Fruits Vegetables

BEE FOOD! Plant wildflowers now from seed for early spring flowers! Germination in cooler weather takes longer, so don’t let the bed dry out.

Santa Barbara’s 11th Annual Seed Swap is Sunday January 27! The last Saturday of January every year is National Seed Swap Day! Look in your area for an event, and if you don’t find one, collaborate with your local garden clubs or permaculture group to get one going!

Wonderful Gardener Style Holiday Gifts!

Please be generous with your time these holidays. Rather than just serving food, maybe show someone how to grow veggies, give them seeds with instructions, give them and the kids a tour of your garden – eat carrots together!

Layer up, enjoy these crisp days. Let the wind clear your Spirit, the rain cleanse and soften your Soul.

Happy December Gardening!


See the entire December Newsletter:
x

DECEMBER ~ Harvests, Maintenance, Planning & Getting Seeds!

All about Beets, So Sweet!
Virtuous Veggies! Alkalize Your Body for Top Health!
Selecting the Right Seeds for Your Annual Plantings!
Wonderful Gardener-Style Holiday Gifts!Upcoming Gardener Events! Not to miss the January Santa Barbara Seed Swap! International Permaculture Conference, IPC 2020 Argentina!


The Green Bean Connection started as correspondence for the Santa Barbara CA USA Pilgrim Terrace Community Garden. All three of Santa Barbara’s community gardens are very coastal. During late spring/summer we are often in a fog belt/marine layer most years, locally referred to as the May grays, June glooms and August fogusts. Keep that in mind compared to the microclimate niche where your veggie garden is.

Love your Mother! Plant bird & bee food! Think grey water! Grow organic! Bless you for being such a wonderful Earth Steward!

Read Full Post »

Use Cover Crops to Improve Soil

By the esteemed Barbara Pleasant!

Cover Crop Pleasant Crimson Clover Batchelor's Buttons

Colorful companion cover crops such as bachelor’s buttons and crimson clover will not only improve soil, they’ll beautify your garden beds [and feed the bees].

Intro! Legume cover crops are more than pretty, they improve your veggie garden soil, a lot! There are informed choices to be made. Cover crops are in the same categories as Living Mulch and Green Manure.

I’m copying the beginning of Barbara’s wonderful post and will link you to the rest. She says…

There are three main ways to improve soil: grow cover crops, mulch the surface with biodegradable mulches, and/or dig in organic soil amendments (such as compost, grass clippings, rotted manure or wood chips). All have their advantages and none should be discounted, but cover cropping is the method least likely to be practiced in home gardens. There is a reason for this: Information on using cover crops is tailored to the needs of farmers who use tractors to make short work of mowing down or turning under cover crops. But when your main tools for taking down plants have wooden handles and you measure your space in feet rather than acres, you need a special set of cover crop plants, and special methods for using them.

How Cover Crops Help

A cover crop is any plant grown for the primary purpose of improving the soil. Since the early 1900s, farmers have used cover crops to restore fertility to worn-out land. In addition to helping bulk up soil with organic matter, cover crops prevent erosion, suppress weeds, and create and cycle soilborne nutrients using the power of the sun. Recent advances in soil biology have revealed two more ways cover crops can improve soil.

Rhizodeposition is a special advantage to working with cover crops. Many plants actually release sugars and other substances through their roots. They are like little solar engines, pumping energy down into the soil. With vigorous cover crop plants, this process goes on much more deeply than you would ever dig — 6 feet for oats and rye! If you are leaving your garden beds bare in winter, you are missing the chance to use cold-hardy crops such as cereal rye or oats to solar-charge your soil. Thanks to this release of sugars, the root tips of many plants host colonies of helpful microorganisms, and as the roots move deeper, the microbes follow.

But so much for scientific talk. If you’ve experimented with cover crops, perhaps you have dug up young fava beans or alfalfa seedlings to marvel at the nitrogen nodules on their roots, or watched a stand of buckwheat go from seed to bloom in four weeks flat. Or how about this one: It’s April and the soil is warming up and drying out. After loosening a clump of fall-sown wheat with a digging fork, you pull up a marvelous mop of fibrous roots and shake out the soil. What crumb! The soil’s structure is nothing short of amazing! These are the moments an organic gardener lives for.

Cover Crop Root Channels for New Plant Roots Bio-drillingBio-drilling is what happens when you use a cover crop’s natural talents to “drill” into compacted subsoil. For example, you might grow oilseed or daikon radishes as a cover crop where their spear-shaped roots will stab deep into tight subsoil. Bio-drilling action also takes place when deeply rooted cover crop plants penetrate subsoil and die. Then, the next crop grown may actually follow the rooting network mapped out by the cover crop. Maryland researchers were able to track this process using special camera equipment (a minirhizotron), which took pictures of the interactions between cover crop (canola) and crop plant (soybean) roots. As the canola’s deep roots decomposed, soybean roots followed the trails they blazed in the subsoil, hand in glove. In addition to reduced physical resistance, the soybean roots probably enjoyed better nutrition and the good company of legions of soil-dwelling microcritters, compliments of the cover crop.

Dozens of plants have special talents as cover crops, and if you live in an extremely hot, cold, wet or dry climate, you should check with your local farm store or state extension service for plant recommendations — especially if you want to use cover crops under high-stress conditions. Also be aware that many cover crop plants can become weedy, so they should almost always be taken down before they set seed.

How to Take Cover Crops Down

Speaking of taking down…  Continue reading!

From here, Barbara talks about how to take the cover crops down, then, which cover crop to use, what time of year to start it in which zone, the pros & cons of each, her experiences, research.

Or, you may not want to take down your cover crop. If you planted a short ground cover type legume, late in the season you may simply want to remove the larger plants, open up spots in the living mulch and put in winter plants! Your cover crop will keep on working as the older plants die naturally and feed your soil.

Two for one and save time and money! If you choose edibles as a cover crop under larger plants, you get living mulch and food! If you choose legumes, they are working at the same time you are growing your large edible plants! I do hope you consider this 100% natural organic method of restoring or improving your soil, improving space you won’t be using right away! You will have less disease, less pests, less amendment expenses. Plant with flower combinations like Crimson clover to make habitat for wild bees/pollinators, and beneficial predatory insects, for simple beauty!

  • Spring and Summer, cover crops also act as living mulch while feeding your soil. Toss seeds around and under bigger plants.
  • In SoCal and southern areas, Fall and Winter, use cover crops as green manure to restore and improve your soil for spring ~ summer planting.

The better your soil, the more handsome your harvests. To your health and happiness!

See also Living Mulch! When, Which and Why?!

Back to top


The Green Bean Connection newsletter started as correspondence for the Santa Barbara CA USA, Pilgrim Terrace Community Garden. All three of Santa Barbara city community gardens are very coastal. During late spring/summer we are in a fog belt/marine layer area most years, locally referred to as the May grays, June glooms and August fogusts. Keep that in mind compared to the microclimate niche where your veggie garden is. Bless you for being such a wonderful Earth Steward!

Love your Mother! Plant bird & bee food! Think grey water! Grow organic!

Read Full Post »

Lacinato Kale, aka Tuscan, Black or Dinosaur, is a zesty and nutritious grower!

Lacinato Kale, aka Tuscan, Black or Dinosaur, is a zesty and nutritious grower!

Delicious winter garden harvests continue! You may not feel like eating as many salads in this cooler time, but veggie soups and stews are super nutritious and great for sharing!

Keep an eye on weather reports! We are still in the frost – freeze time in Santa Barbara until the last average frost date January 22 – measured at the airport. Have old sheets, light blankets, old towels handy. If a freeze is predicted, for small plants, like tender lettuces, just lay tomato cages on their sides and put your coverings over them. Secure coverings well so wind doesn’t blow them around and damage your plants or leave them uncovered. Remove them when the sun comes out! No cooking your plants before their time! Dates vary from the coastal areas to the foothills, and our climate is changing generally to warmer, so these dates may not be viable guides much longer, if even now. Find out the frost dates for your Zip Code! See the details – Protect Your Veggies from Freezing!

No rain in sight, but there are still weeds! Weed, weed, weed! Do it before the roots get bigger and you lose your soil when you pull them out. Weed before taproots get deep and hard to remove. Get those clover roots out all the way down and before grass makes its frilly little seed heads. Remove any weed that is flowering, making seeds soon, first! Anything that is not seeding, healthy and not pest infested, may be cold composted, or you can use them as mulch where there is bare ground not in your garden.

Time to check beds and berms! Install trenches to capture rainwater. Mulch to prevent erosion and soil splash on leafy greens. Add soil on carrot, turnip and beet shoulders and exposed potato bodies. See Rainy Day Tactics for Spectacular Veggies! After a rain, do the finger-in-the-soil check to be sure your plants are getting enough water. A light rain may not be enough…

Once the weeds are out, you have choices to make. Plant very last rounds of winter plants or start making soil for spring planting!

January Plantings  If you love your winter crops, and aren’t necessarily in a rush to do spring/summer, amend your soil immediately and plant one more round, from transplants if you can get them or the starts you have begun on your own, seeds if you must. See December for tips on what to plant. In cooler January weather, plantings will start slowly, but they will mature faster than usual as days get longer. Most January plantings will be coming in March, April. That’s still in good time for soil preps in April for April/May plantings. In April/May there is less fungi in the soil, so plants that are fungi susceptible get a better start.

Plant MORE of these delicious morsels now! Arugula, beets, brocs, Brussels sprouts if you get winter chill, bunch onions, cabbage, carrots, cauliflower, celery, chard, culinary dandelions, garden purslane, kale, kohlrabi, head and leaf lettuces, Mesclun, parsnips, peas, potatoes, radishes – especially daikons, and turnips!

For us SoCal gardeners, besides beautiful bareroot roses, this month is bareroot veggies time! They don’t have soil on their roots, so plant immediately or keep them moist! Grape vines; artichokes; short-day (sweet) globe onions; strawberries; cane berries such as raspberries (get low-chill types); low-chill blueberries; and rhubarb, asparagus, and horseradish. Bare root planting is strictly a JANUARY thing. February is too late.

Continue to make the most of winter companion planting! Carrots enhance peas, onion family stunts peas. Cilantro enhances Brassicas and repels aphids on them! Lettuce repels Cabbage moths. Onions, leeks and chives help repel the carrot root fly. Carrots thrive when Cilantro, Chamomile, Marigold are planted with them. Companion planting is also a size strategy. Keep planting smaller plants, especially lettuce, on the sunny under sides of Brassicas! Take off a couple lower leaves to more sunlight in. Under Brassicas, plant lettuce from transplants since Brassicas are a bit allelopathic, makes biochemicals that inhibit small seeds like lettuce from germinating.

Planting summer crops early isn’t always a gain. Even if the plant lives, some won’t produce fruit until they have enough hours of sun, and for some, warmth including day/night and/or ground temps. And some plants set in too early will never produce. That waiting time for enough sun, enough warmth, interrupts the plant’s natural cycle and the production window is lost. If you take that chance and it doesn’t work, pull and replant.

Peppers are a classic example. For some gardeners peppers take forever…………. For others the standard couple of weeks and seeds are seedlings! If you have experience, you probably know which it is for you. A lot of Latinos start their peppers in January and let them grow slowly until April. If you plant from transplants, I would not try for an early start. Peppers just don’t like cold feet. Whenever you start, plant two rounds, two to three weeks apart. That way you have a better chance of hitting the magic window! Soil Temps are critical for root function. Peppers need 60 degrees + for happiness. A gardeners’ soil thermometer is an inexpensive handy little tool to own.

You can use area that becomes open for quick plants, chard, kale, lettuce, spinach, crops grown for their leaves, until it’s the right time to plant heat lovers. These plants can be removed at any time and you still shall have had lush harvests. However, hardly anyone can resist planting early tomatoes! Another strategy is plant your leafies to one side, leaving room to plant your toms where the toms would be planted if the leafy plants weren’t there. Plant tomatoes on the sunny sides of the leafies! Remove lower leaves of taller plants that would shade the transplants. That way you have table food and your heart is happy too!

Choose early cold tolerant varieties. Ones with northern names, in SoCal that could be Oregon Spring, or Siberian. Stupice from Czechoslovakia is very early! Bellstar, from Ontario Canada, is larger and earlier than other plum tomatoes. Early Girl is a favorite! And SunGold cherry tomatoes are almost always a winner! Cherry toms are small and will ripen when other tomatoes just stay green for the longest!

Summer Garden Design is important right now! You can do diagrams on paper or just give it a good think to see if there are any changes this year, and carry it in your head. That layout is what you need to make your seed list! Seeds from catalogs, seeds from the Jan 28 Seed Swap! Catalogs give you the best selection and of plants your nursery doesn’t carry or isn’t able to get. Check for drought and heat tolerant varieties or look in southern states or world areas that have heat tolerant desert low water needs plants and order up! The seeds of these types may need to be planted deeper and earlier than more local plants for moisture they need. They may mature earlier. Be prepared to do second plantings if needed and use a little water. See Choosing Seeds: Catalogs to Seed Swaps!

Before you opt out of planting tomatoes and/or cucumbers due to Fusarium and Verticillium wilts, check out this special guide for successful results! Get resistant varieties and there are special planting and care techniques that work!

The Seed Swap is free, fun and random, a good way to try plants you might have never considered, and they are adapted to your area!

Later January is time to sow seeds indoors for mid to late March early plantings. If you will be doing succession plantings, sow your seeds in succession, like every 2, 3, 4 weeks depending on which plant it is and how many you need. If those fail, it’s to the nursery you go for transplants! Avoid box stores that bring plants from elsewhere that may not be timely for your area, may be infested or sick. Check them carefully. This is very important in a community garden where pests and diseases can spread quickly. Select local nurseries that order conscientiously for local timing and try to get quality plants for us. You may pay a tad more, but it is worth it. Local people live here and they have your interests at heart since they want your repeat business. Also, they can answer your questions. Establish a good relationship. At the Farmers Market, check with local farmers to see what they plant when. Some feed stores are agriculturally inclined.

Check out  Seed Soaking/Presprouting Tips & Ideas! If seeds and tending seedlings aren’t for you, wait and get transplants and pop them right in the ground per their right times! No fuss, no muss.

For us SoCal gardeners, besides beautiful bareroot roses, this month is bareroot veggies time! They don’t have soil on their roots, so plant immediately or keep them moist! Grape vines; artichokes; short-day (sweet) globe onions; strawberries; cane berries such as raspberries (get low-chill types); low-chill blueberries; and rhubarb, asparagus, and horseradish. Bare root planting is strictly a JANUARY thing. February is too late.

Prevention  A typical disease is Powdery mildew. Plant leaving plenty of space for air circulation. Apply your baking soda mix. Drench under and upper sides of the foliage of young plants to get them off to a great start! Do this the same or next day if transplanting. A super combo is 1 regular Aspirin dissolved, a 1/4 cup nonfat powdered milk, heaping tablespoon of baking soda, a half teaspoon liquid dish soap per gallon/watering can. Reapply every 10 days or so, and after significant rains. Prevention is so much better than after mildew has set in. See Aspirin Solution.

Standard Winter Garden Veggie Predators Keep a keen watch for pests and diseases and take quick action!

  • Bless the birds. If they are bothering your tender plants, cover with netting or wire with small openings, cloches, in such a way you have easy access to weed and harvest.
  • Gophers  You can still put in wire protective baskets or barriers, especially now while the soil is softer after the rains though we in Santa Barbara haven’t had any yet. If you see a fresh mound, trap immediately.
  • Aphids  Watch for leaves unnaturally curled along the length of the leaf, particularly broccolis, cauliflowers, kale, cabbages. Squish or wash any or the colony away immediately, and keep doing it for a few days to catch the ones you missed. Check the new growth tiny leaves at center top. power spray to remove any aphids there. Remove hopelessly infested leaves. After that, water less and give it less food so plant leaves will be less tender and inviting.
  • White flies  Flush away, especially under the leaves. They are attracted to yellow, so keep  those Brassica yellowing, yellowed leaves removed pronto. Again, a little less water.
  • Leafminers  Keep watch on your chard and beet leaves. Pull away those blotchy sections the leafminers make; immediately remove whole leaves that are too funky for rescue. Harvest the bigger outer lower leaves more often to stay ahead of the miners, especially the leaves that touch another plant. Water and feed just a little less to make those leaves less inviting. Plant so mature leaves don’t touch. Rather than row plant, interplant here and there.
  • Slugs, Snails  When you put in new transplants, sprinkle a bit of Sluggo type stuff around immediately to keep snails and slugs from seriously damaging or disappearing tiny seedlings or transplants while they are small. Before you anticipate your seedlings coming up, sprinkle some pellets around the plant, along both sides of rows. That keeps the creatures from mowing them overnight, making you think they never came up! Do this a few times, and there will be no tiny vegetarian predators for a while. If you notice tiny children snails, lay down another couple rounds.

If you need more robust soil, do something absolutely yummy with it! This is perfect timing to put in some green manure for March & April plantings. Depending on the type of plants you choose for your green manure, allow +/- 3.5 months for the process. If you want the earliest planting time for spring, plant ASAP! See Living Mulch! Put it where you will plant heavy summer feeders – tomatoes, potatoes, eggplants, peppers, chilis, squash, pumpkins, cucumbers, melons, and corn; hungry stalk vegetables like celery, fennel, rhubarb, and artichokes; or continually producing green, leafy vegetables like lettuce, spinach, Swiss chard. Or you can ‘rest’ an area by covering it with a good 6″ to a foot deep of mulch/straw! That will flatten down in no time at all! Simply let the herds of soil organisms do their work over winter. That’s called sheet composting, sheet mulching or composting in place – no turning or having to move it when it’s finished. If you are vermicomposting, have worms, add a few handfuls to speed up and enrich the process. Come spring you will have rich nutritious soil for no work at all!

COMPOST always! Soil building is the single-most important thing you can do for your garden. Compost is easy to make, and if you make it, you know what’s in it! Added to your soil, made or purchased, it increases water holding capacity, is nutritious, soil organisms flourish, it helps with immunity, your soil lives and breathes! It feeds just perfectly! Make it HOT, Cold, or In place!  Dry is dead, so be sure it is always slightly moist.

Sidedressing  Heavy leaf producers and big bodied Brassicas, may need a feeding now. Heading is your cue to help them along. If they slow down, or just don’t look perky, slip them a liquid feed that quickly waters into the root zone. Stinky fish/kelp is easy for them to uptake in cooler weather. Get your nozzle under low cabbage leaves and feed/water out to the drip line. Lettuces love manures. Compost and manure teas, fish emulsion (when there are no digging predators like skunks), pretty powdered box ferts, are all good. Use ½ the strength of your summer feedings. Slow release is a wise consideration. Worm castings, though not food, work wonders! Also, be careful of ‘too much’ fertilizer, too much water, that makes for an aphid tasty soft plant. That said, another way to get goodness to the roots is push in a spade fork vertically about 6″ or less deep, wiggle it back and forth, remove the fork, pour your foods into the holes, close ’em back up. Soil organisms will get right to work, your plant will stay healthy and be quite productive!

Especially feed your cabbages, lightly, time to time, because they are making leaf after leaf, dense heads, working hard. I often see kales lose their perk. You would too if someone kept pulling your leaves off and never fed you. Feed them too, please, while feeding your cabbages.

It’s a New Year! Some of you will make serious gardening resolutions, others will take it as it comes, one day at a time as usual. But I do recommend you secure your seeds for the year ahead! Some are now less plentiful with droughts and storms, GMO threats, new laws. Recently much needed seed banks, libraries have sprung up. We want to use our seeds with reverence and seed save our best as they adapt to different climate change conditions, assure their goodness for future generations. At Seed Swaps, take only what you need. If many people grow them, there will be more adapted to our localities. Before there were seed shops, seeds were often used as money. They are as precious today as they have always been, maybe even more so.

Santa Barbara’s 10th Annual Seed Swap is January 28! The last Saturday of January every year is National Seed Swap Day! Look in your area for an event, and if you don’t find one, collaborate with your local garden club or permaculture group to get one going!

Layer up, enjoy these crisp days. Let the wind clear your Spirit, the rain cleanse and soften your Soul.

Happy New Year Gardening!

Back to Top


x
The Green Bean Connection started as correspondence for the Santa Barbara CA USA, Pilgrim Terrace Community Garden. All three of Santa Barbara city community gardens are very coastal. During late spring/summer we are in a fog belt/marine layer area most years, locally referred to as the May grays, June glooms and August fogusts. Keep that in mind compared to the microclimate niche where your veggie garden is. Bless you for being such a wonderful Earth Steward!

I’m so grateful for having all you garden friends in my life! I love sharing, gardening, learning, being outdoors in all kinds of weather together! Please enjoy some frosty and sometimes smokey (Thomas Fire) December images at Santa Barbara’s Pilgrim Terrace and Rancheria Community Gardens!

See the entire January 2018 GBC Newsletter!

January Winter Harvests, Planning Your New Year!
Love KALE! Beauty, Super Nutrition, Easy to Grow!
Living Mulch, Which, When, and Why!
Smart Design for Your Spring & Summer Garden, Seed Selection!

Upcoming Gardener Events! 3 January La Sumida Nursery events, 2018 Permaculture Design Course, 26th Compost Council Conference, 10th Annual Santa Barbara Seed Swap!

Love your Mother! Plant bird & bee food! Think grey water! Grow organic!

Read Full Post »

Greenhouse Henry Ford Hospital Michelle Lutz

Michigan’s Henry Ford West Bloomfield Hospital upgraded the condition of its food by adding a greenhouse. Michelle Lutz oversees production of vegetables, fruits and herbs, used in preparations such as braised romaine salad. / Photos courtesy of Henry Ford West Bloomfield Hospital

Greenhouse seedlings, transplants are ready six to eight weeks early and you can grow Out-of-Season Treats in winter! Pest and disease free equals greater production! For institutions like hospitals, greenhouses are workhorses! A greenhouse is a most valuable part of a productive home garden. Seedlings are ready for earlier planting. Hospitals want the best food possible for the health of their patients, and can’t afford to be weather dependent.

As a home gardener in coastal SoCal areas you may question the need for a greenhouse. Though unheated, ours at our mile-from-the-beach community garden is well used! We often run out of space for everyone’s seedlings as we get closer to planting time or the weather warms! Even unheated, an enclosed space is heated by the sun during the day and doesn’t get so cold at night, no chilling winds or late freezes in there! Seedlings are protected from marauding pests, birds, walkabout creatures. Foothills and inland gardeners get more heat and more COLD! They really can use greenhouses to advantage.

Greenhouse Long CucumbersIn addition to starting preseason transplants, in a heated greenhouse you can grow out of season tomatoes, peppers, lettuces, cucumbers, beans, eggplant, zucchini, cantaloupe! Herbs, chard, raspberries and strawberries! And winter crops too if you just have too much snow outside!

Your greenhouse doesn’t need to be huge or showy. It just needs to do the job.

Super options!

Our land is flat, but yours might have slopes and you could choose to have an earth shelter space complete with indoor shower! See also Heating Greenhouses Without Electricity!

Greenhouses come in a vast variety of shapes from squares to pillowdomes! Buy a premade kit or design and build it yourself entirely to your specs.
You can have a 2′ wide up against the chimney mini to a palatial entire rooftop greenhouse with an elegant view!
You may have a built in the ground greenhouse cousin, a cold frame, or an indoor kitchen window box.

Materials vary from hoop frames to the fanciest filigree and glass, cob or strawbale! They can be spanking new, made of have-arounds, or be recycled from demolition sites! Covering materials can be poly films, panels, glass and glazing. There are so many new products, techniques, new research, all the time, and each person’s needs are so different, it is wise to check these things out for yourself. Talk with several ‘experts’ on each topic. Read up online. Compare. See what you really want. See what will do the best job for your needs.

Barclay Daranyi Greenhouse Hoop House High Tunnel Farming in Norwood CO! Photo by Barton Glasser

Barclay Daranyi uses hoop houses for growing, storage and raising chickens at Indian Ridge Farm in Norwood, Colorado. Photo by Barton Glasser

If you have space for a larger greenhouse, consider gardening some of your crops in it! Hoop houses, or high tunnel farming is a recent invention. They are certainly the larger version of traditional row covers! There are huge commercial installations. Yet home made hoop houses can be no bigger than 8X8, so easy to put up a child can do it! Check out Rodale’s HOOP HOUSES 101

  • Season extension is the #1 advantage. 30 days on the front end and 30 days on the back end of the growing season is equivalent to moving your farming operation 400 miles to the south!
  • Yields increase when your plants are protected from excessive rain and wind. When a more ideal growing temperature is maintained, a reduction in temperature-related stress, fruit set, fruit size increases.
  • There is no bolting, so no loss of your plant’s production.
  • Because temperatures are maintained, you can plant when you want to, not have to wait until conditions are favorable.
  • Soil conditions are more controlled, less moist, less to no fungi – wilts, blights.
  • No pests, no pesticides! No birds, small mammals.
  • Plus, they are movable!

Greenhouse Energy Efficient Attached Lean ToEnergy efficient attached greenhouses make a lot of sense. The home, and these bricks, help heat the greenhouse for free! Some attached greenhouses are beautiful walkin sunrooms, garden rooms, conservatories!

If you decide to build a greenhouse yourself, first check on local ordinances and with your neighbors. Place it conveniently, near electrical and water access if possible. Choose a location with a winter angle for maximum light, as much sun as possible. Use trees for windbreaks if necessary.

Know your prevailing wind direction, be sure it is well anchored. Use concrete blocks with eye hook attachments, sink posts or anchoring stakes, or use sand, not rocks, on the windward base cover.

Your roof choice tells us what kind of weather you have! Steep slopes and insulated lower areas tell us you are in high cold country with snow and need to decrease your heating costs. Medium slopes with rounded shoulders are good in windy and rainy areas. An extended slope on one side that faces the sun tells us you may get a lot of shade from trees on one side.

Doors make a difference. If you are in a windy area, you might choose sliding doors that can be secured and weather stripped versus velcroed flaps, zippers or swing out doors that blow away or animals could get through.

Ventilation is key! Hot days are hot! In two shakes a greenhouse can to get up to 110 degrees! Doors and windows can be the vents if intruders are not an issue, otherwise, ceiling vents are best. Solar devices can be set to open when temps hit a high level. Fans may be needed.

Greenhouse sloped for lots more Solar energy!
Electrical!

Get advice from a greenhouse experienced professional because of the extreme conditions: heat, wet, cold. Make sure that person knows local codes
Consider solar lights, vent openers, fans or simply long sloped sides to have lots more solar energy as in the image!
Growlights? Yes!
Night light to see by
Computer monitor

Irrigation tips! Put your timer OUTSIDE! Make & see your adjustments without getting wet! Mini drop down sprayers or foggers at varying adjustable heights along an overhead line are fabulous! Consider recycling your water – is it legal to use grey water where you live? Collect rainwater.

A word about Damping Off. Damping off is a common problem with seedlings started in containers, indoors or in greenhouses. Per Planet Natural: ‘Several fungi can cause decay of seeds and seedlings including species of rhizoctonia, fusarium and phytophthora. However, species of the soil fungus pythium are most often the culprit. Damping off typically occurs when old seed is planted in cold, wet soil and is further increased’ by poor soil drainage.

Disease Cinnamon Damping Off PreventionThe super simplest prevention is Cinnamon! Just sprinkle it on the soil! Sprinkle on plant injuries and they will heal. It is a rooting hormone. Mildew, mold, fungal diseases? Mix 4 tablespoons cinnamon in a half gallon warm water, shake it vigorously, steep overnight. Strain through a sieve or coffee filter and put it in a spray bottle. Add ¼ teaspoon liquid dish soap as a surfactant, lightly spritz your plants, undersides and tops of leaves! (In Santa Barbara area buy it in big containers at Smart & Final.) Also, it repels ants!

Pathway and Flooring best for your plants and feet! Have a sturdy pathway that stands up to wheelbarrow use. A non muddy pathway saves your greenhouse floor. A raised flooring keeps you from having a muddy mess. Drainage is necessary so there is no rot or mold. Heated flooring is the best. There are great options, more and less expensive! Concrete, rubber matting saves your feet. Dirt, my last choice, and/or pavers. Decomposed granite, pea gravel, raised wooden slats, pallets, straw, chips – use weed mat underneath! Use pest protection wire under weed mat and soft flooring choices. No gophers, no mice, squirrels, bunnies or snakes, thank you.

Greenhouse Shelving FanShelves and Worktable

Make your work table a good working height for you!
Shelving needs to be safe and well supported
Construct your shelves wire covered like the top shelves in the image, or like the lower shelves, out of spaced boards so water drains, the boards dry, there is no mildew or mold.
Enough space between boards makes it easy to clean
Or use open wire metal shelving that allows drainage and dries
If there is lower shelving, slant it down from back to front

  • so you can see what is in the back
  • It is easier to get items in back out – keep heavier items to front
  • No water clings to it – stays dry, no rot or mold

OR some say don’t have bottom shelves so there is no nesting space for mice or chipmunks – they WILL eat your plants! You want to be able to SEE the ground! Depends on how critter secure your house is.

Rather than just the greenhouse, consider a 4 part working complex! A storage shed, the greenhouse, a covered work area and hardening off area.

Tool & Gear Storage could hold your tools and supplies!

Wheelbarrow, all tools – shovel, rake, pitchfork, spade fork
Small tools – trowel, clippers, sprayers
Bags of compost, potting mixes etc
Plug trays, biodegradable containers, labels
Gloves, apron, work boots, jacket
Greenhouse gear & replacement materials

Greenhouse Support Supplies!

Heating gear – heaters, heating mats
Cooling systems – fans
Irrigation, misting items
Lighting – grow light, night light
Thermostat, humidity (no mold), temperature   devices, CO2 generators
Secure, safe-for-children and pets, dry storage containers

Your Workspace needs a sun shade top and wind screen side. It would be a good place for your composter, worm bin and might be a good place for your rain collector barrels

Care and Maintenance

Seasonal checks, reset watering needs, replace brittle coverings
Routine cleaning inside and out
Equipment
Sterilize propagation area
Ventilation – Heat, condensation. Insulation – Frost
Deal with pests and diseases immediately!

Greenhouse Reused Doors and WindowsGreenhouses made of reused doors and windows are much more green than recycling!

Sustainable Greenhouses are often compost or solar heated!
They have heated benches and floor because root zone temperatures are more critical to plant growth than leaf temperatures. By maintaining an optimum root zone temperature, greenhouse air temperatures can be lowered 15° F!
LED’s balance good light, cooler temps
Hydroponics (preferably aeroponics) remove excess heat and water vapor
CO2 is recycled by breaking down old plant debris in a digester
Soluble components of the plant debris can be incorporated back into the nutrient solutions.

If you have the budget and inclination, get a fancy beautiful prefabricated greenhouse with all the tricks including that solar activated shade screen, fans and irrigation on a timer!

White Greenhouse

The Ultimate, perhaps, would be greenhouse living, live-in green space!

Зимние сады — проектирование, изготовление, остекление — Елена Федосова
This greenhouse is in Philadelphia, Pennsylvania. Photo courtesy of Groundswell Design Group, by Top Kat Photo

Sustainable Sources to stir your thinking!

  1. Eco-Friendly Greenhouses
  2. Sustainable Architecture, Greenhouse Book & Video List
  3. Kiva’s straw bale greenhouse – the time & money it takes

Rooftop greenhouse with a view of the city! Germany Fraunhofer UMSICHT

Fresh City Tomatoes, Any Time! On his way home from the office, the computer scientist harvests tomatoes from his company‘s rooftop greenhouse. No food miles! Why not produce lettuce, beans and tomatoes where most of the consumers are to be found: in the city? The flat roofs of many buildings are well-suited for growing vegetables. Rooftop greenhouses can also make use of a building‘s waste heat and cleaned waste water. Solar modules can do the rest. This uptown rooftop greenhouse urban garden is in Germany. Image courtesy of Fraunhofer UMSICHT.

Greenhouse Conferences! Tradeshows, sustainable, educational. Local, international! If you love greenhouses, might want to do urban agriculture business, just want to get involved, check these out online. There are different sponsors, different locations each year!

Whatever your special connection is, in SoCal, before our winter rains and cooler weather, late summer, early fall are perfect for getting your very own fine greenhouse up and running! If you miss that window, very early in the new year is good so you can start seedlings for early March plantings!

You might decide to sleep in it the first night!

See also Heating Greenhouses Without Electricity!

Updated 11.26.21


Love your Mother! Plant bird & bee food! Think grey water! Grow organic! Bless you for being such a wonderful Earth Steward!

The Green Bean Connection started as correspondence for the Santa Barbara CA USA Pilgrim Terrace Community Garden. All three of Santa Barbara’s community gardens are very coastal. During late spring/summer we are often in a fog belt/marine layer most years, locally referred to as the May grays, June glooms and August fogusts. Keep that in mind compared to the microclimate niche where your veggie garden is.

Read Full Post »

Image result for seeds or transplants

Starting Sage & Lavender Indoors – Gary Pilarchik

Do both! Seeds and transplants! Here’s why and when!

If you are late planting seeds, it’s off to the nursery for transplants!
Some plants just don’t come in six packs, like radish. Seeds it is.

SEEDS

Watching seeds sprout and seedlings unfurl and grow is divine! It’s a miracle! Many have just never done it and find, to their delight, how easy and inspiring it is! Seeds can be started indoors at home or right where you want them, in the garden!

Pros:

  • The beauty of seeds is you can select plants your nursery doesn’t carry!
  • You can start them indoors 6 weeks earlier than you can plant seeds in the ground!
  • If you planted it right in the ground, you have saved yourself the step of transplanting!
  • Some plants just don’t like to be transplanted! Annuals, plants with large seeds, plants that require weathering, plants with fragile root systems and root crops – beets, carrots. Like snapdragons, nasturtiums, spinach, and peas.
    • Root crops like carrots need depth. If their tap root comes in contact with the bottom of a container it will fork or bend. Better to sow directly in your soil.
  • Plants that are quick to germinate, get up and get strong, are great to start from seed, like radishes, beans, peas, beets, and turnips.
  • If you are growing a lot or in succession, seeds are the most inexpensive way to grow your garden. Save seeds from your best veggies, flowers and herbs each year and you won’t need to buy any more! Plus they will be adapted to you and your soil!
  • Be prepared to thin your seedlings, which means pulling out a few plants so your crop is spaced apart enough. Beet seedlings need 2-4 inches apart, but the seed grows in fours, so each plant needs room to make a normal-sized beet. Crowded plants compete for light, water, and nutrients. Also, lack of airflow will encourage diseases. The pro here is those young tender seedlings are perfect in salads!
  • Seedlings thinned from over-crowded areas may be moved to fill in bare spots.
  • Growing seeds for transplants indoors are protected from the elements and garden pests while you can also control soil, moisture, fertility and heat.
  • You can select only the strongest seedlings to transplant.
  • All your plants are up when you plant them – no germination failures, empty spaces, no wondering, no replanting necessary, no lost time.
  • If you complete the circle by continually keeping the seeds from open-pollinated plants in your garden, you’ll create a vegetable strain (AKA: landrace) that thrives in your particular environment.
  • There is well deserved pride in growing your veggies from seed-to-plate!

Veggie Seeds Soil Planting Temps!
Seed Soaking/Presprouting Tips & Ideas!
Soil for Seed Starting! DIY, Pre-made

Cons:

  • Seed germination in the ground isn’t guaranteed. You wait to find out and if it doesn’t start, you lose time, possibly it gets beyond the planting window and it was not a plant your nursery carries. Starting a few seeds indoors as backup is wise.
  • The number of days to germinate in your garden could be very different than those given on a seed packet due to soil conditions, weather, whereas with a transplant, there’s no guessing.
  • Extra tender care and time is needed as seedlings germinate and get going. Transplants are sure, up and ready! All you have to do is go get them…
    • Seedlings need to be weeded so they aren’t overgrown.
    • Sometimes seedlings need protection from birds, pests – especially slugs, and freezes or hot sun.
    • Right watering must be done, you can’t miss.
    • Tomatoes like moving air to development well, if starting indoors you may need a fan.
  • Yes, there is a learning curve with seeds. Research is important so you can choose the best for your climate, soil and light conditions, the season – first and last frosts.
  • You’ll need a seed germinating space. Regular shop lights are fine for germinating seeds, but there usually is an initial investment of some kind, like maybe that fan!

Image result for veggie Transplant pepper seedlings

Super healthy homegrown Pepper seedlings at New Life on a Homestead

TRANSPLANTS

Oh it’s so much fun to select transplants! It gives you the option of trying new plants, varieties, sometimes getting another one if one has failed. While you are shopping, there are marvelous other gardening tools, amendments, flowers you can get! Who knows what you will come back with?! And you can plant in the garden the same day!

From the Nursery Pros:

  • Nursery transplants take a whole lot less time! You just go get them.
  • If you don’t have a place to grow seeds, transplants from the nursery are terrific. You can ask, they may be able to get special varieties you would like.
  • Some plants are just plum hard to get started from seed. A transplant is perfect, thanks.
  • Starts are especially perfect for beginning gardeners who would like to skip the part that includes vulnerable, infant plants. Starting and babying tiny plants may not be your cup of tea either! Let the experts do it!
  • With transplants the seed is germinated, it’s showing vigor and chances for a successful garden are more likely from the outset. This is particularly important when you have a limited number of warm summer days or you are planting late!
  • On average, transplants give you a SIX WEEKS jump start on the season, because they will mature sooner and give you an earlier harvest. Transplants give higher early yields, and, one gardener says, in the case of watermelons, give larger fruits.
  • Transplants can give you a great boost with succession planting, which means planting the same thing several times per season to ensure continuous harvest. For great results with lettuce, for example, you can start your first succession via transplants, and then follow every 2-3 weeks with lettuce seeds sown directly into your garden.
  • If your seeds have failed, you can get transplants at the nursery!
  • Transplants can be more resistant to insect pests, because they are more mature and stronger when you first put them into your garden. Many insect pests, like slugs, just love teeny tiny seedlings. Put down Sluggo or something like it even before you transplant, but definitely at the same time you install your plants. An overnight slug fest can remove an entire plant!
  • Planting transplants gives you immediate satisfaction. Who doesn’t love starting their garden and seeing all those baby plants?
  • Buying transplants can be more cost effective, and provides you with a great way to support local farmers and garden centers.
  • Conscientious local nurseries carry starts that are grown specifically for your area. So you don’t have to worry about planting a variety that doesn’t do well in your zone. Box stores are less likely to be region specific.
  • Having strong, young plants gives you some leeway per correct planting times. Transplants can be put in the ground earlier than seeds can be planted! If you miss a planting window, go get transplants from the nursery and you are back on time!

From Your Nursery at Home Pros:

  • Start 6 weeks before safe outdoor soil planting temps. Head start!
  • Sow seeds indoors during cool weather, harden off, then move outdoors, when weather warms up, not before.
  • Since the seedbed produces many more plants than needed, choose only the very best plants!
  • Reduce loss. The disease and pest free, precise environment of indoor planting is more protected than seeds germinated and seedling growth in the ground.
  • You can plant exactly as many as you need.
  • You know they are organic all the way, seed and soil, feeds.

Importantly, if you are growing your own transplants indoors, harden them off well. Expose them to slightly cooler temps and some dryer conditions before putting them out. Most transplants have been raised in warm, favorable temperatures, spoiled with plenty of water. They may suffer transplant shock from suddenly changing those conditions. They may wilt or even die with cooler night temperatures, lots of temperature fluctuation, or drier conditions.

How to Transplant for Super Successful Returns!

Cons:

  • Starts from the nursery are the most expensive way to plant a garden. Prices can vary drastically depending on where you shop.
  • There is a carbon footprint. Yes, most do use plastic containers and you usually drive to the nursery.
  • Your variety choices are limited to the plants the nursery or garden center selects from their grower, which may be local or not. Box stores often carry out of season veggies for your locality.
  • You have to buy more than you need, they only come in four or six packs.
  • The nursery runs out or doesn’t have as many as you need or the plants aren’t in good condition.
  • Consider that transplants can introduce weeds, pests and diseases into your garden. Most producers of transplants are very careful about this, especially with respect to diseases, but it is not uncommon to get a little grass or other weed seed into your transplant pack now and then. Carefully check for pests, the undersides of leaves.
  • Transplants you start yourself are time and labor intensive, and sometimes the whole batch fails. For more assurance, plant backup seeds every few days. If you end up with too many, share them with other gardeners who will be so grateful!

Veggies easy to direct seed – that’s right in the ground!

  • Beans
  • Broccoli, Brussel sprouts, Cauliflower, Collards, Kale, Kohlrabi
  • Chard
  • Corn
  • Cucumbers
  • Leeks
  • Lettuce
  • Melons, Watermelon
  • Okra
  • Peas
  • Root crops – beets, carrots, garlic, onion, radish, turnips
  • Spinach
  • Squashes
  • Sunflowers
  • Tomato grows rampantly from seed!
  • Zucchini

Veggies to transplant or start in trays or get at the nursery!

  • Celery
  • Eggplant
  • Peppers
  • Tomatoes are fun to get at the nursery because there are often so many exotic varieties! In Santa Barbara, that nursery is La Sumida!

Know that different gardeners do better with one plant than another! Their peppers always do well, they never get eggplant! Their onions never get big, but they get super big juicy celery stalks!

Garden Magic! Self-sowers & Volunteers

I have a soft spot for volunteers! I love the variety, surprises the birds bring already fertilized and ready to grow! Plants that self seed are a gift! They know where to grow and come up at the perfect time. Let your plants live out their life cycle, make flowers for the bees, butterflies and beneficial insects, seeds for the birds, before cleaning up. Leave a few of your very best tomatoes and cucumbers to decompose in the garden. Let sunflowers, calendula, violas and other annuals drop their seeds and make pretty next year. These plants will have natural vigor. Transplant them to your convenience if you must, but let them grow as they naturally are whenever possible.

Experienced gardeners do a little seed planting in the ground, some grow their own transplants indoors, and at times buy transplants for various reasons! Maybe the nursery got a new plant and you gotta try it!

Back to top 


See the entire February Newsletter! (Sign up for it if you like!)

February – Final Plans, Preps, 1st Spring Plantings!
Calendula ~ Edible, Medicinal, Good for Your Garden, Easy to Grow!
January, February Seeds or Transplants, Pros & Cons
Other Community Gardens – Virginia Avenue Community Garden, Washington DC 
Events! CEC EARTH DAY Celebration 2017!
x


The Green Bean Connection started as correspondence for SoCal Santa Barbara CA USA Pilgrim Terrace Community Garden. All three of Santa Barbara’s community gardens are very coastal. During late spring/summer we are often in a fog belt/marine layer most years, locally referred to as the May grays, June glooms and August fogusts. Keep that in mind compared to the microclimate niche where your veggie garden is. Bless you for being such a wonderful Earth Steward!

Love your Mother! Plant bird & bee food! Think grey water! Grow organic!

Read Full Post »

Heirloom Golden Detroit Beet 55 Days

Heirloom Golden Detroit Beet at Dust Bowl Seeds: High yield large orange round beet, non-bleeding, good bolt resistance, 55 days.

Beets are what I call a Two for One crop! The leaves are low cal and nutritious; the roots are a sweet treat with excellent benefits of their own!

Companion Plants Beets, with their quick growing flat dense foliage are almost more a living mulch plant than a companion per se. If you don’t eat the leaves, 25% magnesium, add them to your compost! They help bush beans, but stunt pole beans and pole beans stunt them! Grow them with lettuce, onions, Brassicas – especially kohlrabi, and at the foot of peas. Garlic and mints help beets, garlic improving their flavor, speeding their growth. Rather than growing invasive mint with them, grow your mint in a container elsewhere, chop up bits of it and sprinkle it around your beetroots.

VARIETIES, CHOICES ABOUND

Cylindra, long Winter Beets!Winter beets

Like long winter radishes, Daikons, Danish heirloom Cylindra are their beet equivalent. There are orange ones like in the image at left, or that gorgeous crimson red that beets are known for! It is a perfect uniform slicing beet, aka “Butter Slicer”! The flesh is very tender, easy to peel if you want to, is sweet with wonderful texture. The root grows up to 6″ long but many harvest at 3-4″ for fresh eating. 55-60 days These seeds are at Urban Farmer, non GMO.

Mini & Monsters

  • Little Ball (50 days; very uniform, small size; good shape; very tender; grows quickly to form smooth roots)
  • Red Mammoth Mangels are monsters, grow up to 20 lbs and 2′ long! Though generally used to feed stock, harvested small, they are delicious. Read this funny story and see a winning Mangel at Tales from Swallow Farm!

Colors

  • Standard deep reds, scarlets! Ruby Queen is an AAS winner! Early; round, tender, sweet, fine-grained, attractive, uniform roots, 60 days. If you are growing for the color of the leaves, Bull’s Blood has amazing dark, dark red leaves! Pick early and there is no oxalic acid taste at all.
  • Gourmet goldens stay tender-fleshed and particularly sweet and mild in taste, whether pulled very young or allowed to size up. 55 days. If you steam them with rice, the rice will look golden, like you cooked it with Saffron!
  • Striped di Chioggia is a beautiful scarlet-red Italian heirloom with interior rings of reddish-pink and white. It germinates strongly, matures quickly, 50 days, and does not get woody with age!

GREENS There are varieties that produce an abundance of greens, but why not just grow Chard for greens?! What’s different about beets is they make those fine fat roots! If you keep cutting the greens you slow their production. When you harvest your beets, then eat those greens!

Planting 

Beets are closely related to Swiss chard and spinach. The seeds look so much alike you can’t tell them apart! Avoid following these crops in rotation. Grow beets in full sun; beets for greens can be grown in partial shade if you must. Beets tolerate average to low fertility soil, but love tasty fertile soil. However, too much Nitrogen and you get more leaves than beets or no beets at all! They grow best in loose soil so they can swell easily. Add well-aged fluffy compost to the planting beds and keep beds free of clods, stones, and plant debris. Beets like well-drained soil, but keep them moist. If all your seeds don’t germinate, pop in some more right away, not too deep – about a 1/2″ to an inch, a tad deeper in hotter weather. Give cool weather plantings a  bit more time to come up.

Up to one third of the tasty beet greens can be harvested without damaging your plant, but if you want those beet roots, use less leaves, let your beets get their nutrition and grow quickly!

Beet seeds are clusters of seeds in a single fruit.
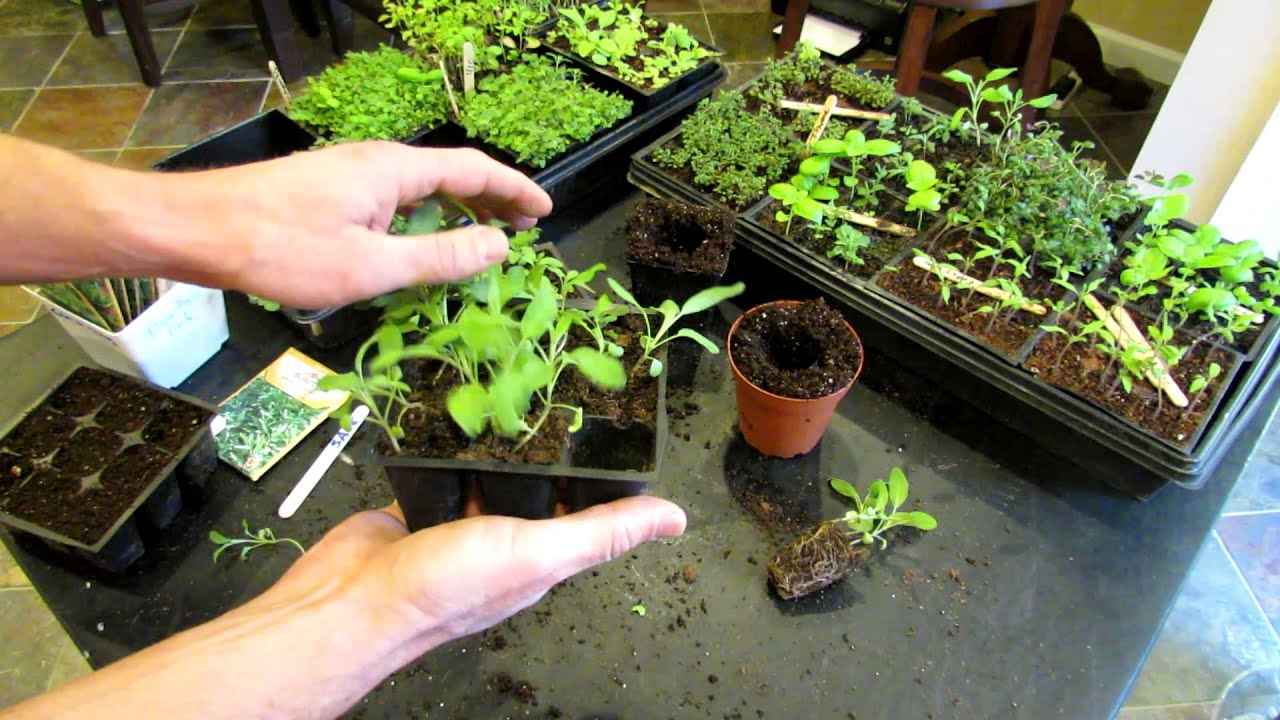
Soak seeds overnight or presprout! Seedlings are established more easily under cool, moist conditions. Start successive plantings at 3 to 4 week intervals until midsummer for a continuous supply. The beet “seed” is actually a cluster of seeds in a dried fruit. Several seedlings may grow from each fruit. See the sprouts at left? Two from one seed is no surprise. Some seed companies are now singulating the seed for precision planting, by dividing the fruit. Plant seeds about 1/2 inch deep and one inch apart. Allow 12 to 18 inches between rows.

Poor stands are often the result of planting too deeply or soil crusting after a heavy rain. In fact, some gardeners don’t bury the seeds at all, but broadcast, throw them over an area, and let them do as and when they will. And they do! Seedlings may emerge at different times, making a stand of different sizes and ages of seedlings. It works as an automatic succession strategy! If you have slugs, an emerging stand can vanish overnight! You thought they never came up. So. Prepare the planting area by putting down a sluggo type stuff before you plant!!! Do it twice, a few days apart, to get two generations. If you forgot, or that didn’t happen, put down the sluggo type stuff right when you plant, then religiously about a week later if you found any dead slugs. You need to kill off the generations.

You can tell when seedlings are up because the tiny stems are red if you planted red beets, yellow if you planted goldens!

Beet - Red SeedlingsBeet - Gourmet Golden Seedlings

Planting Time 

Take Day Length into account! Photoperiodism is applicable to many plants. Some plants and certain varieties of some plants, simply won’t grow or produce if they don’t have the right day length. Some plants stop growing when there is less than 10 hours of daylight. There are special considerations for broccoli, onions and bulbing plants like beets. You need to know your latitude to determine the best choices for your area. Santa Barbara CA is 34N; Jan/Feb have less than 10 hours of light per day. See more and examples of planting strategies!

Beets are a cool-season crop. Sow beets in the garden as early as 4 weeks before the last average frost date in spring. Succession crops can be planted every 2 weeks for a continuous harvest. In warm-summer regions, do not plant beets from mid-spring through mid-summer. Sow beets for fall harvest about 8 weeks before the average first frost date in fall. In mild-winter regions, beets can be sown until late autumn and can be left in the ground for harvest through the winter.  Avoid seeding during daytime temperatures of 80 degrees F, wait until it is cooler.

Storage beets need to be planted early in the season to give them plenty of time to make full size. But, you know you could start a second crop of early maturing smaller beets just for fresh fall eating!

Care  Do thin your beets! The most frequent cause for beet plants failing to develop beets is overcrowding. If you are using unseparated seed clusters to plant from, your beet seedlings commonly emerge in clusters. Hand thinning is always necessary. When the first true leaves form, thin with small scissors leaving the strongest seedling. Cut or pinch so you don’t disturb the roots of nearby seedlings Definitely thin at 5″ tall or less! At 4 to 5″ tall you get to eat those little seedlings in your salad! Thin 1″ up to 5″ apart depending of the size of the beet you want to grow.

Weeding is important because tiny beets have only that little tap root that becomes the fat root. Clearly, deep, or just about any, cultivation is a no, no. Weeds rob beets of nutrients, moisture, and flavor. Keep beets evenly moist for quick growth and best flavor.

Mulch is perfect in summer to conserve soil moisture, prevent soil compaction and help suppress weed growth. In hot weather install shade cloth to keep your beets from bolting. Mulch in winter keeps soil cool, and growth is slowed down.

Beets are heavy feeders and need to be fertilized at planting time, as well as a month later. A fertilizer with the analysis of 5-10-10 can be applied when you plant your seeds, and again when the plants are about three inches high.

Keep young roots covered with soil. When you water or it rains, the soil sinks, exposing part of the root. Add soil or the root may not bulb. Planting the seed deeper doesn’t help. The seedling still needs to be able to get up. Planting beets on lower soil rather than on a higher area, a mound, is better. Soil then has a chance to collect down around the roots rather than leaving them exposed. But always do check the roots anyway. Further drainage can wash that soil away. You might need to install a berm.

Beets, carrots, radish and turnips naturally Keep Beet shoulders covered with Soil!push right up above the ground! Plant in low sloped walled mini trenches. That way the seeds stay more moist longer, germination per cent is better. When the beet root starts to get above the soil level pull the sides of the trench onto the beet root shoulders! Avoid planting on a slope where normal watering washes the soil away. You can see in the image how crowding, not thinning, adds to the problem. Exposed areas toughen and have to be peeled, losing nutrients packed in the skin. Harvest sooner and a bit smaller for fresh tender roots! I have grown big 4-5″ beets though, and they are still tender! Just keep them moist and let them grow fast!

If you’re planning to serve your tender baby beets whole and unpeeled, try hilling the soil around their shoulders as they grow. This will keep the skin from hardening over and losing its smooth, red appearance.

Pests & Diseases

Flea beetles, leaf miners, aphids and Cercospora leaf spot are the usual. Regular inspection of your plants can help deter a major pest infestation. If you have the patience, the use of floating row covers will offer nearly 100% protection.

Biodiversity You almost always see beets planted in rows. The damage from leafminers is, uh, downright ugly. Rather than letting them walk right down the row, plant to plant, try planting your beets in small clusters here and there among your other plants. Another simple remedy, if you have the space, is plant so no plant leaves touch another’s when they are mature. The tastiest remedy is to deliberately overplant then harvest the tiny tasties between, and keep thinning as they get larger! If they still touch, harvest the between leaves first! Remove infested leaves ASAP! Water a tad less so the leaves aren’t quite so soft and inviting.

Flea beetles have a season. If your plant is healthy and growing fast, it will probably be bitten temporarily, then do ok. There will just be a lotta tiny holes in those leaves.

Aphids. Keep watch, spray ’em away before they get out of control. Remove badly infested leaves. Check for ants, water a tad less.

See more on these pests!

Disease - Cercospora Leaf Spot on Chard, Spinach & Beet leavesBeets, Chard and Spinach get Cercospora leaf spot – like the Chard at left. Sadly, no resistant cultivars of table beet are known. Late fall or early spring plantings are most likely to be affected. Late summer when conditions are favorable (high temperatures 75-85˚F, high humidity, long leaf wetness periods at night) is the worst. Beet roots fail to grow to full size when disease is severe. Successive plantings made close together can allow disease to move from one planting into the next. It grows on infected crop residues, so immediately remove leaves that collapse on the ground. It is spread by rain splash, wind, irrigation water, insects, workers, and equipment. This is one case where AM watering really makes sense to reduce humidity. UMASS Amherst recommends to ‘Avoid overhead irrigation if it will result in prolonged leaf wetness periods (e.g., through the night); irrigate mid-day when leaves will dry fully or use drip irrigation.’ If all that fails, use foliar fungicides. Plant less densely for more airflow, thinnings are tasty! In general, harvest more frequently so leaves don’t surpass their prime health. Planting only every 3 years in the same spot isn’t possible if there is too little garden space, so cultivating, turning and drying the soil between plantings is good. See more

Harvest & Storage 

Roots! Most varieties will mature within 55 to 70 days, but can be harvested at any time in their growth cycle. Young roots 1 1/2″ diameter can be harvested about 60 days after sowing. If you like them bigger, it won’t take much longer! After 3″, though, some can get tough if they weren’t kept moist so they could grow fast.

Best color and flavor develop under cool conditions and bright sun. When beets mature in warm weather, they are lighter colored, have less sugar and have more pronounced color zoning in the roots. Fluctuating weather conditions produce white zone rings in roots. Lift spring beets before daytime temperatures average greater than 70°F. Start the fall harvest when daytime temperatures are consistently in the 50s. If you live in cold climes, Pull up the last of your beets before the ground freezes.

Cut the tops off the beets one inch above the roots, to retain moisture and nutrients avoid bleeding during cooking. Greens quickly draw moisture from the root greatly reducing flavor and the beets become shriveled. Beets store best at 32°F and 95 percent humidity for about a week, three weeks in an airtight bag. Do not allow them to freeze. Use beets while they are still firm and fresh. Or, store some as naturally fermented pickled beets, whole or sliced!

For longer storage, don’t wash the dirt off your root crops. Just let it dry, then brush it off as much as possible. Keep at temperatures near freezing and with high humidity to prevent wilting. If you can’t eat all those beet greens, tops, right away, freeze them and use them in soup stocks!

Greens are best fresh in salads when four to six inches tall, but mature sized leaves are plenty tasty steamed over rice. Add them to stews. Stir fry with olive oil and a tad of garlic! Remember, they will wilt with cooking, so gather a few extra!

SAVING SEEDS, Your Second Harvest!

SeedSaving Beets

When the seeds are completely brown and dry, they are ready to harvest.

Only let a single variety of beet, or chard, go to flower when you will be saving seeds. Beet seeds, being wind pollinated, have a talent for cross-pollination over distances of a mile or more. The pollen is light and can travel great distances; therefore, varieties must be separated by at least 2 miles the second year when going to seed to ensure absolute seed purity. If you are in a community garden, that means track your fellow gardeners to make sure they don’t have flowering beets or chard when you do. In an urban neighborhood it likely means you can’t tell, so it’s best to buy pure seeds from a reliable seed house each year.

Beets are biennials. Normally, they produce an enlarged root during their first season. Then after overwintering they produce a flower stalk. If they experience two to three weeks of temperatures below 45 F after they have formed several true leaves during their first season, a flower stalk may grow prematurely. If you are a seed saver, that is a lucky opportunity! Saving beet seeds is generally a two-year project because this biennial doesn’t flower and produce its seed clusters until the next growing season.

Tie the stalks to stakes when they become floppy, look for blossoms in June and July, harvest the seeds in August. if you want to speed the process a little, cut 4′ tall tops just above the root when the majority of flowering clusters have turned brown. Tops can be stored in cool, dry locations for 2-3 weeks to encourage further seed ripening.

Seed harvest is especially easy. Just zip the stems between your fingers and the seeds will come right off into your bag! Done. Let them dry more off plant to be sure they are completely dry. When the seed clusters are thoroughly dry and brittle, they can be gently rolled to break them open. This will release the seed, usually 3 to 5 per cluster. LABEL the seed pack with name and year because beet & chard seeds look virtually the same! Beet seed will remain viable for about six years. Do a moonlight dance in gratitude!

Important tips per Everwilde Farms: ‘Beet plants must weather the winter in order to produce seed; in warmer climates, simply mulch the plants. In cooler climates, dig up the roots and store them in sand, without the roots touching, in a cool and humid location; plant them in early spring. In the spring, the plants will go to seed; wait until the seed heads are fully grown and dry before removing them. The seeds will readily come off the stems after they are completely dry. Store the seed in a cool, dry place for up to five years.’ You can see it is a lengthy, but worthy, process.

Fall Beets! Fistful of Tasty Happiness!A Fistul of Nutrition and Benefits!

Beets have my admiration! Drinking beet juice may help to lower blood pressure in a matter of hours, boost your exercise time by 16%! Beets have betaine, a nutrient that helps protects cells, proteins, and enzymes from environmental stress. It’s an anti-inflammatory, protects internal organs, improves vascular risk factors, enhances performance, and likely helps prevent numerous chronic diseases. Beets have phytonutrients that help ward off cancer. Beet powder reduces cholesterol. Check out more details at whFoods.com.

Beets are high in folate and manganese. Folate is a B9 vitamin that helps strengthen neural tubes, reduces the risk of neural defects in babies, and can help prevent gray hair! Manganese helps your body with blood-clotting factors, sex hormones, bones and connective tissue. It helps with calcium absorption, carbohydrate and fat metabolism, blood sugar regulation, and that your brain and nerves function at optimal levels. Manganese is an integral part of the antioxidant enzyme superoxide dismutase, that helps combat free radicals.

What makes beet greens unique is they are high in calcium and provide 25% of the daily magnesium we need, higher than turnip and mustard greens. Calcium is good for our bones, a gentle temperament, pain reduction. Magnesium is a mineral that maintains normal muscle and nerve function, keeps a healthy immune system, maintains heart rhythm, and builds strong bones.

Like other greens, they excel in Vitamins K and A. A is significant for eye health, prevents night blindness, strengthens your immune system, stimulating production of antibodies and white blood cells. The beta-carotene in vitamin A is a known antioxidant that fights free radicals, cancer and heart disease. Vitamin K has blood clotting properties, helps wards off osteoporosis, works with calcium to boost bone strength, and may also play a role in fighting Alzheimer’s disease. Beet greens have a higher iron content than spinach! And they are low in fat and cholesterol!

Comparison of Kale to Beet Greens. The comparison isn’t complete, so compare carefully to what is written here. Variety is good.

Practical Cautions Beet greens contain unusually high levels of oxalic acid though far less than Spinach and Purslane. Oxalic acid is a chelating compound that binds to minerals like calcium, phosphorous, etc which are then expelled unused from the body. Oxalic crystals can cause kidney stones when eaten in large quantities for very long periods. Use with caution and keep your water intake up.

Because of the greens’ high vitamin K content, patients taking anti-coagulants such as warfarin are encouraged to avoid these greens. Beets tops increase K concentration in the blood, which is what the drugs are attempting to lower.

Since beetroots have the highest sugar content of all vegetables, sugar beets are second only to sugarcane in sugar production, eat your beetroots in moderation! Two to three times a week is fine. Though beets are a veggie, see sugary fruits for how to best eat your beets if you need to keep your body alkaline! If you are making a salad with beets, check out the alkaline dressing recipes at the bottom of Virtuous Veggies!

Due to that sugar, candida overgrowth can be a problem, but beets are abundant in nitrates; great for your heart. They can increase exercise endurance, allowing people to exercise for 16% longer periods of time without tiring. The trick is to ferment them, drink them juiced with fiber! See the details at Body Ecology!

Fermented Beet KrautCulinary Treats! When preparing your beets for cooking, wash them carefully to avoid breaking the skin. Breaks and tears allow color and nutritional value to escape. They can be cooked whole, then sliced or diced. Shred fresh or cooked and cooled into salads. Ferment/probiotic. Beets are high in natural sugar and roasting brings out the natural sweetness. Borscht is a popular beet soup which can be served hot in winter and cold in summer. Beet Salsa! Cut your beets up into small bits, add sweet onion, apple cider vinegar, a touch of honey and some water. Pop the whole mix in the fridge and add to salads or eat alone as a tangy treat, dip! Make beet smoothies! Substitute the leaves for spinach. Put greens in soups, drinks, ravioli, pasta, on sandwiches, pizza, in omelets, stuffed in bread and puffs!

May your beets be sweet, beautiful and plentiful! 

Updated 7.20.23

^Top


Love your Mother! Plant bird & bee food! Think grey water! Grow organic! Bless you for being such a wonderful Earth Steward!

The Green Bean Connection started as correspondence for the Santa Barbara CA USA Pilgrim Terrace Community Garden. Both of Santa Barbara City’s community gardens are very coastal. During late spring/summer we are often in a fog belt/marine layer most years, locally referred to as the May grays, June glooms and August fogusts. Keep that in mind compared to the microclimate niche where your veggie garden is. Bless you for being such a wonderful Earth Steward!

Read Full Post »

Strawberry Plants Blooming

Strawberry lovers have their tastes. Some love those potent pinkie size Alpine babies. Others of us love big fat hand size juice-down-your-jaw types that you eat when you pick. There are the ones that have berries that arc up and never touch the ground – bug free and clean! And there are those who want their quite firm non messy berries that store a bit better. And strawberries have different shapes, slim conicals to fat and wide, as well as different colors of flowers!

Strawberry Types

  • June Bearers literally produce in June, intensely, and that’s it! For some gardeners that’s just right. Camarosa, Chandler (high yield, large fruit), Oso Grande, Sweet Charlie, produce lots of runners, so rows quickly become a tangle of plants. The constant new growth and work of production requires regular fertilizer, typically a light feed of liquid fish/kelp every two weeks or so.
  • Day Neutrals make berries any time they can, at right temps. Albion has high yield, large firm fruit, is resistant to verticillium wilt. Seascape is very resistant to Strawberry Spot, has high yield of tasty firm large berries all season long. Seascapes were bred at UCSB, Santa Barbara CA, and are perfectly suited to this coastal area. Day Neutrals don’t send out as many runners as June-bearers. Store well.
  • EverBearers produce from spring to fall, whenever the weather is right. Sequoia has large fruit. Everbearers have fewer runners than June bearers.

Timing

Timing is essential for a productive strawberry crop. Strawberry and onion varieties are region specific, strawberries even more than onions. So plant the varieties your local nurseries carry, or know that you are experimenting! Plant when your local farmers do! In Santa Barbara CA area, plant your bareroot Albion Strawberries NOV 1 to 5! Yes, the Santa Barbara dates are that specific! OR plant bareroot Sequoias or Seascapes December through February.

As of 2019, sadly, bareroot strawberries are no longer available in Santa Barbara area. But you can get some great 6 packs though they are more expensive. 2020 I was able to get Seascapes from Terra Sol Garden Center late March. Depends on how many berries you want and for how long. Remember, strawberries rank #1 for pesticide residue, followed by spinach and kale. Grow your own, organically.

In areas with cold winters, plant your strawberries early spring as soon as all danger of frost has passed and the ground is dry enough to work. If you squish soil in your fist, it doesn’t drip.

In mild winter areas, plant your everbearers in spring so that you can harvest during summer. June-bearing varieties, however, can be planted in late summer or fall for a harvest the following spring. Planting June-bearing strawberries at this time allows them to become productive earlier. If you plant June bearers in spring, they will not start to grow fruit until the next year.

Companions!

Borage and strawberries were made for each other! Borage strengthens their resistance to insects and disease. Some say it improves their flavor! Borage has a good 3’+ diameter footprint, so allow for that. Put it right in the center and plant around it, or at least on the sunny side. If it doesn’t fit in the patch, put it as close to them as possible! Lettuce, spinach and strawberries together are thought to enhances the productivity of all three plants. Spinach contains saponins, which repel “bad guy” insects. Marigold borders discourage pests.

If you live where it’s comfy cool to grow blueberries and highbrush cranberries, plant your berries on the sunny side of them. They all thrive in acidic soil.

Strawberries are also a companion plant! Plant them as a ground cover to control weeds around horseradish, rhubarb, and asparagus. Clever.

NOT Companions! Strawberries stunt the Brassica family: broccoli, broccoflower, Brussels sprouts, cabbage, Chinese broccoli, cauliflower, collard greens, kale, kohlrabi, and Romanesco broccoli. And be careful around Verticillium-Susceptible Species – tomatoes, potatoes, eggplant, peppers, okra, melons or celery. If these plants have been grown in the same spot within 5 years, grow your berries somewhere else.STRAWBERRIES, LOTS OF STRAWBERRIES! Planted Overhead in rain gutters!

Plant in overhead rain gutters with food and fertilizer drips installed, and pluck your berries right from the sky!

Planting Tips

Select a sunny spot where they won’t be shaded by taller plants. If you don’t have such a spot, raise them up. Do containers on a stand, a raised bed, a trellis type device with planting pockets, rain gutters attached to a sunny wall, an upright pallet! Be creative! Plant them in an old wheelbarrow you can move with the sun during the day and the seasons. Hanging baskets are slug free and very pretty!  Strawberries are generally planted in an area or a way for convenient picking. Make your patch no wider than an easy arm’s length from either side, or plant as a pretty border plant!

Yes, you can plant from seed! Start them in containers indoors about eight weeks before you plan to transplant the strawberries to the garden. They love sun, and rich, moist, well-draining soil. Be careful about the ‘rich’ part. Too rich and you will get all leaf, no berries. Dig the patch deep enough that the roots can go as deep as they want. Bareroot plants start at 5 to 8″ when planted! In nature strawberries grow along the woodland edge in slightly acidic soil. You can make them optimally happy by incorporating some pine needles, stomped cone broken bits months before planting because these bits take a long time to be incorporated into your soil. Bagged acidic compost (for azaleas, camellias) is much better. It has well balanced added nutrients, has excellent water holding capacity, planting can be done asap! 

Plants like strawberries, that tend to attract fungal spores, benefit from worm castings! Castings contain anti-fungal chemicals that help kill the spores of black spot and powdery mildew! Add them to your soil before or at planting time.

There are variations of recommendations for planting spacing. 14 to 18 inches apart in rows 2 to 2 1/2 feet apart, OR 18-24 inches apart in rows 3 1/2 feet apart, are two examples. Get bareroot plants in the ground the day you get them if possible. DO NOT LET BareROOTS DRY OUT. If you can’t set them at once, small lots can be kept in good condition in the fridgie. Keep them moist but not waterlogged. To wake them up before planting you can soak the roots 20 mins to a couple hours (not overnight!) in warm water or a diluted seaweed solution. Just the roots, don’t immerse the whole plant.

Plant depth and root position are important. You want the crown just above the soil, roots completely covered, stems should be completely exposed. Spread the roots open like a little fan; get them down in the soil, let those little food seekers do their job! Some of your bareroots come with long roots, cut them off about 5 – 6″ long. Remove damaged or bent roots. Dig your planting hole accordingly. Dig down, make a little soil cone at the bottom, spread the roots over it, bury with soil. You don’t want the roots to be bent and remain near the surface where they can dry out.
Strawberry Planting Depth, Roots

CARE

Mulch, when or not? If you live where there are cold snaps, in winter do a deep straw mulch to keep the soil at an even temp. Otherwise, remove mulch so the ground will be warmer. Cooler soil delays flowering. Mulch does conserve moisture in summer, keeps your berries up off the ground out of the munching pest zone – roly polys (sow/pill bugs) and pincher bugs/earwigs, and reduces rot, yes. It certainly doesn’t prevent slugs like many sites say it will. I am merciless with slugs. I use a tad of Sluggo type stuff two or three times, killing off the generations of slugs, and am pest free for almost the rest of the season. If they reappear, do another set of rounds. Plant just close enough so mature plants act as living mulch in summer. When you pick, put still ripening berries up on leaves to keep them clean. Save your back, save the straw.

No overhead watering. That spreads the Strawberry Spot disease, those little brown spots. You will read it is only cosmetic, but no, plants that have it don’t thrive, produce smaller and less berries, get more and more sick, eventually die. Leaf to leaf it spreads plant to plant. Remove/replace sick plants. Plant further apart so leaves don’t touch. Be sure your soil is a little acidic – your plant will have more resistance. Get Strawberry Spot disease resistant varieties like Seascape. It has great resistance! Seascape was bred in the Santa Barbara area at UCSB. They are large, firm, more heat and drought tolerant!

Cat faced! Micronutrient deficiencies such as boron, damage to flowers from insects (thrips, mites, tarnished plant bug/TPB aka lygus bug, etc.) and botrytis may cause misshapen fruit. Depending on where you live, with the Lygus bug, it feeds on strawberries when the fruit is very young. The bug overwinters as adults in plant debris and weeds in areas near to your strawberries. Adult females lay their eggs on a number of broadleaf plants including many weeds. After the nymphs hatch, they also spend the winter hiding in plants and debris. Remove debris so they have nowhere to overwinter. Could be your plants might be a tad short on water. Pollination may be a problem if you have rain, it’s too hot or cold, have too much wind and the bees don’t fly.

Birds! At least as soon as your berries start blooming, cover them to protect your berries from bird tastings. Some use netting, some aviary wire. Make picking and weeding access easy or you will get grumpy and maybe neglect your plants.

Weeding is good. Be sure it is your strawberries that are getting the nutrients.

Feeding is good! A grower that started veggie gardening in one of our community gardens had splendid berries he fed every 2 weeks! It was just a bit of fish emulsion in a watering can. But he was regular. He harvested into shoeboxes and had a big smile on his face when he told us how many boxfuls he had gotten each time! He was offered land on a private estate, supplied the estate and went on to sell at the Farmers Market!

Northern and cooler clime gardeners, you can extend your season! So can you southern gardeners! Per UK gardener Nic Wilson: If you have an established strawberry patch, now [he wrote in March] is an ideal time to cover some of the plants with a cloche to encourage an earlier harvest (they will crop 7-10 days earlier than uncovered plants). Make sure that you roll up the sides of the cloche when the flowers appear to allow insects to pollinate them. If your plants are in pots or hanging baskets, they can be brought into the greenhouse to achieve the same result as long as insects still have access. With careful choice of cultivars and some crop protection, your strawberry season can begin in May and you’ll still have that summer feeling as you pick the final fruits in October.

Berries will produce 2 years, even 3, but production gets less and less. Commercial growers replant every year. So do I! I love strawberries most every day and non organic berries are treated with more pesticides than any other fruit! Grow your own! I also provide the best soil I can so my crop is optimum. Early October I remove my old Seascapes, plant the patch to green manure – Bell beans, Austrian peas, vetch and oats! The legumes produce Nitrogen nodules on their roots to feed themselves. When the plants are tilled in, the Nitrogen becomes available to other plants! The oats grow deep creating channels for air and water and soil organisms. I chop down the mix when the Bell beans (a short variety of fava) bloom. Chop into small pieces and let it sit on the surface for two weeks keeping it moist. Then add acidic compost and a tad of manure and turn it under. Let it decompose in the soil, the soil organisms restore themselves, for 2 to 4 weeks, then plant bareroot mid January! You will have the best crop!

Strawberry Cake Chocolate Drizzle


Eat ‘e
m ASAP!!! On average, studies show 2 days as the maximal time for strawberry storage without major loss of vitamin C and polyphenol antioxidants. However, many strawberries never make it to the kitchen. A cup of fresh berries gives 112% of your Vitamin C needs! Not bad. If they are not eaten blissfully immediately, preserve flavor and shelf life by picking into a shallow, paper towel lined container, no more than three or four layers of berries deep. Refrigerate immediately after picking. If you can bear it, or you really do have more than you can eat, give some away to a worthy recipient.

Strawberry Heaven! Fresh berries, berries and cream or yogurt, puddings, shortcake, cake, scones, ice cream, refrigerator jam, smoothies, strawberry lemonade, on top of pancakes, fresh fruit salad, dipped in chocolate!!! There are so many ways to enjoy your delicious strawberries!

Updated 12.27.20


Love your Mother! Plant bird & bee food! Think grey water! Grow organic! Bless you for being such a wonderful Earth Steward!

The Green Bean Connection newsletter started as correspondence for the Santa Barbara CA USA, Pilgrim Terrace Community Garden. All three of Santa Barbara city community gardens are very coastal. During late spring/summer we are in a fog belt/marine layer area most years, locally referred to as the May grays, June glooms and August fogusts. Keep that in mind compared to the microclimate niche where your veggie garden is.

Back to Top

Read Full Post »

Older Posts »