Feeds:
Posts
Comments

Posts Tagged ‘shade’

Desert Planting at Home Noelle Johnson!
.
AZ Plant Lady, Noelle Johnson, is a horticulturist, landscape consultant, and garden writer and you can see why! Now imagine this space planted to abundant veggies…

Why am I, a coastal low lander, writing this?! Because we are experiencing drought, using desalinated water, and it’s time to learn from the experts who have always had drought! Part of what we do will help drought conditions be less extreme. If the principles are applied on a larger scale, perhaps we will become heroes who remediate conditions and even prevent drought! At the very least we can grow more veggies in spite of our current conditions! As a footnote, our Santa Barbara CA foothills here are hot and plenty dry every summer.

At a whopping 479′ elevation in the Sonoran Desert, Palm Springs Ca is hot. They close their City community gardens in the summer. Their garden population is mainly seniors and many seniors don’t do well in the heat. First, take care of yourself! Appropriate clothing, headgear – be prepared for sudden weather changes. Stay hydrated. Work a shorter time earlier in the day or work in the evening, even at night! Make a rule for yourself! This is Sheila Custer’s: ’10 minutes outside or IF you feel dizzy or lightheaded ~ GET INSIDE NOW where it’s cool, drink cool (not icy) water, apply cool damp cloths. Heat prostration is no joke.’

In low desert, even Palm Springs, and high desert, intrepid knowledgeable gardeners carry on, learning as they go. Some have successful fruit trees – date palms, apples, pear, beautiful fast growing Red Baron Peaches, Santa Rosa Plums, figs, mulberries and pomegranates – they plant in spring! Have nut trees like pistachio, almond, for protein! Check out Peach Trees In Tucson – Las Aventuras Chris recommends low profile dwarfs that need less water and are easy picking height, can be covered to protect from wind! He gives other excellent tips from experience – be sure to scan the comments! Trees are important because they are the long term immovable anchor plants for your garden design.

Some of Sheila’s unique desert tree lessons are often learned the hard way.

  • Do know that a brutal desert wind can ‘thin’ your tree of plums! What was on your tree in the evening is on the ground in the morning.
  • Dang squirrels ate ALL except 5 peaches off Red Baron tree, and a couple weeks back I was SO EXCITED because there was over a hundred peaches on that tree, grrr…my fault, I forgot to replace the pinwheels beneath the fruit trees ~ they scare the squirrels, rabbits and birds away ~ shiny metallic pinwheels from the dollar store.
  • Borers are my biggest problem with trees.
  • There is a canker apple trees suffer from when in proximity to Cypress trees.

You see the details you learn? It may be wise to find some local mentors before you plant long term plants like trees. Combinations, companions, placement really do matter!

You take your chances! ‘Zero apricots this year due to a very hard freeze right as they flowered. Frozen blossoms. No bees = No fruit. I have lived in the high desert 22 years now. This was the ONLY year the freeze was so low that NO fruit grew. Other times, I worried, but fruit always appeared. Not this year.’

As soon as possible, for the long term, plant more trees like fast grower legume trees that feed the soil and cool the Earth or quick growing food source trees. Fast growth is good because the plant has better survival chances once it is mature. Plant them in Bioswales that hold moisture. The trees make shade, hold even more moisture, secure the soil with their roots. If possible, start where there is an initial water supply, but plant NO TREES 100′ of a well! Protect them from desert animals. Be sure mature trees won’t shade your garden.

Desert Vegetable Gardens in Unexpected Places Phoenix front yard Noelle Johnson
.
‘Vegetable Gardens in Unexpected Places’ like downtown Phoenix front yards! Noelle Johnson teaches you how!

Well before planting time, prepare your land for water capturing, holding moisture.

Hugelkultur - Sepp Holzer's Method

This image combines the use of Hugelkultur and bioswales! It can be modified to suit your needs!

For water retention, install Bioswales, terracing for slopes and hillsides for zero water loss. These can be graceful and attractive.

You can use Hugelkultur techniques for water retention. The Hugelkultur that most people are familiar with are the great above ground humps, but the humps are not necessary at all! You can dig down, install the logs and leave it all level or choose mounds! The logs still decay and build soil, hold water. The decaying logs produce a little heat that can keep your plants warmer at night, lengthen your growing season in cooling weather, and in spring you can plant a little earlier. Hugelkultur is also touted as water saving because after the first two years, it is self watering. In the desert you don’t have that luxury; you still need to keep watering but it may need less water! And over time, it still builds soil! Getting the logs and getting them to your site is the toughest part!

Beautiful graceful design of Hugelkultur style compost!

Hugelkultur is the long term sustainable choice. It can be a simple huge pile or an elegant graceful design like this one. Could be right in your front yard! Be creative! See more!

Windbreak Effectiveness Diagram Porous

Microburst desert winds can flatten your garden in seconds. Install permeable windbreaks to slow or move the wind to save your plants and direct it away from where you want the land to stay moist. Some desert gardeners say wind is worse than the dry. Hot, or cold, the wind sweeps moisture out of the leaves ‘faster than the roots can replace it.’ Many desert gardeners get started with a perimeter of straw bales on their sides then plant right beside them in the lee of the wind. In their dry climate the bales last for years.

However, a permeable windbreak allows some airflow through and extends its wind protection a greater distance. With a dense windbreak a downwind draws the wind back to the ground quicker, drying soil and cutting the distance it throws the wind. Gradually grow in permeable windbreaks. Food producing trees interplanted with food producing shrubs takes time to establish, but so worth it! As it matures you can add taller vegetable plants. This kind of windbreak does triple duty ~ slows and diverts wind, your soil retains more moisture, and you get food!

Desert Maureen Gilmer's Straw bales Windbreak and Field fencing tomato cages
.
Maureen Gilmer’s Straw bales and Field fencing tomato cages. Notice she is planting short type determinate tomatoes, not tall determinate tomatoes in tall cages that would topple in the SoCal high desert winds. In a bed like this, decide which plants will get morning sun, which can tolerate afternoon sun.

Maureen recommends installing pest prevention wire around your garden. Desert animals are thirsty and hungry.

Furrows, trenches, are like mini bioswales. Plant IN deep wide bottom furrows, where the moisture settles. The reason I say wide is because plants take up moisture and nutrients from surface feeder roots* and we need room for those roots! Install trenches crosswise to the Sun’s arc so the plants’ root areas will be shaded by the depth of the furrow in early AM and late afternoon. If you make the sides of your trenches low slopes, and water carefully under your plants’ leaves, your furrows won’t degrade as much or as quickly from water washing the trench walls away and you don’t want to uncover the feeder roots. Nor will seeds or plants’ stems be buried too deeply.
*What do surface feeder roots do? Their main job is to absorb water and minerals. Near the soil surface, they have access to water, nutrients, and oxygen. [This is important because] These elements are more abundant near the soil surface than deep within the soil. (from Gardening Know How)
Plants grown in thoughtfully made trenches need far less waterings and for less time. As the plants grow, they also self mulch and need even less water and less frequent waterings. Trench planting is akin to the New Mexico Zuni waffle gardens, the ultimate planting system for sparse water areas for three reasons! 1) The waffle technique is ingenious in that the berms shelter each planting area from every direction. A trench can be a wind channel. Not so in a waffle layout! The berms cause drying winds to rise over the waffle and it stays more moist inside. 2) The basins can be flexible sizes, allowing the feeder roots ample growing and feeding room. If you look at some of the old images of waffle gardens, the waffles varied in size in the same garden to accommodate different plants’ needs. 3) Plants are separate enough that they don’t have to compete for water or soil. That equals more production. Similar sunken beds for growing food with less water have been used globally in arid regions, arising independently by Indigenous farmers. See more

Curtis Quam’s waffle garden, which he tends with his family at Zuni Pueblo, NM. Uses less water, Food Security Greta Moran
.
Curtis Quam’s waffle garden, which he tends with his family at Zuni Pueblo, NM = less water used, food security – by Greta Moran. Photo by Curtis Quam.

Greenhouse Walipini Pit InteriorDepending on your soil conditions, whether you have shifting dunes or stable banks, you can install a Walipini Pit Greenhouse! If it isn’t at a low point and no storm water flows near or at the location, simplest and cheapest is to set up an underground greenhouse to equalize seasonal temps. Dig it right into the side of a hill or slope if possible. You want that shade and shelter for both you and the plants. You can live in it! Check out the Pros and cons of building bank barns? It can be improvised to suit your particular needs. Make it the right size, open to the right direction, etc.

Arizona Specialty Crops | The University of Arizona | College of  Agriculture and Life Sciences

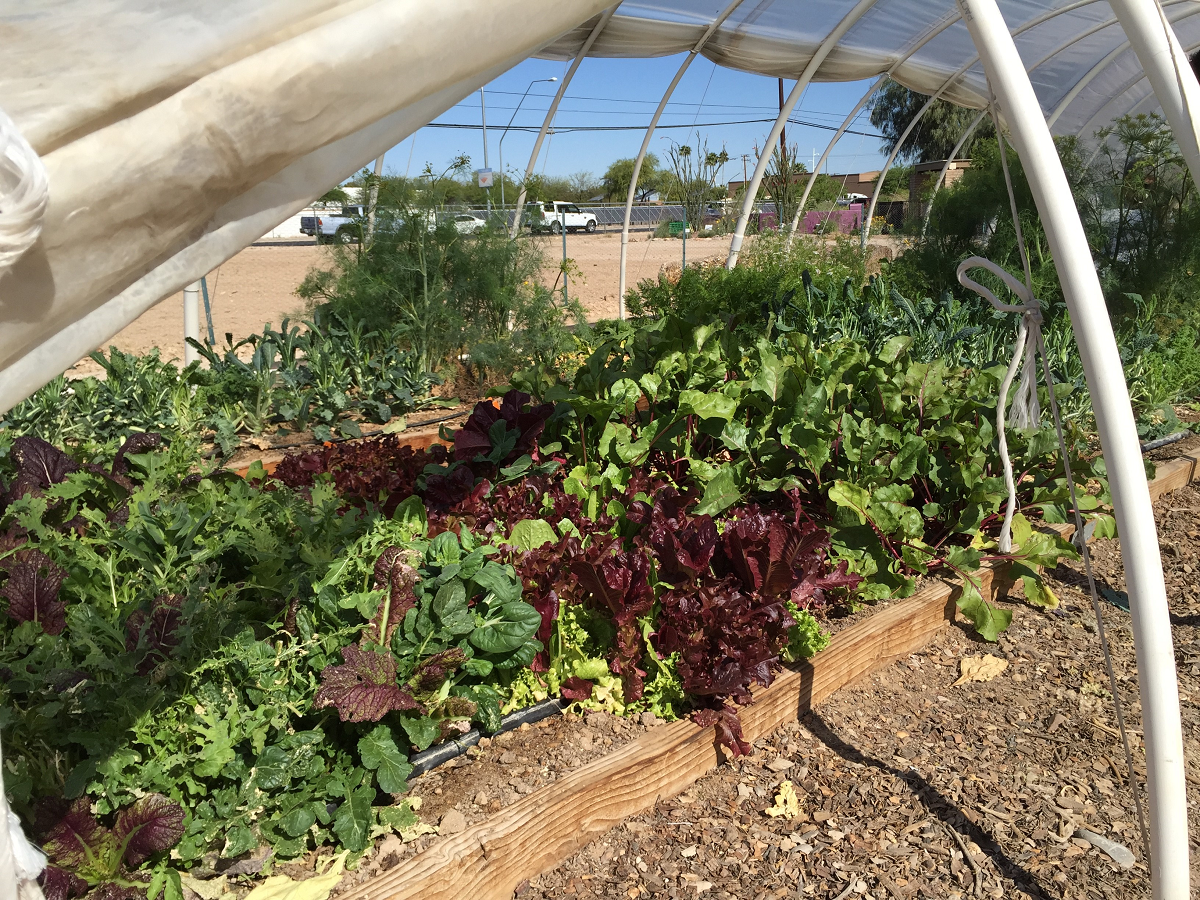
Here is a University of Arizona Hoop House in action! From freezing winter nights to blazing summer days, hoop houses are terrific and less work and less expensive than most greenhouses! From a row cover to whatever size you need, they are flexible to make! Cover with shade cloth having the perfect shade % density you need, usually 50%. Cover the entire house or part of it – front or back, just on top or one side, roll it up as needed. Change things per season, add or completely remove per season! Have both hoop houses and outside gardens. The University of Nevada Reno uses fifty percent shade cloth on the outside of the hoop house in the spring, summer and early fall. Six mil plastic is used on the outside in the winter months, and is rolled up on the sides to allow for ventilation. Per XtremeHorticulture of the Desert: #1 TIP! Greenhouses in the hot desert should be as tall as possible to get the heat off of the crop. Temps in small ‘hobby’ greenhouses are hard to manage. See several other great tips there!

PREPARE YOUR SOIL

If you will be gardening in a new area, a soil test may save you a lot of heartache. You can easily do it yourself. Soil test kits are inexpensive. Get good with your soil from the get go! If your garden is slowing down, maybe something is used up, now missing. Check it and get growing again!

Desert soil is mostly sand and gravel that water drains through while you stand there, and clay. For water holding capacity, add a powerful lot of compost, organic material, garden soil, worm castings. Add more every year. Compost your kitchen scraps. They are gold!

Las Cruces NM nursery owner Gary Guzman says while the city, and maybe others, offer compost for free, he recommends buying bagged compost. I’m with him. You get a complete compost, read the ingredients, with water holding capacity often better than the compost you make yourself! I give my kitchen gatherings to my worms, don’t have access to brown ingredients, straw takes too long, so I combine my 100% fresh worm castings and nursery bought compost!

If your soil is really dry, has clay-type sand, and shows no sign of natural moisture, you might choose to use raised beds and adjust your windbreaks accordingly.

GATHER YOUR SYSTEMS, INSTALL IN TIME TO TEST THEM IN PLACE BEFORE PLANTING

As a home or community garden gardener, there are many techniques you can use. As a farmer you would likely use well secured shade cloth covered hoop houses. Many commercial grower techniques can be scaled down to your home garden. Use row covers when appropriate. Use flexible systems to be able to adjust quickly to changing weather conditions.

Desert simple overhead shade structure for taller plantsDesert Structure Covered with plastic open weave material keeps animals birds out

Left above: At your home you may make a simple overhead shade structure for taller plants. Shade cloth is draped to one side to protect from afternoon sun. Right above: Covered with plastic open weave material that can be secured to keep animals and birds out. Can be draped with shade cloth as needed. Below: Sliding Shade Canopy at Rock Rose Desert Botanical Garden can be opened fully, moved side to side as needed during the day.
Shade Sliding Canopy, used by permision from RockRose Blog! At Desert Botanical Garden.

PLANTING CHOICES

Plant low water needing trees, like various fast growing Australian legume trees, that feed your soil so your soil is restored and neighboring plants will be fed too, right on the spot! Plant them at their right time of year so they will have enough water to get started. Some of these trees produce food and are grown for a fire wood source for those cold desert winters. For our purposes here, let them be the perimeter of the beginning of your Food Forest. Plant shrubs to fill in the spaces between trees, to keep the tree roots shaded, cooled, moisture retained, leaves to fall to become mulch. The shrubs provide a natural permeable windbreak that slows the wind, reduces drying and soil erosion. A food producing shrub is even better!

Food Forest - Forest Garden 7 Level Design

.
Mediterranean Understory & Guild Plants for Food Forests  This link is not written for Desert or Drought conditions, but here to give you an idea what can be done in the desert too! Select your guild plants accordingly. In addition to planting levels, another kind of desert companion planting is to plant more delicate plants below taller hardier plants. One gardener puts her chard and kale in the center of a pole bean teepee!

In your off season, weather permitting, grow a soil feeding cover crop! Living Mulch! When, Which and Why?! This link is not written for Desert or Drought conditions. Select the right soil feeding cover for your area. See your local farmers, farmers market, nurseries, cooperative extension, nearest university.

VARIETIES OF VEGGIES

The University of Nevada, Reno, did some studies about growing veggies from 3 to 6,000′, from ‘warm’ to cold. When we think about HOT we forget that also means Cold! Select heat, drought tolerant food producing trees and food plant varieties that can also withstand cold desert nights! They advise: Varieties that develop produce quickly, less chance of weather damage, may perform better than crops with more days to maturity, especially in higher, desert locations.

Heat lovers are nightshade or Solanaceae (tomatoes, peppers, eggplant) and squash or Cucurbitaceae (cucumbers, melons, summer and winter squash) plus corn and beans. Heat tolerant varieties of basil thrive in the hottest desert summers. Perennial herb Thai Basil is slow to bolt.

Laura Miller has a great post on growing herbs in Texas where summer temp highs average 90°F! See her varieties recommendations! She says: resist the urge to plant Texas summer herbs in containers. Pots and planters dry out too quickly in 90°F (32 C.) heat. Instead, plant outside herbs for Texas gardens directly in the ground. If you must container garden, keep the herbs inside the air-conditioned house where they can enjoy the sun from a bright window.

But depending on your location…this in Palm Springs CA:

Desert Grow winter greens in pots grow boxes Maureen Gilmer
Maureen Gilmer, in Special To the Desert Sun, says ‘Virtually all winter greens can be easily grown in pots or grow boxes!’
.
Per UNReno studies with farmers in mind! And remember, these are in Nevada. Check your area for any differences, local champion varieties well adapted to your area!

Tomatoes! Varieties such as Early Girl, Better Boy and some cherry types performed more consistently. Tomatoes have been shown to perform better when provided a protective cover of shade cloth. Field trials had New Girl tomatoes yield 78 to 84 percent higher under shade cloth covered hoop houses than the same tomatoes in the field without cover. Heirloom tomatoes required more care  because many are prone to disease.

Peppers! Jalapeños, Poblano (when dried called ancho) and sweet banana peppers provided high quality and good yields. Peppers vary in whether yield and quality improve under protection from shade cloth. Jalapenos yielded better in full sun. Sweet banana peppers have been shown to be heavier and higher quality when grown under shade cloth. In desert regions at around 4,000 feet of elevation, sweet bell peppers often fail to develop a thick fleshy wall, especially upon ripening, and their quality can be poorer than store-bought bells. Specialty peppers (hot or sweet) of different varieties should be tested in your region to determine how well they do.

Eggplants grow well in the open desert. Studies showed a disadvantage to using shade cloth over eggplant. It is best to pick varieties that remain fleshy on the inside with few seeds. Avoid varieties that will quickly set a large amount of tough seeds on the inside (a slender green and small striped plump variety). Some chefs prefer small, slender, fleshy and flavorful Japanese types (variety – Magnum).

All types of summer squash tested grew well in the desert. Chefs preferred fruit with amazing color, nice texture, and consistency throughout the fruit. Consumers favor golden zucchini (variety – Golden Dawn III) over yellow crookneck due to a firmer texture and more flavor after cooking. Squash blossoms are a great add on crop that is highly specialized and sought out by chefs and food lovers. It was estimated that a third of the male blossoms could be harvested without impacting pollination and full female blossoms with a tiny squash attached are premium priced. Golden zucchini can yield 4.5 pounds of fruit per square foot in addition to yields of one blossom per square foot per week for the 15-week harvest period. Squash bug infestations are the major production problem that needs to be controlled for all summer squash, regardless of the variety. Control with several pesticide applications can be achieved if started early. Organic control systems are not consistently effective. Vacuuming them off the plants, covering with row cover, and diatomaceous earth has been recommended as having some benefit in controlling them.

Desert grown Brilliant Golden Dawn III zucchini fruits  Desert grown Squash Blossom

Brilliant Golden Dawn III zucchini fruits and squash blossom

Of the winter squashes, butternut and pumpkin consistently produce a crop whereas some others grew slowly and would lose quality and yield due to immaturity with fall frost.

Melons, cantaloupes and some watermelons performed well, whereas Crenshaw, casaba and honeydews were less reliable. Often the shorter season types and varieties produced higher yields and better quality product reliably such as Ambrosia cantaloupe. Melons require a LOT of water.

Cucumber advice! Cucumbers can be inconsistent in quality because of gaps forming inside by the seeds and different viruses invading crops. Variety selection for disease resistance and consistent watering can help to address these problems.

Greens! Southern Exposure Seed Exchange strongly recommends Red Malabar summer spinach to anyone who hasn’t tried growing it yet. The crisp, slightly succulent leaves stay mild in high heat and maintain healthy growth all summer. The gorgeous red vines need to be trellised or caged, keeping the leaves clean. They’re excellent as cooking greens and in salad mixes.

Blueberries and strawberries are not generally favored, sigh. One gardener says strawberries will grow in early spring but MUST be protected from the wind, they like northern exposure. Strawberries maybe if in a container… And, some gardeners say their area does work for blueberries! Talk with locals to see if they have had success.

In cold weather, growing in greenhouses, a plastic covered hoop house or plastic covered low tunnels is a game changer! Leaf and root crops are doable! Cold-tolerant crops grow even when temperatures fall well below freezing. If you are doing this kind of growing, research your options online!

Cool weather crops are the most suited for spring and fall production but due to extreme temps and periods of temps remaining for too many days, they are a challenge. Hoop houses, low tunnels and frost blankets can help. It’s important to choose varieties with shorter days to maturity (50 to 60 days to maturity) that can achieve more harvests. Ironically, though harvests may be small, they have high quality due to less disease and good flavor. UNReno says ‘Experienced producers commonly adjust estimated yields like those published in Johnnie’s seed catalog by reducing them by one half.’ That gives you an idea of your challenge. Remember, the farmers are looking at salable produce. Home gardeners don’t always need to have that commercial top quality.

Use cool spring and fall weather to plant beets, broccoli, cabbage, carrots, lettuce, onion, pea, potato, radish, spinach, turnips!

Succession and Variety! ‘Crops can be selected to achieve the broadest possible range of harvest dates to provide produce all year long rather than huge crops a few times. A steady stream of harvests can be achieved by utilizing a variety of crops or different varieties of the same crop that differ in the number of days to maturity. In many areas, growers recommend planting seeds every week or two to spread out the harvest. The local desert research shows harvest dates are poorly related to seeding date and the harvesting date of many crops were more dependent on temperature. The crops matured faster if they did not spend too much time in too cold or too hot of temperatures compared to that plant’s optimal range. In the desert, spreading the harvest is best achieved through varying the crops and varieties.’

Famed Las Vegas gardener John Kohler’s favorites are Thai basil but grows several basils, okra, eggplant, dinosaur kale, red Malabar spinach, Swiss chard (in the shade), purple perennial tree collards! Perennials are always a winner because they don’t need to be planted/started over and over again, needing more start up water and waiting time for production. Many perennials can be harvested all year long! See more drought tolerant perennials at Grow Delicious and Amazing Edible Perennials!  John’s Video

One of the things we are learning is to see what is growing successfully in other desert regions and grow them here! South American Chaya Tree Spinach is now being gratefully grown in Zimbabwe! The Maya ate legumes, including beans, which have fairly high protein content — 19.4% to 24.8%. Chaya leaves, on the other hand, have about 30%, higher than any other plant food known for the Maya and comparable to the protein content of animal flesh!

Definitely, information found in desert area publications from Universities, seed catalogs and from local successful growers can help narrow down and improve the choice of crops.

PLANTING TECHNIQUES IN THE DESERT!

The laws of nature shift when you change to desert territory! 

Desert Seedlings Rock Bottom Ranch elevation 6,611'

LOVE these babies! Image by Rock Bottom Ranch, Basalt CO, elevation 6,611′. Note they are double planted.

As always, start seeds indoors for an earlier start, but your timing is different. Frost free days are key, and that can vary year to year, location to location. Check what they are at your place. Plant two or more rounds of seeds just in case!

Make first plantings near the warm house maybe in side-of-the-house mini greenhouses. Use buildings to buffer cold, and heat! Grow early heat lovers like basil, herbs, tomatoes near your house! Plant lettuces in the afternoon shade area.

Plant veggies with more space between them, usually about 18 inches. Planting in crowded rows doesn’t work. Your plants ‘starve’ for water. Give them room to survive. It’s like being root bound in a different way.

Planting depth becomes deeper so seeds will survive drying topsoil. Plant 4X deeper than the diameter of the seed. Put markers, sticks, a rock, where you plant your seeds so you know right where to keep that soil moist.

In general water lightly every 2 to 3 days or as needed in exceptional heat or high winds. When your seedlings get their 2nd, 3rd true leaves, let the soil dry out between heavy waterings to encourage deep root growth. This will make your plants more able to survive low water availability.

MAINTENANCE

If there is no wind, to help plants through midday heat, protect them with a fabric grow cover, especially young plants. Lay it on when temps soar, remove it mid to late afternoon. You can also use well anchored fabric cover to make a more humid environment, hold moisture in the soil.

High summer July/August UV shields Maureen Gilmer says: During the summer this exposure soars to such an extent that some plants just can’t take it. I use wire field fencing rolled into tubes in lieu of tomato towers. They’re perfect for another solution, using shade cloth attached with clothes pins to the west side of each wire tube. This helps plants during July and August when very hot afternoons can be tough on food plants.

Melissa Willis from Santa Fe, New Mexico says: I’ve found that Summer and Winter Squash benefit greatly from a bit of shade at the hottest time of day! You can achieve this by simply inserting PVC pipes in your beds as you would when creating a hoop house or low tunnel and then securing your shade only over the very top of the PVC pipes using small clamps so your plants get some sun, just not the hottest sun of the day.

WATER IN THE EARLY MORNING OR LATE EVENING TO LESSEN WATER EVAPORATION. Often there is a predawn lull in the wind, easier to water, soaks in better before it dries. A consistent watering regimen is key. In Santa Barbara CA’s droughty hot summers we water before 10:30 AM and after 4 PM as possible. I imagine in the desert those hours are much earlier and later in the day…

Our high desert gardener Sheila advises: ‘I find that watering before sun up is best for both plants and trees as it prevents mold, scalding (if one waters during heat of day, sun can scald leaves from water droplets) and water attracts rodents, of which rabbits do a number on anything less than an inch thick. I rinse leaves occasionally because they get covered with dusty dirt. Mold and insects are drawn to damp dark ground, not so good for plants overnight. Early morning watering is best. However, I do water more before full moon, always makes a big difference in growth.’

Her Tree watering tip! Trees will tend to grow out toward side they are watered. If the prevailing wind causes them to bend toward the northeast, watering them on the southwest side has them righting and sending branches toward that side more heavily watered, in effect balancing the tree.

Sprinkler systems lose a lot of water to evaporation. For extensive areas use subsurface drip systems. For smaller quickly changing gardens an easily movable soaker hose can be best. Plants get the majority of their nutrition from subsurface feeder roots! They need water to uptake the nutrients they are looking for. So, put water where your plant takes it up, at the roots to the drip line. Rather than a straight row line, only along the stems, circle your plants. If drip systems aren’t for you, watering by hand is the most efficient especially if you have a small garden or are doing a waffle garden. See how: Hand Watering Veggies During Drought? Big Yes!

Our high desert gardener gives these tips as well: ‘Soaker hose is great as long as squirrels or other rodents don’t chew on them. Sun and heat is hard on them here in the desert. Lines, hoses, must be checked to insure water flow often. Irrigation ditches help. Bathwater using only Ivory soap helps reduce aphids and won’t kill praying mantis on roses and vegetables.’

Cultivating lightly after rains disturbs the soil surface and stops water from wicking up and evaporating. Dry farmers use this technique.

Melissa from Ever Growing Farm also recommends Water catchment, in the form of rain barrels, can be a life saver (if it is legal in your state). Allowing the rain water to be diverted from your roof and into large barrels or cisterns on your property can help offset your water costs (or alleviate some of the stress on your well) when used to spot water plants that require a bit more water than others. Alternatively, you can set up your rain barrels with hoses and a gravity feed or a timer to water your plants.’

Mulch, mulch, mulch! Heavily mulching gives your soil a chance to absorb water. Big wood chips, that won’t blow away, prevent light germinating weed seeds from sprouting, protects your top soil and the base of your plants from the elements, helps keep soil temperatures low and retains soil moisture. Use crushed tree leaves as mulch. Do regular checks and keep the mulch thick.

Impressively, Bryce Richard of Pata Viva Farm near Las Cruces NM, clay soil, says “What’s underneath the woodchips will still be moist three or four days later and the stuff that’s 3 or 4 inches away from where the woodchips are will have cracks in it!” He says: “An average vegetable crop tends to use about 30 to 35 inches of water in a season, a mature plant getting about an inch to an inch and a half a week, let the soil dry out half an inch to an inch down before watering again. Put mulch on top of the soaker hose to stop it from breaking and getting brittle in the sun.” The voice of experience!

Remove weeds around trees, veggies. Weeds compete with them for moisture. Instead, if your soil supports it, grow living mulch, a shorter level of plants under the trees, larger plants or if the under story plants need more sun, plant around the perimeter of your tree, larger veggies.

I’m quoting Maureen Gilmer because she lives in the high desert. She speaks from experience. ‘May 1st is the most universal date of the last frost, then the growing season is fast for the first month or two, until it slows down in the depths of summer. During August your plants may rest in the heat, then take off again in September growing rapidly until frost. Be sure to feed your garden at summer’s end with a tomato and vegetable fertilizer to help them flourish in this “second season”.’

So, you see, it’s doable! Adjust your land and soil, you’re gardening techniques. Get the right plants and the right varieties being particularly mindful of the days to maturity. If these stalwart desert gardeners, always in drought conditions, can do it, so can we! Modify to suit your needs!

A xeriscape type veg garden is the ultimate! Start converting and use these clever desert tips NOW!

Updated 4.27.23

Many thanks to high desert gardener Sheila Custer for generously sharing multiple tips of her 22 years of expertise!

Top^


Love your Mother! Plant bird & bee food! Think grey water! Grow organic! Bless you for being such a wonderful Earth Steward!

The Green Bean Connection started as correspondence for the Santa Barbara CA USA Pilgrim Terrace Community Garden. Both of Santa Barbara City’s remaining community gardens are very coastal. During late spring/summer we are often in a fog belt/marine layer most years, locally referred to as the May grays, June glooms and August fogusts. Keep that in mind compared to the microclimate niche where your veggie garden is.

Read Full Post »

Greenhouse Henry Ford Hospital Michelle Lutz

Michigan’s Henry Ford West Bloomfield Hospital upgraded the condition of its food by adding a greenhouse. Michelle Lutz oversees production of vegetables, fruits and herbs, used in preparations such as braised romaine salad. / Photos courtesy of Henry Ford West Bloomfield Hospital

Greenhouse seedlings, transplants are ready six to eight weeks early and you can grow Out-of-Season Treats in winter! Pest and disease free equals greater production! For institutions like hospitals, greenhouses are workhorses! A greenhouse is a most valuable part of a productive home garden. Seedlings are ready for earlier planting. Hospitals want the best food possible for the health of their patients, and can’t afford to be weather dependent.

As a home gardener in coastal SoCal areas you may question the need for a greenhouse. Though unheated, ours at our mile-from-the-beach community garden is well used! We often run out of space for everyone’s seedlings as we get closer to planting time or the weather warms! Even unheated, an enclosed space is heated by the sun during the day and doesn’t get so cold at night, no chilling winds or late freezes in there! Seedlings are protected from marauding pests, birds, walkabout creatures. Foothills and inland gardeners get more heat and more COLD! They really can use greenhouses to advantage.

Greenhouse Long CucumbersIn addition to starting preseason transplants, in a heated greenhouse you can grow out of season tomatoes, peppers, lettuces, cucumbers, beans, eggplant, zucchini, cantaloupe! Herbs, chard, raspberries and strawberries! And winter crops too if you just have too much snow outside!

Your greenhouse doesn’t need to be huge or showy. It just needs to do the job.

Super options!

Our land is flat, but yours might have slopes and you could choose to have an earth shelter space complete with indoor shower! See also Heating Greenhouses Without Electricity!

Greenhouses come in a vast variety of shapes from squares to pillowdomes! Buy a premade kit or design and build it yourself entirely to your specs.
You can have a 2′ wide up against the chimney mini to a palatial entire rooftop greenhouse with an elegant view!
You may have a built in the ground greenhouse cousin, a cold frame, or an indoor kitchen window box.

Materials vary from hoop frames to the fanciest filigree and glass, cob or strawbale! They can be spanking new, made of have-arounds, or be recycled from demolition sites! Covering materials can be poly films, panels, glass and glazing. There are so many new products, techniques, new research, all the time, and each person’s needs are so different, it is wise to check these things out for yourself. Talk with several ‘experts’ on each topic. Read up online. Compare. See what you really want. See what will do the best job for your needs.

Barclay Daranyi Greenhouse Hoop House High Tunnel Farming in Norwood CO! Photo by Barton Glasser

Barclay Daranyi uses hoop houses for growing, storage and raising chickens at Indian Ridge Farm in Norwood, Colorado. Photo by Barton Glasser

If you have space for a larger greenhouse, consider gardening some of your crops in it! Hoop houses, or high tunnel farming is a recent invention. They are certainly the larger version of traditional row covers! There are huge commercial installations. Yet home made hoop houses can be no bigger than 8X8, so easy to put up a child can do it! Check out Rodale’s HOOP HOUSES 101

  • Season extension is the #1 advantage. 30 days on the front end and 30 days on the back end of the growing season is equivalent to moving your farming operation 400 miles to the south!
  • Yields increase when your plants are protected from excessive rain and wind. When a more ideal growing temperature is maintained, a reduction in temperature-related stress, fruit set, fruit size increases.
  • There is no bolting, so no loss of your plant’s production.
  • Because temperatures are maintained, you can plant when you want to, not have to wait until conditions are favorable.
  • Soil conditions are more controlled, less moist, less to no fungi – wilts, blights.
  • No pests, no pesticides! No birds, small mammals.
  • Plus, they are movable!

Greenhouse Energy Efficient Attached Lean To
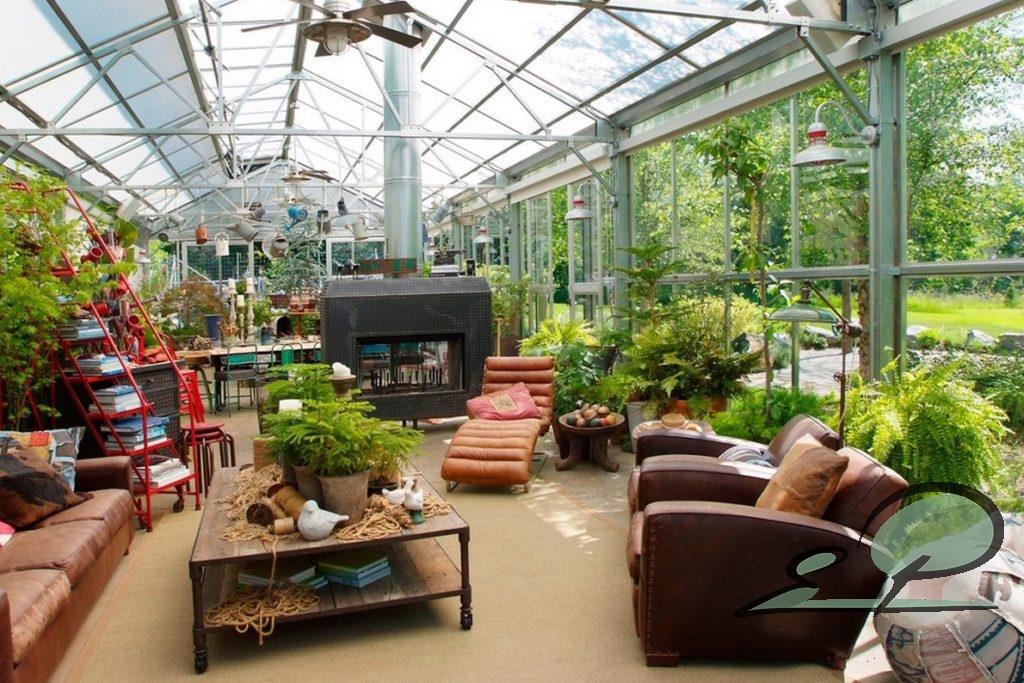
Energy efficient attached greenhouses make a lot of sense. The home, and these bricks, help heat the greenhouse for free! Some attached greenhouses are beautiful walkin sunrooms, garden rooms, conservatories!

If you decide to build a greenhouse yourself, first check on local ordinances and with your neighbors. Place it conveniently, near electrical and water access if possible. Choose a location with a winter angle for maximum light, as much sun as possible. Use trees for windbreaks if necessary.

Know your prevailing wind direction, be sure it is well anchored. Use concrete blocks with eye hook attachments, sink posts or anchoring stakes, or use sand, not rocks, on the windward base cover.

Your roof choice tells us what kind of weather you have! Steep slopes and insulated lower areas tell us you are in high cold country with snow and need to decrease your heating costs. Medium slopes with rounded shoulders are good in windy and rainy areas. An extended slope on one side that faces the sun tells us you may get a lot of shade from trees on one side.

Doors make a difference. If you are in a windy area, you might choose sliding doors that can be secured and weather stripped versus velcroed flaps, zippers or swing out doors that blow away or animals could get through.

Ventilation is key! Hot days are hot! In two shakes a greenhouse can to get up to 110 degrees! Doors and windows can be the vents if intruders are not an issue, otherwise, ceiling vents are best. Solar devices can be set to open when temps hit a high level. Fans may be needed.

Greenhouse sloped for lots more Solar energy!
Electrical!

Get advice from a greenhouse experienced professional because of the extreme conditions: heat, wet, cold. Make sure that person knows local codes
Consider solar lights, vent openers, fans or simply long sloped sides to have lots more solar energy as in the image!
Growlights? Yes!
Night light to see by
Computer monitor

Irrigation tips! Put your timer OUTSIDE! Make & see your adjustments without getting wet! Mini drop down sprayers or foggers at varying adjustable heights along an overhead line are fabulous! Consider recycling your water – is it legal to use grey water where you live? Collect rainwater.

A word about Damping Off. Damping off is a common problem with seedlings started in containers, indoors or in greenhouses. Per Planet Natural: ‘Several fungi can cause decay of seeds and seedlings including species of rhizoctonia, fusarium and phytophthora. However, species of the soil fungus pythium are most often the culprit. Damping off typically occurs when old seed is planted in cold, wet soil and is further increased’ by poor soil drainage.

Disease Cinnamon Damping Off PreventionThe super simplest prevention is Cinnamon! Just sprinkle it on the soil! Sprinkle on plant injuries and they will heal. It is a rooting hormone. Mildew, mold, fungal diseases? Mix 4 tablespoons cinnamon in a half gallon warm water, shake it vigorously, steep overnight. Strain through a sieve or coffee filter and put it in a spray bottle. Add ¼ teaspoon liquid dish soap as a surfactant, lightly spritz your plants, undersides and tops of leaves! (In Santa Barbara area buy it in big containers at Smart & Final.) Also, it repels ants!

Pathway and Flooring best for your plants and feet! Have a sturdy pathway that stands up to wheelbarrow use. A non muddy pathway saves your greenhouse floor. A raised flooring keeps you from having a muddy mess. Drainage is necessary so there is no rot or mold. Heated flooring is the best. There are great options, more and less expensive! Concrete, rubber matting saves your feet. Dirt, my last choice, and/or pavers. Decomposed granite, pea gravel, raised wooden slats, pallets, straw, chips – use weed mat underneath! Use pest protection wire under weed mat and soft flooring choices. No gophers, no mice, squirrels, bunnies or snakes, thank you.

Greenhouse Shelving FanShelves and Worktable

Make your work table a good working height for you!
Shelving needs to be safe and well supported
Construct your shelves wire covered like the top shelves in the image, or like the lower shelves, out of spaced boards so water drains, the boards dry, there is no mildew or mold.
Enough space between boards makes it easy to clean
Or use open wire metal shelving that allows drainage and dries
If there is lower shelving, slant it down from back to front

  • so you can see what is in the back
  • It is easier to get items in back out – keep heavier items to front
  • No water clings to it – stays dry, no rot or mold

OR some say don’t have bottom shelves so there is no nesting space for mice or chipmunks – they WILL eat your plants! You want to be able to SEE the ground! Depends on how critter secure your house is.

Rather than just the greenhouse, consider a 4 part working complex! A storage shed, the greenhouse, a covered work area and hardening off area.

Tool & Gear Storage could hold your tools and supplies!

Wheelbarrow, all tools – shovel, rake, pitchfork, spade fork
Small tools – trowel, clippers, sprayers
Bags of compost, potting mixes etc
Plug trays, biodegradable containers, labels
Gloves, apron, work boots, jacket
Greenhouse gear & replacement materials

Greenhouse Support Supplies!

Heating gear – heaters, heating mats
Cooling systems – fans
Irrigation, misting items
Lighting – grow light, night light
Thermostat, humidity (no mold), temperature   devices, CO2 generators
Secure, safe-for-children and pets, dry storage containers

Your Workspace needs a sun shade top and wind screen side. It would be a good place for your composter, worm bin and might be a good place for your rain collector barrels

Care and Maintenance

Seasonal checks, reset watering needs, replace brittle coverings
Routine cleaning inside and out
Equipment
Sterilize propagation area
Ventilation – Heat, condensation. Insulation – Frost
Deal with pests and diseases immediately!

Greenhouse Reused Doors and WindowsGreenhouses made of reused doors and windows are much more green than recycling!

Sustainable Greenhouses are often compost or solar heated!
They have heated benches and floor because root zone temperatures are more critical to plant growth than leaf temperatures. By maintaining an optimum root zone temperature, greenhouse air temperatures can be lowered 15° F!
LED’s balance good light, cooler temps
Hydroponics (preferably aeroponics) remove excess heat and water vapor
CO2 is recycled by breaking down old plant debris in a digester
Soluble components of the plant debris can be incorporated back into the nutrient solutions.

If you have the budget and inclination, get a fancy beautiful prefabricated greenhouse with all the tricks including that solar activated shade screen, fans and irrigation on a timer!

White Greenhouse

The Ultimate, perhaps, would be greenhouse living, live-in green space!

Зимние сады — проектирование, изготовление, остекление — Елена Федосова
This greenhouse is in Philadelphia, Pennsylvania. Photo courtesy of Groundswell Design Group, by Top Kat Photo

Sustainable Sources to stir your thinking!

  1. Eco-Friendly Greenhouses
  2. Sustainable Architecture, Greenhouse Book & Video List
  3. Kiva’s straw bale greenhouse – the time & money it takes

Rooftop greenhouse with a view of the city! Germany Fraunhofer UMSICHT

Fresh City Tomatoes, Any Time! On his way home from the office, the computer scientist harvests tomatoes from his company‘s rooftop greenhouse. No food miles! Why not produce lettuce, beans and tomatoes where most of the consumers are to be found: in the city? The flat roofs of many buildings are well-suited for growing vegetables. Rooftop greenhouses can also make use of a building‘s waste heat and cleaned waste water. Solar modules can do the rest. This uptown rooftop greenhouse urban garden is in Germany. Image courtesy of Fraunhofer UMSICHT.

Greenhouse Conferences! Tradeshows, sustainable, educational. Local, international! If you love greenhouses, might want to do urban agriculture business, just want to get involved, check these out online. There are different sponsors, different locations each year!

Whatever your special connection is, in SoCal, before our winter rains and cooler weather, late summer, early fall are perfect for getting your very own fine greenhouse up and running! If you miss that window, very early in the new year is good so you can start seedlings for early March plantings!

You might decide to sleep in it the first night!

See also Heating Greenhouses Without Electricity!

Updated 11.26.21


Love your Mother! Plant bird & bee food! Think grey water! Grow organic! Bless you for being such a wonderful Earth Steward!

The Green Bean Connection started as correspondence for the Santa Barbara CA USA Pilgrim Terrace Community Garden. All three of Santa Barbara’s community gardens are very coastal. During late spring/summer we are often in a fog belt/marine layer most years, locally referred to as the May grays, June glooms and August fogusts. Keep that in mind compared to the microclimate niche where your veggie garden is.

Read Full Post »

Soil Germination Temperatures Veggies Parsons

We can thank Dr Jerry Parsons, Extension Horticulturist at the Texas Agricultural Extension Service, for the temps info in this great chart!

The graph above is of best SOIL temps for seed sowing! And even then, some seeds are more cold or heat tolerant, so get enough seeds to try again should there be some kind of fail or temps take an unprecedented shift.

Challenging conditions can be shady areas, or if you are intermingling veggies in your landscape, areas shaded by permanent ornamental plants. Transplants are already up and more hardy, sun reaching sooner, so your wise choice may be to start with transplants, not seedlings started outside. If you are container gardening, move your container to follow the sun during the day. Use one of those little plant dolly thingies if it is a heavy container.

Bushel of tasty String Beans in a Basket!STRING BEANS 

DARK AND LIGHT-SEEDED BEANS: Dark-seeded beans are more resistant to rotting in cool soil than light-seeded beans. Beans need a minimum soil temperature of 65°F to germinate well, otherwise rotting may occur.

Beans are crazy to grow! They will give you a good crop in soil that’s loamy, sandy, rocky, rich or poor and even in clay as long as it has good drainage. They do prefer slightly acid soil. Though beans do need regular water for their short roots, still, avoid planting them in shade with soil that stays wet.

When growing beans in a new garden site or place in your garden! Special tip from Bountiful Container: ‘With inoculant, the critical bacteria that enhance the plant’s ability to convert Nitrogen from air into N in the soil, are added to the soil. Either powder the inoculant on wet seed or sprinkle granules in the soil along with seeds. Grow stronger, produce more beans.’ Like with our other favorite legumes, peas and favas, be sure to use the right inoculant with your seeds if your soil needs it. Inoculants are plant specific. Actually, the bacteria ‘infect’ your plants and cause them to make the nodules. If there is none in the soil, seeds may even be unable to start. Even if you presprout to start your seedlings, they will live, but not have the ability to fix the N they need, are feeble, struggle and produce little. That lack can be why. Definitely work inoculant into the soil before you plant presprouted seeds, or, better yet, dip them in your inoculant mixture when you put them into your soil! Even simpler, if available, scatter a few spadefuls of soil from last year’s bean patch into new planting sites.

Beans like days to be at least 70° and nights to dip no lower than 40°. It’s worthwhile to wait until those conditions are met. Otherwise, you’ll have spotty germination and stunted, spindly plants. Beans grow so quickly that waiting for ideal temperatures will be worth some patience.

Cucumbers Space Saving Easy Harvesting Overhead Trellis

CUCUMBERS

Warm, light, sandy loam soils are preferred for early production. Compost and composted manure is good. Cukes like moist well drained, fertile soil and need a pH above 6.0. A farmer says: Apply 6 to 10 pounds of fertilizer for each 100 foot of row, using care not to bring fertilizer into contact with the seed. A home gardener says: When I plant cukes, I dig out a hole, about a foot square, fill it with compost, and plant my seed right into the compost. No fertilizing the rest of the season and you’re not wasting fertilizer in soil between plants that the roots never touch.

A tropical vegetable, cucumbers thrive when the weather is hot and water is plentiful. If the weather is unseasonably cool, wait a while to mulch until the ground is warmed by the sun. When you mulch, scatter straw for airflow, to let soil dry somewhat – reduce fungi, only 1″ deep.

Sow seeds directly in the garden when daytime temperatures are at least 65° to 75°. They are frost tender and should not be planted until the soil has warmed up to 65°, some say 70°! Cukes grow well in daytime temperatures in the 70’s, best at 81° F to 101°.

Mini FYI: The inside of a cucumber can be up to twenty degrees cooler than the outside temperature. This is where the saying cool as a cucumber came from!

Eggplant Purple Long Shiny Harvest BasketEGGPLANT

Wherever you plant them, the key word for eggplant soil is ‘rich.’ Sandy loam or loam is lovely. Eggplants are greedy feeders; ideal eggplant soil is well-drained, rich in organic matter, including lots of well-rotted manure, and has about a neutral in pH. During the season, sidedress with extra compost. Keep the soil moist to promote maximum growth.

Eggplant do NOT thrive in very humid areas. Pollination is difficult when the weather conditions are very wet, overly humid or excessively hot.

The minimum soil temp needed for seed germination is 60° F. The optimum range is 75-90° F. 
Transplant at soil temp that is minimum 65°F.

Critical temperature for setting out eggplants isn’t the daytime high, but the nighttime low. Cool evenings will set back the seedlings’ growth and make them more susceptible to diseases. Wait until the evening temperatures are above 65° before putting in seedlings. Cold temperatures will stop plant and root growth reducing plant vigor and yields. If your crop is still producing in the fall, cover them on cold evenings to extend the harvest.

Place transplants in the garden slightly deeper than they were in their pot. Cold soil will shock the plant and set it back several weeks.

Eggplants are more susceptible than tomato plants to injury from low temperatures and do not grow until temperatures warm. They like temps to remain above 68°, 70° to 85° F is even better.

Don’t be in a rush to mulch. Mulching too early in the season keeps the soil cool, resulting in slow growth, poor fruit set, and shallow rooting.

California Wonder Peppers Changing Color - Eden Brothers imagePEPPERS, either hot or bell, need VERY RICH SOIL, are heavy feeders!  Place compost, worm castings, rotted manure under them when transplanting. Mix in 1 T Epsom Salts, Maxi Crop, and from Island Seed & Feed, Landscape Mix. Sandy soils are preferred for the earliest plantings because they warm more rapidly in the spring. Heavier soils can be quite productive, provided they are well drained and irrigated with care.

Rather than in the soil, do foliar Epsom Salts! It is a cheap home remedy that can keep plants greener and bushier, enhance production of healthier fruit later in the season, and potentially help reduce blossom-end rot. Apply 1 tablespoon of granules around each transplant, but research has shown a foliar spray of a solution of 1 tablespoon Epsom salts per gallon of water at transplanting, first flowering, and fruit set is more effective! As a foliar spray, Epsom salts can be taken up quickly by plants, otherwise, it is sometimes hard for the plant to get it out of the soil because of calcium competition.

Peppers are Temp Particular! Hot peppers grow best in daytime air temperatures 65° to 85°F. Transplant when night time temperatures stay above 50°, 55° is better. Below that plants grow very slowly, have yellowish, puckered leaves, and look sickly, often don’t recover. Night temps between 60° and 70° are best. In temperatures greater than 85°F, peppers may drop their blossoms although set fruit will ripen. The ideal temperature for peppers is a daytime temperature around 75°F and a nighttime temperature around 62°F.

At soil temperatures above 65°, pepper growth accelerates. Plants may become stunted and never recover if either the soil or air temperature is much below 55°.

  • Nighttime temperatures below 60° F or above 75° F can reduce fruit set.
  • Plumping up – making thick walls! Gardeners in hot regions will need to be especially patient with big bells and sweet roasting peppers. Both of these tend to wait until the nights are longer and cooler in late summer before fruiting and plumping up. These folks may want to plant banana peppers or sweet non-bells, which will ripen in time to use with those bumper crops of tomatoes and basil. Peppers need time on the plant to absorb nutrients and water and plump up their flesh, so pack your patience.
  • Color Changes! Mother Earth News says: After reaching their maximum size, green peppers that are meant to turn red, will develop red pigments in 10 to 28 days, if daytime temperatures are between 65° and 75°. In southern regions where temperatures exceed that range, peppers turn yellowish and may acquire an off-color pallor that is not attractive. Below the optimum temperature range, color development slows dramatically; below 55°, it stops completely. If soil temperatures drop below 68°, pigment production declines and eventually ceases.

Zucchini Summer Squash YellowSQUASHES grow best in full sun! They like rich well-drained soil, high in organic matter, and require a high level of feeding. Zucchini, in particular, produce a lot of leaf and fruit and get hungry!

Days need to be at least 70° and nights to dip no lower than 40°. Summer squashes grow best in air temperatures ranging from 60° to 75°F.

Plant in a warm soil. If the soil is below 60° F, summer squash seeds are more likely to rot in the ground before sprouting. The ideal soil temperature for germination is 70-90° F. A doable temp is 65-70°F.

Tomatoes, Red Slicers and Cherries!

TOMATOES

I add a good dose of animal manures and compost, and my usuals to the planting hole –- a huge handful of bone meal – for blossoms, bird guano high in P, Phosphorus helps your plants continue to bloom LATE in the season! An NPK ratio like 1-10-0.2, takes 4 months to become available to your plants. I add a handful of non-fat powdered milk – for the immune system,  25% worm castings – immune system, a tad, half a %, of coffee grounds. This robust combo works well. As they decompose, coffee grounds appear to suppress some common fungal rots and wilts, including FUSARIUM! Go VERY LIGHTLY on the coffee grounds. Too much can kill your plants. It was found in studies, what worked well was coffee grounds part of a compost mix, was in one case comprising as little as 0.5% of the material. That’s only 1/2 a percent! During the season, sprinkle them very lightly on top of your soil, then scratch in and water lightly.

Temps are crucial! Tomatoes are not happy when there are

High daytime temperatures – above 85° F – select heat tolerant varieties
High Nighttime Temperatures – above 70° F – select heat tolerant varieties
Low Nighttime Temperatures – below 55° F, except those very early varieties!

True, tomatoes are heat lovers, but per the University of NV, temperatures over 104° F, for only four hours, causes the flowers to abort! If you expect high summer temps, plant heat tolerant (“heat set”) varieties: Florasette, Heat Wave, Solar Set, Sunchaser, Sunmaster, Sunpride, Surefire. When your variety is not heat tolerant, temps above 85° are out of your tomatoes’ happiness range, they abort fruit set and go into survival mode, stop production. That’s why your plant may make no tomatoes for a period of time. Don’t think it is a quitter and pull it. It will start up again when temps lower.

High nighttime temps are even worse than high daytime temperatures because your plant never gets to rest.

Unless you have early varieties, in spring, wait until nighttime temperatures are reliably above 55° F or protect your plants with a cover at night.

Soil Thermometer VeggiesMany seeds can be presprouted. Presprouting is super and clever because you know you have plants! Germination in the soil can be spotty, so get fresh seed from a reliable source and presprout! It’s easy and terrific fun to watch the little ones appear! See more

Regions have huge variances in planting time strategies, and even in the same yard there are micro niches that vary considerably, so get a soil thermometer and plant in the right place at the right time!

With your Soil Thermometer, and good gardener self discipline, get your seeds and plants in the ground at their most productive times for your location!

Here’s to super tasty abundant harvests!

Updated 3.23.23


Love your Mother! Plant bird & bee food! Think grey water! Grow organic! Bless you for being such a wonderful Earth Steward!

The Green Bean Connection started as correspondence for the Santa Barbara CA USA Pilgrim Terrace Community Garden. Both of Santa Barbara City’s remaining community gardens are very coastal. During late spring/summer we are often in a fog belt/marine layer most years, locally referred to as the May grays, June glooms and August fogusts. Keep that in mind compared to the microclimate niche where your veggie garden is. Bless you for being such a wonderful Earth Steward!

^Top

Read Full Post »

Design Your Beautiful Summer Garden!

Designing your garden is an intricate and intimate process depending on a lot of factors. It will ‘look’ like you as you are at the time of your life that you do it. Gardens are a form of autobiography. ~Sydney Eddison, Horticulture magazine, August/September 1993. If you plant from seed, designing your garden leads to making a pretty accurate seed list.

Some of your choices will be the same as what your family always did. Or, you may be a permaculture type doing a Food Forest guild system. There is no right way. You are you, your situation unique. You may be the same the rest of your life, only influenced by drought, deluge, seasons or climate change. You may be research oriented and enjoy trying out new plants and practices from across the world, allowing volunteers the birds bring to grow. You might decide to leave an untouched wild area in the name of freedom or magic, or rest a section of your garden each winter! Or plant it to green manure!

Take Day Length into account! Photoperiodism is applicable to many plants. Some plants and certain varieties of some plants, simply won’t grow or produce if they don’t have the right day length. Some plants stop growing when there is less than 10 hours of daylight. There are special considerations for broccoli, onions and bulbing plants like beets. You will need to know your latitude to determine the best choices for your area. Santa Barbara CA is 34N; Jan/Feb have less than 10 hours of light per day. See more and examples of planting strategies!

Choose a sunny place with easy access to water! Bioswales may be part of your water capture plan. In SoCal consider a centuries old technique, a water saving Waffle GardenGreywater distribution location may determine where fruit and nut trees will be planted. Then how will their mature shade affect the rest of your garden? Use dwarfs? 

Garden Design Slope HillsideMake your garden a shape that flows with the area, whether that be simply the space available, or contoured to the land. Use slopes and hillsides! (Image by Arterra LLP Landscape Architects) Grow permeable windbreak shrubs to slow wind. If you don’t have outdoor space, but do have a sunny doorstep or balcony, put those containers to work! See some smart design ideas and tips at the Magic of Permaculture!

Layouts can be any design you want! Circles with cross points, spokes, concentric, spiral! Squares like a formal British royal garden. Wild like a cottage garden or food forest garden guild. Beds in blocks. Straw bales wherever you can put them! Terraced on a slope! S curves along an existing path interspersed with ornamentals! Maybe you would like to add a greenhouse this year, a worm bin, or you need a shed and convenient workspace.

Put in pathways – straw bedding, boards, gravel, pallets, living mulch, as suits the spirit of the location, are safe and make you happy to be there!

Where is the summer and winter sun path in the sky? Design to plant so tall plants don’t shade out the shorties – generally that is tall in the North, short in the South. If you have only morning sun, you plant tall in the West, vice versa for only afternoon sun. A full 6 to 8 hours of sun is best for almost all veggies. You can do shade, but it’s slower and fruits are not as big or plentiful.

If you choose to make your own compost, select an easy access area for composting, near the kitchen, if you will be using it on an ongoing basis. Plant compost speeding herbs like comfrey or yarrow right next to it. Plant pretty calendula or borage to hide it and bring bees and butterflies! If you use straw layers, leave space beside your composter or compost area for a bale staked in place on its end.  See more

Also choose an area, maybe near the compost, for your worm box if you will be growing them for their valuable castings. Mine take full sun all year. See more

Decide if you want to do a no dig Lasagna type bed or your soil is fine and you can just get to planting right now! But first, either way, install gopher protection wire!

The nitty gritties are deciding what plants you want, how much space they take up per the return you hope for.

What plants do you want? Will you judge by nutritional value first, return per square foot? Will you really eat them or has your family just always grown it? Will you be biodiversely companion planting or monoculture row planting?

Think about your choices for permanent residents! Plant perennial herbs by the kitchen door, at corner points or gates. The perennial Dragon Fruit along the fence. An amazing chayote needs tons of room. Artichokes are big, and grow 10 years! Set aside an all year area for flowering plants for bees, beneficials, butterflies and birds! See Stripes of Wildflowers!

Where will biggies like that Winter Hubbard Squash, pumpkin, squash or melon, artichoke fit or is there really enough space for it per its production footprint? Do you need it to cover space while you take a break from other planting?

Will you be planting successive rounds of favorites throughout the season? If you plant an understory of fillers – lettuces, table onions, radish, beets, carrots, etc – you won’t need separate space for them. If you trellis, use yard side fences, grow vertical in cages, you will need less space. See Vertical Gardening, a Natural Urban Choice! If you plant in zig zags, rather than in a straight line, you can usually get one more plant in the allotted space.

Are you growing for food or seed or both? Waiting for plants to flower to seed takes time, and the space it takes is unavailable for a while. But bees, beneficial predator insects, butterflies and birds come. And you will have seeds adapted to your area for next year’s planting, plus extras to share, perhaps take to the Seed Swap!

Would be lovely to put in a comfy chair to watch the garden grow, see birds, listen to the breeze in the leaves, read a bit and snooze.

Social at Davie Village Community Garden in Vancouver's West EndOr a social area, table, chairs, umbrella. Have candlelight summer salads in the garden with friends. This is at Davie Village Community Garden in Vancouver’s West End.

Plant sizes, long-short day or day neutral, time to maturity  There are early, dwarfs, container plants that produce when they are smaller, have smaller fruits. There are long growing biggies that demand their space, over grow and outgrow their neighbors! Maybe you don’t need huge, but just enough for just you since it’s only you in your household. Or it’s not a favorite, but you do like a taste and nutrition! The time it takes to mature for harvest depends on weather, your soil, whether you feed it or not along the way and select the right long-short day or day neutral variety. The size depends on you and the weather also, but mainly on the variety you choose. You can plant smaller varieties at the same time you plant longer maturing larger fruiting varieties for a steady table supply. How long it takes to maturity, and the footprint size of your mature plant is critical to designing your garden, making it all fit.

Vertical and Horizontal Spacing!

  • Vertical Space – More plants per square foot!
    • One method is to double trellis up! Cucumbers below beans!
    • The other is to plant in ‘layers!’ Plant an understory of ‘littles’ and fillers below larger taller plants ie Lettuce under Broccoli. They do double duty as living mulch!
  • Horizontal Space – Give them room to thrive at MATURE SIZE!
    • Pests and diseases go right down the row of plants of the same kind, especially when they touch each other. You may lose them all ~ better is Biodiversity. Interplant with pest repelling, growth enhancing and edible companion plants! Alternate varieties of the same kinds plants.
    • More is not always better. Plants too closely transplanted, seeded/not thinned, get rootbound. That squeezes oxygen from the soil, prevents or dramatically reduces water uptake for plants in the center. Plants can’t take up nutrients without water. That lessens growth and production since your plants are literally starving. In crowded conditions feeding your plants doesn’t help. Weakened plants are more disease and pest susceptible. Give them room to breathe and live to their full glory! Only ONE healthy plant may produce more than an entire row of stunted plants.

Look up each of your plant choices. Make a list – name, variety, days to maturity, mature spacing. The mature spacing gives a good indication how tall your plant might get and if it will shade out other plants. If you put your list on your computer you can click on the column to reorganize the list per footprint space/height or days to maturity.

Your purpose may be for your and your family’s daily food, as a chef for your clients, for a Food Bank. Fruit and nut trees may be part of your long term plan.

Now that we know how much space you have and your purpose for growing each plant, we can estimate how many plants of each you need, how many seeds you will need if you plant from seeds. Know that Mama Nature has her own schedule – lots of rain, no rain. Wind. Hail. Heat. Birds love picking seeds you planted and snails/slugs are perpetually hungry. We won’t speak about gophers. Add to your number of seeds to account for surprises and gardener error. Get enough for succession plantings.

If you are a SoCal gardener, you may plant several times over a season. Plant bush bean varieties and determinate tomatoes for soonest table supply and to harvest all at once for canning. If you want a steady table supply all season long, also plant pole bean varieties and indeterminate tomatoes. If you have a Northern short season summer window, you may choose cold tolerant early bush and determinate varieties for quicker intense production.

Take into account the number of people you are feeding and their favorites!

Graph paper, sketches, a few notes jotted on the back of an envelope, in your head. It all works and is great fun! If you sketch it, keep that sketch to make notes on for next summer’s planning!

Here’s to many a glorious nutritious feast – homegrown organic, fresh and super tasty!

Updated 12.31.21 


Love your Mother! Plant bird & bee food! Think grey water! Grow organic! Bless you for being such a wonderful Earth Steward!

The Green Bean Connection started as correspondence for the Santa Barbara CA USA Pilgrim Terrace Community Garden. All three of Santa Barbara’s community gardens are very coastal. During late spring/summer we are often in a fog belt/marine layer most years, locally referred to as the May grays, June glooms and August fogusts. In 2018 they lasted into September and October! Keep that in mind compared to the microclimate niche where your veggie garden is.

Back to top

Read Full Post »

July Gardening is Red Hot! Tomatoes and Peppers!
Love your Mother! Plant bird & bee food! Think grey water! Grow organic! 

Gardening is civil and social, but it wants the vigor and freedom of the forest and the outlaw.  –  Henry David Thoreau

In July most gardeners are in full swing, tomatoes coming in force! Sidedressing (feeding) to prolong harvests, especially in late July, is garden wise. Harvests need to be regular, happily eaten, stored well, surplus given! Seed saving is on the agenda. Make compost! Soil prep for fall planting is starting as plants finish and space is available, that is unless you want to plant one more round of a summer fav that will produce in October!

If you are just starting, plant a few patches of fast growing, less water needing, heat lovers, lots of summer heat tolerant lettuces for your salads! They may need a little shade cloth protection. Plan out your fall/winter layout, remembering tall to the north, short to the south. Start amending your soil. If you will be planting bareroot strawberries late October or so, reserve that area. Amend that patch with acidic compost – the kind used for azaleas and camellias. Winter plants don’t take up as much food in cooler weather, so use less compost. Remember, nature’s soil is naturally only 5% organic matter, but we are growing veggies, so a little more than that is perfect. Too much food and plants go to all leaf. But then a lot of winter veggies are just that, all leaf! Cabbage, Chard, Kale, Lettuces. Oh, lettuces thrive with manures, so put more in the lettuce patch areas, but none where the carrots will grow. They don’t need it.

In summer you want a stronger lettuce, heat tolerant & slow bolting! Lettuce Leaf and Red Sails are good. Jericho from Israel is great. Sierra, Nevada. Nevada is a Green Crisp/Batavian that grows BIG, doesn’t bolt, and is totally crispy! Parris Island is slow bolting. Green Towers Romaine tolerates moderate summer heat and has some resistance to tipburn and bolting. Check out this page at Johnny’s Seeds!

Planting! Some planting is always doable in July, and very last rounds of summer favorites! Transplant basil, celery, chard, cucumbers, dill, kale, leeks, summer lettuce, green onions, white potatoes, summer savory, New Zealand spinach. In our hot foothills and further south, go for more melons, okra, pumpkins, summer & winter squash. Corn is an exception – late plantings often develop smut. I’ve seen tomato transplants and bean seeds started in August produce plentiful crops into October! Rattlesnake pole beans do as they are supposed to, make beans in up to 100 degree weather! Yard long beans tolerate late summer weather and make magnificent beans! And some varieties of those don’t get mildew!

Fall transplants need babying! Transplant late afternoon or evening so plants have the whole night to begin to recover before they’re hit with a full day of sun and heat. Water well and provide shade from intense mid-day sun. Prop up and secure some of those plastic plant flats that have the finer grid pattern to filter the light. Keep your transplants moist for at least a month or until they’re well established. Mulch to save water unless they thrive on the hot soil, or you have Bagrada Bugs.

At the end of the month, sow carrots (they do best from seed), celery and, if no Bagrada Bugs, Brassicas. If you have the Bugs, wait until it cools in October. Brassicas are arugula, broccoli, Brussels sprouts, cabbage (especially red and savoy types, which resist frost better), cauliflower, and kohlrabi, mizuna, mustard, pac choi, radish, rutabaga, turnip. Keep the soil moist and shaded until they’re up, and then gradually allow them more sun over a week’s time.

Start a Nursery Patch  It’s time to get seeds if you don’t already have them! While there is little space for big winter plants, small nursery patches can be planted. Leave enough room between seedlings so you can get your trowel in to lift them out to transplant later when space becomes available! If seeds and nurseries aren’t your thing, wait until your local nursery starts having the transplants that make you happy! Late August they might start trickling in. Labor Day weekend is a favorite planting time for some gardeners. October is just fine too!

Watering in July is critical, along with Compost & Mulch. Compost increases water holding capacity. Mulch shades soil, keeps it and your plant’s roots cooler, keeps soil more moist longer, less water needed. Steady water is a must to produce good looking fruits. Some water then none makes misshapen strawberries, called catfaced, curled beans and cukes, carrots lose their consistent shape. Tomatoes have more flavor when they are watered a tad less just before harvest. You can do that with bush varieties, determinates, but indeterminate vining types you just have to see how it goes. Lots of tasty flavor tests may be in order! They have deep tap roots, so usually watering nearby plants is sufficient. Melons in cooler coastal areas don’t need mulch! They self shade and hot soil helps them produce better. Give them a good sized basin so tiny lateral feeder roots can fully supply your plant with water and nutrients. Put a stake in the center so you know where to water, and let them go! Short rooted plants like beans, beets, lettuces need frequent watering to keep moist. Some plants just need a lot of water, like celery.

Do it now to be ready for winter rain! If you garden at home, please look into water capture and gray water systems – shower to flower, super attractive bioswale catchments. In Santa Barbara County there are rebates available! Also there are FREE landscape workshops! And we have FREE water system checkups. Call (805) 564-5460 to schedule today! Check out the Elmer Ave retrofit!

Don’t be fooled by Temporary High Temps! Tomatoes, peppers, eggplant, stop flowering and fruiting when temps rise above 85 to 90 degrees F (depending on humidity) for an extended time. Humidity causes pollen to stick and not fall to pollinate. Dry heat causes the pollen to fall and not stick! When weather cools, you will have blooms again and be back in production. Rattlesnake beans, on the other hand, keep right on producing at 100 degree temps! So choose heat tolerant veggie varieties, like Heatmaster and Solar tomatoes, from locales with hot weather. Wonderful heat tolerant varieties are out there!

Sidedressing

  • Manure feeds are great for all but beans, beets, carrots, parsnips, sweet and white potatoes, and tomatoes, or there’ll be more foliage than fruit!
  • Give your peppers and solanaceaes, tomatoes, eggplant, potatoes, Epsom Salt/Magnesium foliar treatments.
  • Every couple of weeks your strawberries would love a light fish emulsion/kelp drench.
  • 25% Worm castings help our plants uptake soil nutrients and boost your plant’s immune system. When your plant is taxed producing fruit in great summer conditions, it also is peaking out for the season and fighting pests and diseases are harder for it. And, sometimes a plant is just done. No amount of coaxing will have effect. It worked hard. Thank it and take it to the compost altar.

When your plants start flowering, they need another feed, sidedressing. Late July when some plants are near the end of production, extend their fruiting with a good feed. Pull back any mulch, push in your spade fork, rock it gently, remove the fork leaving the holes. Give them a deep drink of compost, worm or manure tea or kelp/fish emulsion. Or pull back the mulch, scratch in a little chicken manure – especially with lettuces. Or, lay on a 1/2″ blanket of compost and some tasty worm castings out to the dripline! If you prefer organic granulated fertilizer sprinkle it around evenly. Recover with your mulch, straw, then water well and gently so things stay in place. Let that good stuff trickle down those spade fork holes. That’s like giving them manure/compost/worm tea in place. If any of your plants are looking puny, have yellowing leaves, might give them a bit of blood meal for a quick pick me up.

Yes, there are pests, and diseases. Mercilessly squash the cucumber beetles, the green/yellow and black striped jobs. They give your plants diseases. I found refraining from watering my strawberries but once a week, more in exceptionally hot or windy weather, and not mulching under my strawberries keeps the slugs and snails at bay. They don’t like dry soil. I’m growing the Seascape variety that has deep roots, so it works well. Do put down organic slug/snail bait where you will be sprouting seeds and while the seedlings are coming up. Aphids don’t thrive in a dryer environment either. Water the plants susceptible to them a little less. Remove yellowing leaves asap. Yellow attracts whiteflies. Leafminers love the 70s! Remove damaged areas of leaves immediately. Mice and rats love tomato nibbles and they are well equipped to climb! A garden kitty who loves to hunt; keep your compost turned so they don’t nest in it; remove debris piles and ground shrub or hidey habitat. Please don’t use baits that will in turn kill kitties or animals that would feed on a poisoned animal. That includes Gophers. For gophers, install wire barriers. See more!

As summer is peaking, keep your garden clean. Remove finishing weakened plants that attract pests and get diseased. Remove debris, weeds. Remove mulch from under plants that were diseased and replace with clean mulch.

Important Habitat! July is perfect time to let a carrot or two, a celery, arugula and some cilantro bloom out! The blooms will be food for and bring beneficial insect pollinators. Birds will have seeds for food and scour your plants for juicy cabbage worms, whiteflies, aphids, earwigs, grasshoppers, cucumber beetles and grubs fresh for their hatchlings! Chickadees even eat ants!

SeedSaving SeedSavers Exchange - Passing on Our Garden Heritage

Seeds are your second harvest, insure the purity of your line. Your plants adapt to you and your unique location! Each year keep your best! Seedsaving is really a no-nonsense game! It’s important to our world community, as Thomas Rainer says, to preserve our garden heritage & biodiversity! Besides, it’s fun! Keep some for you – some as spices & others for planting. Package as gifts, and reserve some to take to the Seed Swap in January!

Think on when you want those October pumpkins, ThanksGiving sweet potatoes, and pumpkin pie! And at Christmas time, maybe a sauce over some of those delicious beans you froze or some fresh butterhead lettuce salad topped with cranberries. Plan for it and plant accordingly!

Meanwhile, take advantage of our summer weather and have breakfast at the garden!


Back to Top


The Green Bean Connection started as correspondence for the Santa Barbara CA USA, Pilgrim Terrace Community Garden. We are very coastal, during late spring/summer in a fog belt/marine layer area most years, locally referred to as the May grays, June glooms and August fogusts. Keep that in mind compared to the microclimate niche where your veggie garden is. Bless you for being such a wonderful Earth Steward!

See the entire July GBC Newsletter!

JULY Summer Garden Harvesting, Relaxing, Feasting!
FYI InfoGraphic: Home Gardening in the US
Harvesting & Storage Tips for Our Summer Favorites!
The Veggie Gardening Revolution Starts with YOU & ONE SEED! 

Events!  Soil Not Oil International Conference, National Heirloom Exposition

…and wonderful images of Pilgrim Terrace Community Garden in June!


Read Full Post »

Cauliflower Purple Leaf
Purple cauliflower has flavonoid compounds called anthocyanin, antioxidants. Steaming retains the most nutrition. Mark Twain once said, “Cauliflower is nothing but a cabbage with a college education.”

Got some favorite old Italian heirloom Violetta Italia caulies at Terra Sol Nursery and a Cheddar, abundant with carotenoids, at ACE! Terra Sol had Cosmic Purple carrots too!
I’m trying Arcadia Broccoli because it is somewhat heat tolerant with excellent side shoot production.
Island Seed & Feed has the wonderful Harmony Four green manure seed mix and the inoculant that goes with it, plus a goodly batch of winter transplants including celery and some interesting peas!
Sad to report, no bare root strawberries anywhere. La Sumida usually has them when they reopen in January after the holidays. Sure hope so this year too!

Finally the SoCal HEAT is over!? Many of us at Pilgrim Terrace Community Garden didn’t plant until the very end of October, and even then we had record high temps. Very delayed start this year. There will be fewer rounds of planting. Instead of leaving space available for a second round, this year I planted all the space right away. I’ll fill in as space becomes available ~ when the cabbage and cauliflower heads are harvested. I’m planting more kale and chard than I used to so I’ll have a quick supply of greens while waiting for the others. This late, plant transplants for sure. Seeds are fine, and seeds of the same plants, if planted at the same time as the transplants, give an automatic equivalent of a second round of planting!

Winter light is less, so your placement strategies are more critical. Remember, tall to the North and shaded areas, graduating down in size to the shorties South and sunny. For example, if your garden gets only morning sun, plant tall to the west, shorties on the east. Tall means at their mature height.

Tall
  • Pole peas on a trellis might be your backdrop, against a wall, along a fence. Plant carrots on the sunny side of peas to enhance the growth of your peas! I plant beets behind the peas because the beets are fast broadleaved growers that would shade out young peas or slow growing carrots. Peas like a lot of water, so though carrots from seed need to be kept moist, after that, too much water makes carrots split. So plant your carrots far enough from the peas so your carrots don’t get as much water as the peas do.
  • Brocs get tallest, some up to 5 feet+ unless you are planting dwarf/patio varieties.
  • Kales can get that tall and taller if you let them grow pom pom style. Even dwarf kales will do that! Given time, dwarfts revert to their natural size.
  • Cauliflower, collard greens, Brussels sprouts, Rapini are about 3′ tall
  • Plant your Tall plants in zig zag ‘rows’ so you can plant them closer together. In the inside of a zig zag, on the sunny side in front of the ‘back’ plant, put in your medium and shorties. Some gardeners call them fillers; I call some of them ‘littles.’
Medium
  • Chards are next, different varieties at varying heights, Fordhook Giants the tallest.
  • Bush peas – carrots on the sunny side
  • Leeks (away from the peas)
  • Cilantro repels aphids on Brassicas – broccoli, kale, cauliflower, Brussels sprouts! Said to make them grow REALLY well, bigger, fuller, greener! Plant generous mini patches here and there. Harvest some, let others flower for bees and beneficial insects. Then share some seeds with the birds, collect some seeds for next plantings.
  • Celery by the water spigot. If you have room, you can let celery flower and seed too!
Shorties, Fillers, ‘Littles’
  • Bareroot Strawberries, transplant strawberry runner daughters first/second week of November if possible. They need ACIDIC compost mixed into their soil! Put them in spots for easy picking, lovely along borders. Keep them moist. When they start to fruit in spring, cover with aviary wire to keep out birds.
  • Heading winter lettuces like plenty of water to stay sweet, grow quickly, stay in high production. Put them in a low spot or near the spigot, on the sunny side of taller celery. Also, lettuces repel cabbage moths. Put a few of them between the cabbages and other Brassicas. Plant lettuces you want under Brassicas from transplants because dying parts of Brassicas put out a poison that prevents some seeds, like tiny lettuce seeds, from growing. Compost fallen Brassica leaves right away. In fact, remove yellowing leaves ASAP! Yellow attracts whiteflies.
  • Bunch onions away from peas
  • Arugula, Bok Choy, Mizuna, mustards, spinach, the longer winter radishes
  • Kohlrabi, rutabagas and turnips
  • Have fun with beets & carrots! They come in different shapes and lots of different colors. Try Danish heirloom Cylindra beets! Special tip from Hole’s: ‘Nearly two thirds of the length of the root will grow above ground, so some gardeners like to hill up soil around each plant as the root emerges. This will keep the skins of the root very tender and protect them from insects.’ True for any beet and a bit for carrots! Hilling up the soil keeps carrots from having those green shoulders.
  • Plant carrots, slow growers, on the sunny side of faster growing flat leaved plants like beets so the carrots won’t be shaded out. Colorful carrots brighten your winter stews! Baby Little Fingers make small carrots quicker than most, only 57 days to maturity! Put in multi colored Circus Circus!

GARLIC! Hmm…usually I would encourage you to grow garlic but with these general overall warmer times, some garlic lovers are reporting they aren’t growing it here anymore. Garlic likes chill, so even in our regular winters we don’t get the big cloves like up in Gilroy, the Garlic Capital, Ca. If you don’t mind smaller bulbs, plant away. Plant rounds of your fattest garlic cloves now through Dec 21, Winter Solstice, for June/July harvests! See a LOT about GARLIC!

Space your plants well. Think of the footprint of your mature plant. Crowded plants can shade each other out. They don’t get their full productive size or produce as productively, both size or quantity. Smaller plants too close together can get rootbound, suffer from lack of nutrition. The remedy is simple! Thin when young and eat these luscious little plants! Rather than planting so closely, keep some of those seeds back for another later planting. If they come that way from the nursery, gently separate the little plants, plant separately. Give away your extras! Plant to allow air flow so your plants will harden up a bit, and don’t overwater, inviting sucking pests like aphids and white flies that feed easily on soft tissue. Especially true for kales and chard that gets leaf miners. Ideally with chard the leaves won’t touch another chard.

Biodiversity Mix up your plantings to stop diseases and pests from spreading down a row or throughout a patch. Monoculture can be costly in time spent and crop losses. Plant different varieties of the same plant with different maturity dates. Pests and diseases are only attracted at certain stages of your plants’ growth.

See Super Fall Veggies Varieties, Smart Companion Plantings!

Divide your artichokes! Give new babies plenty of room to grow big and make pups of their own or give them to friends! Remember, they have a huge 6′ footprint when they thrive and are at full maturity. Plant bareroot artichoke now or in Feb, or in March from pony packs. They have a 10 year life expectancy!

Strawberry Notes!  Chandlers are June bearers. Sequoias are Everbearers. Seascapes are one of California’s own, released by the University of California breeding program in 1992. They are Day-Neutral, producing 3 months after planted no matter when you plant them! They produce spring, summer and fall, are heat tolerant and remarkably disease resistant! Seascapes, Albions and Sequoias have large berries, Albions very firm. Strawberry and onion varieties are region specific, strawberries more so than onions. So plant the varieties our local nurseries carry, farmers grow, or experiment! 1st half of Nov: Plant seeds of globe onions for slicing. Grano, Granex, Crystal Wax.

With the majority of fall crops, the main harvest is leaves! Cut and come again means a long harvest, and a very hungry plant! So, plant in super soil to get a good start! Add composts, manures, worm castings. In the planting hole, mix in a handful of nonfat powdered milk in for immediate uptake as a natural germicide and to boost their immune system. For bloomers, brocs and caulis, throw in a handful of bone meal for later uptake at bloom time. If you have other treats you like to favor your plants with, give them some of that too! Go lightly on incorporating coffee grounds either in your compost or soil. Studies found coffee grounds work well at only 0.5 percent of the compost mix. That’s only 1/2 a percent! See more details about soil building! The exception is carrots! Too much good soil makes them hairy, fork, and too much water makes them split.

Also at transplant time, sprinkle mycorrhizal fungi directly on transplant roots! Pat it on gently so it stays there. Direct contact is needed. Brassicas don’t mingle with the fungi and peas may have low need for it, so no need to use it on them.

Immediately after transplanting, give your babies a boost! Drench young plants with Aspirin Solution, + a 1/4 cup nonfat powdered milk, heaping tablespoon of baking soda, teaspoon liquid dish soap per gallon/watering can, to get them off to a great start! Do this the same or next day! Reapply every 10 days or so, and after significant rains.

Winter plants need additional feeding, and steady adequate moisture to stay healthy and able in such demanding constant production. Give them yummy compost to keep their soil fluffy with oxygen, the water holding capacity up to par. Be careful not to damage main roots. Get a spade fork if you don’t have one. Make holes in your soil instead, then, if you don’t have skunks or other digging predators, pour them a fish/kelp emulsion cocktail! Or compost, manure, or worm cast tea down the holes. Your plants will thrive, soil organisms will party down!

RESTORE OR REST an area. Decide where you will plant your tomatoes, heavy feeders, next summer and plant your Green Manure there! Plant some hefty favas or a vetch mix for green manures to boost soil Nitrogen. The vetch mix can include Austrian peas and bell beans that feed the soil, and oats that have deep roots to break up the soil. When they start flowering, chop them down into small pieces and turn them under. Wait 2 or more weeks, plant! Favas only are good and big, you get a lot of green manure per square foot. If you change your mind, you can eat them!

Or cover an area you won’t be planting with a good 6″ to a foot deep of mulch/straw and simply let the herds of soil organisms do their work over winter. This is called Lasagna gardening, sheet composting or composting in place – no turning or having to move it when it’s finished. If you are vermicomposting, have worms, add a few handfuls to speed up and enrich the process. Keep it slightly moist. Next spring you will have rich nutritious soil for no work at all!

Mulch? The purpose for mulch in summer is to keep your soil cool and moist. If you live where it snows, deep mulch may keep your soil from freezing so soon. But when SoCal  temps start to cool, days are shorter, it’s time to remove mulch and let what Sun there is heat up the soil as it can. When it is rainy, mulch slopes with mulch that won’t blow or float away. If needed, cover it – garden staple down some scrap pieces of hardware cloth, cut-to-fit wire fencing or that green plastic poultry fencing. Or do a little quick sandbag terracing. Low to the ground leaf crops like lettuce, arugula, spinach, bok choy, chard, need protection from mud splash. Lay down some straw before predicted storms. If you live in a windy area, lay something over the straw, like maybe rebar pieces, to hold the straw in place.

Rain Garden Muck Boots Women SloggersThis SoCal winter El Niño rain is predicted. Plant where there is good drainage. Make above ground beds. If you built berms that hold in too much water, open a low spot to let water out. At home, make water collection areas, channel the water to your fruit trees. Securely stake tall or top heavy plants before winds. Tie your peas to their trellis or plant them inside well-staked remesh round cages. Check on everything the morning after. Some areas may need more shelter and you could create a straw bale border, or even better, low growing bushes, like maybe blueberries! Lay down seedless straw, a board, or stepping stone pathways so your footwear doesn’t get muddy. Treat yourself to some fab muck boots! (Sloggers)

BEE FOOD! Plant wildflowers now from seed for early spring flowers! Germination in cooler weather takes longer, so don’t let the bed dry out. If you are a seed ball person, fling them far and wide, though not on steep slopes where they simply wash away. What is a seed ball?

Enjoy the crisp evenings, a little bit of clearing wind, enjoy these spectacular sunrises & sunsets! Plant for holiday sharing!

Back to Top


The Green Bean Connection started as correspondence for the Santa Barbara CA USA Pilgrim Terrace Community Garden. We are very coastal, during late spring/summer in a fog belt/marine layer area most years, locally referred to as the May grays, June glooms and August fogusts. Keep that in mind compared to the microclimate niche where your veggie garden is. Bless you for being such a wonderful Earth Steward!

October Garden Images! Dragon Fruit in progress ~

See the entire November GBC Newsletter:

Love KALE! Beauty, Super Nutrition, Easy to Grow!
Cilantro Repels Aphids, Attracts Bees & Beneficial Insects!!!

Wonderful Gardener-Style Holiday Gifts!
Massachusetts Horticultural Society Garden 

Events!  Master Gardener Training, Seed Swap!

Read Full Post »

Cilantro - persnickety, smelly and lovely!!

Cilantro is persnickety but lovely and valuable! Maybe it is even temperamental. You see, it needs everything just so. Cool weather is its favorite time to grow in SoCal!

Cilantro even tolerates a light frost, but has a short life. It simply grows right up and quits. No, you didn’t do anything wrong, and it’s not that you just don’t have a way with it. With the best conditions Cilantro will last about 8-10 weeks before flowering. It’s doing what it does. It has a unique taste, so if you love it, save seeds and keep right on planting, again and again and again for a steady supply! That’s called succession planting!

I let a plant fall down after it died last summer, forgot about it. Now I have a quite dense sizeable thriving cilantro patch! Do what nature did! Plant densely, just broadcast the seed, better without fancy rows, contrived spacing. Planting tightly shades the ground, keeps your soil moist and cooler. Mulch well around the perimeter of the patch! It is not the heat of the air that causes cilantro to bolt, but rather the heat of the soil. If you are attempting a spring or summer planting, warmer days, read more about bolting, especially do this. Also read up about Photoperiodism!

If you are in a hurry and want more surety of germination, soak the seeds 24 hours before planting. Put them in a half a glass of water, soak, lay them out on a paper towel and pat them dry. Plant a half inch deep in a 2″ deep trench with low sloping sides. The low slope keeps the soil from filling in the trench, burying the seeds too deeply when you water. Firm the soil well so there is good contact and they will stay moist after watered. If your weather is unseasonably hot and dry, plant just a tad deeper so the seeds stay moist. Happy cilantro is not picky about soil pH, but it likes well composted soil, well drained though they do like to stay moist.

Baby cilantros don’t take to transplanting because their little taproot goes deep quickly and can be easily broken. These babies are vibrantly fresh, have powerful flavor. It happens, for my taste, just one in a salad or a stew is ample. I cut it up, toss it in, roots and all. The roots look like little tiny white carrots. In fact, carrot, celery, cilantro, dill, parsley and parsnips are all in the Carrot Family, Apiaceae or Umbelliferae.

Usually you start harvesting the outer leaves when they are about 6″ tall. Harvest frequently, take the central stems immediately! This may slow down your plant’s demise, but only for a while. Once it starts to flower, the leaves lose their flavor, but you do have edible flowers! Sprinkle fresh to taste on salads, bean dishes, and cold vegetable dishes.

Because your plantings are going to be closely spaced, you can see liquid fertilizers, fish/kelp types, are going to be the ones to use so they will trickle down into the soil. A little goes a long way. This is a Mediterranean native used to harsh infertile conditions. Over fertilize and you lose the flavor. However, they do like to be kept moist, not swimming, but consistently moist. But they don’t like humidity!!! Like I said, they are persnickety.

Cilantro flowers and seeds

I love cilantro in all its stages. As a mature plant, before it bolts (makes a central stalk) flowers and seeds. It smells so lovely when you walk by. It bolts when weather warms, even if only a few days. You can see, why in summer, it’s best to plant so it gets morning sun, afternoon shade. Also it wants to be sheltered from wind. Ok, ok. You definitely want to get slow bolting, bolt resistant varieties. Four varieties of cilantro currently dominate Central California Coast commercial production: Santos, Long Standing, Slo Bolt, and Leisure. All four are used for spring, summer, and fall production, while Santos is the most common variety grown during the winter months.

The tiny white or pink blooms are beautiful, perfect for bees and beneficial insects, especially those little beneficial parasitic wasps and predatory flies! Plant some just for them! The feathery leaves don’t make too much shade, so plant cilantro throughout your veggies, under your fruit trees, any place you can fit them in.

Cilantro Seeds have Personality and are easy to Harvest! Bag or Broadcast!

Harvesting seed is an easy affair! Cilantro makes tons of little brown round seeds no more than an eighth of an inch across, very easy to harvest for next year’s plantings. If you have an ongoing garden, just remove the seeds by the handful, they pop right off when they are dry on the plant, and scatter them where you would want some cilantro next, even if for a year from now. They know when conditions are right for them and come up at perfect times in perfect places for their needs. You can use the dry plant for mulch or compost as you wish. I also scatter them to fill empty places or along the border of my garden. Along the border is nice ‘cz that way all I have to do is stoop a bit as I walk by, to enjoy their scent and those bright little ferny leaves.

Another harvest technique option per Birgit Bradtke at Tropical Permaculture:

…cut the stalk, stick the whole thing upside down in a big paper bag and leave it in a dry spot for a couple of weeks. (Most people recommend to hang it up. In my place it just lies around somewhere…) After a couple of weeks you take the bag and shake it and bash it and all the coriander seeds should fall off and you can pull out the bare stalk. Keep your coriander seeds in a cool dry place. (Most people recommend an airtight container. In my place they just stay in that bag…) And now you should have enough coriander seed to cook with and still have plenty left to throw around your garden next year!

Cilantro Companion enhances Broccoli growth!

Cilantro enhances the growth of Broccoli, is a terrific companion plant for them! Plant it close, let it grow up among the Brassica leaves.

Make your plantings really count by planting generous patches among your Brassicas like broccoli, cauliflowers, kales and cabbages because it repels APHIDS!

A mighty threesome is your Brassicas, with cilantro to repel aphids, and lettuce to repel Cabbage butterflies! Not only does cilantro repel aphids, but it enhances the growth of Brassicas! It makes them grow REALLY well, bigger, fuller, greener. Your winter giants will thrive! With that and edible flowers and seeds cilantro is truly a worthy plant.

So here it is, quite a list, but you can do it!

  • Cool season is best
  • Select afternoon shade when in warming conditions
  • Plant closely to keep soil cool, reduce & delay bolting
  • Keep moist but avoid humid locations
  • Plenty of airflow but sheltered from wind!
  • Harvest frequently, especially & immediately the central stems – sure thing!

Cilantro is the Spanish word for Coriander. We know the seeds only as Coriander. They are used in pickling and sausages. Cilantro comes from the Middle East, and is used in many ways in other parts of the world. It is a proven antibacterial, is used in the treatment of type 2 diabetes. The uniquely flavored leaves are high in Vitamin C, and it concentrates Calcium – good for older women! Cilantro is a crucial part of salsa, gazpacho, chimichurri sauce, veggie burgers, steamed with rice, and more. We like it in cocktails, pesto and Indian snacks, too. It is an ingredient in Belgian wheat beers!

Ahem. Keep in mind that many people are not Cilantro lovers like you and I, so go easy on it at that dinner party – leave it out of the salad. One in 6 have taste buds that find it bitter. It’s a genetic trait! Ha! More for us!

Happy planting, enjoy the most fresh delicious cilantro!

Updated 12.26.22


Love your Mother! Plant bird & bee food! Think grey water! Grow organic! Bless you for being such a wonderful Earth Steward!

The Green Bean Connection started as correspondence for the Santa Barbara CA USA Pilgrim Terrace Community Garden. Both of Santa Barbara City’s remaining community gardens are very coastal. During late spring/summer we are often in a fog belt/marine layer most years, locally referred to as the May grays, June glooms and August fogusts. Keep that in mind compared to the microclimate niche where your veggie garden is. Bless you for being such a wonderful Earth Steward!

SUBSCRIBE to the entire newsletter!    Friend on Facebook! 

^Top

Read Full Post »

15 Super Tips for a Productive Summer Veggie Patch!

Asymmetrical Design

Whether you are tucking things into niches between ornamental landscape plants, planting a patio patch like in the image, setting up a first time summer garden patch, or replanning your annual garden, here are some great ideas to increase your production!

1. If you have space, and are creating a back, or front, yard food forest, always start with your tree placements first! Determine which veggies grow well with each kind of tree. Santa Barbara Mediterranean Food Forests

2. Keep in mind veggies need sun! 6 to 8 hours, preferably 8! They are making fruit, and often many! That takes energy.

3.  Put tall plants to the north (see image below), so they won’t shade the shorties. If there is a partially shaded area, plant your tallest plants on the shaded side so they can reach up to get some sun; put the shorter plants in decreasing heights, in front of them so all get as much light as they can. When you are planting rounds, another batch every few weeks, start in the north or the ‘back’ – the shaded area, and work your way forward.

4. Trellises and tall cages are terrific space savers and keep your plants off the ground out of harm’s way – pests, diseases, damage. Your veggies will be clean, and have more even ripening. Cucumbers, beans, tomatoes. Squashes and melons can be trellised if you provide support for heavy fruits. Even Zucchini can be grown up through cages leaving a lot of ground space for underplantings. Harvesting is a lot easier and certain when those fast growing zuchs are up where you can see them!

Inefficient Single Row Planting

5. There are rows and there are rows! Single row planting wastes space! Compare the images. If you do rows, plant 2 or 3 different plants in side by side rows, then have your walk way, then another 2 or 3 plants together. Whether you do 2 or 3, or even 4, depends on plant size, your reach, and ease of tending and harvest. Plant taller or medium size plants, like peppers and eggplant, by twos so you can reach in to harvest. Plant shorter smaller plants like lettuces, spinach, strawberries together since they are easy to reach across to harvest. If plants in the rows are the same size, plant the second row plants on the diagonal to the first row plants. That way your rows can be closer together and you can plant more plants!

Attractive Multi-row Veggie Amphitheatre around the Eden Project restaurant!

6. Rather than rows, biodiversity, mixing things up, confuses pests, stops diseases in their tracks, because they can’t just go from the same plant to the same plant down a row. Since we are not using tractors, there is no need for rows at all, but they can be lovely. The curved rows in the image are behind the Eden Project restaurant outdoor seating! Truly garden to table!

7. If you need only a few plants, rather than designating a separate space for lettuces and littles like radishes, tuck them in here and there on the sunny side under bigger plants! When it gets big enough, remove the sunny side lower leaves of the larger plant to let light in.

8. Plant what you like, and will really eat along with some extra nutritious chards, kales.

9. Plants with the same water needs are good together. Like a salad patch – lettuce, arugula, spinach, bok choy, bunch onions, radish, chards. Putting the things together that you will harvest together saves time! Put carrots at the foot of pole beans.

10. Overplanting can take the fun out of things. Too many zucchini in hot summers, and you are going crazy trying to give away the over large ones you didn’t harvest soon enough. Too many green beans are labor intensive harvesting, takes forever. Planting green beans too close together is hard to harvest, and they mildew more with low air circulation. Overplanting is delicious when you plant lots of lettuces, carrots then harvest what you thin out! That’s baby kales, chard, mini carrots. These are the eat-on-the-spot-in-the-garden types!

11. Traditionally, and if you lived in the North with cold winters, you planted the garden all at once in spring! If your parents did that, you are unthinkingly likely to do it as well. In our SoCal Mediterranean climate, we plant all year though there are warmer and cooler veggie seasons. But each of these seasons are longer, and overlap! It is easy to get 3 plantings in succession IN EACH SEASON! Some plants will grow all year, mostly the ‘winter’ plants in our coastal gardens, for example, beets, broccoli, onions and cabbages. It takes strength to leave open space for successive rounds. But you can do it. Mark that space off, plant temporary fast growers, nitrogen-fixing fava, or lay down some soil feeding mulch like seedless straw. That space will be super productive when its turn comes.

12. Pole plants, have a lot longer production period than bush, like beans! Indeterminate tomatoes are true vines, can last all season long, but are susceptible to Fusarium and Verticillium wilts/fungi diseases. Might be better to plant determinates, limited growth varieties, in succession. That’s plant a few, then in a few weeks a few more, and so on. Let the determinates produce like crazy all at once, pull them when they show signs of the wilts. If you have only a small space available, or want to do canning, then bush plants are for you!

13. Plants that act as perennials in our climate are smart money plants! Broccoli’s for their side shoots, continuous kales and chards.

14. Special needs or companions!

  • Eggplants, though heat lovers, love humidity, but not overhead watering. Put them among other medium height plants.
  • Basils are great on the sunny sides of tomatoes, and go to table together.
  • Corn needs colonies – plant in patches versus rows! Every silk needs pollination because each produces a kernel! The best pollination occurs in clusters or blocks of plants. Consider that each plant only produces 2 to 3 ears, usually 2 good ones. How many can you eat a once? Will you freeze them? The ears pretty much mature within a few days of each other! So, if you are a fresh corn lover, plant successively only in quantities you can eat.

15. Consider herbs for corner, border, or hanging plants. They add a beautiful texture to your garden, are wonderfully aromatic, repel pests! Remember, some of them are invasive, like oregano, culinary thyme. Sage has unique lovely leaves. Choose the right type of rosemary for the space and look you want.

Please be CREATIVE! You don’t have to plant in rows, though that may be right for you. Check out this Squidoo Vegetable Garden Layout page! Check out the Grow Planner for Ipad from Mother Earth News! They may make you very happy! This is a perfectly acceptable way to play with your food.

Read Full Post »

Mediterranean Understory & Guild Plants for Food Forests – Part 2

Please SEE Part 1 before you read this list!

Here is what a young Food Forest can look like in a part of your urban yard!

Linda’s List here is intended for a Mediterranean climate like coastal Southern California has, one of only 5 in the world. The list in your area may be different. Check out your local gardeners’ successes, check with your local nursery. This list is not tree specific yet. We’re working on that!

More than a list of plants, Linda’s List gives tips for good growing, eating, and usage!
____________________________________________________________________

Once our fruit trees are planted in their water-saving basins in a budding Mediterranean food forest, it’s now time to think about what else to plant in these usually moist wells and swales. Or up the trees? Or nearby? We need these companion plants to increase our food and medicine yield, and also to enrich the soil, provide habitat, pull up minerals and other nutrients from deep in the earth, draw nitrogen from the air and bring it into the soil, attract beneficial insects to control pests, create shade for delicate roots — and to provide beauty, a critical psychological and spiritual yield in every garden.

Thanks to the members of the Permaculture Guild of Santa Barbara and the Santa Barbara Organic Garden Club for their ideas and input. Additions and corrections are welcome.  Please email lbuzzell@aol.com. Especially welcome would be input on what plants do best under specific fruit trees – so far I don’t have much information on that.

BERRIES
Blueberry. To grow well here, they need acid soil, so a container is often the best solution, since Santa Barbara soil and water tend to be alkaline. One gardener we know waters hers with a very dilute solution of white vinegar, plus puts pine needles, coffee grounds around the plant. Best in Mediterranean climates are the low-chill varieties like ‘Misty,”O’Neal,’ ‘Sharpblue’
Cane berries. Upright cane berries are fun to pop in here and there as understory plants and they take some shade. But we found out the hard way that you probably don’t want to put in sprawling, thorny berries (especially blackberry) that sucker underground – they pop up all over the yard and are hard to eradicate. When we buy new berries we limit ourselves to thornless varieties and our current favorites are ‘Navajo’ and ‘Apache,’ although the thorny varieties that still linger in our garden – and will probably be there for hundreds of years as they’re ineradicable – taste best. So we live with them and enjoy the berries.
Elderberry. Shrub. There is a California native variety. Produces edible fragrant white flowers (used to make elderberry syrup and wine) and edible small blue berries that the birds love. Ripe berries are safe to eat but leaves, twigs, branches, seeds and roots are toxic. Has medicinal uses. We use our elderberry as a sacrificial plant attracting birds away from other fruit trees.
Lemonade Berry (native). Rhus integrifolia. Can also control erosion.

BULBS AND ROOT CROPS
Placement of these may take special care, as you don’t want to plant them too close to delicate tree roots.
Carrots
Edible canna. Canna edulis –Achira. Flowers are smaller than most cannas and the root is edible, can be chopped and sautéed like potato.
Onions
Potato and sweet potato

EDIBLE FLOWERS (note: most fruit trees, veggies and herbs also have edible flowers. Always triple check the safety of any flower before eating!
Daylilies. Hemerocallis species. Buds are used in Chinese stir fry, Petals in salad.
Nasturtium (flowers, young leaves and buds that may be pickled like capers) Let the plants die back in place. They will reseed and form a straw mulch.
Roses (yield petals for salads, sandwiches, syrups, desserts; rose hips for tea, syrups, jam)
Scarlet runner bean
Scented geranium

HERBS (most have edible flowers in addition to other uses)
Borage
Chili peppers, including tree chili
Cilantro
Garlic
Italian parsley
Lavender
Lemon balm
Lemon verbena. A drought tolerant shrub with delicious leaves for tea.
Mint. Some fear its vigorous, spreading roots, but we welcome it into drier areas as ground cover, autumn bee food and a source of fresh leaves for cooking and tea.
Mustard (young leaves can be stir fried, flowers are edible, plus seeds for making mustard)
Pineapple sage (leaves and flowers make delicious herbal tea)
Oregano
Rosemary
Sage

SHRUBS/Understory trees
Guava. Psidium Tropical shrubs native to Mexico, Central and South America that yield white, yellow or pink fruit. Not to be confused with Pineapple Guava (Feijoa) Psidium guajava (apple guava) is one tasty variety. Also try lemon guava and strawberry guava.

VEGGIES (there’s no way to name them all – it’s fun to experiment to see what likes the soil under and around your fruit trees. Our favorites are those that overwinter and/or reseed themselves)
Artichokes. Plant away from tree roots, in baskets as the gophers love them.
Brassicas like broccoli, kale, collard greens.
Chard.
Dandelions. Leaves are great in salads and so good for us. Small birds like the seed heads.
Fava beans and other beans.
New Zealand spinach.

VINES
We often forget about vertical space in the garden, but it’s nice to increase your yield by growing edible vines up fruit trees, on walls and over arbors, fences and hedges.
Grapes. Note: the Permaculture Guild of Santa Barbara has a separate list of recommended table and wine grapes for our area. Contact lbuzzell@aol.com for details
Passion Fruit. A garden member says “mine is simply rampant, productive and trouble-free; gets little to no supplemental water.” The juice can be used to make a spectacular salad dressing (served at Los Arroyos on Coast Village Road in their tropical salad).

MISCELLANEOUS
Bamboo. Use clumping instead of running kinds to avoid it taking over your garden. Bamboo shoots are a delicacy in Asia.
Pepino melon.
Sacrificial plants. In permaculture designs we often plant trees, shrubs and other plants that are nitrogen-accumulators, “nurse” plants or fruit-providers for animals that might otherwise eat our crops. When they have performed their function, we “chop and drop” them around our fruit trees as a nutritious mulch.
Yucca. We’ve read that yucca yields edible fruit and flower buds. Anyone have more info on this?

BENEFICIAL ATTRACTORS AND NUTRIENT ACCUMULATORS
Ceanothus. Shrubs and ground covers that fix nitrogen in the soil.
Salvia, ornamental. These are treasures in the Mediterranean forest garden.
Tagetes lemmonii. Golden color is lovely in fall.

GROUND COVER
Easy-to-grow succulents can provide temporary ground cover for delicate roots. They can act as a living mulch until other plants take over that function. This crop is often free, as gardeners who have ground-cover sedums always have too many and are glad to share.
Pelargoniums and lantana are other easy, colorful ground cover that can be removed as needed.
__________________________________________________________________

#1 Home Permaculture book in the world for seven years!

Per PatternLiteracy.com, Toby Hemenway’s home site, Gaia’s Garden has been the best-selling permaculture book in the world for the last 7 years. The enlarged, updated 2nd edition is the winner of the 2011 Nautilus Gold Medal Award.

The first edition of Gaia’s Garden sparked the imagination of America’s home gardeners, introducing permaculture’s central message: Working with nature, not against her, results in more beautiful, abundant, and forgiving gardens. This extensively revised and expanded second edition broadens the reach and depth of the permaculture approach for urban and suburban growers.

Treat yourself and your land to this incredibly efficient way of gardening. Wisely use ALL the space available to you in a good way. Nature is the Master Gardener – follow her lead.

Read Full Post »

Water is the driver of Nature.  –   Leonardo da Vinci

When, Who, How, & How Much to Water

Midday, on a hot day, watering will burn the leaves.
Evening watering promotes mildew, fungus growth.  Plants drink during the day, so AM watering is best.

Plants that need little or no water and why:
Onions, garlic, that are flowering, going to bulb, needing to dry
End of season tomatoes that you want to have a stronger flavor
Tomatoes in soil with Fusarium and Verticillium Wilt fungi in the soil.  Fungi don’t do well in dry soil.

Plants that need water almost daily, sometimes twice daily 
Shallow rooted beans, beets, bunch onions, cucumbers, peas, strawberries
Celery and chard, lettuce, arugula – leaf crops, to keep them growing fast, tender and tasting sweet.
Planted seeds, seedlings, newly planted transplants, must be kept moist; if they dry, they die.  Put up temporary shade.

Use a watering can for seeds and tender seedlings so seeds aren’t washed away or seedlings broken.

Most plants need only an inch of water once a week unless it is hot and/or windy weather.  Most gardeners over water by two times as much as is needed!  Overwatering drowns plants, and kills micro soil organisms; they don’t get oxygen.  Soil structure is destroyed as air spaces cave in.  Overwatering also causes poor root growth making it difficult to move enough water to the leaves during hot weather.

Irregular watering results in misshapen fruits, tomato flower drop, can stop production

Fuzzy plants like tomatoes, eggplant, don’t do well with watering on their leaves.  Water underneath please.

Plants that are mulched generally need less water.  Poke your finger in the soil to see how deeply it is moist.  More on mulching next week.

Water and Pests & Diseases 

Overhead watering contributes to mildew on beans, squash, peas.  It spreads Strawberry Leaf Spot and other waterborne diseases 

Tomatoes:  stop watering when about a foot tall.  Water around them, but not right at them.  Keep back about a 2’ perimeter to reduce Fusarium and Verticillium Wilt fungi.  If you do water them, on mature plants, cut off the lower leaves, up to 18” high, to prevent soil splash when watering.  The fungi are especially taken up by leaves touching the ground.

Flush off aphids and the undersides of broccoli leaves and broc side shoots, kale leaves, especially the curly varieties.

Flush white flies from the undersides of broccoli leaves, kale, beans

BE JUICY!

Read Full Post »

Older Posts »