October 1, 2023 by Cerena Childress

See the Farmers’ Almanac Fall Forecast 2023: When Will Sweater Weather Arrive?
Congratulations on your Squash & Pumpkin harvests and Happy Halloween, Day of the Dead!
Brassicas are the SoCal winter veg garden winners!
LARGE BRASSICAS
Broccoli is the favorite Brassica and rightfully so per the nutrition it offers. Plants differ in size, head color and shapes, how heat tolerant they are, if you intend to let them over summer and make side shoot production, varies! To get value for the room Brocs take up, a lot of gardeners seek varieties that produce a lot of side shoots after the main head is taken. Some newer varieties produce side shoots before the main head is taken! These smaller heads are great steamed if large, or tossed with your salad if small. Do as you wish! Many of these newer varieties grow no more than 1 to 1 1/2′ tall, in other words, close to the ground rather than up on taller stalks. This means you can’t cut off the lower leaves to plant smaller plants underneath. So before you select varieties, take a look online at mature plant profile. You can still plant around them, just not under them. Keep that in mind when planning your layouts. Research has shown there are less aphids when you plant different varieties of brocs together! Probably true for other large Brassicas as well. Superb Broccoli!
Kale has become a have-to-have! Eat young leaves fresh in salads. Steam with other veggies over rice. High in Vitamin A and anti-cancer properties! Lovely varieties – green or purple, flat or curly leaves. They just keep growing. They are technically a biennial, 2 year plant. The first year is for production, the second they make seeds. But. In SoCal they can over winter several years. Or if we have exceptionally hot weather, they may bolt and make seeds the first year! You can end up with a pom pom style, a poof of small leaves on a tall bare stalk, especially the curly leaf or dinosaur kales. But they lose their verve, look tired, are tasteless, rather tortured. A fresh young kale in good soil will easily take up a 3′ footprint and produce thick tender vibrant leaves like crazy! What a difference. I hope you start fresh ones each year. They grow so quickly. You won’t lose any harvest time if you plant a baby at the base of the old one, then take the old one down when you are getting those sweet young leaves from the baby. I’ll bet you forgot how good they can really taste! Just be sure to work in some high quality compost so it can be strong and keep producing well. Beautiful Kale!
Cauliflower now comes in the standard white, also green, orange and purple! The disadvantage is there is only one head and that’s it, though as with any Brassica, the leaves are edible. Like Collard greens.
Cabbage is more dense for the dollar than Cauliflower though it too has only one head and takes a long time to grow – even the mini varieties! But what a feast! A cabbage head is amazing and you can fix it so many ways. Shred in salad, coleslaw, steamed, cabbage soup – Borscht, stir fried, cabbage rolls, cabbage kimchi, in tacos, as sauerkraut! Or try a traditional Irish dish, colcannon, a mixture of mashed potatoes, cabbage or kale, onions, and spices. YUM! There are many cabbage varieties as well – ‘white,’ red or green. Different sizes, and I do mean different. There are 4 to 6″ minis for container gardens, sooner eating or you just don’t need a huge cabbage. There are easily more than a foot in diameter monsters you can barely carry! First they grow loose, then they fill in and make hard dense heads. An amazing plant! While your cabbages are putting on size, plant lettuces among them and other Brassicas. Lettuce repels cabbage moths. Magnificent Cabbages!
Brussels Sprouts are charming mini cabbages on a stalk! They like a colder climate to make big sprouts. In Santa Barbara SoCal area you need to be prepared to harvest lots of small ones. But, I have to tell you, the last couple years we have been getting sprouts up to almost 2″ diameter in two of our community gardens, so it wasn’t good soil that made the difference. The sprouts liked the weather or new more heat tolerant varieties are on board!
All these big Brassicas need feeding from time to time because they are big, and most of them are continuously producing leaf crops! They are all susceptible to Mildew. Try for resistant varieties. Water in the morning when possible so they can dry by evening. A good reason not to over water or fertilize is aphids and whiteflies! They like softer plants. Use plenty of worm castings, as much as possible in their soil – as much as 25% if you can! Plant your Brassicas far enough apart, leaves not touching, for airflow when they are mature, so pests and diseases don’t easily spread plant to plant. Brassicas are generally frost tolerant, even a bit freeze tolerant, and it is said their flavor improves with a freeze!
Cilantro is their best companion! If you like the scent, winter, early spring are good times for cilantro. It doesn’t bolt so fast. Summer it bolts, winters it will freeze, so replants go with the territory. Cilantro makes brocs grow REALLY well, bigger, fuller, greener! Plant it just inside the mature drip line and let it grow up and through your Brassicas! The exception is cabbage since it can’t grow through cabbage. I grow cilantro even though I don’t eat it. I like how it looks and smells and it is a living mulch. When it seeds I scatter the seeds where I think I will be wanting some as companion plants and comes up where and when it wants if you keep the soil moist. Cilantro!
ENJOY LOTS OF SMALL BRASSICAS!
For salads arugula, bok choy, kohlrabi, mizuna, mustard, tatsoi, peppery sweet alyssum! Alyssum is a terrific little companion plant and attracts special small pollinators. Root crops are winter Daikon and White Icicle, pretty China Rose and handsome Long Black Spanish radish, turnips, rutabagas! Grow horseradish for fermenting. No need to allot special space for these except for the horseradish. It has a good 3′ diameter footprint! Plant these tasty small Brassicas in rows, between, among, around, in patches on the sunny side of big brassicas! A few here, a few there! Be artful with your design – sizes and colors. Enjoy their many flavors at your winter table! Same with other little winter types like onions, beets.
Then, there are all the other plants not Brassicas!
Peas – Flat, Snap or Pod


Flat is the same as Chinese or snow peas. String ’em or buy the stringless variety, and eat ’em right then and there or toss a few with your salad, steam or stew in Asian dishes, add to your stir fry! Shelling or English peas are so delicious fresh out of the pod and mighty tasty steamed so fresh from the pod. SNAP peas are the sinful favorite of many. The pod is thick and tender, sweet and delicious! Few make it home from my garden. I just eat them. That’s why you get stringless varieties. Who wants to be picking their teeth at the garden, LOL?! Ok, if some of those snap peas do make it to the kitchen, add them to salads. If you must, lightly steam them, add them to stir fries. They are very tender. To keep their fresh green look, undercook….
Yellow, green or purple, you can get bush or pole peas! Bush peas come in sooner; pole peas grow tall, so come in later. Soon as your bush peas are done, the pole peas will come in shortly after, making for a steady supply. And the pole peas keep on coming. Compared to beans or tomatoes, peas have a shorter life span. And when they are done, they are done. Fertilizing, coaxing, additional water doesn’t help. Successive planting is the answer. Plant once a month or so if you love peas. You do have to keep them picked or, like beans, they stop producing. They have short roots and need to be kept moist. Onion family stunts peas! But carrots enhance peas! Plant carrots around the cage or along the trellis. If you plant carrots on one side of them, trench peas a tad lower. Water the pea side so the carrots don’t get too much water and split.
Peas are the winter legume as beans are the summer legume of your garden! They are the trellis plants of our winter gardens. Put in your trellis first, then plant pole seeds, plus transplants of bush and pole all at the same time for them to come in one after the other. Your bush peas in cages will produce first, then your pole peas, and likely your seeded pole peas will follow in short order. Soon as your peas are done, clip off the plant, leaving the roots with their Nitrogen nodules in the ground to feed your soil. The Nitrogen is only released from the nodules after the plant has died. Plant more!
Presprouting your pea seeds makes sense! Presprouting assures no spots will be empty where a seed didn’t come up and you lose production! Presprouting peas is super simple. Paper towel on plate, lay out peas an inch apart, fold the paper towel over them, spritz with clean water, keep them moist. By +/- 5 days they will have sprouted, some more than others! Carefully put the ones that sprouted in the ground so you don’t break the little roots. If you have hungry birds, cover the sprouted peas with aviary wire soon as you put them in the ground. A smart trick is to plant them in a slight low sloped mini trench. Moisture goes to the bottom of the trench, drying wind goes over the top of the trench. When you are planting while it is still warm in late fall, if you are planting from sprouts, very carefully cover the soil with a very fine mulch to keep the soil moist. Planting from seed do the same cover the soil lightly. The sprouts will emerge and grow through the mulch. You can cover the trench with a board on top of the aviary wire. It’s high enough so the sprouts can get some size. Be sure there is a tad of airflow so the sprouts under the board are not baked! Delicious Peas! As with any seeds or transplants, a couple days before planting put down organic slug/snail bait and remove any overnight marauders that would feast on your tiny new plants.
You can have a terrific time with beets! They thrive in cooler weather. Many colors! Grow the elongated winter biggies, Cylindra! Plant them at the same time you plant smaller varieties so you have the littles first, while you are waiting for the biggies! Early Wonder Tall Tops and Dutch Baby Ball are a tasty choices, or red cold hardy Flat of Egypt! Try a yellow like Touchstone Gold! All About Beets, So Sweet!
 Chard is an elegant super productive winter favorite! Handsome, colorful, really, they are the ‘flowers’ of the winter garden! Superlative nutrition, low calorie, easy to grow! If you want quantity, plant Fordhook Giants! They are wondrous – easily 3′ tall, foot wide leaves when conditions are right for them! Chard can’t be beat for production per square foot. Elegant Nutritious Chard!
Lettuces thrive in cooler weather too, but do cover them at threatened heavy pelting rain storms and freezes. Lay down tomato cages, cover, and secure the cover so it doesn’t blow away. Remove when the day warms up. Lettuces come in all kinds of shapes and delicious colors. They do best in rich soil, regular moisture. Winter is the cooler time when tender butter leafs and heading varieties do well.
Try super dense Salanova! Johnny’s Seeds says: Harvested as fully mature heads, the flavor and texture have more time to develop than traditional baby-leaf lettuces. The unique structure of the core produces a multitude of uniformly sized leaves, harvestable with one simple cut. Salanova is more than 40% higher yielding, has better flavor and texture, and double the shelf life of traditional baby-leaf lettuce, making it an excellent, more economical option. What do you think about that?! Beautiful Lettuce!
Perfect timing for tasty root crops – beets, turnips, rutabagas, daikon radish. Beets are a double winner because the roots and the leaves are edible! Pick leaves from time to time. When your beets are the size you want, pull them and eat all the leaves and the beets as well!
Winter is growing time for long Daikon Radish. And Carrots. Carrots are a dense root, so they take a while. Plant short varieties like Thumbelina and Little Fingers for sooner eating. Kids love them! At the same time plant longer varieties to eat when the Little Fingers are done. Or plant successively, every 2 weeks, once a month per your needs. The longer the carrot, the longer it takes to grow. Look at the seed pack to see how many days it takes to maturity. Of course, you can pull them sooner and smaller, like for you and your pup! 🙂 Avoid manuring where you know you will be planting carrots – makes them hairy. Steady water supply and not too much or they split or fork. You might enjoy some of the mixed color packs – Circus Circus, Sunshine, or Cosmic Purple! Tasty Nutritious Carrots!
Parsnips, celery and parsley are all in the carrot family and enjoy cool SoCal weather. Celery is another in-the-garden edible let alone low calorie! Leeks and bunch onions, but, remember, NO onion family near peas.
If you haven’t planted already…some of you carry your layout plan in your head, others draw and redraw, moving things around until it settles and feels right. Do add a couple new things just for fun! Try another direction. Add some herbs, flowers for pollinators, or different edible flowers. Leave a little open space for surprises! Stand back, take a deep breath and ask yourself why you plant what you plant and why you plant the way you do. Anything been tickling the back of your mind you are curious about? More about Designing Your SoCal Winter Veggie Garden!
Once you have decided what to plant, when is the big question! Day length and temps are important. Temp sequences make a difference! Some plants bolt easily – Cilantro, Brassicas, Beets and Chard. Bolting is when your plant sends up a flowering stalk to seed. Check out Bolting aka Running to Seed! Causes and Prevention! Day Neutral/Photoperiodism
Where you plant, sun/shade is important. Plant longer maturing larger and taller varieties to the back, shorter early day varieties in front where they will get sun. Put littles on the sunny side of these. Plant your tall plants first, let them get up a bit. Then clip off the lower leaves on the sunny side and plant your littles. Or plant quick rounds of littles between, among the tall plants. They will be ready to harvest when the big plants would start shading them. A classic combo is lettuces among starting cabbages that take quite a while to make their big footprints!
Mixes rule! Plant several varieties for maturity at different times and to confuse pests. Pests are attracted at certain stages of maturity. They may bother one plant but leave others entirely alone depending on temps and the pest’s life cycle! There are less aphids on broccoli when you plant different varieties together. See Super Fall Veggies Varieties, Smart Companion Plantings! for excellent biodiverse choices.
Peas and green manure mixes – legumes and oats, feed and replenish your soil because they take N (Nitrogen) out of the air and deposit it in little nodules on their roots! If an area in your garden needs a pep up, plant it to green manure. Broadcast a seed mix of legumes and oats and let them grow. Bell beans, Austrian peas, vetch and oats from Island Seed & Feed Goleta is an excellent choice. Be sure to get the legume inoculant they recommend to use with it. The first three deposit N; the oats have deep roots that bring nutrients up and create soil channels for oxygen, water, soil organisms and roots! Plant it where next summer’s heavy feeders, like tomatoes, will be grown!
If you are planning for mid January bareroot strawberry planting, be preparing your strawberry patch now if you are planting green manure! The green manure mix I use takes 2+ months to grow. I chop it down when the bell beans start to flower. Chop it into bits, let it lay on the surface 2 weeks. Keep it moist. For strawberries and many other plants, add acidic (azalea/camellia) compost, worm castings and turn it all under at the same time. It takes two to three weeks to decompose, let the soil organisms restabilize, and be ready to plant. That puts us right at mid January when the bareroots arrive! More details on Living Mulch!
Here’s the schedule:
- Oct 1 plant your living mulch – put this on your garden calendar! If Bell beans are in your seed mix, or are your choice, they take a couple months to start to flower.
- About Dec 1 chop down/mow, chop up your living mulch and let it lay on the surface two weeks. This is necessary to let the dead plants release the Nitrogen from their roots. If Bell beans are in the mix, chop when they flower or before the stalks will get too tough to easily chop into small pieces. Keep your chopped mulch moist, not wet, until it is tilled in. Being moist aids decomposition.
- Mid Dec till in your living mulch for mid January bareroot planting. The little white balls on the roots are like a beautiful little string of pearls. Those are the Nitrogen nodules legume plants make that we are growing them for! At this time add any other amendments you want. Strawberries and many veggies like slightly acidic soil, so I add store bought Azalea/Camellia acid compost. It has little bark bits that add water holding capacity.
OR. Strawberry runner daughters can be clipped Oct 10 to 15, stored in the fridge for planting Nov 5ish in Santa Barbara. Remove any diseased soil where your beds will be; prep your beds with acidic compost like an Azalea mix. Commercial growers replace their plants every year. Some gardeners let them have two years but production of some varieties tapers off a lot the second year. Seascape, bred at UCSB, has excellent second year production! If you let them have two years, generously replenish the soil between the berries with acidic compost. I lay down boards between the rows where my berries will be planted. The boards keep the soil moist underneath. I planted the berries just far enough apart that they self mulched (shaded the soil) when they grew up a bit. Worked beautifully. I got the idea for the boards from a pallet gardener. If you use boards, just lift them, scoop out a little soil, add the new acidic compost.
Plant in super soil to get a good start! Clean up old piles of stuff, remove old mulches that can harbor overwintering pest eggs and diseases. Note whether your plant needs slightly acidic soil and add the right compost for that. Add the best-you-can-get composts, manures, worm castings. Worms casting are especially good in seed beds. They increase and speed germination and boost immunity. In planting holes, toss in a handful of nonfat powdered milk for immediate uptake as a natural germicide and to boost your plant’s immune system. Throw in a handful of bone meal that will decompose for uptake at bloom time, and some bird guano high in P in the NPK ratio, to extend bloom time after that. If you have other treats you like to favor your plants with, give them some of that too! If your soil has Verticillium or Fusarium Wilts, go lightly on incorporating coffee grounds either in your compost or soil. In studies, what was found to work well was coffee grounds at only 0.5 percent of the compost mix. Yes, that’s only 1/2 a percent! See more details about soil building! If you have containers, dump that old spent stuff and put in some tasty new mix!
Winter Feeding Lettuces like a light feed of chicken manure cultivated in the top 1/4 inch. All the winter plants are heavy producers – lots of leaves, some of those leaves are monsters! Cabbages are packed tight, leaf after leaf! They may need a light feed. Remember, it’s cooler now, so their uptake is slower, so give them liquid feeds of things easy for them to uptake. Fish emulsion (if you don’t have predators like raccoons or skunks) or a tasty tea mix – compost, worm castings, manure (no manure tea for lettuces). Slow release like alfalfa pellets.
Weather! Rain may be coming. Give your berms a check. Restore or add, shift their location if needed. Before wind or rain, double check cages and trellises, top heavy plants. Stake them, tie peas to the trellis or cage. More Rainy Weather Tips Start gathering sheets, light blankets for possible cold weather to come. Keep tomato cages handy. Protect Your Veggies from Freezing! Cover and tuck ’em in!
You don’t have to garden this winter!
- You can cover it deeply with all the mulch materials you can lay your hands on up to 18′ deep. Believe me, it will settle quickly. Let the herds of soil organisms do their work over winter. That’s called sheet composting or composting in place, lasagna gardening – no turning or having to move it when it’s finished. If you are vermicomposting, have worms, add a few handfuls to speed up and enrich the process. Next spring you will have rich nutritious living layers of whole soil for no work at all!
- If you have access to materials, another wise option is to do some form of long term sustainable Hugelkultur! There are many variations, quite adaptable to your situation. It can be done in a container, a tub, on a hillside, a field, in your own little garden plot!
- A third thing is to plant legumes and oats for superb soil restoration that takes some labor, but a lot less than tending your garden on a daily basis! You can plant it with green manure. Laying on lots of mulch is a ton of work when you do it, just gathering the materials can be a challenge. Green manure takes some work too, but it has awesome results as well. You broadcast a seed mix of legumes and oats, cover ever so lightly with soil, let them grow. Bell beans, Austrian peas, vetch and oats from Island Seed & Feed in Goleta is an excellent choice. Legumes gather Nitrogen from the air and store it in nodules on their roots! N is the main ingredient your plants need for their growth! The oat roots break up the soil. They dig deep and open channels for water and air flow, soil organisms, roots.
“Our most important job as vegetable gardeners is to feed and sustain soil life, often called the soil food web, beginning with the microbes. If we do this, our plants will thrive, we’ll grow nutritious, healthy food, and our soil conditions will get better each year. This is what is meant by the adage ‘Feed the soil not the plants.‘ – Jane Shellenberger, Organic Gardener’s Companion: Growing Vegetables in the West (Colorado)
Winter watering in drought areas is the same as for summer. Before 10:30 AM, after 4 PM. Watch which way water flows along the leaves. Some plants it flows to the central stem. Some drip water off the leaf tips in a circle around your plant, the dripline. Some go both ways. Make berms just beyond where the mature plant’s water flows. If at the dripline, that’s where the tiny feeder roots take up moisture and nutrients. That’s why they call them feeder roots! If your garden has a low spot, plant your water loving plants – chard, lettuces, spinach, mizuna, mints – there or near a spigot.
Fall Pests & Diseases
- Prevention Drench young plants, ones you just transplanted, with Aspirin solution to get them off to a great start! Drench your seedlings when they get up a few inches. One regular Aspirin, 1/4 C nonfat powdered milk, 1/2 teaspoon liquid dish soap (surfactant), per gallon of water. Aspirin triggers a defense response and stimulates growth! Powdered milk is a natural germicide and boosts the immune system. Be sure to get under the leaves too!
- Brassicas, Peas! Lots of ants and on Brassicas, lengthwise curling leaves are the giveaways for aphids, then whiteflies. Aphids carry viruses. Aphids come in fat gray or small black. Avoid over watering and feeding that makes for soft plants, tender leaves that aphids thrive on, and ant habitat. Spray aphids and whiteflies away, make the ants leave. Get up under those leaves, and fervently but carefully do the tender center growth tips. Do it consistently until they don’t come back. Cinnamon is amazing. Ants don’t like it at all, and when you are starting seedlings it prevents molds and damping off. Sprinkle it on the soil in your six pack. Get it in big containers at Smart and Final or bulk food stores. Reapply as needed. ASAP remove yellowing leaves that attract whiteflies.
- Chard, Lettuces, Spinach – Slugs and snails are the bane of so many crops, but these especially. Lay down something like Sluggo immediately. Then do it again in a week or so. Kill the parents, kill the children. After about 3 times you rarely need it again anytime soon.
- Biodiversity In general, avoid row planting where disease and pests wipe the plants out from one to the next to the next. Instead or rows, plant in several different spots. If you can’t help yourself, because your family always planted in rows or that’s the way farm pictures show plantings, remember, this is YOUR garden! Also, leave room so mature plants’ leaves don’t touch. Give them room to breathe, get good big leaves that get plenty of sun and produce lots more big leaves and many big fruits! Stunted crowded rootbound plants just don’t perform as well and are more disease and pest susceptible. Leaving that breathing room between plants pay off when you plant little plants along, under bigger plants. It’s like having two crops in the same space. No need to make separate space for smaller plants. There is no law that says you must plant in a straight line or a separate space! Forget the stakes and twine; plant where you want to! Use companion plants where they will do the most good!
Keep up with your maintenance. Weed so seedlings aren’t shaded out or their nutrients used up.
If you have lots of seeds, over planting is an age old practice. Plant too, too many, then thin them with tiny pointy scissors, aka harvest the young, and eat ’em! Young radish sprouts, teeny carrots – for you and your pup, beets, cilantro, arugula, onions, little Brassicas of all kinds are wonderful in a salad! If they get a little big, steam them or add to stir fries and stews. Another way to do it is plant flats of lettuces, Mesclun mixes, and mow them! Tender baby greens! They will grow back 3, 4 times.
Have it in the back of your mind what summer plants you will be wanting, where you will plant them. For example, plant more permanent plants like a broccoli you will keep over summer for side shoots (like All Season F1 Hybrid), or a kale that will keep on going, where they will not be shaded out by taller indeterminate summer tomatoes.
October is the last of Seed Saving time for most of us. Make notes on how your plants did, which varieties were the most successful. These seeds are adapted to you and your locality. Each year keep your best! Start sorting and labeling seed baggies on coming cooler indoor evenings. Store your keepers in a cool dry place for next year’s plantings. Generously gather seeds for upcoming January Seed Swaps!
Santa Barbara’s 16th Annual Seed Swap is January 26 2024 The last Saturday of January every year is National Seed Swap Day! Look in your area for an event, and if you don’t find one, collaborate with your neighbors, local garden clubs or permaculture group to get one going!
Plant gift plants or bowls or baskets for the holidays now! Make Lavender sachets! Put ribbons on some of your seed jars gifts. See Wonderful Gardener-Style Holiday Gifts!
Take a deep breath of this fine fall weather! Happy Gardening!
Updated annually
Love your Mother! Plant bird & bee food! Think grey water! Grow organic! Bless you for being such a wonderful Earth Steward!
The Green Bean Connection started as correspondence for the Santa Barbara CA USA Pilgrim Terrace Community Garden. Both remaining Santa Barbara City’s community gardens are very coastal. Climate is changing, but it has been that during late spring/summer we are in a fog belt/marine layer area most years, locally referred to as the May grays, June glooms and August fogusts. Keep that in mind compared to the microclimate niche where your veggie garden is.
Friend on Facebook! Subscribe at top right on this page!
Top^
Feeling inspired? Get the word out! Sharing is caring ~
Posted in 2023, Acidic, Amendment, Aphids, Aspirin, Biodiversity, Bolt Resistant/Slow Bolting, Bolting, Brassicas, Broccoli, Cabbage Butterfly, Carrot, Cercospora leaf spot, Chard, Cilantro, Companion, Compost, Cover crop, day length, Design - Layout, Disease, Fall, Freeze, Garden, Gophers, Green Manure, Harvest, Kale, Legumes, Lettuce, Living Mulch, Manure, Mildew, Mulch, October, Peas, Pests, Photoperiodism, Photoperiodism, Plant, Pollinator, PreSprout, Rain, Restoration, Season, Seed Saving, Seeds, Snails & Slugs, SoCal, Soil, Succession, Temperature, Transplant, Understory, Varieties, Veggies, Water, Weather, Winter, Worm Castings | Tagged 2023, acidic, Aphid, biodiversity, Bolt, Brassica, carrots, cilantro, Companion, Companion Plant, Compost, Cover crop, Design, Fall, Fall Starts, Garden, Garden Design, gopher, Harvest, Inoculant, Island Seed & Feed, Jane Shellenberger, Kale, Mulch, October, Peas, Pest and Diseases, Plant, Pollinators, PreSprout, Rancheria Community Garden, Santa Barbara CA, Seed Swap, SeedSaving, SoCal, Soil, Soil Prep, Soil Restoration, transplants, Varieties, Veggies, Watering, Winter, Worm Castings | Leave a Comment »
September 1, 2023 by Cerena Childress

This veg garden is at Gaia Retreat, in Bundjalung Country, Brooklet, Australia. They are approaching vernal equinox now, while we in SoCal are soon upon autumnal equinox. Their cool plants are finishing while we are starting ours! This spot offers a fine shed, a native bee home low on the pole and a three floor bird apt at the top!
This month I thought you might enjoy some images of garden tools in situ from over the years at Pilgrim Terrace and Rancheria Community Gardens! Some are quite unique, get you thinking! Work easy, get the right tool for the right job! Improvise, have fun! We are Sowing the Future!
Share your gardening stories! Community of Gardens, a digital archive hosted by Smithsonian Gardens, is gathering gardening stories from gardeners and community gardening enthusiasts. Your participation can help others to better understand the meaning and value of gardens to American life – today and in the future. Submit your images, videos, and stories to their archive by emailing communityofgardens@si.edu or sharing your stories through their website.
If you or a friend would enjoy gardening at a community garden, please join one! September is a classic time to start fall plantings! Install gopher wire protection first! The gardeners will be delighted to meet you, share friendship, the great outdoors, and garden craft!
It’s definitely fall now. In coastal Santa Barbara we have had mixed cool and hot weather and 2 helpful rains due to unusual Southern storms. If you love your summer plants a lot more than winter plants, you can take a chance if it looks like some steady hot fall weather. Plant that last batch of bush beans, even pole beans, and early cold tolerant determinate bush tomatoes. More likely it will be better to get those winter plants going a few days after the heat, like mid to late September, otherwise there may be early bolting. That will give you time for second plantings November/December. If late August was hot where you garden, and so is September, it will be a tad challenging getting winter seeds and starts going. Extra watering will be critical; shade may be needed for seedlings.
Many of you that had HOT August weather haven’t gotten transplant starts going, but have started seedlings at home. Often, rather than planting out your seeds garden wide, it would be easier to plant them in a shaded patch for transplant later. Caring for them will be all in one place, easier to cover if needed to protect them from the heat. See the details: Veggie Garden Nursery Patch Many veg gardeners are still waiting until the bolting time passes in your area.
SoCal areas that had flooding will need soil remediation. Here are some tips for remediation and recovery if you are in extreme conditions. Call in Permaculture teams to make the best new beginnings. Even many of them have never been so challenged and are learning as they go. Take time to work with the team as much as you can. Get connected with experience leaders. Collaborating is productive.
Last Harvests are being collected and stored, seeds saved! See more about SeedSaving! How to Save Tomato Seeds!
Many have been prepping their soil as various summer plants are finishing and space becomes available! When you do, make your fall planting beds extra yummy! Add 5-10% compost, and, if you have them, add 25% worm castings – seeds germinate better and plants do especially better with worm castings! Manure amounts depend on the type of manure and which plants. Rabbit poop manure can be used immediately with no composting – get some at the shelters! We want rich soil for big winter plants so they can make lots of those marvelous leaves for greens too. Winter plants like brocs, collards, cauliflower, cabbage and chard, are heavy producers, need plenty of food, but remember, winter is cooler and slower. Reduce you feeds potency by about 50%. Know that Carrots need little if any manure. With too much food/water they grow hairy, split /fork. Peas are legumes and usually feed themselves! Smart Manure Choices More winter Soil tips!
It’s BRASSICA time! They are the mainstay of winter gardens! Their nutrition can’t be beat! Kale’s the Queen! Broccoli, Brussels sprouts, Cabbages, Cauliflower and Collard greens! Then there are all the mini Brassicas, the fillers and littles – arugula, bok choy, mizuna, kohlrabi, mustards, radish, turnips. Rather than plant just six packs of transplants, put in seed at the same time when possible and stagger your plantings of the large Brassicas. Rather than all six cauliflower coming in at once, plant two now, two later and so on. Adjust that, of course, if you have a large area available to plant and a lot of people to feed! Another way to do it is to get varieties with early, middle and late maturity dates and plant them all at once! Plant both mini and monster cabbages at the same time! Minis come in sooner, while waiting for the monsters! Successive plantings mean a steady table supply.
There’s kale and there’s kale! This truly tasty purple curly leaf kale image is by Steve!
 Finicky, or bored, eaters may enjoy a selection! Fall veggies come in lots of shapes and colors! Kales are renowned for their beauty and varieties – classic curly leaf, plain and simple flat leaf has less aphids that are easy to hose away), Red Russian, Elephant, Red Bor that is really purple are just a few! Cauliflower comes in traditional shape and spiral, classic white plus yellow and purple and green! Get seed packs of them all and mix them together! Carrots already come in color mix seed packets! Circus Circus is a fun choice, especially when your kids are planting! Thumbelinas are faster producers for excited kids. Beets are terrific fun! Yellows, reds, pinks, whites and Chioggias (concentric circles of colors)! You can get them in rainbow mixes just like getting rainbow chard mixes! Rather than have your finicky, or bored, eater say no, open up that catalog or take them shopping at the nursery and let them pick what they would like to try!
More ‘littles,’ understory veggies that love cooler weather are beets, carrots, celery, chard, cilantro, leeks, spinach and especially lettuce – now is the time for tender butter leafs and heading lettuce! If you anticipate a hot Sep, plant more heat tolerant lettuces.
The SoCal winter legume is PEAS! Peas are like beans, our summer legume; they come in bush and pole types. And those come in three main types – English shelling, eat-’em-whole snap peas and flat China/snow peas! They are super easy to sprout! Definitely plant some every month or so. They don’t live all season long. When they are done, they’re done. It is true that picking peas, just like picking beans, is labor intensive. I eat a lot of mine before they get home, so I don’t mind. Bush peas come in first and pretty much all at once; pole come on later and continue to produce. On the first round it makes sense to plant both at once! If you don’t have time to do seeds, and aren’t wanting varieties nurseries don’t carry, just wait and when they arrive, get six packs! Transplants are always stronger than tiny seedlings. But do cover your plants if they show signs of being pecked by birds! That’s little V shaped nibbles on the leaves. Aviary wire is your best cover choice because it allows pollinators access and it is durable. You can clothespin or use clips to close/open for harvest and plant care access.
CARROTS! Compost, yes! They want easy-to-push-through soil. Manure, no! Makes them hairy and they fork. And over watering, irregular watering, can make them split or misshapen. Build your beds up so they drain well, are above the coldest air that settles low down. PEAS! The same. Compost to keep the soil loose and have water holding capacity for these short rooted green People. This winter legume makes their own Nitrogen, so feed only lightly if at all. Decide where both of these will be planted and amend accordingly. Conveniently, Peas are enhanced by Carrots! Peas are done well in a shallow trench about 4-6″ away from and below your carrot row. the pea trench water can also water the carrots! One way to do it is install your pea trellis, plant peas close to it and carrots just a bit away from it on the other side of the trellis.Start your carrots as much as 3 weeks to a month before you start your peas so the Carrots will be up and helping.
If your ground hasn’t been planted to peas before, or if you don’t know if it has, it’s more than wise to use peas specific inoculant at planting time. Seeds may be unable to start, if there isn’t ample Rhizobium leguminosarum, a nitrogen fixing bacteria, available to them. The bacteria ‘infect’ your plants and cause them to make the Nitrogen nodules they need to supply their Nitrogen for quality survival. Without those nodules, they are feeble, struggle and produce little. Very sad. See more and how to use the inoculant at Peas!
Presprouting your Peas is easy and it’s fun to watch them come to life! Fold a paper towel in half on a plate. Open and spritz half the towel with water. Lay on your seeds about an inch apart. Cover and spritz the paper towel cover until good and wet. Put them in a warm place ie top of fridge, out of sunlight. Check them about every 6 hours; keep them moist. Water well at bedtime so they make it those 8 hours. Take them to work with you if it’s only you doing the parenting. While you are waiting, put up their trellis if they are pole peas.
When the little sprout is 1/4 to 1/2″ long, depending on temps it takes 2 -5 days, gently dip them in your inoculant slurry, put them in the ground sprout (root) down, right at the foot of that trellis. Gardeners vary greatly on how they space those pealets. 1″, 2″, 6″. There is good reason to leave a little more space. More air circulation makes for less mildew later that Peas are quite susceptible to. You can put the pea practically at the surface! But do cover it a bit so it doesn’t dry out. Next thing you know, you will have little plant sprouts coming up! The nice thing about presprouting is you know if you’ve got one! If a seed doesn’t sprout, you won’t be wondering like as you would had you planted it in the ground. That’s why some gardeners always presprout their Peas. If you plant early fall there may still be some warm days. Be prepared to give them some shade if they need it. They are short rooted and, and in those conditions, may need water daily or even twice daily.
If seeds aren’t your thing, transplants will soon be along at your nursery…
See more on how to pick the best varieties for you! For strong mildew resistance, more, take a look at Cornell’s super plant by plant Veggies Disease Resistant List!
Onions For the biggest, sweetest harvests, late summer and early fall are the prime times to sow seeds of short- or intermediate-day onions. Fall-sown short- and intermediate-day onions tend to yield more and are larger and sweeter than those seeded or transplanted in early spring.

Varieties that do better in winter are long beets like Cylindras – at left, long radishes like Daikons, pretty China Rose and handsome Long Black Spanish! Plant small beets like Dutch Baby Ball for quick beets while your Cylindras are growing twice to three times bigger! All about Beets, So Sweet!
 Companion planting combos make a difference! Carrots enhance peas, onions stunt peas. Late summer plant the carrots on the sunny side at the feet of finishing pole beans. The Carrots will be up for when the beans are replaced by winter peas! Combos can use space wisely! Carrots grow down, peas grow up, perfect! Cabbage babies need to be planted 12 to 28″ apart! A healthy plant will take up much closer to that 28″. They take a long while to grow, head, head tight! While waiting, plant lettuces that repel cabbage moths, or other small fillers, that mature sooner, in the space between the Cabbages. You can do this at home amongst your ornamentals, and/or in containers too! Fillers can be onion/chive types, beets. Short quickest growing winter radishes can be among the long slower growing carrots among the slowest growing, your cabbages. Cilantro makes brocs grow REALLY well, bigger, fuller, greener! Research has shown there are less aphids when you intermingle different varieties of brocs! See more!
No need to plant blocks or rows of smaller plants, unless you want to for the look. Biodiversity works better and uses space more wisely! Scatter them about on the sunny side between larger plants as an understory – living mulch! If it happens to be flowers, they bring pollinators right to your plant! Plant different varieties to keep your table exciting. Don’t plant them all at once, but rather every week or two for steady table supply. If you would enjoy a quick payback for your table, select the earliest maturing varieties.
If you have lots of seeds, over planting is an age old practice. Plant too, too many, then thin them with tiny pointy scissors, aka harvest the young, and eat ’em! Young radish sprouts, teensy carrots, little Brassicas of all kinds are wonderful in a salad! If they get a little big, steam them or add to stir fries and stews. Another way to do it is plant flats of lettuces, toss an entire packet of seeds in a small spot, Mesclun mixes, micro greens and mow or thin them! Tender baby greens! If mowed, they will grow back 3, 4 times.
When planting in hot fall weather, plant your outdoor seeds a tad deeper than you would in spring; soil is moister and cooler an extra inch or two down. It’s the law to keep them moist. If you plant successively for steady fresh table supply, plant a batch in September, again in October. Days will shorten and start cooling, but early fall you are taking advantage of a faster start because your plants will grow quickly in the warmer weather now than later on. September plant from seeds & transplants if you can get them, October from transplants. Be careful which plants to plant ~ see bolting! Also see Short Day, Long Day, Day Neutral Plants – Photoperiodism! Or ask a knowledgeable nursery person who has a working knowledge of these two items.
Winter Feeding Lettuces like a light feed of chicken manure cultivated in. All the big winter plants are heavy producers – lots of leaves, some of those leaves, ie Baker Creek’s 1000 Head Kale, are monsters! Cabbages are packed tight, leaf after leaf! They may need a light feed. Remember, it’s cooler now, so their uptake is slower, so give them liquid feeds, teas, half strength, and things easy for them to uptake.
Keep letting your strawberry runners grow for Oct harvest. Store them in the coldest part of your fridge for them to get chilled. Plant in January. OR. Let the babies grow through winter and get the earliest spring berries! Very carefully remove old parent plants. If the roots are entangled, cut the parent plant off just below the crown. If you replace your strawberries annually, as commercial growers do, in Santa Barbara area try Seascape, bred locally at UCSB. Seascapes are big fill-your-palm plentiful berries, firm, tasty, store well, are strawberry spot resistant! They have strong roots that gather plenty of nutrition. Plan ahead! Call your nursery ahead, earliest January, to get the date bareroots arrive – they go fast! Seascapes and other varieties are available as transplants later if you miss the January window. If you will be planting bareroot berries in January for April eating, remove old plants.
Some gardeners like precise and efficient organization. Others like every square inch planted like Food Forests. Some of you carry your layout plan in your head, others draw and redraw, moving things around until it settles and feels right. Others let it happen as it happens… Do add a couple new things just for fun! Try a different direction. Add some herbs or different edible pollinator flowers. Leave a little open space for surprises! Leave some space for succession planting. Stand back, take a deep breath and ask yourself why you plant what you plant and why you plant the way you do. Anything been tickling the back of your mind you are curious about? More about Designing Your SoCal Winter Veggie Garden! Consider a Food Forest Guild!
Soil is always first in garden care! An old adage is ‘Feed the soil, not the plants.’
Winter plants need different care than greedy summer production plants, growing fast heavy feeders. Special soil tips for your winter plants! Almost all soil can do with some compost. Some say the most important soil tip of all is Gopher wire prevention, LOL, and I can tell you the misery it is to lose a prime plant in full production that took months of growing and TLC to get there. Grrr! See Gopher prevention
The right soil! Many veggies like slightly or more acidic soil! Use that azalea/camellia compost! Acid tolerant veggies: beans, broccoli, cabbage, turnips, carrots, cauliflower, lettuce, celery, cucumbers, garlic, onions, corn, sweet peppers, pumpkins, winter and summer squash and fruits tomatoes, strawberries, raspberries, blueberries and many herbs. Acid loving veggies are radish, sweet potato, parsley, peppers, eggplant, potato, rhubarb. Note that there are varying opinions on these choices. Some say some of the acid tolerant veggies prefer acidic soil! Please see Sasha Brown’s post for more details, pH and tips!
Per GardenGuides.com there’s no reliable way to guess about or estimate soil pH, so having the soil tested is the best approach to ensuring that your vegetables have the proper acidity levels. The Cooperative Extension System offices in your state can help with this. My note: If you have a small plot like our community garden 10X20s, it may not help to soil test because there is so much variance within even a couple feet, but you can do it and see! You can get a pH meter if you want only pH readings. Or you can get a soil test kit that tests for soil deficiencies and pH! Look up Best Soil Kits Compared for the year. This 2022 KTLA link gives you some quick ideas about how to select a soil test kit.
Here are lists of veggies and fruits pH tolerance. 7 is the neutral point. I was surprised at the acidic tolerance of the majority of plants! See Acu>Rite’s site for shrub and tree pHs. These pHs are not to be confused with the alkalinity/acidic qualities of the veggies and fruits when we eat them! See chart!


You can add tasty items to the planting holes too! Some plants might like a bit more manure. Add a handful of bonemeal for blooms at 2 to 3 months, and also add bat/seabird guano for continued later blooming at 4 months! It takes that long for it to become available to your plants. A handful of powdered milk is for disease prevention. Worm Castings are super valuable, give immunity and increased water holding capacity! You may have some specials of your own depending on the soil in your area and which plant you are planting there. Some gardeners spritz the roots and planting hole with Hydrogen Peroxide to add oxygen, help plant roots absorb nutrients from the soil and more!
If you need to skip a beat, take some time off from the garden, let it rest, but be smart and let nature rebuild your soil while you are resting!
- You can cover it deeply with all the mulch materials you can lay your hands on up to 18′ deep. Believe me, it will settle quickly to less than half that height in a few days to a week depending on temps! Let the herds of soil organisms do their work over winter. That’s called sheet composting or composting in place, lasagna gardening – no turning or having to move it when it’s finished. All you have to do is keep it moist. If you live in a windy area you might cover it. If you are vermicomposting, have worms, add a few handfuls to speed up and enrich the process. Next spring you will have rich nutritious living layers of whole soil ready for planting for no work at all! Yarrow and Comfrey leaves also speed composting. Lay them in and on.
- You can plant an area with green manure. Laying on lots of mulch is a ton of work when you do it, just gathering the materials can be a challenge. Green manure takes some work too, but it has awesome results as well. You broadcast a seed mix of legumes and oats and let them grow. Bell beans, Austrian peas, vetch and oats from Island Seed & Feed in Goleta is an excellent choice. Legumes gather Nitrogen from the air and store it in nodules on their roots! N is the main ingredient your plants need for their growth! The oat roots break up the soil. They dig deep and open channels for water and air flow, soil organisms. Cover Crops For more details see Living Mulch
Here’s the schedule:
- Oct 1 plant your living mulch/cover crop – put this on your garden calendar! Bell beans take this long if they are in the mix or are your choice. Use the specific FRESH inoculant to produce the Nitrogen nodules on the legume plants.
- About Dec 1, chop down/mow, chop up your living mulch and let it lay on the surface. Studies show there is more nutrition if it is let to lay before turning under. Keep your chopped mulch moist, not wet, until it is tilled in. Being moist aids decomposition. If Bell beans are in the mix, chop when it first flowers or the stalks get too tough to easily chop into small pieces.
- Mid Dec till in your living mulch for mid January bareroot planting. The little white balls on the roots are like a beautiful little string of pearls. Those are the Nitrogen nodules legume plants make! They don’t release their Nitrogen until the plant dies. That’s why you don’t till the mulch in until 2 weeks go by. If there are no nodules, you either forgot to use the inoculant or not enough. The whole purpose for growing the legumes is for these Nitrogen rich nodules that restore your soil, so it is critical to use that inoculant! When you turn the chopped bits under, also turn in the right compost at the same time! If your soil needs more water holding capacity, choose compost with slightly chunkier bits. Add worm castings for more water holding capacity if you have enough. Otherwise, save the castings for the planting holes.
If you aren’t planting bareroot berries in January, you can plant your soil feeding cover crop in September, just be sure you have enough time for when you plan to plant in spring. However, if you wait until November the soil is colder and the process takes longer.
Pest and Disease Prevention Drench young plants, ones you just transplanted, with Aspirin solution to get them off to a great start! Drench your seedlings when they get up a few inches. One regular Aspirin crushed, 1/4 C nonfat powdered milk, heaping tablespoon Baking Soda, 1/2 teaspoon liquid dish soap (surfactant), per gallon of water. Aspirin triggers a defense response and stimulates growth! Powdered milk is a natural germicide and boosts the immune system. Be sure to get the under sides of the leaves too!
- Brassica pests! Lots of ants and lengthwise curling leaves are the giveaways for aphids. Aphids carry viruses. Aphids come in green, black, red, yellow, brown or gray. Avoid over watering that makes for soft plants, tender leaves that aphids thrive on, and ant habitat. Spray the aphids away, make the ants leave. Get up under those leaves, and fervently but carefully do the tender center growth tips. Do it consistently until they don’t come back. Cinnamon works sometimes and other times not at all. Boo. But when you are starting seedlings it prevents molds and damping off. Sprinkle it on the soil in your six pack. Doesn’t hurt to get it on the leaves. Get it in big containers at Smart and Final/bulk stores. Reapply as needed. There are other spray mixes that get rid of those aphids. Water and Vinegar, or hydrogen peroxide, alcohol, a few drops of simple dish soap. If you want to spend more money, use Neem Oil. Soaps, neem oil, and horticultural oil kill only aphids present on the day they are sprayed, so applications may need to be repeated. Plant garlic and chives among your Brassicas! Their strong scent repels aphids. IPM re Aphids
Most of all, generously plant CILANTRO among your Brassicas! It repels aphids as well as attracting bees and beneficial insects!
- Later on, the most prevalent disease problem is mildew. Give your plants some room for air circulation, feed and water less so they don’t get so soft. It is much harder to deal with mildew once it has started. Better to do preventative treatments of the Aspirin Solution.
September is still Seed Saving time for some areas and some plants. Make notes on how your plants did, which varieties were the most successful. These seeds are adapted to you and your locality. Each year keep your best! Store your keepers in a cool dry place for next year’s plantings. Generously gather seeds for upcoming January Seed Swaps! If your area doesn’t have a seed swap, start organizing one!

Don’t forget winter food for our pollinators! Borage is a beautiful cool season herb with edible flowers, blue for bees! It has a large 3 to 4′ footprint, so allow for that or plan to keep clipping it back. It is a helper companion plant, so when possible, plant it right in the middle of your other plants! See more about Borage! What flower colours do birds and bees prefer?
Plant Sweet Peas for Christmas bloom! Plant gift plants or bowls or baskets for the holidays!
Have you put up your Greenhouse yet?! Get going! DIY Hoop houses are quickly built, inexpensive and do the job admirably! See also Greenhouses in Climate Emergencies. You can start more seedlings, overwinter sensitive plants – eat tomatoes in December! A greenhouse may be perfect for you – the right size, easy to maintain!
Have fun! September gardens are a magical time of creativity and transition!
Updated annually
Check out the entire September 2023 Newsletter!
SoCal Fall/Winter Veggie Soil Tips for Delicious Returns!
Super Fall, Winter Veggie Varieties, Smart Companion Planting!
Bolting aka Running to Seed! Causes and Prevention!
Love Kale! Beauty, Super Nutrition, Easy to Grow!
Taming Your Butternut, Waltham, Winter Squash!
Upcoming Gardener Events! Get your lodgings for the 10th Annual National Heirloom Expo, Ventura CA Sep 12-14! Don’t miss this superlative event! 44th American Community Gardening Assn Annual Conference Sep 27-30! Santa Cruz Permaculture is in full swing – get your Certificate and MORE! Lane Farms Pumpkin Patch opens Sep 30! Jan 26, 2024 FREE 16th Santa Barbara Community Seed Swap!
SUBSCRIBE to the entire newsletter! Friend or Follow on Facebook!
Love your Mother! Plant bird & bee food! Think grey water! Grow organic! Bless you for being such a wonderful Earth Steward!
The Green Bean Connection started as correspondence for the Santa Barbara CA USA Pilgrim Terrace Community Garden. Both Santa Barbara City’s remaining community gardens are very coastal. During late spring/summer we are often in a fog belt/marine layer most years, locally referred to as the May grays, June glooms and August fogusts. Keep that in mind compared to the microclimate niche where your veggie garden is. Bless you for being such a wonderful Earth Steward!
^Top
Feeling inspired? Get the word out! Sharing is caring ~
Posted in 2023, Acidic, Alkaline, Amendment, Aphids, Aspirin, Baking Soda, Bees, Bolt Resistant/Slow Bolting, Brassicas, Broccoli, Bush, Cabbage, Cilantro, Community Garden, Companion, Compost, Cover crop, Design - Layout, Disease, Disease Resistant, Fall, Feed, Foliar, Garden, Greenhouse, Harvest, HOT, Inoculant, Kale, Living Mulch, Manure, Mildew, Mulch, Mycorrhizae, Nonfat Powdered Milk, Peas, Pests, Photoperiodism, Pilgrim Terrace, Pollinator, Rancheria, Remediation, Seed Saving, Seeds, September, SoCal, Soil, Temperature, Understory, Varieties, Veggies, Water, Weather, Winter, Worm Castings | Tagged 2023, Aphids, Brassica, broccoli, Bundjalung, cabbage, cilantro, Community Garden, Companion, Compost, Cornell, Diseases, Fall, Fall Soil Prep, Fall Starts, Feeder Roots, flood, Foliar Feed, Gaia Retreat, Garden, Garden Tools, grow, Harvest, heat tolerant, High Temps, HOT, Inoculant, interplant, Island Seed & Feed, Kale, mildew, Mulch, NATIONAL HEIRLOOM EXPO, Nursery Patch, Peas, Permaculture, Pests, phosphorus, Pilgrim Terrace, Plant, Rancheria Community Garden, SeedSaving, September, Sidedress, Smithsonian Gardens, SoCal, Soil Restoration, Summer, Understory, Varieties, Veggies Disease Resistant List, Winter amendments, Winter Soil, Worm Casting | Leave a Comment »
August 1, 2023 by Cerena Childress

Tasty image from Fresh off the Grid! Drying is the most ancient method of food preservation known to man. And it is efficient!
Stop giving away your zucchini! Those were the words that got me! I dusted off my dehydrator and made zucchini chips, which I just finished eating!
Dehydration is the healthiest, easiest and most economical way to preserve foods. Besides retaining nutrition if done right, it is safe! Dehydrating your food reduces its moisture content to between 5 and 20%. Within that range, the yeast and bacterium that cause food to decay can’t survive. Your food stays well preserved. Dehydrating preserves nutrients and vitamins in foods. Natural flavors, sweetness and aromas of your food are condensed, and so are sugars! It’s tempting to overeat!
Dried foods are far healthier than high-fat snacks and high-sugar candies that are filled with chemical preservatives. Every step is per your personal needs! No sugar or salt, gluten, fat, but more protein?! You got it just as you want it! They use little to no packaging. They are healthier for the planet and save money, especially if you grow them yourself organically! Large items dry to a fraction of their original volume, saving space, especially if you are hiking or backpacking! Saving your own gives you a much bigger range of foods on a trip, at a huge price difference!
Dry for healthy munching, lightweight snacks for school, bike ride, camp or trail! Sun dried, hung from the rafters, or dehydrator style, from figs to strawberries, fruit rolls to kale chips, herbal flavorings and remedies, carrots to ‘maters, what a smart choice!
If you are an off grid type or live in small quarters, drying reduces the storage size significantly compared to canning or freezing! Dehydrated food is easy-to-carry, lightweight healthy food on long road trips, hunting trips, and backwoods camping or canoe trips. Food drying may provide a means of livelihood for your family or community as an easy business to increase your income.
They do take time to dry! Some you can leave all day and they will be ready to store when you get home, or put them on when you go to bed and be done at breakfast! Before you start, check this handy dehydration chart from the University of Georgia’s Extension Studies Program. It includes a long list of popular foods for dehydration. Cooler days, more humidity, extend the amount of drying time needed.
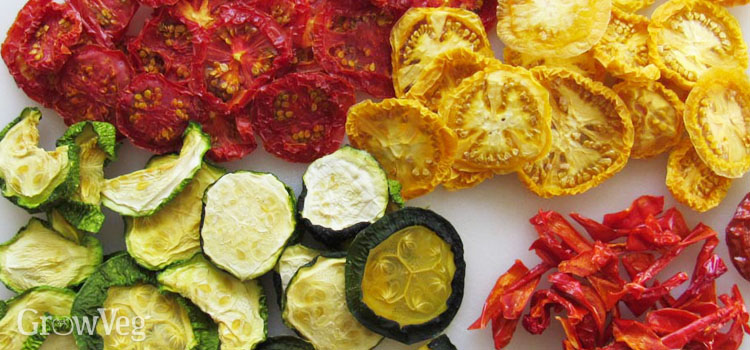
What can you dehydrate? Look at this amazing list!
- Fruits (citrus, apples, bananas, apricots, peaches, pears, cherries, raspberries, blueberries, cranberries, grapes) for eating as snacks or chopped in granola and trail mixes, or dried as purees for fruit leather.
- Vegetables ( beets, carrots, cabbage, mushrooms, onions, peas, okra, beans, lentils, rhubarb, squash, zucchini, tomatoes, kale, potatoes!) for adding to soups, stews, and backpacking meals.
- Grains, rice, and pasta
- Meat and fish (ground beef, chicken, or turkey; sliced meats; cured meats; fresh fish; beef jerky) for adding to backpacking meals or storing for soup and stew ingredients.
- Nuts, seeds (walnuts, hazelnuts, almonds, pecans, macadamia) after soaking or sprouting, to make them more digestible.
- Sprouted grains (rice, buckwheat, barley, quinoa, amaranth) to preserve nutrients and to store for flours, granolas, and baking.
- Sauces (that are fat, dairy, and egg-free)
- Herbs (oregano, basil, parsley, dill, fennel, mint, lemon balm, hyssop, cilantro (seeds too for coriander powder)) for later use in teas, baking, and cooking, medicinal purposes.
- Crackers, breads, and granolas for raw food diets.
Of course there are things that don’t dehydrate well…and avoid store-bought items containing a lot of preservatives or additives that they tend to be filled with chemicals, fats, sugar, and other useless or harmful ingredients. Dehydrating some things makes them taste bad or tasteless, destroys their nutritional value causes them to be unsafe, don’t last long enough.
- Avocados, fatty meats, butter, nuts – too much oil/fat, don’t store well, go rancid more quickly
- Olives – bad taste, too high in fat
- Eggs, Dairy, such as milk, butter, cheese due to the high risk of food poisoning. Use powdered milk.
- Store bought condiments
- Sodas
- Juices – what?! Freeze instead
Little particular tips!
Use largest zucchini for chips. They dry small!
Be creative, experiment with your cuts! Make sticks, slices, cubes, diagonals, thick, thin!
Experiment with spices, cheeses, dips!
Use different temperatures for dehydrating different foods.
Retain their Natural color and nutrition!
- Spray Pears, Bananas, and Apples with lemon juice
- Predry mushrooms a bit first. Rinse in water before dehydrating, so they will retain most of their flavor and nutritional value.
- Blanch or steam leafy greens like kale before drying
- Put Blueberries in boiling water, 15 seconds, to crack their skin. Otherwise they look ‘pale and limp.’
- Steam or blanch a low-acid food before you dehydrate it.
- Fruit leathers can take forever. Each fruit has a different recipe, so don’t try to do things in a one-size-fits-all fashion.
Pros and Cons of Drying Methods
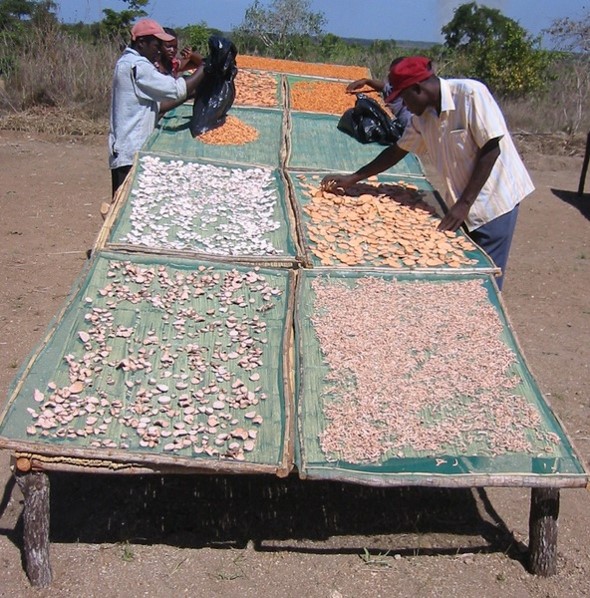
Study on preservation of Vitamin A on solar dried Sweet Potato in Uganda and Mozambique. They found it did not greatly affect retention of vitamin A, but storage did. In fact, after four months of storage, up to 70-80% of the vitamin A in the sweet potato can be lost. Natural Resources Institute
If you have dry weather and lots of hot sun, grab your thermometer and let’s go! The high sugar and acid content of fruits (includes tomatoes) make them safe to dry in the sun. Vegetables and meats are not recommended for sun drying.
Sundried, solar – dry food for free year after year depends on where you live! A 3 to 4 day minimum temperature of 86°F is needed – can be hard to predict. Here in coastal Santa Barbara CA, we often have summer marine layer that is cool and moist. As of July 23, our July 2023 weather has topped out at 78°, a possible 80 expected. We have had exactly ONE all sunny day. Each time 80s weather has been predicted, it hasn’t happened. The higher foothills may have been different, you may have a hot spot…but our ocean side temps have been low, moist and are unpredictable.
A note about racks: Per U of Georgia, the food safe screens are stainless steel, Teflon coated fiberglass or plastic. Avoid screens made from “hardware cloth.” This is galvanized metal cloth that is coated with cadmium or zinc. These materials can oxidize, leaving harmful residues on the food. Also avoid copper and aluminum screening. Copper destroys vitamin C and increases oxidation. Aluminum tends to discolor and corrode. Most woods are fine for making trays. However, do not use green wood, pine, cedar, oak or redwood. These woods warp, stain the food or cause off-flavors in the food.
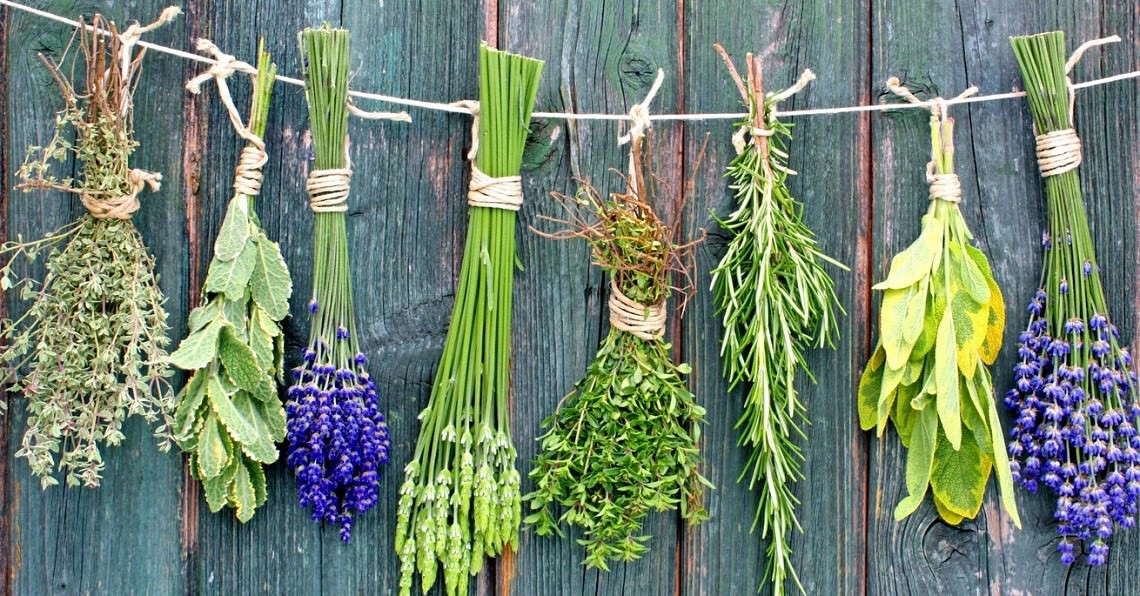
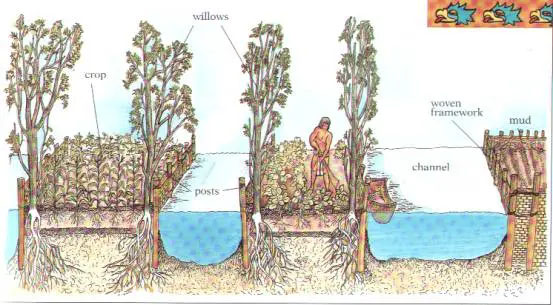
Air dried! Why do one when you can do bunches?! Use the window sill, the fence, hanging from the dry rafters, cardboard, an untreated piece of board or a rack on the dashboard if you are traveling. Depends entirely on humidity, where and when you are traveling! If you are camping, put your treasures in a safe place protected from ants, birds and predators, ie squirrels and raccoons.
Martha Piccolo makes good points! 1) There must be good air flow for food to dry properly. 2) To protect food from dust and insects, the food is placed inside paper bags with holes on the sides for proper air circulation. 3) Unlike sun drying, it does not depend on sunlight or enough heat. The only concern is humidity. Too much, and you have mold. 4) If tied in bunches, the tricky part is getting the ones in the center dry. Maybe spread them out on a rack for a final drying. Though pretty and strongly scented when you start, color and flavor typically fade as food dries.
Electric dehydrator, oven – Ovens can heat up your house, since you’ll need to prop the door open to let the moisture escape. If you don’t have a convection oven with a fan, it takes about two times longer to dry food in an oven, and it’s more expensive. But if it is all you have for now, it will do the job. You need a temp about 140°, so keep watch, have a thermometer or you may cook your food instead! The quantity you are able to process at once may be a lot less than a standard size processor. The greatest flexibility and dependability is using an electric dehydrator unless you have power outages or are entirely off grid. The biggest drawback may be the price, but there are little cheapies that do a pretty good job. They are easy to use, can dry a lot at once. If you need a bigger one, they are available. Since the pandemic, a lot more people are growing their own food, dehydrating their food, saving money! In SoCal, food for winter is less an issue since we grow all year, but dehydrating special foods for out of season treats, snacks without chemicals, is a wonderful choice! Take good care of yourself. Balance your diet in all seasons.
Electric Dehydrators! Look around, compare, compare, compare. I started by looking at electric dehydrators and ended up with a lot of questions!

Dehydrator prices vary a lot! They basically depend on what features are offered, the number and size of trays and temp settings available. See through types are an advantage.
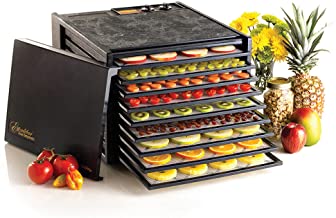
Excalibur, left, gets rave reviews from many for its good job, ease of use, fast dehydrating. 7.25.22 Home Depot’s 9-Tray Electric Food Dehydrator with Clear Door Adjustable Temperature Settings and 26-Hour Timer is $329.99. They come in black or white. Check on shipping fees, returns/guarantees.
Second choice seems to be, especially for off grid homesteaders, are Cabela’s large size options, and comparable good price. They offer a little home version, right, 3 temp settings, the Harvester 5-tier, on sale for $50 today, and a commercial 160 liter, 24 rack, commercial version, with bells and whistles, at $499.99 and a lot of options in between. The 80 liter on right was found for $299.99. With $50 off when purchased with club card.
Things to look for, compare with the Excalibur:
- 9-trays and 15 sq. ft. of drying space provides extra-large capacity
- Trays do not need to be moved or rotated during operation
- Adjustable thermostat 95° to 155°F, safe to dry meat for jerky
- Accurate temperature controls to dry fruits, vegetables, meats, flowers, herbs, pet treats, arts and crafts
- Recess-mounted ADA compliant
- Perfect for large families and gardens
- This unit includes flexible poly screen tray inserts to prevent foods from sticking to trays
- 7 in. fan, built in on/off switch, adjustable thermostat and a convenient 26 hour timer.
- [I think a see through glass door is an advantage…]
- Look for low to no fan noise
- Vertical-Flow Dehydrator VS. Horizontal-Flow Dehydrator?!
- Off gridder, Sarita Harbour, recommends: You might even find you could pick one up at your local small appliance store, a thrift store, through a local Facebook buy and sell group or even through your local online classifieds [and maybe on craigslist or Nextdoor?!]. She got her first dehydrator when her partner Dan ‘picked one up for $10!’ It was a game changer for them!
Sites say that dehydrators with temp choices are the Number 1 pick! Here’s why! Look at the range of temp variances best for each food! You can process items that need the same temps at the same time unless their flavors aren’t good together. Thanks for this list from Fresh off the Grid! Also they have excellent tips for how to choose a dehydrator!
95°F Herbs
125°F Vegetables
125°F Beans and Lentils
135°F Fruit
145°F Grains
145°F Pre-cooked Meats
160°F Meat, Seafood
165°F Poultry
Storage!
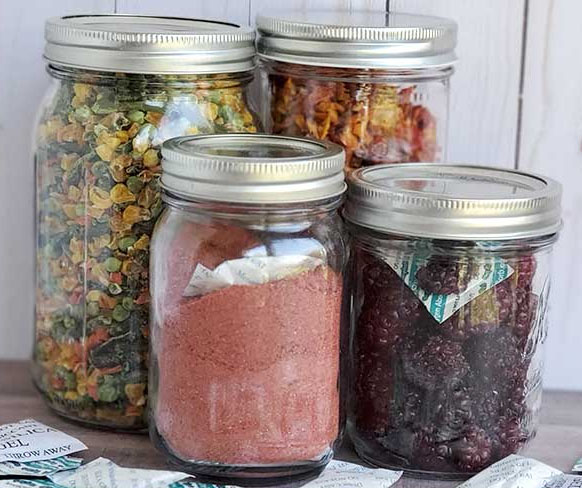
See more about those little packets at How to Store Dehydrated Foods at The Purposeful Pantry!
What you can’t eat all you have yourself, share fresh or in storage containers! It’s a super healthy gift for someone who doesn’t have a garden or can’t garden, for busy parents, singles on the go, schoolkids, when someone’s not feeling well, road snacks for when on a journey! So appreciated.
Store in a cool dark dry place with good ventilation to keep them cool! Food stored at 60F has twice the shelf life as food stored at 80F (source: NCHFP).
Safe storage time depends on how you store your dried food, whether they are completely dry. The dryer they are, the longer they can be stored. Recommended time is 4 months to a year or two, maybe 5. Vegetables have about half the shelf-life of fruits. Powdered last a lot less time than when in whole form.
First, cool completely. Warm food causes sweating which could provide enough moisture for mold to grow. Check in a couple days for any sign of moisture, or insects! Make sure they are still crackly dry. If not, back in the dehydrator they go! Then check them again later. We don’t want to have leathery or moldy food after all your hard work of growing and processing!
Get the air out! Darcy Baldwin says: Any airtight container will work – but test to make sure it’s truly airtight. If you can squeeze the sides and hear air escaping, it’s not airtight. Commercial glass jars with good lids, Tupperware, other plastic ware with good seals, lids with silicone inserts are fine. See a lot more details at Darcy’s page How to Store Dehydrated Foods at The Purposeful Pantry!
Pack food in amounts that will be used completely at the time. Every time a package is re-opened, the food is exposed to air and moisture that lower the quality of the food. If necessary, put it back in the dehydrator!
LABEL & DATE those babies! Powders are especially hard to tell apart, especially if they fade in storage. The date is important for use by info.
I am a total GrowVeg fan! Look at these delicious bits! I love their post Cooking With Dehydrated Vegetables; it takes things to the next step from my post here!
Wishing you tasty super high quality, space & money saving, nutritious dry foods!
This post is meant to inspire you to try! In no way is it an end all answer to your questions or questions you haven’t even thought of asking! Take a good look at this University of Georgia’s Extension Studies Program if you didn’t have time to before. Details! The issue of humidity is important when drying food, especially in places like Georgia, maybe in the damp NorthWest! If you are desert living, your drying time may be considerably less and solar one of your working choices!
Your questions and comments will be most appreciated by all of us! Thank you!
Updated 7.30.23
Love your Mother! Plant bird & bee food! Think grey water! Grow organic! Bless you for being such a wonderful Earth Steward!
The Green Bean Connection started as correspondence for the Santa Barbara CA USA Pilgrim Terrace Community Garden. Both remaining Santa Barbara City’s community gardens are very coastal. Climate is changing, but it has been that during late spring/summer we are in a fog belt/marine layer area most years, locally referred to as the May grays, June glooms and August fogusts. Keep that in mind compared to the microclimate niche where your veggie garden is.
SUBSCRIBE to the entire newsletter! Friend on Facebook!
^Top
Feeling inspired? Get the word out! Sharing is caring ~
Posted in Dehydrate, Garden, Harvest, Storage, Veggies, Zucchini | Tagged Air dried, Cabela dehydrator, Darcy Baldwin, Dehydrate, Drying herbs, Drying methods, Drying racks, Drying screens, Electric Dehydrator, Excalibur, Extension Studies Program, Food preservation, Fresh off the Grid, Garden, GrowVeg, Harvest, Martha Piccolo, NCHFP, Off Grid, Pros and Cons of Drying Methods, Purposeful Pantry, Retain Natural Color, Retain Nutrition, Sarita Harbour, Store Dehydrated Foods, Sundried, University of Georgia, Veggies, Wood trays, Zucchini | Leave a Comment »
August 1, 2023 by Cerena Childress
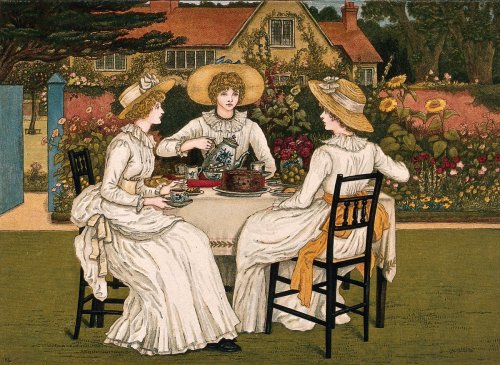
August is a lovely time for a garden party…a weekend breakfast or perhaps at the Full Moons Aug 1 and the Aug 30 Blue Moon! Or wear your loveliest summer hat at the Afternoon Garden Tea Party! By fabulous illustrator Kate Greenaway!
Veggies and Flowers, Birds & Bees! Summer is in full swing at Rancheria Community Garden! Please enjoy tasty images of beauty and bounty at Rancheria Community Garden! We are Sowing the Future!
Share your gardening stories! Community of Gardens, a digital archive hosted by Smithsonian Gardens, is gathering gardening stories from gardeners and community gardening enthusiasts. Your participation can help others to better understand the meaning and value of gardens to American life – today and in the future. Submit your images, videos, and stories to their archive by emailing communityofgardens@si.edu or sharing your stories through their website.
Across-the-Plot Gardening Tips
In SoCal, trees bloomed a month late; birds arrived a month later than usual. July has been coolish, lots of overcast and mildews, some plants never got full stride, some are ending a bit early. BUT, here at the very end of July, here in Santa Barbara, we got 84° the 25th with more heat predicted! In spite of that, get those winter plants going. That will give you time for second winter plantings November/December. When hot, it is a tad challenging getting winter seeds and starts going. Watering will be critical, 2 to 4 times/day sometimes. Morning water is best for your plants in general. It keeps the ground cooler during the day when your plant needs that protection. Shade might be crucial for seedlings; Mulch well. Don’t slack off; you will be glad for the earlier rewards later.
For those of you who planted early spring, many of your plants are now finishing. It’s time to save seeds from your best plants! Clear space and ready your soil for winter planting. Start mini nursery seed beds in your garden or for transplanting from local nursery starts as soon as they become available. If you haven’t installed gopher protection wire, this is the best time, as summer ends, fall begins!
Just getting started in a new garden, or you just love to plant?! Summer plants you can still plant for fall harvests are early varieties of determinate tomatoes, bush beans and corn. Today, 7.31, I saw six packs of peas at a nursery! Hope they are late summer hardy! Corn is more disease prone at this time though. Tuck in your year-round fillers, beets, bunch onions, carrots, summer lettuces, winter radish, to keep a colorful and delicious variety on your table.
ONIONS For the biggest, sweetest harvests, late summer and early fall are the prime times to sow seeds of short- or intermediate-day onions. Fall-sown short- and intermediate-day onions tend to yield more and are larger and sweeter than those seeded or transplanted in early spring. Onions have stupendous flavor and come in white, yellow, red!
In our hot Santa Barbara foothills and further south, watch your melons, big squashes and pumpkins for their best harvest time – when their stem is brown and dry, or they ‘slip’ off the vine. Let your winter squash harden. When you can’t push your fingernail in winter squashes, and the stem is brown, it’s ready to harvest. Hold off irrigating melons about a week before they will ripen so their sugars will concentrate. Harvest okra while it is small and tender – bigger is NOT better!
Keep up with harvesting so plants don’t quit producing. More about harvesting! As in July, keep up with watering just beyond that dripline, maintain trenches and berms, replenish mulch.
If you want to extend your season, give your favorite late summer/fall heavy producers a good feed to extend their harvests. Eggplants have large or many fruit, beans put out a ton of beans, tomatoes, big or small, are working hard, peppers can be profuse! They like a tad of chicken manures scratched in, bunny poop and straw (pick up at Animal Shelters), well aged horse manure and compost makes them dance with the faeries in the night time! If you are avoiding digging pests, use alfalfa meal, but avoid fish emulsion, manures and worm castings that attract them. Do this also if you planted late or have second rounds that are just beginning to bud and bloom. Compost is #1 because it gives a sustained feed and increases water holding capacity.
- First, pull back your mulch, scratch the soil lightly to break up any crusty area. Scratch only around your plant in spots, not the whole area. You want to leave the majority of the surface feeder root system intact because they are where your plant uptakes most of its nutrients, oxygen and water.
- Use a spade fork to open holes around your plant, water well.
- Lay on what you are adding on the surface out to just beyond the drip line. If your plant has grown beyond the basin you made for it, enlarge the basin to fit it.
- Mix your amendments in gently in a few spots or not at all, so as not to break surface feeder roots. Again, feeder roots not only supply your plant with food and oxygen, but also uptake water so needed in late summer in SoCal.
- Pull the mulch back into place, replenish if needed, replace if it is no longer doing its job.
- Water again, gently and slowly so not to wash the mulch away, to let the water and nutrients soak in. You can water once then come back and give them a third round of water to let it soak down a little deeper. The nutrients from the feed drizzle down and act like compost tea.
Fertilizers highest in P, Phosphorus – the P in NPK, keep blooming and fruiting optimum. Liquid fertilizers are absorbed easily and promptly, and there is no root damage. Now is the time you wish you had added mycorrhizae fungi, the good guys, at planting time, to enhance Phosphorus uptake! Aged organic compost makes for healthy roots that make their own natural organic phosphoric acid that helps break down compounds of calcium and phosphate into a usable, soluble form. It’s too late to add bonemeal or seabird guano. They take 2 and 3-4 months respectively to become available to your plants for blooming. They are another must add at planting time. NOW, Phosphorus from fish bone meal 3-18-0 is easily taken up! So is chicken manure 1.1-0.8-0.5, but the P is a lot less. Add chicken manure using the process as in the list above. Lettuces thrive on chicken manure feeds! Reminder, don’t use these if you have digging predators like raccoons, skunks.
- Peppers specially like a foliar feed of non-fat powdered milk (Calcium) and Epsom Salts (Magnesium & Sulfur). They also can use more Potassium. This time of year kelp meal is good source and releases quickly. If you have predators about, don’t get the kind mixed with stinky fish emulsion.
- Foliar feed all your plants with a super mixed tea – use NO manure in teas you will use on leaves you will eat, like lettuce! At the same time, for deeper root feeding, use a spade fork to make holes about your plant. Push it into the soil, wiggle back and forth a bit, then pour the rest of that tasty mixed tea down the holes. Replace the mulch and water well at soil level to a bit beyond the dripline.
A word to the wise. If your plant is done, it’s done. No amount or any kind of feeding will ‘help’ it. It’s nature. Thank it. Either save seeds or if it is clean, not diseased or infested, compost it.
Seeds are your last harvest! Allow your healthiest top producers to seed. Tie a ribbon on plants (at top and bottom or where you might grab it if in a weeding frenzy) or on fruits you want to save seeds from so you don’t accidentally harvest them too soon! Each year keep your best! Remember, these seeds are adapted and localized to you, your location, how you garden! Scatter some seeds about if they would grow successfully now! Or just scatter them about and when it’s the right time up they come, even if it’s next spring! Many seeds, especially self seeders, will come up quite well on their own, even the tiniest ones like Breadseed Poppy, chamomile and some lettuces! Some need Cold Stratification, overwintering in the ground, or some time in your fridge!
Save enough seeds for your own planting, for several rounds of planting across next year’s season, for replanting when there are losses. Save some to give away or share at the seed swap. Our 2024 Santa Barbara area Seed Swap is in January! If you are willing, take some of your extras to a local Seed Bank! While you are there, pick up some of your favorites and some new ones to try out! Keep the local races going. 2020 Note! As your plants come into seeding time, consider sharing them as soon as possible! “Little Free Seed Libraries” are Sprouting Up to Help Gardeners Share Seeds in Troubled Times. Take a look at some very clever and loving ideas!
Store your keepers in a cool dry place for next year’s better than ever plantings. See more about SeedSaving! How to Save Tomato Seeds!
After seedsaving, when your plants are done, let them go, compost if pest and disease free, start clearing space for fall soil prep. Bag up ground waste where plants have had disease or infestations and put it in the garbage, NOT in the green waste recycle.

Fall Soil Prep!
August is perfect time to ready your soil for the very first fall plantings, starting mid-August from seed!
At this time of year, seasonal change, before deciding how to prep your soil, decide what you will plant! Some plants are perfect this time of year and the next couple of months. See Photoperiodism! Know if your favored plants need regular or acidic soil. Make or amend accordingly for more bountiful harvests! Maybe put the acid lovers in a area of their own?
Designing your winter garden depends on your microclimate, seeds you have or can get, transplants you can get or grow, the amount of space you have, whether you will be growing a soil feeding leguminous cover crop. How you prep your soil depends on what your soil already is like, what your plants need. Many plants need slightly acidic soil. Some areas need more rich soil for high production winter ‘heavy’ feeders. Some want a little sand, others don’t want soggy feet. If you are planting seeds, do the seed beds first! Seeds germinate faster and healthier with worm castings. 25% is ideal. Be sure to protect this area from worm loving predators like raccoons or skunks. Check out Designing your SoCal Winter Veggie Garden! Think Big!
EMPHASIS! Some would consider the ultimate ‘soil prep’ to be installing GOPHER wire protection, LOL! Here we are at the turn of the season, a very good time to do the job. Water well and deeply each of 3 days before if your soil is hard deeper down. Test a spot first. Get a team of friends together and go for it! Appoint a watcher to play music, make sure everyone stays hydrated. Bring gloves, wear sturdy shoes, safe boots. You may not be able to do the whole area at once, but do what you can. You will be so glad you did! You can do it!
Cover crop soil restoration! You can plant herbs, Calendula, all sorts of things, but a Green Manure mix including lots of legumes and oats does the best. Legumes collect Nitrogen from the air, N being the number one element plants need for leaf growth! Know that Nitrogen fixing plants don’t pull nitrogen from the air on their own. They actually need help from a common bacteria called Rhizobium. Whether you are planting cover crops, beans or peas, if there is no Rhizobium in the soil from previous plantings, add the bacteria to the seed mix, making a seed covering slurry, then plant immediately. Legumes deposit the N on their roots in little nodules. When you turn the legumes under, they not only feed your soil with their leaves, but those little nodules on their roots! Beans and Peas are legumes. Always cut off rather than pull out their roots. Leave those roots there to feed your soil! Their nitrogen isn’t released until the plant dies. The deep roots of oats loosen your soil, creating channels for oxygen and water and soil critters to navigate. Also, they produce more growth in late fall/early winter than in spring! Perfect for winter crop plantings! The Basics – Cover Crops In depth about Living Mulch!
If you have enough area, plant one space entirely with a cover crop. If your area is smaller, each year plant a different section with your cover crop. Some years you can get two cover crops in, especially if you are planting successively for a steady table supply. When the first patch is done you plant it. You start your second patch where another area has been finishing. Or if you are doing one area for early planting, save another for planting bareroots in January.
If you are inclined, always be making compost with clean garden waste, kitchen scraps. Decide where you want to compost; leave space next to it so you can move your compost back and forth. Or you can move your composter around to enrich the soil there. The fastest way to compost is to make a pit or a trench. Add your healthy green waste or kitchen waste, chop it fine, turn it in mixing it with your soil. If you trenched it, turn it a few times over the next few days. If you have a pit, turn it two to three times over the next few days, then add it where it is needed when it is done. To balance the materials, add dry newspaper or something dry that decomposes quickly. Straw can literally take months. If you don’t have dry material, add bought compost that has plenty of bark type bits for water holding capacity and to keep your soil looser.
If composting isn’t for you, buy the best in bags you can! In addition to the basics, we want to see worm castings, mycorrhizae fungi, bat guano, kelp meal, maybe some peat to loosen clay and add more water holding capacity, chicken manure. If you soil isn’t loamy and doesn’t hold water well, look for a texture that has bits of bark that will add more water holding capacity.
Start Seedlings for transplant, or plant seeds right in the ground!
Choose the very best seeds possible! We want health and abundance! Climate is your first consideration. Cold tolerance if you are in a year round area. Disease and pest tolerance, resistance. Pests are per your area and time of year. For strong mildew resistance, more, take a look at Cornell’s super plant by plant Veggies Disease Resistant List! Allow plenty of time. It covers a lot. Also know that some of the plants are commercially produced and may not be what a home gardener wants ie a tough plant that can withstand processing before it gets to market. But sometimes, those commercial plants are the very best and the latest on the market! Try two or three varieties!
Seeds germinate really well, quicker and healthier when worm castings are added to your soil along with the compost. Castings strengthen your plants’ immune systems germination is faster, they have water holding capacity! Add 25% for best results. Boost up seed beds and add amendments out to the dripline where you will be installing transplants. Put a stake where your planting holes will be so you can add more at those points when you install your transplants. See Soil for Seed Starting! DIY, Pre-made Remember to protect any areas where you use worm castings in advance!
Plant seeds of small plants where they will live permanently as space becomes available. That’s beets, celery, chard, mustard greens, parsley, winter radish varieties, kohlrabi, Mizuna, bok choy, rutabaga, turnips. Peas are a well favored winter crop! Pole peas go up on the trellis to save space! Sow carrots (they do best from seed). Keep the soil moist and shaded until they’re up, and then gradually allow them more sun over a week’s time. Some plants, especially hard seed carrots, do well in mini low sided trenches where they keep more moisture to germinate.
Plant the seeds for biggies in little nursery areas. Plant them far enough apart that you have plenty of space to get your trowel in, not damage any neighbor seedling roots, to transplant them to their permanent home as space becomes available. That’s Brassicas: cabbage (especially red, and savoy types that resist frost better), broccoli, Brussels sprouts, collards, cauliflower and kale babies!
Don’t forget to plant your plants’ companion plants as well! In fact, plant them together in your Nursery Patch and transplant them together when their space becomes available! A great winter set might be Broccoli, cilantro and lettuce. If you choose cilantro, don’t delay transplanting when space becomes available – cilantro makes deep roots fast! The exception is carrots, another deep roots fast plant. Better to plant them in a permanent location. Instead of a trowel, leave enough space between them and other companion sets, to lift them out with a small shovel! When ready, predig their new space for them, dig deeply so there is room for their roots to go straight down. Add winter amendments as needed and mix them into the soil. Water the hole just enough to moisten it. Dig deeply under your companion sets so not to cut their growing roots, and transfer them to their new planting hole. Immediately give them their first pest/mildew prevention treatments. Voilà! Happy plants! They will grow quickly, be strong and productive.
See Super Fall Veggies for help choosing the very best varieties and Fall companion planting! Don’t forget to plan space to commingle your valuable companion plants! They enhance growth, repel pests, bring pollinators, can help withstand diseases. Here’s your quick handy list of winter companions:
- Cilantro with Broccoli! It makes brocs grow REALLY well, bigger, fuller, greener!
- Celery, potato and onions enhance broccoli flavor! Chamomile is thought to too and, called the Plant Dr, heals nearby plants!
- Lettuce among, beside Cabbages to repel cabbage moths
- Chives, Cilantro, Garlic, Geraniums, Lavender, Mint family (caution – invasive), and onions are said to repel aphids.
- Mustard and nasturtium can be planted near more valuable plants as traps for the aphids. A word to the wise, nasturtiums are often snail habitat and can quickly take over an area!
- Calendula is a trap plant for pests such as aphids, whiteflies, and thrips by exuding a sticky sap that they find more appealing and delicious than nearby crops. Plant them a bit away from the plant you want to survive.
- Peas and carrots are terrific together but NO onion family with Peas!
- Include winter blooming flowers and herbs plus habitat for your pollinators!
PLEASE plant winter habitat and flowering plants for our beneficial insects – bees, hoverflies, butterflies, pollinators! Here’s a BC list of 15 Plants that Help Bees through the Winter If they will grow there, they surely will grow here! We depend on bees for our survival! See Pollination: Honeybees, Squash Bees & Bumblebees! How to Care for Your Pollinators in Winter
Winter plants that get a good start while there is still some heat, will be producing a lot sooner than plants started when it gets cooler. You will have a much earlier crop, plus time for a successive crop, maybe start another round in December! Be sure to leave space to plant additional rounds to keep a steady table supply, especially peas! You can plant the waiting to space to quick small growers for table variety. Just harvest them when you are ready to plant your second round.
If planting from seed is not for you, no time, gone on vacation, of course you can wait and get transplants when the nurseries bring them in. Just know nursery selections are not as big as what you can buy as seeds. They sell what sells most. Island Seed & Feed has the best and greatest selection of organic seed in the Santa Barbara area, and there are marvelous ethical seed companies. Be sure to get seed varieties that are right for your area! Always choose the best, varieties that resist or tolerate local pests or disease, that in winter can withstand frost/freeze.
Keep harvesting, do your soil preps, plant some seed, and wait for September or October for transplants. Labor Day weekend is a favorite big planting time for many gardeners, and that’s only a month away now! At that time you can plant both seeds and transplants of the same plants! Effectively that’s two rounds at once, the seeds, depending on weather, coming in six to seven weeks after the transplants!
Among HOT August days, there are hints of fall. Days are a tad shorter; shadows fall in different places. For us SoCal gardeners it’s time to design – Think Big! It’s in our minds, maybe put to paper. What will be new and different this year. Will you relocate your garden, reroute your paths? Start a Food Forest?! What new foods will we try, is there a more productive or resistant variety? Will you be adding compost space, or a worm bin? Would you like raised beds on legs this time? How about a greenhouse?! Have you ever planted a green manure cover crop? Will your soil be different? Will you be planting tall indeterminate peas in a cage that shades, or quickie low bush peas? Both?! Is the gopher wire installed yet? What about greywater systems? Rainwater capture?
Put your feet up, review your garden notebook. In the cool of late summer evenings think it through…. Dream about your new winter garden…
Updated annually
Check out the entire August 2023 Newsletter!
Winter Garden Design!
Veggie Garden Nursery Patch!
Broccoli, the Queen of Brassicas!
5 Simple & Easy Storage Ideas for your Harvest Bounty!
Dehydrate?! EZ, No Storage Expenses, Use Less Space, Nutritious Tasty Results!
Upcoming Gardener Events! Get your lodgings for the 10th Annual National Heirloom Exposition, Ventura CA Sep 12-14! Sep 27-30 44th American Community Gardening Assn Conference in Houston. Santa Cruz Permaculture is in full swing – get your Certificate and MORE!
SUBSCRIBE to the entire newsletter! Friend or Follow on Facebook!
Love your Mother! Plant bird & bee food! Think grey water! Grow organic! Bless you for being such a wonderful Earth Steward!
The Green Bean Connection started as correspondence for the Santa Barbara CA USA Pilgrim Terrace Community Garden. Both Santa Barbara City’s remaining community gardens are very coastal. During late spring/summer we are often in a fog belt/marine layer most years, locally referred to as the May grays, June glooms and August fogusts. Keep that in mind compared to the microclimate niche where your veggie garden is. Bless you for being such a wonderful Earth Steward!
^Top
Feeling inspired? Get the word out! Sharing is caring ~
Posted in 2023, Amendment, Aphids, August, Bees, Bell Pepper, Broccoli, Bush, Cilantro, Community Garden, Companion, Compost, Cover crop, Design - Layout, Determinate, Disease, Disease Resistant, Early, Epsom Salt, Fall, Feed, Fertilzer, Fish - Kelp, Foliar, Garden, Green Beans, Harvest, HOT, Lettuce, Manure, Mildew, Mulch, Onion, Peas, Pests, Phosphorus, Pollinator, predator, Rancheria, Seed Saving, Seeds, SoCal, Soil, Stratification, Summer, Temperature, Tomato, Varieties, Veggies, Water, Weather, Winter, Worm Castings | Tagged 2023, August, Beneficial insects, Bunny poo, Cold Stratification, Companion, Compost, Cornell, Diseases, Fall Soil Prep, Fall Starts, Feeder Roots, Foliar Feed, Garden, grow, Harvest, heat tolerant, High Temps, HOT, interplant, Island Seed & Feed, Kate Greenaway, melons, mildew, Mulch, Nursery Patch, Pests, phosphorus, Plant, Rancheria Community Garden, SeedSaving, Sidedress, Smithsonian Gardens, SoCal, Soil Restoration, Summer, Veggies Disease Resistant List, Winter amendments, Winter Garden Design, Worm Casting | Leave a Comment »
July 1, 2023 by Cerena Childress
May You and your family enjoy a super beautiful, bountiful and juicy July!
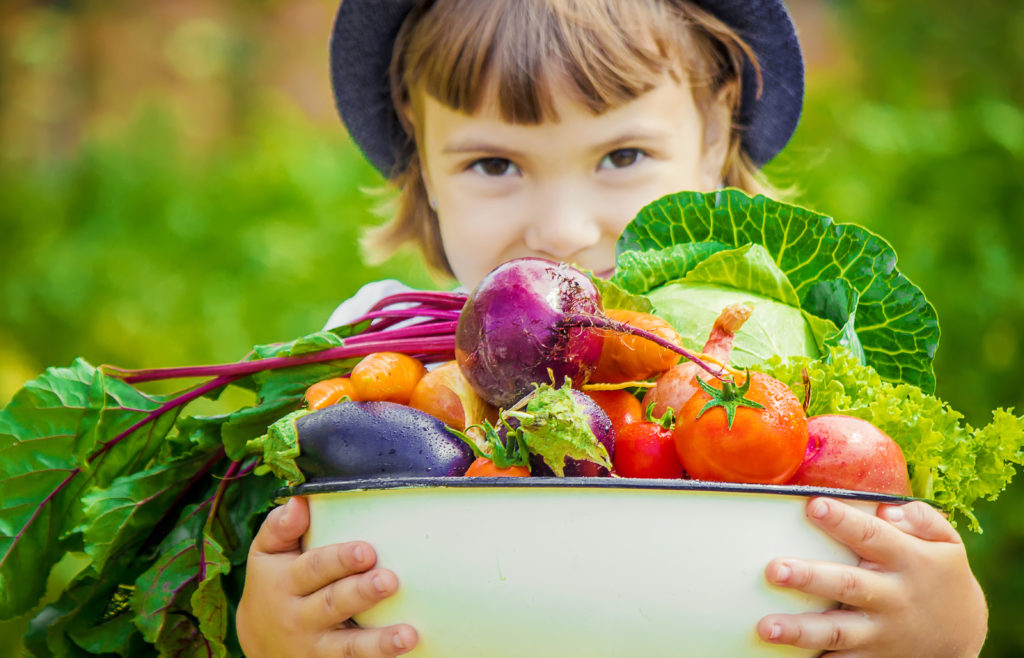
Happy 4th of July to you all! Henry David Thoreau says ‘Gardening is civil and social, but it wants the vigor and freedom of the forest and the outlaw.‘ That’s us, growing the freshest, most nutritious, organic food there is! Enjoy your luscious tomatoes!
July is Tomato month! Bush and cherry toms turned red in May and June, but the big beefsteaks, and indeterminate all-summer-long tomatoes come in July in big numbers! Super sandwiches and salads on the way!
July is not so much a planting month as water, sidedress, harvest and share, seedsaving/getting seeds, and make compost month. Fall soil prep begins for late July, Aug, Sep & Oct plantings! Plan your fall garden. Update your seed variety selections to more resistant, heat and drought tolerant varieties.
July usually brings your greatest variety of table fresh veggies, herbs and flowers! It’s colorful and full of great textures. This is giveaway time if you don’t do canning. It’s giveaway time if you have so much there is enough canned and/or frozen for you and your family and then some! Some of us SoCal gardeners don’t can at all because our fall, winter crops are so nutritious and freshly abundant there is no need! Some feel eating with the seasons is the most natural and best for your body.
Sharing is a blessing for people who don’t have access to fresh organic food or are unable to garden. Fresh foods last so much longer than store bought, and have so much better taste and nutrition! Start with family, friends, neighbors. Give to senior communities and those who prepare food for them. Remember they often have special dietary needs and more fragile teeth. Less spicy and less crunchy. Give to any organization that helps people in need, the FoodBank, maybe your local women’s shelter. When we eat better we think more clearly, our body heals, our Soul mends. Thank you and bless you for caring so much.
Sidedressing is important now while plants are working hard!
General sidedressing, during season feeding times, are when baby plants are just up 5, 6 inches tall, when vines start to run, at bud time & first flowering, and first fruiting. From then on it varies per plant! Late July when some plants are near the end of production, extend their fruiting with a good feed – in the ground, or foliar, preferably both, but foliar tops ground feeding for several reasons! See more!
- Manure feeds are especially great for lettuce, and all others except for beans, beets, carrots, parsnips, sweet and white potatoes, and tomatoes, or there’ll be more foliage than fruit! Lettuce loves chicken manure but only about a 1/4 inch gently dug in. NO foliar teas with manure in them on foliage you will be eating.
- Give your peppers and Solanaceae, tomatoes, eggplant, potatoes, Epsom Salt/Magnesium foliar treatments.
- Every couple of weeks your strawberries would love a light fish emulsion/kelp drench.
- Or you can foliar feed everyone some tea! Make a super duper mixed tea – no compost is needed in that mix for plants whose soil was well composted before planting. First make your tea. When it is ready, make your spade fork holes and apply a good compost/worm castings mix, then foliar feed with your tea! Less holes are better because you don’t want to damage too many of the lateral surface feeder foots. Drippings will help moisten your mulch and compost/castings on the ground below! Last, water gently and well with a low flow water wand underneath your plant so everything stays where you put it and you don’t wash away your foliar feed. Do that before the sun gets on your plants or while it is still cool in the day and plants have plenty of time to dry during the day. Low flow also lets water and tea and compost/castings drippings drizzle down into the spade fork holes! THAT is a super feed!
Mixed teas feed and help prevent pests and diseases. They serve up beneficial living microbes to your plant and provide trace minerals it may need. Use foliar tea more frequently for plants that are ailing or in recovery. On an immediate basis, foliar feeding is 8 to 20 times more potent than ground feeding, and your plant takes it up in as little as an hour! Plants in immediate need can be helped right away! Compost supplies the organic matter that tea doesn’t supply, so it is critical in and of itself, plus it has many times more nutrients than a diluted tea. On and in the ground it decomposes slowly, feeds your plant steadily. It and castings have great water holding capacity. Do both whenever you can!
- Compost is always super. Remember to use acidic compost for veggies that prefer slight acidity! Pull back the mulch. Grab your spade fork, insert it, rock it gently, remove the fork leaving the holes. Stay 8″ away from the central stem, go out to the dripline. Gently scratch up only one or two separate areas around your plant out to the dripline, even a little further to encourage roots to extend, and to feed the feeder roots that are in progress growing out further. Avoid breaking a substantial number of tiny surface feeder roots, otherwise your plant will be slowed down by being in recovery for lack of food and ability to uptake water. Mix in your compost and lay on a 1/2″ to an inch of compost on top of areas you didn’t dig up. While you are at it, be sure your basins are retaining their shape out to the dripline. Put your mulch back, add more (straw) if it needs replenishing, replace it if it’s by a plant that has had pests or disease. If wilts or blight, put no more than 1″ total of straw. You want airflow so the soil will dry a bit. Gently water well. Keep the area moist for a few days so soil organisms can multiply! See Composting Methods, Make it Your Way!Get/make acidic compost for your plants that prefer acidic soil – blueberries, cranberries, beans, cucumber, eggplant, parsley, parsnips, pepper, radish, rhubarb, rutabaga, sweet potatoes, and tomatoes. Another site says: Chicory, eggplant, endive, potato, rhubarb, shallot, sorrel, sweet potato. SFGate says ‘Vegetable plants that do best in mildly acidic soil include carrots, cauliflower, celery, cucumbers, garlic, sweet peppers, pumpkins, winter squash and tomatoes. Another site says: Bean, Brussels sprouts, carrot, chive, collard, corn, cucumber, garlic, kale, kohlrabi, mustard, parsley, pea, pepper, pumpkin, radish, rutabaga, squash, sunflower, tomato, turnip, watermelon. Get a soil test kit or use your intuition. You can see there are differences of opinion among the ‘experts!’ Woody mulches help maintain acidic soil pH. Specific info about soil pH for veggies
- Save yourself some time by adding 25% Worm castings, and for plants that need it, a bit of manure, to your compost and apply them all together. Especially apply that mix to any ailing plants or plants in recovery. Castings help our plants uptake soil nutrients and boost your plant’s immune system. When your plant is taxed producing fruit in great summer conditions, it also is peaking out for the season and fighting pests and diseases are harder for it. Adding compost and castings may prolong and up the quantity and quality of late summer fruits. However, sometimes a plant is just done. No amount of coaxing will have effect. It worked hard. Thank it. Let it produce its seeds for seedsaving, or take it to the compost altar.
If you prefer organic granulated fertilizer sprinkle it around evenly per instructions, and water in well. Just know you will have to do that more frequently, and it doesn’t provide the water holding capacity that compost and castings do.
Feeding your plants can be plant specific or in general. For example, Tomatoes and Peppers (and Roses – edible petals), do well with a little sulfur. It is easily applied – a Tablespoon of Epsom salts, and a 1/2 teaspoon liquid dish soap as a surfactant (so your application sticks to the leaves), in a gallon watering can is all it takes. If the nozzle turns up to get under those leaves, all the better. Apply before the sun hits your plants or while it is still cool. For Peppers, usually one or two feedings are enough – at transplant or baby height about 8″ and when buds and blooms/fruit set start.
If any of your plants are looking puny, have yellowing leaves, you might give them a bit of easy uptake blood meal for a quick Nitrogen pick me up. Add compost, castings and a tad of manure too so your plant has steady food after the blood meal (an expensive feed) is used. If you have predator creatures, especially skunks or raccoons, forgo stinky fish emulsions, manures and blood meal. Use something else, like Alfalfa Meal.
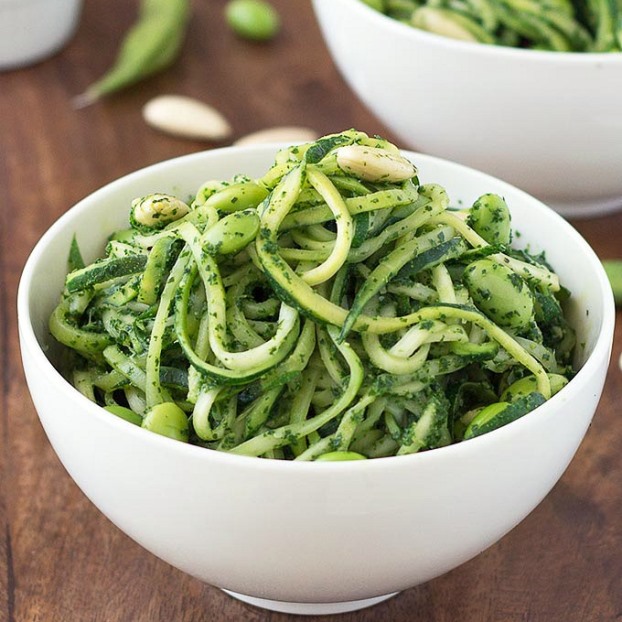 Late July, gardeners are starting to want new ways to enjoy their Zucchini! ZOODLES! Zucchini Zoodles Kale Pesto Edamame Recipe! Here are 28 cool summer variations on how to include this common veggie in a unique way!
Take care of pests and diseases asap! You don’t want them to spread or increase, lose the fruit of all your efforts and time. July brings hot weather, water stress, the stress of continued production. Though you may be a bit tired with all your tending and harvesting, this is not the time to interrupt your care. The heat will bring pest hatchings; tired plants may get overwhelmed by diseases. Be consistent with your watering. Stay on it with your harvest to keep your plants in production, sidedress (feed) as needed. Mercilessly squash the cucumber beetles, the green/yellow and black striped jobs. They give your plants, especially cucumbers, deathly systemic diseases. Put down pellets for slugs & snails, use sulfur and soap in foliar feeds to keep back aphids. See more! Keep plants that are susceptible to Whiteflies free from dust and Ants, and well supplied with worm castings. Hose the flies away, and remove infected leaves or the whole plant if it gets them repeatedly. Insecticidal soaps or Neem oil can reduce populations, but they also harm beneficial insects.
The old one, two! If your area has Fusarium/Verticillium wilts or Mosaic Virus, first foliarly apply 1/4 C bleach to a gallon of water. Be sure to apply to both under and upper sides of the leaves, and the stems. The next day give your plants a boost with the immune booster/mildew prevention mix: 1/4 C nonfat powdered milk, 1 regular crushed aspirin, heaping tablespoon Baking Soda, 1/2 teaspoon dish soap, to a gallon of water. Or spray with Copper. Let NO LEAVES TOUCH THE GROUND OR ANOTHER ALREADY DISEASED OR VULNERABLE PLANT. Know that the fungi are also windborne, so if your plants are beside each other it spreads from one to the next and others nearby.
I found refraining from watering my strawberries but once a week, unless it is exceptionally hot or windy weather, and not mulching under my strawberries keeps the slugs and snails at bay. They don’t like dry soil. Do put down organic slug/snail bait where you will be sprouting seeds and while the seedlings are coming up. Aphids don’t thrive in a dryer environment either. Water and feed the plants susceptible to them a little less. Remove yellowing leaves asap. Yellow attracts whiteflies. Leafminers love temps in the 70s! Remove damaged areas of leaves immediately so they don’t spread. Plant so mature plant leaves don’t touch each other so pests and disease don’t go plant to plant. Three to four consecutive 80+ hot days can bring those odd Leaffooted Bugs! Keep special watch on your tomatoes! Mice and rats and birds love tomato nibbles and the rodents are well equipped to climb! A garden kitty who loves to hunt is a good helper. Put a tiny bell on your kitty so birds, especially hummingbirds, are warned. Keep your compost turned so mice don’t nest in it, or use a covered enclosure; remove debris piles and ground shrub or hidey habitat. PLEASE don’t use rodenticides that in turn kill birds, pets, or animals that would feed on a poisoned animal. That includes Gophers. For gophers, install wire barriers. See more about pests!
Watering in July is vital, along with Compost & Mulch. Compost increases water holding capacity. Mulch shades soil, keeps it and your plant’s roots cooler, keeps soil more moist longer, less water needed. EXCEPTION: Melons and winter squashes in cooler coastal areas don’t need mulch! They self shade and hot soil helps them produce better. Give them a good sized basin so tiny lateral feeder roots can fully supply that big plant with water and nutrients. Put a tall stake in the center of the basin so you know where to water when the area is covered by those big leaves! For plants that do well with mulch, replenish tired or missing mulch the birds might have scratched away.
Steady water is a must to produce good looking fruits. Some water then none makes misshapen strawberries, called catfaced, curled beans and cukes, carrots lose their consistent shape and may be dryish. Tomatoes have more flavor when they are watered, but a tad less just before harvest concentrates their sweetness. You can do that with bush varieties, determinates, but with indeterminate vining types you just have to see how it goes. Lots of tasty flavor tests may be in order! They have deep tap roots, so usually watering nearby plants is sufficient. Short rooted plants like beans, beets, lettuces need frequent watering to keep moist. If you are in an extremely hot area, shade cloth might be needed. On hot windy days, some may need watering twice a day, even more. Some plants just need a lot of water, like celery. Eggplant needs 2″/week rather than the standard 1″/week!
If you are in a hot, dry, windy area, see Growing Super Veggies in HOT, Drought, Desert Areas!
Don’t be fooled by Temporary High Temps! Non heat resistant or tolerant tomatoes, peppers, eggplant, and beans, stop flowering and fruiting when temps rise above 85 to 90 degrees F for an extended time depending on humidity. Humidity causes pollen to stick and not fall to pollinate. Dry heat causes the pollen to fall and not stick! When weather cools, you will have blooms again and be back in production. Rattlesnake beans, on the other hand, keep right on producing at 100 degree temps! So choose heat tolerant veggie varieties, like Heatmaster and Solar tomatoes, from locales with hot weather. Wonderful heat tolerant varieties are out there!
 Cool summer evenings enjoy Zucchini Lasagna! You can even eat it cold, and for breakfast!
Though July is more a maintenance and harvest month, Yes you can plant more! At this point, transplants are best, but many plants will not still be available at nurseries, and it is a tad late to plant many summer plants from seed. What you can plant is beans! They grow quickly and if you grow bush beans and quickly maturing heat tolerant varieties you will still be eating beans in Sept and Oct if it doesn’t get cold early! Get patio container, dwarf types of quick growing heat tolerant determinate tomatoes if you can find them. Previously planted tomatoes may be done producing, or bit the dust for one reason or another – likely a blight or wilt. Remove the old plants to reduce further spread of disease – do NOT compost them – bag and trash, do not green recycle. Beef up the soil and plant your late tomatoes in an entirely different spot.
More lettuces! In summer you want heat tolerant, slow bolting, tip burn resistant lettuce! Lettuce Leaf and Red Sails and Outredgeous are great. Jericho from Israel is great. Sierra, Nevada. Nevada is a Green Crisp/Batavian that grows BIG, doesn’t bolt, and is totally crispy! Green Star is ruffly, quickly grows big around! Parris Island Romaine is slow bolting. Green Towers Romaine tolerates moderate summer heat and has some resistance to tipburn and bolting.
Transplant basil, celery, chard, cucumbers, dill, kale, leeks, summer lettuce, green onions, white potatoes, summer savory, New Zealand spinach. In our hot foothills and further south, go for more melons, okra, pumpkins, summer & winter squash. I’ve seen tomato transplants and bean seeds started in August produce plentiful crops into SoCal’s October! Rattlesnake pole beans do as they are supposed to, make beans in up to 100 degree weather! Yard long beans tolerate late summer weather and make magnificent beans! And some varieties of those don’t get mildew!
Corn is an exception – late plantings often develop smut. But. That smut, from a fungus called Ustilago maydis, is considered a delicacy by many. ‘It’s insanely delicious and luxurious, like black truffles.’ In Mexico it is known as huitlacoche. – weet-la-COH-cheh. Your neighboring gardeners may especially not be pleased, however. See more!
Fall transplants need babying! Transplant late afternoon or evening so plants have the whole night to begin to recover before they’re hit with a full day of sun and heat. Water well and provide shade from intense mid-day sun. Prop up and secure some of those plastic plant flats that have the smaller grid pattern to filter the light. Keep your transplants moist for at least a month or until they’re well established. Mulch to save water unless they thrive on hot soil.
Harvesting See Grow Veg’s great post on ‘How to Tell When Fruits and Vegetables are Ready for Harvest’ Harvesting has special little techniques and storage varies considerably from veggie to veggie! See more for details!
Be really patient with your big Bells and sweet roasting Peppers. Both like to wait until the nights are longer and cooler in late summer before fruiting and plumping up – making their thick walls. Peppers need time on the plant to absorb nutrients and water and plump up their flesh. Some will still need to change color.
♦♦ At the end of the month, SoCal gardeners start your early winter crops first plantings! Sow carrots (they do best from seed), celery and Brassicas. Brassicas are arugula, Broccoli, Brussels sprouts, cabbage (especially red and savoy types, which resist frost better), cauliflower, and kohlrabi, mizuna, mustard, pak choi, radish, rutabaga, turnip. Besides having your tasty winter crops earlier, you may have time to plant a second round later on. I have planted in December and had terrific crops! They aren’t called winter crops for nuthin!
Mid to late July start preparing by clearing areas for late July first fall plantings.
- Remove finishing weakened plants that attract pests and get diseases. Remove debris insects live in. Remove and trash mulch from under plants that were diseased and replace with clean mulch.
- Decide if and where you will plant your green manure patches/aka living mulch/cover crops. Living Mulch! Cover Crops
- Improve the soil, mainly, add worm castings to mini nursery areas where you will be planting seeds. Castings speed germination, boost the immune system of the seedlings, and add water holding capacity to help keep the soil moist. Leave space so the seedlings can be removed by a narrow trowel to their permanent place when they become big enough and space becomes available. Keep the soil moist and shaded until they’re up, and then gradually allow them more sun over a week’s time.
It’s time to get seeds if you don’t already have them! If seeds and mini nurseries aren’t your thing, wait until your local nursery starts having the transplants that make you happy! Late August they might start trickling in. Labor Day weekend is a favorite planting time for some gardeners depending on how hot it still is. October is just fine too! One year it stayed so hot we all planted the first couple weeks of November!
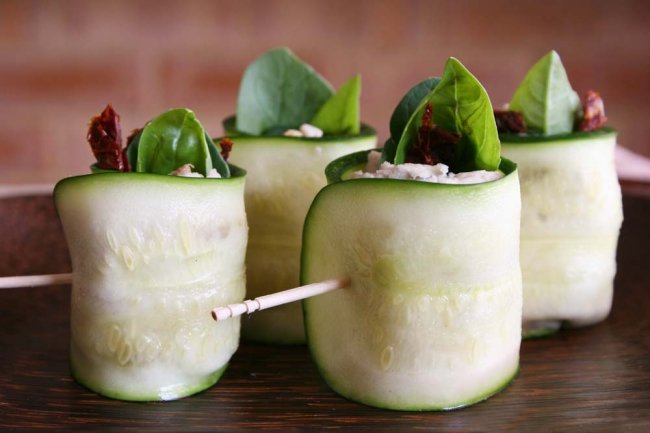 Tasty Zucchini Rolls made with Sunflower Seeds Pate, Sun Dried Tomatoes and Spinach! See complete recipe by Chris at Sprout People!
If you are just starting, just got your first plot at one of the community gardens, first, prepare your soil! While waiting for fall planting time, plant a few patches of fast growing, less water needing, heat lovers, lots of summer heat tolerant lettuces for your salads! They may need a little shade cloth protection. Plan out your fall/winter layout – general rule is plant tall to the north, short to the south. Winter plants don’t take up as much food in cooler weather, so use less compost and manure. Remember, nature’s soil is naturally only 5% organic matter, but we are growing veggie bearing plants, so a little more than that is perfect. Too much food and plants go to all leaf, but then a lot of winter veggies are just that, all leaf! Cabbage, Chard, Kale, Lettuces. Oh, lettuces thrive with manures, so put more in the lettuce patch areas, but none where the carrots or peas will grow. They don’t need it. Garden Design/Seed Selection Fall/Winter Garden Design Magic of Permaculture!
Important Habitat! As plants finish, let some of them grow out to save seeds. A carrot, celery and cilantro produce masses of seeds! Besides being food for pollinators and beneficial predator insects, their blooms are beautiful! Birds will have seeds for food and scour your plants for juicy cabbage worms, whiteflies, aphids, earwigs, grasshoppers, cucumber beetles and grubs! Chickadees even eat ants!
Seedsaving is really a no-nonsense game! Besides being our second harvest, it insures the purity of your line! Save seeds from your best plant, a plant that grew well at your place! It’s important to our world community, as Thomas Rainer says, to preserve our garden heritage & biodiversity! Besides, it’s fun! Keep some for you – some as spices & others for planting. Package as gifts, and reserve some to take to the Seed Swap in January! 2020 Note! As your plants come into seeding time, consider sharing them as soon as possible! “Little Free Seed Libraries” are Sprouting Up to Help Gardeners Share Seeds in Troubled Times. Take a look at some very clever and loving ideas! Here we are in 2023 and it’s still a good idea!
Let some beans go until they are completely dry in their pods; let corn dry until the kernels are hard on the cob. Let a cucumber turn yellow and tough. Save some seeds from your favorite and best tomatoes. Dry them further at home. When ready, put in an envelope, label with the date/year, their name/variety, where grown, any special notes you think would be helpful. See more about SeedSaving! Here are important details for all veggies at NativeSeed.org!
SoCal, be ready for winter rain! If you garden at home, please look into water capture and gray water systems – shower to flower, super attractive bioswale catchments. Santa Barbara City offers several rebates! Santa Barbara County rebates info per city! Call (805) 564-5460 today to schedule a FREE water system checkup! Check out the Elmer Ave retrofit!

Oh, and please see Tomato Varieties! Humble to Humongous & More!
Gardening is cheaper than therapy and you get tomatoes. ~ Author Unknown
Updated annually
Check out the entire July 2023 Newsletter!
Harvest & Storage Tips for Our Summer Favorites!
Seasonal Soil Care for Veggies!
Leaffooted Bugs, Leptoglossus zonatus
SeedSaving! A Beautiful Annual Ritual & Celebration!
Veggie Seed Saving Plant by Plant!
Upcoming Gardener Events! Reminder! Get lodgings for the 10th Annual National Heirloom Exposition, Ventura CA Sep 12-14! Don’t miss this superlative event! July 21 & 22 43rd Annual Seed Savers Exchange Conference! Sep 27-30 44th American Community Gardening Assn Conference in Houston.
SUBSCRIBE to the entire newsletter! Friend or Follow on Facebook!
Love your Mother! Plant bird & bee food! Think grey water! Grow organic! Bless you for being such a wonderful Earth Steward!
The Green Bean Connection started as correspondence for the Santa Barbara CA USA Pilgrim Terrace Community Garden. Both Santa Barbara City’s remaining community gardens are very coastal. During late spring/summer we are often in a fog belt/marine layer most years, locally referred to as the May grays, June glooms and August fogusts. Keep that in mind compared to the microclimate niche where your veggie garden is. Bless you for being such a wonderful Earth Steward!
Top^
Feeling inspired? Get the word out! Sharing is caring ~
Posted in 2023, Bees, Bell Pepper, Biodiversity, Blood Meal, Bumblebee, canning, Companion, Compost, Corn, Cover crop, Cucumber Beetle, Determinate, Epsom Salt, Fall, Feed, Fertilzer, Fish - Kelp, Foliar, Fusarium Wilt, Garden, Gophers, Green Beans, Harvest, Heat Tolerant, HOT, Interplant, June, Leaffooted Bug, Lettuce, Manure, Mice - Rats, Mildew, Mosaic virus, Mulch, Pests, Pollinator, predator, Recipe, Seed Saving, Sidedress, Snails & Slugs, SoCal, Soil, Succession, Summer, Tea, Tomato, Varieties, Veggies, Verticillium Wilt, Water, White Fly, Worm Castings, Zucchini | Tagged 2023, Bell Peppers, canning, Companion, Compost, Disease Resistant, Diseases, Drought Tolerant, Epsom salts, Fall garden preps, Fall Starts, Feeder Roots, Foliar Feed, Foodbank, Garden, grow, Harvest, heat tolerant, Henry David Thoreau, High Temps, HOT, interplant, lettuce, manure, Mulch, Pests, Plant, predator, SeedSaving, SFGate, Sidedress, SoCal, Summer, tomato, Varieties, Worm Casting, Zoodles | Leave a Comment »
June 1, 2023 by Cerena Childress

What’s a garden for? Fertility and good living! Bridgette and Hoyt got married on a supermoon evening at Lyons Farmette & River Bend, Lyons CO! How fine.
June is Midsummer Magic month! Divine small Faery beings will be celebrating your garden!
June 21, 24, 25 or a date close to the Summer Solstice, any day June 19–24, is celebrated as Midsummer Night; June 24 is Faery Day! In Santa Barbara the 2022 magical 48th Summer Solstice Parade will be IN PERSON June 25!
Tasty, beautiful and inspirational May garden images at Rancheria Community Garden, Santa Barbara, CA, show how our weather has been and what’s growing! Plant more rounds for a steady table supply!
Abundance is flowing, harvests are happening!
 In our area, near the beach in Santa Barbara, we have been having coolish May grays, low morning clouds, some heavy mists, with warm sunny weather predicted soon! Zucchini, cucumbers and lettuces of all kinds are being eaten. Sizable Bell peppers are on board and small Banana, Anaheim and hot Peppers coming; humongous Seascape strawberries are here and tasty! Beans are blooming. BUT, the 25th I saw the first western striped cucumber beetle. BAD news, a vector for bacterial wilt and mosaic virus! Please – very carefully read the info in Pests below and the link about them there. Be careful with some of your harvests. Clip rather than break away and damage or pull your plant up.
Tomatoes are on the plants. Small Cherry tomatoes come in first. Fertilize your toms with a slow release fertilizer, like alfalfa pellets, once the fruiting begins. See the Summer Feeding Schedule for all your favorites!
I have had the pleasure of growing Pink Boar Tomatoes, from the Wild Boar series bred by farmer/breeder Brad Gates. As High Mowing says, ‘Deep pink skin is stunning with contrasting olive stripes and luscious deep red flesh,’ and it was!
Unexpected benefit! Reviewer Rebecca of Old Mosses Secret Garden said: I bought [Brad Gates Blue Berries] tomatoes for my whimsical choice. My experiences were similar to others opinion, they are abundant, vigorous and salad enhancing, plus they make a wonderful antioxidant jam spread. What I wanted to share about the blue berry tomatoes is that they are top of the menu choices for BATS. Bats were not on our urban radar, four years later five thousand bats have moved in and troll the garden where the fence lines are abundant with these little tasty gems, which get devoured. This plant is the greatest organic gardening boon ever sprouted. For fair reveal though I have hundreds of evergreen spruce that also get bat vacuumed for more meaty choices, so Thank you Baker seed, your diligence to excel is my secret weapon for a fantastic garden.
Harvest at your veggie’s peak delicious moment! Juicy, crunchy, that certain squish in your mouth, sweet, full bodied flavor, radiant, vitamin and mineral rich! Besides being delicious and beautiful, it keeps your plant in production. Left on the plant, fruits start to dry and your plant stops production, goes into seeding mode. The fruit toughens or withers, maybe rots, sometimes brings cleanup insect pests that spread to other plants. Keep beans picked, no storing cucumbers on the vine. Give away or store what you can’t eat. Freezing is the simplest storage method for many veggies. Cut veggies to the sizes you will use, put the quantity you will use in baggies, seal and freeze. Whole tomatoes, chopped peppers, cut beans, diced onions. Probiotic pickle your cukes. Enjoy your sumptuous meals! Sing a song of gratitude and glory!
Plant more! Try some new ones too!
In those empty spots you have been saving, plant more rounds of your favorites! Check your lettuce supply. Put in more bolt resistant, heat and drought tolerant varieties now. Some heat tolerant lettuce varieties are Sierra, Nevada, Jericho, Black Seeded Simpson. That ruffly little beauty queen Green Star has excellent tolerance to hot weather, bolting, and tipburn. Rattlesnake beans keep right on producing when temps get up to 100 degrees! Plant more of everything except winter squash, big melons, pumpkins, unless you live in the hot foothills.
Put in plants that like it hotter! Long beans grow quickly from seed now. They grow later in the season when your other beans are finishing. They make those enormously long beans in the ample late summer heat. Keep watch on them, in spite of their size they grow quickly. Harvest promptly, usually daily! Certain varieties of them don’t get mildew either! Their unique flavor keeps your table interesting. Plant Okra now, it grows quickly in this warmer weather! More eggplant and also tomatoes you have been waiting to put in the now drier fungi free ground. Plant mini melons like Sugar Baby watermelons!
For those of you that are plagued with fungi diseases in your soil, the drier soil now makes this a better time to plant. Select wilt and blight resistant Tomatoes. Remember, when you plant your tomatoes and cukes, build a mound and make a basin whose bottom is higher than the surrounding soil. You want drainage and a wee bit of drying to reduce the potential of fungi – verticillium and fusarium wilts, blights. They have deep roots, so water nearby plants but not your Tom! More Special Planting and growing tips for your Tomatoes and Cucumbers!
Companion Planting Teamwork!
Plant WHITE potatoes with Zucchini to repel squash bugs, radishes with cukes and Zucchini to repel cuke beetles, and radishes with eggplant, potatoes and arugula to repel flea beetles.
If you have more space or you lost a plant here or there, think on putting in some perfect companion plants! One of the Three Cs are super!
- Calendula – so many medicinal uses, bright flowers, and traps aphids, whiteflies, and thrips! Yep. Plant Calendula by tomatoes and asparagus.
- Chamomile – is called the Plant Dr! It heals neighboring plants and improves the flavor of any neighboring herb! The flowers make a lovely scent and the tea is sweet.
- Comfrey – aka Knitbone, is an amazing medicinal herb, a super nutritious compost speeder upper! Plant it by your compost area, but remember, it has a large footprint, and easily spreads! I planted mine in 5 gallon containers with the bottoms removed. It likes a LOT of water! UK gardeners make Comfrey Tea for their Tomatoes!
Tasty herbs – chives, parsley, or more permanent perennials like rosemary, oregano (invasive), thyme are flavorful choices that often repel pests.
Hot Peppers emit a chemical from the plant roots that helps prevent Fusarium wilt, root rot, and a wide range of other plant diseases! Interplant them with susceptible plants.
Pat Mycorrhiza fungi right on the roots of all your transplants except Brassicas. It increases uptake of nutrients, water, and phosphorus that helps roots and flowers grow and develop. Ask for it bulk at Island Seed & Feed in Goleta. Support your local nurseries.
Here’s your tending list for Beauty and Bounty!
 WATER regularly so everyone is moist the way they like it! Seeds and seedlings daily, even 2 to 3 times daily on super hot/windy days. Shading them may save their lives. Peppers like moist, so as they need it. Others not so water critical on average need an inch a week; water beans, cukes, lettuces and short rooted varieties of strawberries more frequently – lettuces could be daily on hot windy days. To double check use the old finger test or push your shovel in and wedge the soil open enough so you can see if it is moist as deep as it needs to be. Watering at ground level, rather than overhead watering, keeps your plant dry. That means less mildew, less fungal diseases, especially for fuzzy leaved plants like toms and eggplant. They don’t like water on their leaves. See Growing Super Veggies in HOT, Drought, Desert Areas! for further considerations.
If at all possible, water in the AM before 10:30 to let leaves dry before evening to prevent mildew – beans, cucumbers and squashes are especially susceptible. Plant fewer beans further apart for air flow. If your plants are near a street or there has been a dusty wind storm, wash the dust off your plants so they can breathe, and to make them less attractive to Whiteflies.
Some plants need MULCH now, and if the mulch is tired and flat, replace it with fresh clean mulch. No more than an inch of straw mulch under toms and cukes. They need airflow so the soil can dry a bit and reduce harmful fungi. Otherwise, put on 4 to 6 inches minimum to keep light germinating seeds from sprouting. Mulch any Brassicas you are over summering – broccoli, kale – 4 to 6 inches deep for them too. They need cool soil. Melons and winter squash – Butternuts, acorn, pumpkins – need heat! They are the exception – no mulch for them if you are coastal cool. Yes, they are a big plant/vine, they will need more water, so be sure their basin is in good condition and big enough so they get water out to their feeder roots. Put a stake in the center of the basin so you know where to water when the leaves get big. The only place for straw for them is right under the melons. See more at Mulching ~ Why, When, With What, How Much?! If you are in hot foothills, mulch away!
Surface Feeder Roots are vital! Near the soil surface, they have access to water, nutrients, and oxygen. These elements are more abundant near the soil surface than deep within the soil. Most of a plant’s feeding is near the surface by the horizontal surface feeder roots. They must have water to pickup nutrients the plant needs. In this video, notice how much more root surface is near the soil surface versus the deep central roots! This is why you don’t want to break these roots when you cultivate, surface feed, sidedress your plants. Rather than circling your plant destroying its ability to feed, slowing, stunting it, putting it in recovery rather than production mode, instead, do only a couple small portions of area if necessary. Better is to foliar feed your plant, then, additionally, on the soil surface, add worm castings and a light layer of manure, cover with compost, cover all with mulch to keep your additions moist and from washing away. Gently water in.
Kidney bean time lapse 25 days|soil cross section. Showing how roots and upper part of plant grows Please also enjoy the comments!
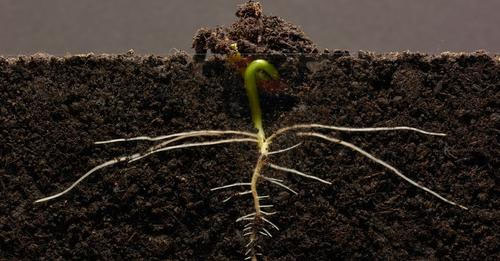
Keep a sharp eye on tomatoes. If your soil has fungi, that’s wilts or blights, immediately remove leaves touching the ground or will touch the ground if weighted with water! Trim so neighboring plants don’t touch and spread diseases. Remember, the wilts are spread by wind as well as water, so neighboring plants are very likely to give it to one another. Try planting other plants between, especially HOT peppers! See Companions above. You can still do rows, just mix up the plants! Your healthier tomatoes will produce more, bigger toms, and longer.
POLLINATION is vital & easy to do!
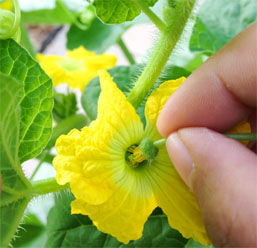
Hand Pollination of Cucurbits! In left image, male flower on left, female right.
Improve your tomato, eggplant and pepper production by giving the cages or the main stems a few sharp raps, or gently shake the stems, to help the flowers self pollinate. Midday is the best time. Honey bees don’t pollinate tomatoes, or other Solanaceae! Build solitary bee condos for native bees. Native bees, per Cornell entomology professor Bryan Danforth, are two to three times better pollinators than honeybees, are more plentiful than previously thought and not as prone to the headline-catching colony collapse disorder that has decimated honeybee populations. The very best Solanaceae pollinator is a Bumblebee!!! See more! Plant plenty of favorite bee foods, especially ones with purple and blue colors, their favorites!
While you are helping your tomatoes pollinate, if you are growing them in cages, also very gently help them up through the cages. Remove any bottom leaves that might touch the ground when weighted with water. Remove any diseased leaves ASAP! Do NOT put them in compost! Bag and trash.
Squashes, melons and monoecious cucumbers can easily be hand pollinated. Cukes are notorious for needing help being pollinated! Cucurbits have male and female blooms on the same plant. If there are not enough pollinators about, we need to help. Also, multiple visits from the bees are required for good fruit set and properly shaped cucumbers. Male flowers open in the morning and pollen is only viable during that day. Hand pollinate during the morning hours, using only freshly opened flowers. You can use a small pointy paint brush, a cotton swab, Q-tip, your finger, and move pollen from the male stamen to the center of the female flower. Or the best, most complete method is to take the male flower off the plant, pull the petals off, and gently roll the male flower anther around and over the female stigma in the center of the female flower. The pollen is sticky, so it may take some time. One male anther can pollinate several females. Repeat. Female blooms will simply drop off the plant if they are not pollinated or not pollinated adequately. So when your cukes are in production, you need to do this daily for more fruits.
Don’t be confused by the little fruit forming under the female flowers and think pollination has already happened. The flower needs to be fertilized, and adequately, or the fruit just falls off. Flowers not pollinated enough, that don’t abort, make misshapen fruits. That goes for corn having irregular to lacking kernels. Strawberries are called cat-faced. Squash and cucumbers can be deformed. On an unwindy day, tilt the stalk so the corn tassels are over the silks and tap the stalk. You will see a shower of pollen fall on the silks. You may need to do it from one plant to another so you don’t break the stalk trying to get the pollen to fall on silks on the same plant.
Planting a lot of plants close together stresses the plants. At higher densities, plants compete for water, nutrients, and sunlight, and the resulting stress can lead to a higher proportion of male flowers, less female flowers, the ones that produce. If you really want more fruit, give them room to be fruitful. The same goes for other stresses – damage from insects or blowing soil, low light intensities, or water stress – less female flowers are produced.
Weather affects pollination. Sometimes cool overcast days or rain, when bees don’t fly, there is no pollination. High humidity makes pollen sticky and it won’t fall. Not good for wind pollinated veggies like tomatoes. Drought is a problem for corn pollination. Too high nighttime temps, day temps 86°F and above, will keep your tomatoes, cucumbers and other vegetables from setting fruit unless they are high temp tolerant varieties. Too windy and the pollen is blown away. See Pollination: Honeybees, Squash Bees & Bumblebees!
If it is your cucumbers that are not pollinating well each year, try parthenocarpic varieties. Parthenocarpic varieties produce only female flowers and do not need pollination to produce fruit. This type of cucumber is also seedless. Try a few varieties and see if you like them.
Did you know? Flowers can hear buzzing bees—and it makes their nectar sweeter!
SIDEDRESSING! This IS the time! Feeding when your plants start to bloom and produce is a pretty standard recommendation. But if your baby is looking peaked, has pale or yellowing leaves, an emergency measure could be blood meal. Foliar feeding a diluted fish emulsion/kelp is easy for your plant to uptake. Foliar feeding a tea mix per what each plant might need, is the ultimate feed and it’s not hard to make tea mixes! Your lettuces love it if you scratch in a 1/4″ chicken manure, but no manure in a tea on leaves you will be eating! Pull your mulch back, top with some tasty worm castings, that light 1/4″ layer of manure, cover with a 1/2 – 1″ of compost. If you prefer organic granulated fertilizer, easy to apply, sprinkle it around evenly. But remember, that has to be repeatedly applied. Recover with your mulch, straw, then water well and gently so things stay in place. That’s like making compost and worm tea in place!
Face up to pests! It’s easier to deal with them when there are only a few rather than losing your whole plant or a row of plants. This is the time you will see Cucumber beetles foraging on Cucumber, zucchini flowers, on Tomatillos. They are deadly to cucumbers because they transmit bacterial wilt and squash mosaic virus and cucumbers are the most susceptible to the wilts than any other garden veggie. Squish those beetles. Put one hand under where the beetle is, reach for it with the other hand. Be prepared! They are fast and can see you coming! See more Here are tips for Beetle prevention for organic gardeners:
- If possible plant unattractive-to-cucumber beetle varieties. In 2012 U of Rhode Island trials, best pickling choices are Salt and Pepper and H-19 Little Leaf. Marketmore 76 was tops for slicing cukes. If you find more current research on best varieties, please let me know!
- Plant from transplants! The youngest plants are the most susceptible.
- Interplant! No row planting so beetles go from one plant to another.
- Delay planting! In our case, most of us already having planted cucumbers, can plant another round late June or when you no longer see the beetles. Start from seeds at home now since transplants may no longer be available in nurseries later on.
- Plant repellent companion plants BEFORE you plant your cukes. Radish with eggplant, cukes & zukes act as trap plants for flea beetles and to repel cucumber beetles. Radish are the fastest growers, so get them in ASAP if you didn’t before.
- Natural predators are Wolf Spiders, daddy long legs and Ground Beetles! Let them live! They eat beetle eggs and larvae. And there is a tachinid fly and a braconid parasitoid wasp that parasitize the striped Western cucumber beetle, and both sometimes have a large impact. When you see a dark hairy fly, don’t swat it! It is doing important garden business!
- Here is a super important reason to use straw mulch! Per UC IPM ‘Straw mulch can help reduce cucumber beetle problems in at least 3 different ways. First, mulch might directly slow beetle movement from one plant to another. Second, the mulch provides refuge for wolf spiders and other predators from hot and dry conditions, helping predator conservation. Third, the straw mulch is food for springtails and other insects that eat decaying plant material; these decomposers are important non-pest prey for spiders, helping to further build spider numbers. It is important that straw mulch does not contain weed seeds and to make certain that it does not contain herbicide residues which can take years to fully break down.’
- Organic mulches foster diverse populations of beneficial soil microorganisms that trigger the plant’s internal defenses.
- At the end of the season or when your plants are done, remove garden trash, tired mulch and other debris shortly after harvest to reduce overwintering sites.
If you are by a road or in a dusty windswept area, rinse off the leaves to make your plants less attractive to whiteflies. Also, asap remove yellowing leaves that attract whiteflies. Pests adore tasty healthy plants just like we do. They also make us see which plants are weak or on their way out. Give those plants more care or remove them. Replace them with a different kind of plant that will do well now and produce in time before the season is over. Don’t put the same kind of plant there unless you have changed the conditions – enhanced your soil, installed a favorable companion plant, protected from wind, terraced a slope so it holds moisture, opened the area to more sun. Be sure you are planting the right plant at the right time! Remove mulch from under plants that were diseased and replace with clean mulch. Do not compost that mulch or put it in green waste. Bag and trash it.
Please always be building compost and adding it, especially near short rooted plants and plants that like being moist. Compost increases your soil’s water holding capacity.
Reduce your carbon footprint! Grow local!
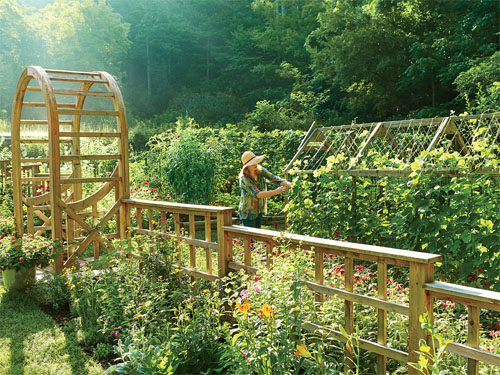
Mary Alice Ramsey in her North Carolina backyard. Photo by Hector Manuel Sanchez
May You enjoy a super beautiful, bountiful and a juicy June!
Updated annually
Check out the entire June 2023 Newsletter!
Peppers, HOT or Not!
Veggie Feeding Schedule for Your Delicious Summer Favorites!
Container Gardening, Garden Anywhere!
Vacation, Super Busy?! Self Watering Systems!
Special Treat! Sweet Summer Magic: Solstice Honey Cookies!
Upcoming Gardener Events: Santa Barbara’s 49th Summer Solstice Parade June 24, ROOTS! July 21 & 22 43rd Annual Seed Savers Exchange Conference! Reminder! Get lodgings for the 10th Annual National Heirloom Exposition, Ventura CA Sep 12-14! Don’t miss this superlative event!
SUBSCRIBE to the entire newsletter! Friend on Facebook!
Love your Mother! Plant bird & bee food! Think grey water! Grow organic! Bless you for being such a wonderful Earth Steward!
The Green Bean Connection started as correspondence for the Santa Barbara CA USA Pilgrim Terrace Community Garden. Both of Santa Barbara City’s remaining community gardens are very coastal. During late spring/summer we are often in a fog belt/marine layer most years, locally referred to as the May grays, June glooms and August fogusts. Keep that in mind compared to the microclimate niche where your veggie garden is. Bless you for being such a wonderful Earth Steward!
Top^
Feeling inspired? Get the word out! Sharing is caring ~
Posted in 2023, Bees, Biodiversity, Blood Meal, Bolt Resistant/Slow Bolting, Bumblebee, Companion, Compost, Cucumber, Cucumber Beetle, Disease Resistant, Dripline, Drought Tolerant, Feed, Foliar, Garden, Heat Tolerant, HOT, HOT Pepper, Interplant, June, Lettuce, Long bean, Mulch, Okra, Pests, Pollinator, Radish, Sidedress, SoCal, Succession, Summer, Tea, Tomato, Varieties, Veggies, Water, White Fly, Worm Castings | Tagged 2023, biodiversity, Bolt Resistant, Brad Gates, Bryan Danforth, Bumblebee, Companion, Disease Resistant, Drought Tolerant, Feeder Roots, Foliar Feed, Garden, grow, Hand Pollination, heat tolerant, HOT, interplant, June, Mary Alice Ramsey, MidSummer, Native Bees, Plant, pollination, Sidedress, SoCal, Summer, Summer Solstice, Surface feeder roots, tomato, Varieties, Veggies, Water | Leave a Comment »
April 30, 2023 by Cerena Childress
Across-the-Plot Gardening Tips May 2023!
Merry May! Radiant Flowers, Luscious Veggies!

Are you having fun?! Does your garden make you this happy?! PLANT MORE!
Our Santa Barbara April daytime temps varied from 59 to 84! Night temps have been 42 to 56 but dropping back to 47 the first week of May. Depending on what you are planting, some gardeners will wait until Mid-May. Sweet peppers need night temps steadily above 55°F, some say 60, and soil temps above 65°F. Get out your soil thermometer and check the soil temp where you garden! If planted too soon, sometimes plants miss their natural sequence of production, and never produce. Best to replant if you suspect this is happening. In general, plant another round 2 -3 weeks later just in case! See Best Planting Temps Per Veggie!
May, June Planting Timing
MAY is time for cantaloupe, sweet bell peppers, pumpkins and squash! Try some Urizun Japanese Winged Beans! Wait until the soil has warmed to 70°F before planting squash and melons. Many wait until May, some even June, for warmer drier soil, to plant tomatoes to avoid soil fungi. Some gardeners wait until JUNE to plant okra. Okra really likes heat and grows quickly when happy. Choose faster maturing varieties for coastal SoCal. 2022 I tried Heavy Hitter, an early super productive variety. We had a cool summer and the standard Burgundy Okra outperformed it. This red variety has always outperformed every green I’ve grown. If YOU anticipate a HOT summer, plant a tad earlier, but be prepared to deal with it if summer is overcast as often is the case after all.
Long beans are spectacular and love heat. Late May, June is the best time to start them. They grow quickly from seed. They last longer than other beans, hitting their stride toward the end of summer. Certain varieties of them don’t get mildew either! Their unique flavor keeps your table interesting. See more!
While we are waiting for the right temps, do soil preps that are still needed. Weed out plants that won’t help your summer lovers. Make your soil fluffy with water holding compost, only 5 to 10%, while also adding tasty well aged manure! Add worm castings to areas that will be seeded. Castings improve germination, germination is sooner, seedlings healthier! Plan for year round bee habitat and install helpful companion plants in advance.
Plant another round of your favorite heat lovers! Might be eggplant, limas, bell peppers and pumpkins! Transplant or seed different varieties of beans, cucumbers, eggplant, melons, peppers, squash, and tomatoes than you planted before! Sow and/or transplant asparagus, beets, carrots, celery, chard, herbs, kale, kohlrabi, leeks, heat-tolerant leaf lettuce, summer-maturing onions, parsley, peanuts, rhubarb and spinach! Add white potatoes and radish with zucchini, radishes with cukes to repel cuke beetles, and with eggplant to repel flea beetles. Add fillers and littles under bigger plants as living mulch! Put some color in your choices! Plant RED table onions, pink celery, fancy multi-color lettuces! Tips for super Successful Transplanting!
Time for heat and leaf tip burn resistant, bolt-resistant lettuces of all kinds! Sierra, Nevada, Jericho, Black Seeded Simpson are some. Green Star wins the beauty and production award!
Choose heat and drought tolerant varieties when you can. For example, why wait when it gets HOT and your tomato stops setting fruit?! Get heat tolerant varieties the heat doesn’t bother! Heat tolerant tomatoes keep right on producing when temps get up to and above 85! Rattlesnake beans are a winner! They produce in up to 100 degree weather! They have a slightly nutty flavor. You do have to keep watch and pick almost daily because they get long and plump quickly – and are still tender!
Problem temps for most tomatoes:
High daytime temperatures (above 85 F)
High Nighttime Temperatures (above 70 F)
Low Nighttime Temperatures (below 55 F)
Check out this nifty page HOW TO GROW TOMATOES IN HOT WEATHER at Bonnie Plants! Do these things well in advance to be ready! Select as Julie Martens recommends: ‘Heat-tolerant tomato varieties like Heatmaster, Solar Fire, Summer Set, and Phoenix can form fruit even as temperatures climb. These tomatoes are often described as “heat set” types, or have heat-related words or locations in their names.’ If your plant is not heat tolerant, wait. When things cool down, your plant will start making flowers and setting fruit again. See also Tomatoes are the Fireworks of Your Summer Garden!
Tomatoes! Heirlooms are particularly susceptible to the wilts, Fusarium and Verticillium. If your soil is infected, instead, get varieties that have VFN or VF on the tag at the nursery. The V is for Verticillium, the F Fusarium wilt, N nematodes. Ace, Early Girl, Champion, Celebrity, are some that are wilt resistant/tolerant. In the Mother Earth News tomato survey, they found gardeners chose heirlooms over hybrids if their soil is wilt/blight free. Otherwise, the longer the gardener has gardened, they more they chose wilt resistant toms if their soil has fungi. Home Improvement/ACE has the largest tomato selection in the Santa Barbara area! See Special Planting and Growing Tips for your Tomatoes and Cucumbers!
Once you have these strong varieties installed particular maintenance will keep them healthy longer.
- Remove any leaves that will touch the ground if weighted with rain, dew or by watering.
- Remove infected leaves the curl the length of the leaf or get brown spots.
- Lay down a loose 1″ deep straw mulch blanket to allow air circulation and the soil to dry. No friendly fungi habitat. The most important purpose of this mulch is to keep your plant’s leaves from being water splashed or in contact with soil, which is the main way they get fungi/blight diseases.
- When the straw gets flat and tired, remove (don’t compost) and replace.
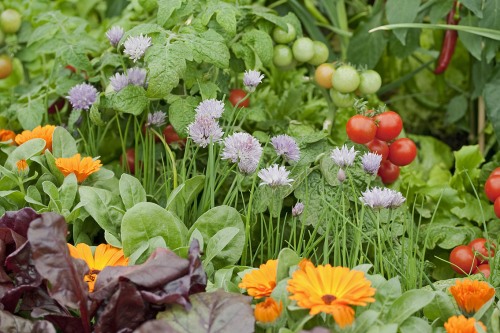
Flowers or veggies that are great companion plants for your tomatoes!
Strengthen your summer garden! Always be thinking what goes near, around, under, with, what enhances your plant’s growth and protects it from damaging insects and diseases, or feeds your soil! Keep the biodiversity rolling! Plant pest deterring plants first so they will be up and working when you put in your seeds or transplants! If you forget, you can always add your companions later.
- Alyssum is a great old fashioned pretty border plant, an understory living mulch. And WHITE Alyssum repels the cabbage butterfly and feeds mini beneficial pest predators like hoverflies whose primary food source is aphids!
- Basil repels several unwanted insects, is great near tomatoes but not in the basin with the tom. The tom needs less water. Plant the Basil beside the tom basin. The deeper tomato roots will get water used to water the Basil!
- Beans, Cukes, Dill, Radish Combo! Cukes and Beans are great on the trellis, one high, one low unless you are growing long cuke varieties. They can fill a trellis all by themselves! Dill to go with pickling cukes. Radishes to deter Cucumber beetles.
- WHITE Potatoes with Zucchini & Cukes to repel squash bugs.
- Radish with eggplant, cukes & zukes as trap plants for flea beetles and to repel cucumber beetles.
- Carrots love being with cilantro and chamomile, and chamomile improves the flavor of any neighboring herb! Plus, it helps neighboring plants – called the Plant Dr!
- Calendula traps aphids, whiteflies, and thrips! Plant with tomatoes and asparagus.
- Chamomile is a love! Pretty, great tea, known as the “plant doctor,” chamomile has been known to revive and revitalize plants growing near it. That’s especially good to know for plants that are susceptible to diseases. Plant it by plants that are wilts susceptible, like your tomatoes & cucumbers .
- Spanish Lavender, Purple Cosmos are favorites of pollinators that love purple!
- Marigolds are brilliant and called the workhorse of pest deterrents!
- Lettuce and carrots make a great understory below larger plants like peppers, eggplant. They act as living mulch! Leave a little open space to lightly dig in some compost or manure later in the season. If you already have enough lettuce, beets and carrots, scatter a living mulch, soil feeding legume seed mix under those plants. At the end of the season you can turn it all under – aka Green Manure. Or remove the larger plants, open up spots in the living mulch and put in winter/summer plants! See much more – Living Mulch/Green Manure!
- Hot peppers emit a chemical from the plant roots that helps prevent Fusarium wilt, root rot, and a wide range of other plant diseases!Plant whole sets of companion plants as in the image above right! Very efficient use of space!See more at Super Spring & Summer Veggies Companion Planting Tips!
Now is the time watering becomes critical!

Lots of rain so far this year. But, please, always use your Water Wise Practices!
Please water before 10:30 AM and after 4 PM as possible. Use a watering sprinkler head or wand with an easy-to-use shutoff valve. Berms need to go to the dripline or further for some plants so tiny subsurface feeder roots can fully supply your plant with water and nutrients as it needs.
SEEDS need to be kept moist. If they dry they die. If the soil gets a dry crust, tiny seedlings might not be able to push through. Covering it very lightly with a very fine textured mulch like ‘Gorilla Hair’ can help. It keeps the soil moist longer and seedlings can push through it. If not, you either replant or if you don’t have time, just go get transplants. Of course, the advantage of seeds is you have a lot more variety choices than what you can get at the nursery if you aren’t too late in the season to get them, if you don’t have any more seeds… Always purchase extra seed for accidents and incidents, ie birds or insects, extreme temps.
A consideration for seeds is for convenience, plant them in a very mini ‘trench,’ nursery bed or patch, a low spot you make for them. That area will stay moist longer. Plant your seeds, cover with fine hairy light mulch. Try it! Once the seedlings have second leaves, transplant them to their permanent homes.
TRANSPLANTS need to be kept moist the first few days until they acclimate to their new home. Gentle watering. I water once, then go back and do the whole area again, giving the first watering a chance to soak down. Flooding is not necessarily a good choice. Soil needs oxygen, and plants can literally drown.
THE SCHEDULE What schedule, LOL?! It all depends on the weather or if you have planted seed have seedlings just up. In our area there are hot days, cool days, overcast days, sometimes windy. But very hot and windy together might mean watering twice a day, whereas cool and overcast might mean an inch of water a week could be just fine. Water beans, cukes, lettuces and short rooted varieties of strawberries more frequently – 2 to 3 times a week, daily, in very hot or windy weather. If you have seeds in, you might provide shade and water twice a day! Poke your finger in the ground after rains to see just how deep the water soaked in. Use your shovel and wedge a spot open to see if the soil is moist deeper.
To SAVE WATER In Santa Barbara, a long summer, low water table area, consider getting only indeterminate tomatoes. To keep a tomato supply for your table, if you plant determinates, that have a burst of tomatoes then taper off, you have to keep planting, wait for another two months to produce. Your new tomato will need water while there is no production. Indeterminates produce all summer long, with no waiting. Determinates are good for cooler northern short summers and crops that come in all at once for canning! Early determinates are good for getting tomatoes on the table soonest! It is common practice to plant both at first planting time.
- Use a long water wand to water under your plants, not the foliage. Use one with different settings so you use only what your plant needs, and an easy-to-use shut off valve so you use water only when you need to. See Hand Watering Veggies During Drought? Big Yes!
- Furrows, basins and berms are perfect for water capture, just like the SW indigenous peoples did with their waffle gardens. The water collects at the bottom, the drying wind goes over the berms. You can raise your tomato and cucumber basins onto the tops of your mounds so there is better drainage and your soil dries somewhat. For plants that are not wilt fungi vulnerable, dig your basins and furrows down, less work because no berms need to be made. Let the normal soil level be the ‘berm’ for the wind to blow over. See Growing Super Veggies in HOT, Drought, Desert Areas!
Most plants need to be kept moist. Kept moist. Dry crusty soil keeps your soil from breathing. Compost, worm castings, mulch and planting living mulch are all good answers. Compost has excellent water holding capacity. Work it in gently around your plant to just beyond its drip line. So as to damage as few roots as possible, maybe only do one or two sides of your plants so all the feeder roots are not destroyed. Feeder roots provide most of the nutrition and moisture for your plant, and it will set your production back if your plant has to stop, gets hungry, must regrow them. Worm Castings have super water holding capacity! Mulch only if your soil temps are up to par. Otherwise, wait, so the mulch doesn’t keep your soil cool. In a cool summer you might choose not to lay down mulch.
Living mulch has two advantages over dead mulch like bark or straw. 1) Living mulch can be an edible understory of small plants I call Littles. Their shade keeps the soil cool and moist. On balance they need water too, so you might use a wee bit of more water, but you also get 2 crops in the same space! 2) Living mulch can be soil feeding legumes under your bigger plants. They too shade and keep your soil moist and looser. In Santa Barbara a good choice can be White Clover. Get bulk seed at Island Seed & Feed.
The plant that does well with straw is cucumbers! It keeps the fruits clean and soil free, and, drum roll, might slow cucumber beetle movement from one plant to another! Plus, it is great shelter for wolf spiders, daddy long legs and other predators. The more spidies the more healthy your garden!
The first plant you mulch is any over summering Brassica – broccoli, kale. They like cool soil, so pile it on good and deep, 4 to 6 inches not touching the stem, or plant a dense understory of living mulch that won’t be harvested, or if you do harvest, cover that spot with straw ASAP! Peppers are quite the reverse, the last plants you mulch. They like soil temps above 65. Mulch keeps the soil cooler, so use your soil thermometer to see if the mulch is cooling it too much for your peppers.
Pumpkins, melons and winter squash may do much better with NO mulch at all! They all need heat. Rather than trellis these crops, up in the cooling air, leave them on the ground where it’s good and hot. You might even put in a straw bale windbreak for them if you have the room. Put the bales on their sides in a U shape that opens to the hottest time of day sun! Put reflective pie tins under fruits, or mulch under the fruits to keep them clean and above ground insect level.
Sprinkle and pat on Mycorrhiza fungi right on the roots of your transplants when you put them in the ground. It increases uptake of nutrients, water, and phosphorus that helps roots and flowers grow and develop. Ask for it bulk at Island Seed & Feed in Goleta. The exception is winter plants in the Brassica family – Broccoli, Kales. They don’t interact with mycorrhiza.
Garlic, bulb onions, and shallots naturally begin to dry this month. When the foliage begins to dry it’s time to STOP watering them. Dry outer layers needed for long storage will form on the bulbs. When about half of the foliage slumps to the ground, bend the rest to initiate this maturing. The bulbs will be ready for harvest when the foliage is thoroughly dry and crisp.
Natural Disease & Pest Prevention!
- Be wise and pick the right plant varieties for your temps and conditions! Get heat tolerant, bolt resistant, drought tolerant, disease tolerant/resistant. If you are just starting, just start! You will learn as you go. Our climate is changing, so we are all adjusting and plants will be being hybridized, and hybridize naturally, for new climates. We can get varieties from other areas that are already used to conditions we will be having. Together we will do this. Locally, save seeds from plants that do the best with the heat and share some of those seeds at the Seed Swap and with other gardeners.
- Think biodiversity! Plant companion plants that repel pests, attract pollinators, enhance each other’s growth so they are strong and pest and disease resistant. Mix it up! Less planting in rows, more under stories and intercropping – biodiversity. Split up groups so pests won’t go from one plant to the next, and the next. When you do rows, alternate plants like a tomato, eggplant, pepper. Allow enough room for air space between, no leaves of mature plants touching each other. That breaks up micro pest and disease habitats.
- Make top notch soil!
- In planting holes
– Add worm castings for your plants’ excellent health. 25% is best; 10% will do if that’s all you got.
– Add a tad more tasty properly aged manure mixes where manure lovers like peppers will be planted.
– Add non-fat powdered milk for immediate immune system support at planting time
– Put in a finely ground bone meal for 2-3 months later uptake when your plant gets to flowering time.
– Add bird guano high in P, Phosphorus, at planting time. It helps your plants continue to bloom LATE in the season! An NPK ratio like 1-10-0.2 is good, takes 4 months to become available to your plants.
– Add an eency tad of coffee grounds (a 1/2 of a %) if you have wilts in your soil
– Sprinkle mycorrhizae fungi directly on transplant roots, all but Brassicas, at planting time to increase their uptake of nutrients and water.
– Use slightly acidic compost where you will be planting celery and string beans.
- Immediately drench your transplants, foliar feed, with a non-fat powdered milk, baking soda, aspirin, soap mix to jazz up their immune systems. Specially give your peppers an Epsom salt and soap mix foliar feed for a taste of sulfur. More details and all the recipes.
- Maintenance! Keep your plants strong while they are working hard! Be ready to do a little cultivating composts and manures in during the season (called sidedressing), or foliar feeding fish/kelp emulsion mixes if you don’t have predator pests like skunks! Some sites say with good starting soil you shouldn’t need to amend during the season. Your plants will tell you if they do need more food. Maybe your soil wasn’t perfect. Maybe your plant has phenomenal production and gotten hungry. When production slows down, decide if you want more. Feed your plant a bit and see what happens.
- Keep your plants watered and vibrant, but not so much as to make their leaves soft and inviting to munching insect pests like aphids, leafminers.
- Trap gophers immediately if you are able. Better is to install underground wire prevention.
- Harvest promptly. Insects and diseases can signal when plants/fruits are softening and losing strength as they age, are past prime. Insects are nature’s cleaner uppers, and they and disease organisms are hungry! If leaves are yellowing or not looking up to par, remove them. Whiteflies are attracted to yellow.
- Prevention A frustrating typical spring disease is Powdery mildew. It’s common on late peas, Curly Leaf kales, broccoli, beans, cucumbers and zucchini. Choose mildew resistant varieties! Plant leaving plenty of space for air circulation. Apply your baking soda mix. Drench under and upper sides of the foliage of young plants to get them off to a great start! Do this the same or next day if transplanting. A super combo is 1 regular Aspirin dissolved, a 1/4 cup nonfat powdered milk, heaping tablespoon of baking soda, a half teaspoon liquid dish soap per gallon/watering can. Reapply every 10 days or so, and after significant rains. Not only is prevention so much better than after mildew has set in, but this mix stimulates your plant’s growth! See Aspirin Solution.Cornell’s Disease Resistant Vegetable Varieties LIST is awesome! Take a peek before you order seeds or buy transplants! It may take some time to make your choices, but is so worth it! A point to know is some varieties are commercial, meaning they are tough enough to last through shipping, and all the time it takes to process the fruits. If you are eating fresh from your garden, you may not prefer some of those varieties. Try two or three so you have some choices. Look up the variety online and see other home gardeners’ comments. Note if the commenters are in an area with similar planting conditions as yours. If a commercial seed company is the seed seller, sometimes they will also sell in mini quantities to home gardeners! Yay! Just call that 800# and ask! Often they really enjoy talking with a home gardener, delighted you called! They generally are very well informed because their business depends on it. They can tell you inside things that aren’t in the catalogs!
The usual May culprits!
- Cucumber Beetles get in cucumber, squash and melon blossoms. They aren’t picky. Depending on your location, they are yellow greenish with black stripes or dots about the size and shape of a Ladybug. They are cute but are the very worst garden pest. They carry bacterial diseases and viruses from plant to plant, such as bacterial wilts, Fusarium and Verticillium, and mosaic virus, deadly to cukes, etc. Radish repels them, is a champion plant, a hero of the garden! Plant enough radish for you to eat and to let others just grow, be there permanently or at least until the beetles are done, gone. IPM data Straw mulch recommended.
- Cucumber Mosaic Virus, CMV, per IPM ‘…has a very wide host range including cucurbits (except watermelon), tomato, spinach, celery, safflower, beans, blackeyes, peppers, beets, potatoes, many ornamentals and weeds. The virus is transmitted by many species of aphids and could be seedborne.’ Buy your seeds from reputable seed houses.The 303 Plots, each 20′ X 30′, Long Beach CA Community Garden has been doing trials under guidance of entomologist, Dr. Perring at UC Riverside. Gardener Joanne Rice reports:1. Since aphids carry the virus from specific perennial weeds, we are trying to keep everything weed free.2. Starting January 1st, all members have been asked to put up yellow sticky cards to reduce the number of aphids for the year. Aphids hate hot weather so their mating time is the cold months. Dr. Perring says that will help. Also, since aphids hate hot weather, we will probably not plant squash or cucumbers until July when our real heat starts.3. Dr. Perring, when we talked, said that CMV does not damage the soil. The CMV, is on the roots of the infected plants and if when you remove the plants you do not remove every root, you will get CMV at next planting. [REMOVE suffering plants immediately so they don’t make more infected roots. If you think you may have missed some, remove any questionable soil well beyond the dripline and Do Not put that soil anywhere you will be growing vegetables.]
4. We are currently working on a list of veggies, Summer and Winter, that are known to be CMV resistant. If you have such a list, I certainly would appreciate it. [If any of you have a list, please send it to us!]
- Squash Bugs like your Zucchini and other squash, cucumber and melons. Plant radish and WHITE potatoes amongst them to repel the bugs. Let some of the radish grow full height, eat the others as usual! You will get three crops instead of just one! IPM info
- Flea Beetles look like large black fleas and do hop mightily! They seem harmless enough, make tiny little holes in the leaves of eggplant, potatoes, arugula. But, those tiny holes add up. As the beetles suck out the juice of your plant they disrupt your plant’s flow of nutrients, open the leaves to disease, your plant is in a constant state of recovery, there is little production. Your plant looks dryish, lacks vitality. The trap plant for them, one that they like best, is radish! Thank goodness radish grow fast! Better yet, plant it ahead of time, or ASAP when you put seeds and transplants in. IPM notes
- Whiteflies do the honeydew thing like aphids do, leaving a nasty sticky black sooty mold or white fibers all over your plant’s leaves. The honeydew attracts ants, which interfere with the activities of Whitefly natural enemies. They are hard to get rid of, so keep a close watch on the undersides of leaves, especially if you see little white insects flying away when you jostle your plant. Whiteflies develop rapidly in warm weather, in many parts of California, and they breed all year. Prevent dusty conditions. Keep ants out of your plants. Hose them away immediately. Calendula is a trap plant for whiteflies. See more
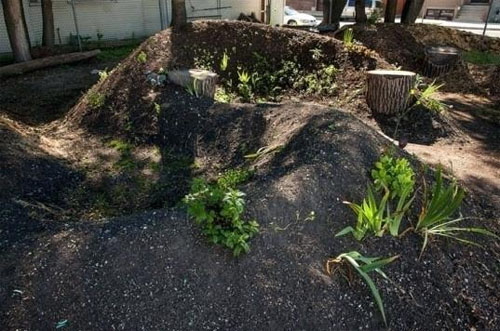
Now is the time to be thinking of soil prep for the future! Gather and dry good wood now for trial Hugelkultur composting at the end of summer, early fall! Woods that work best are alders, apple, aspen, birch, cottonwood, maple, oak, poplar, willow (make sure it is dead or it will sprout). Hugelkultur can be a simple huge pile or an elegant graceful design like this one above. Could be right in your front yard! Be creative! See more!
Plant Bee Food, Herbs and Flowers! Sow or transplant basil, borage, chervil, chamomile, chives, cilantro, comfrey, dill, fennel, lavender, marjoram, mint, oregano, rosemary, sage, savory, tarragon, and thyme. Comfrey, mint and oregano are invasive. Remove the bottom of a 5 gal container, sink it where you want your plant and plant in it. That contains the roots where you want them. Mint can jump ship, so keep a constant eye on it! Be mindful where you plant your herbs… Mediterranean herbs from southern France, like lavender, marjoram, rosemary, sage, savory, and thyme, do well in hot summer sun and poor but well-drained soil with minimal fertilizer. On the other hand, soft herbs like basil, chives, coriander (cilantro), and parsley thrive in richer soil with more frequent watering. Wise planting puts chives by your broccoli, kale, but away from peas if you are still growing some. Cilantro, a carrot family workhorse, discourages harmful insects such as aphids, potato beetles and spider mites, attracts beneficial insects when in bloom. Dill is a natural right next to the cucumbers since you will use the dill if you make pickles. They mature about the same time. Bumble Bees are special and need our support!
Let some of your arugula, carrots, lettuces, cilantro bloom! Bees, and insect eating birds and beneficial insects love them and you will get some seeds – some for the birds, some for you, some to take to the seed swap! Grow beauty – purple cosmos, marigold, white sweet alyssum – all benefit your garden in their own way! See Grow a Pollinator Meadow at Home in Your Veg Garden!
To plant a seed is to believe in tomorrow.
Audrey Hepburn, born May 4, 1929
Great Images at Rancheria Community Garden, Santa Barbara CA!
Updated annually
Check out the entire May 2023 Newsletter!
The Magic of Melons ~ Cantaloupe, Honeydew!
Pollination: Honeybees, Squash Bees & Bumblebees!
Mulching ~ Why, When, With What, How Much?!
Growing Super Veggies in Hot, Dry Desert Areas!
Upcoming Gardener Events! 13th International Permaculture Day May 7! 49TH Summer Solstice Parade June 25 2023, Theme is ROOTS! ADVANCE NOTICE NATIONAL HEIRLOOM EXPO Sep 2023!
SUBSCRIBE to the entire newsletter! Friend or Follow on Facebook!
Love your Mother! Plant bird & bee food! Think grey water! Grow organic! Bless you for being such a wonderful Earth Steward!
The Green Bean Connection started as correspondence for the Santa Barbara CA USA Pilgrim Terrace Community Garden. Both remaining Santa Barbara City’s community gardens are very coastal. Climate is changing, but it has been that during late spring/summer we are in a fog belt/marine layer area most years, locally referred to as the May grays, June glooms and August fogusts. Keep that in mind compared to the microclimate niche where your veggie garden is.
^Top
Feeling inspired? Get the word out! Sharing is caring ~
Posted in 2023, Amendment, Aphids, Aspirin, Baking Soda, Basil, Bees, Beneficials, Biodiversity, Bolt Resistant/Slow Bolting, Bone Meal, Brassicas, Bumblebee, Bush, canning, Community Garden, Companion, Compost, Cucumber, Cucumber Beetle, Desert, Design - Layout, Determinate, Disease, Disease Resistant, Drought, Drought Tolerant, Eggplant, Flea Beetles, Foliar, Fungus, Fusarium Wilt, Garden, Green Manure, Guano, Heat Tolerant, HOT, HOT Pepper, Hugelkultur, Indeterminate, Inoculant, Interplant, June, Legumes, Lettuce, Living Mulch, Manure, May, Mildew, Mosaic virus, Mulch, Nonfat Powdered Milk, Pests, Plant, Pollinator, Potato, Radish, Season, Seeds, Sidedress, SoCal, Soil, Spring, Squash, Summer, Summer, Temperature, Temperature, Tomato, Transplant, Understory, Varieties, Veggies, Verticillium Wilt, Waffle Garden, Water, Weather, Wind, Winter, Worm Castings | Tagged 2023, Amendment, Aphid, Aphids, Audrey Hepburn, biodiversity, Bolt Resistant, Bonnie Plants, Brassica, Bumble Bees, canning, carrots, cilantro, Companion, Companion Plant, Compost, Cornell, cucumber, cucumbers, determinate, Disease Resistant, Dr. Perring, Early, Early Tomatoes, fungi, Garden, Garden Design, Garden Prep, Harvest, Heat Lovers, Heirloom Expo, Hugelkultur, indeterminate, International Permaculture Day, Joanne Rice, Julie Martens, Living Mulch, Long Beach Community Garden, March, mildew, Mulch, NATIONAL HEIRLOOM EXPO, peppers, Pest and Diseases, Pollinator, Pollinator Meadow, radish, Santa Barbara CA, seeds, SeedSaving, Sidedressing, SoCal, Soil, Soil Prep, Soil Temp, straw, tomato, Varieties, Veggies, Watering, weather, whiteflies, wilts, Worm Castings | Leave a Comment »
April 1, 2023 by Cerena Childress
Across-the-Plot Gardening Tips April 2023!
Oh, Yes, Time for Those Luscious Heat Lovers!
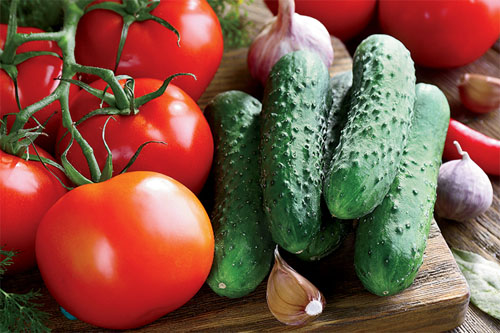
…each a miracle of seed and sun, I’ve always been one to enjoy tomato or cucumber right off the vine, with never a trip into the house—one magical wipe down a shirt-front and they’re ready. ~ commenter Rachel
Happy Santa Barbara Earth Day! It returns to Alameda Park Saturday and Sunday April 29 & 30! The 151st Arbor Day is Friday April 28! Please plant trees, lots of trees!

March 30 Santa Barbara had 1-3” of SNOW on our mountains, and, yes, it’s been chill, and we have rain saturated soil! Many gardeners are waiting for mid to late April to plant in drier soil. Night temps have still been in the 40s, in the next five days predicted as low as 44°. 60° to 65° soil temps are what we are looking for. BELL PEPPERS especially need warmer temps, nighttime temps steadily above 55°F and soil temps above 65°F. If planted too soon, sometimes they miss their natural growth sequence and never produce. Check out the Quick Guide to Summer Veggie Soil & Temp Preferences!
APRIL through JUNE Planting Timing
Weather note! In Santa Barbara it is cooler and a lot more moist than usual. As it warms, mildew will be in the picture. The soil is saturated and when it warms a bit, it is prime fungus – verticillium and fusarim wilts, habitat. The crops that suffer the most from wilts are tomatoes and cucumbers, squashes coming in third. Some gardeners will be waiting until May/June, when the soil is more dry, to plant those crops. Resistant/tolerant varieties will do well as long as they can. If you plant now, be prepared to start some new plants again, in May and/or June.
APRIL is true heat lovers time! Start MORE seedlings indoors NOW for successive June plantings. Sow seeds right in the ground! If seeds and tending seedlings aren’t for you, get transplants and pop them in the ground per their right times! April 1 or as close to it as you can, start your Jicama seeds! Winter squash for sure. It needs time to grow big and harden for winter storage. MAY for cantaloupe, peppers, pumpkins and squash! Wait until the soil has warmed to 70°F before planting squash and melons. Many wait until May, some even June, to plant tomatoes to avoid soil fungi. May and June are good for Urizun Japanese Winged Beans. Some gardeners wait until JUNE to plant okra. Okra really likes heat and grows quickly when happy. Choose faster maturing varieties like hybrid Annie Oakley F1 for coastal SoCal. Heavy Hitter is a phenomenal producer in the right location – you may need only 1 or 2 plants! Some Long beans and Asian tropical veggies need warm temps to start from seeds. If YOU anticipate a HOT summer, plant a tad earlier and be prepared to plant second rounds as plants finish early! Also be prepared to deal with it if our Santa Barbara summer is overcast as often is the case after all.
While we are waiting for the right temps, do soil preps that may still be needed. Weed out plants that won’t help your summer lovers. Make your soil fluffy with water holding compost, only 5 to 10%, while also adding tasty well aged composted manure, and worm castings too! If you don’t have enough castings, save what you have and add to your planting holes amendments.
Keep COMPOSTING! Soil building is the single-most important thing you can do for your garden. Compost keeps your soil aerated, has great water holding capacity, feeds slowly just perfectly! And if you made it, you know what’s in it! Make it HOT, Cold, or In Place! In place takes the least time, is the most efficient, is a worm buffet! Make a trench 6-8″ deep, put in your ingredients, chop fine with your shovel, sprinkle with well aged composted manure, mix in some soil so the chopped bits don’t form an impervious mat, cover with the soil you removed. Give it 1 to 3 weeks and you are ready to plant! Dry is dead, so be sure it is always slightly moist. Giving back to Mama Earth is nature’s natural way! And, like Will Allen says ….there is something very Spiritual about touching the soil, that’s where life begins.
Put in last minute amendments, soil preps for May plantings of cantaloupe, okra, more tomatoes. About Manures
Heat lovers are eggplant, limas, okra and bell peppers, pumpkins! Transplant early-maturing varieties of beans, cucumbers, eggplant, melons, bell peppers, squash, and tomatoes. Sow and/or transplant asparagus, beets, carrots, celery, chard, corn, herbs, kale, kohlrabi, leeks, heat-tolerant leaf lettuce, okra, summer-maturing onions, parsley, peanuts, the last peas (choose a heat-tolerant variety such as Wando), white potatoes with zucchini, radishes (with cukes and squashes to repel cucumber beetles, and with cukes, squashes and eggplant to trap flea beetles!), rhubarb, and spinach.
Choose heat and drought tolerant varieties when you can. For example, why wait when it gets HOT and your tomato stops setting fruit?! Get heat tolerant varieties the heat doesn’t bother! See Tomatoes are the Fireworks of Your Summer Garden!
Tomatoes! Heirlooms are particularly susceptible to the wilts, Fusarium and Verticillium. Instead, get hybrid varieties that have VFN or VF on the tag at the nursery. The V is for Verticillium, the F Fusarium wilt, N nematodes. Ace, Early Girl, Champion, Celebrity, are some that are wilt resistant/tolerant. In you are in continual drought conditions, consider getting only indeterminates. In the Mother Earth News tomato survey, they found gardeners chose heirlooms over hybrids if their soil is wilt/blight free. Otherwise, the longer the gardener has gardened, they more they chose wilt resistant hybrid toms if their soil has fungi. La Sumida has the largest tomato selection in the Santa Barbara area! Haley St Home Improvement probably has the largest pepper selection. See Special Planting and growing tips for your Tomatoes and Cucumbers!
Time for heat-resistant, bolt-resistant lettuces of all kinds! Sierra, Nevada, Jericho, Black Seeded Simpson are some. Green Star wins the beauty award and is super productive! Tips for super Successful Transplanting!


Strengthen your summer garden! Organize your Companion plant sets! Keep the biodiversity rolling! Plant pest deterring plants first so they will be up and working when you put in your seeds or transplants!
- Alyssum, in the image above left, is a great old fashioned pretty border plant, an understory living mulch. And white Alyssum repels the cabbage butterfly and feeds mini beneficial pest predators like hoverflies whose primary food source is aphids!
- Basil repels several unwanted insects, is great near tomatoes but not in the basin with the tom. The tom needs less water. Water the basil but not the tom!
- Beans, Cukes, Dill, Radish Combo! Cukes and Beans are great on one big trellis, one high, one low unless you are growing long cuke varieties. They can fill a trellis all by themselves! Dill to go with pickling cukes. Radishes to deter Cucumber beetles.
- WHITE Potatoes with Zucchini to repel squash bugs.
- Radish with eggplant, cukes & zukes as trap plants for flea beetles and to repel cucumber beetles.
- Carrots love being with cilantro and chamomile, and chamomile improves the flavor of any neighboring herb! Plus, it helps neighboring plants – called the Plant Dr!
- Hot peppers emit a chemical from the plant roots that helps prevent Fusarium wilt, root rot, and a wide range of other plant diseases!
- Calendula traps aphids, whiteflies, and thrips!
- Marigolds are brilliant and called the workhorse of pest deterrents!
- Lettuce and carrots make a great understory below larger plants like peppers, eggplant. They act as living mulch! If you already have enough lettuce, beets and carrots, scatter a living mulch, soil feeding legume seed mix under those plants. At the end of the season you can turn it all under – aka Green Manure. Or remove the larger plants, open up spots and put in winter plants! See much more – Living Mulch/Green Manure!
- Plant whole sets of companion plants as in the image above right! Very efficient use of space!See more at Super Spring & Summer Veggies Companion Planting Tips!
Keep ’em coming! If you have already done some early planting, at mid to late April schedule to pop in another round! Poke in some bean seeds where your very last peas are finishing, add cucumber seeds or transplants between the beans, plus dill at each end of the trellis to be there when you pickle those cukes! Plant more radishes to deter the Cucumber beetles, repel flea beetles. Fill in spots that could use a helper companion plant like calendula or chamomile! Succession planting makes such good sense. To keep a steady supply of your veggies, put your seeds and transplants in at the same time. Seedlings will come along 6 to 8 weeks after your transplants! But, again, if tending seedlings isn’t your cup of tea, just leave space and put in more transplants in 6 to 8 weeks after your first planting.
It is perfect to put in fast growers like lettuce, beets, turnips, arugula, to hold space until you are ready to plant bigger plants. When it’s time for the bigger ones, clear a space/harvest, pop in your seeds or transplants and let them grow up among the littles. As the bigger plants start to shade out the littles, remove strategic lower leaves of the big plant so the littles get light too! If you anticipate a HOT summer, plant littles on the morning light side of larger plants.
Put in borders of slow but low growers like carrots, mini cabbages, in more permanent placements, like on what will become the morning side of taller backdrop plants like peppers and eggplant. Let your Alyssum ramble. Add some Marigolds. Plant purple and blue favorites for bumble bees – rosemary, scabiosa, lavender, chives. Bumble bees pollinate tomatoes, the nightshade family; honey bees don’t! See Pollination: Honeybees, Squash Bees & Bumblebees!
Natural Disease & Pest Prevention!
- Be wise and pick the right plant varieties for your temps and conditions! If hot and dry, get heat tolerant, bolt resistant, drought tolerant, disease tolerant/resistant. If you are just starting, just start! You will learn as you go. Our climate is changing, so we are all adjusting and new plants are being hybridized, and hybridize naturally, for new climates. We can get varieties from other areas that are already used to conditions we will be having. Together we will do this. Locally, save seeds from plants that do the best with the heat and share some of those seeds at the Seed Swap and with other gardeners.
- Think biodiversity! Religiously plant companion plants that naturally repel pests – no pesticides needed, enhance each other’s growth so they are strong and pest and disease resistant. Mix it up! Less planting in rows, more understories (living mulch) and interplanting. Split up groups so pests won’t go from one plant to the next, and the next. Allow enough room for air space between, no leaves of mature plants touching each other. That breaks up micro pest and disease habitats.
- Make top notch soil!
- In planting holes
– Add worm castings for your plants’ excellent health. 25% is best; 10% will do if that’s all you’ve got.
– Add a tad more tasty properly aged composted manure mixes where manure lovers will be planted.
– Add non-fat powdered milk for immediate immune system support at planting time
– Put in a finely ground bone meal for 2 months later uptake when your plant gets to flowering time.
– Add bird guano high in P, Phosphorus, at planting time. It helps your plants continue to bloom LATE in the season! Choose an NPK ratio like 1-10-0.2, takes 3-4 months to become available to your plants.
– Add an eency tad of coffee grounds (a 1/2 of a %) if you have wilts in your soil
– Sprinkle mycorrhizae fungi directly on transplant roots and pat it on, all but Brassicas, at planting time to increase their uptake of nutrients and water.
– Add acidic compost where you will be planting celery and string beans.
- Immediately drench your transplants, foliar feed, with a non-fat powdered milk, baking soda, aspirin, soap mix to jazz up their immune systems. Specially give your peppers an Epsom salt and soap mix foliar bath for a taste of sulfur. More details and all the recipes.
- Thin baby plants you have deliberately or not overplanted! Many are great tiny salad greens. Most of all plants need space for their roots, or they struggle for soil food (can literally be rootbound in place), are weak and disease/pest susceptible, are not able to reach their full productive size. See this terrific post on Thinning Seedlings by DeannaCat!
- Maintenance! Keep your plants strong while they are working hard! Be ready to do a little cultivating composts and manures in during the season (called sidedressing), or adding fish/kelp emulsion mixes if you don’t have predator pests like skunks or raccoons! Keep your plants watered and vibrant, but not so much as to make their leaves soft and inviting to munching insect pests like aphids. Trap gophers immediately if you are able. Install wire protection.
- Harvest promptly. Insects and diseases know when plants are softening and losing strength as they age. Insects are nature’s cleaner uppers, and they and disease organisms are hungry! If leaves are yellowing or not looking up to par, remove them and don’t leave them lying on the ground. Whiteflies are attracted to yellow.
- Prevention A frustrating typical spring disease is Powdery mildew. It’s common on late peas, Curly Leaf kales, broccoli, cucumbers and zucchini. First, get the most resistant varieties. Plant leaving plenty of space for air circulation. Apply your baking soda mix. Drench under and upper sides of the foliage of young plants to get them off to a great start! Do this the same or next day if transplanting. A super combo is 1 regular Aspirin dissolved, a 1/4 cup nonfat powdered milk, heaping tablespoon of baking soda, a half teaspoon liquid dish soap per gallon/watering can. Reapply every 10 days or so, and after significant rains. Not only is prevention so much better than after mildew has set in, but this mix stimulates your plant’s growth! See Aspirin Solution!

Lots of rain so far this year. But, please, always use your Water Wise Practices!
Please water before 10:30 AM and after 4 PM as possible. Use a watering sprinkler head or wand with a shutoff valve. Berms need to go to the dripline of your plant so tiny subsurface feeder roots can fully supply your plant with water and nutrients as it needs. Some plants need ground water to 1 and a half times the size of the foliage diameter. Slow, spread Sink!
- Choose heat and drought tolerant varieties! They need less water! Some will keep producing at 85° and above!
- How much should you water? General rule is 1″/week. May take two, three waterings a day in extreme hot weather. Seeds and seedlings must be KEPT moist. On very hot days frequent waterings during the day may be needed. Some of your plants may need shade covers.
- Trenches or waffles?! To save water consider planting IN furrows, where moisture settles and drying wind crosses overhead. Plant crosswise to the prevailing wind so drying wind isn’t funneled down the trench, and, if possible, also to the Sun’s arc so the plants’ root areas will be slightly shaded by the depth of the furrow in early AM and late afternoon. If you still want your plants on top of the furrow, make the raised part of your furrows wide enough that you can put a mini trench on top of it! That’s what commercial strawberry farmers do. That holds the water up at your plants’ surface feeder roots area. If you make the sides of your trenches low slopes, and water carefully, your furrows won’t seriously degrade from water washing the sides away. Nor will seeds or plants be buried too deeply. But some maintenance will be required.Plants grown in thoughtfully made trenches need far less waterings and far less maintenance time. As the plants grow, they also self mulch and need even less water and less frequent waterings.Trench planting is akin to the New Mexico Zuni waffle gardens. The advantage of waffle gardens is, you can see, the wind and sun arc directions don’t matter to waffle gardens! The wind can change direction and it’s no problem! Berms cover all four sides. You can save the making and maintenance of berms by simply digging down! Zuni climate is hot and dry, sometimes windy. The berms/sides that shelter each waffle space cause hot drying winds to rise/cross over the waffle and it stays more moist inside. Be sure to mulch your waffles after the soil gets warm and before temps get hot. At that point you want to keep your soil moist and cool. The early Zunis used gravel from the nearby riverbeds. Similar sunken beds for growing food with less water have been used globally in arid regions, arising independently by Indigenous farmers.
 Curtis Quam’s waffle garden, which he tends with his family at Zuni Pueblo, NM = less water used, food security. By Greta Moran, photo by Curtis Quam.
- Please always be building compost. Compost increases your soil’s water holding capacity.
- When planting, make mounds with basins on top for virus sensitive plants like toms and cukes, make sure the bottom of the basin is higher than the level of the surrounding soil level. Rather than losing water to evaporation from overhead watering, put the water right where it will do the most good and nowhere else. Make the mound to the dripline or to 1.5 of it so your plant’s small surface feeder roots get moisture for food uptake. For larger leaved plants like squashes, put a stake in the center of the basin so you know where to water when the leaves get big and cover the basin. With a long watering wand you can water under the leaves rather than on them ~ unless they need a bath to remove dust. Fuzzy leaved plants like tomatoes, eggplant and zucchini don’t like wet leaves. Water at ground level.
- Once your soil is heated up, PLEASE MULCH! Straw, Self Mulching, a living mulch of understory plants like lettuce, or plant soil feeding living mulch legumes! It keeps your soil cooler, more moist, less water needed. And it stops light germinating weed seeds from germinating! Super heat lovers like melons and winter squash may be the exception. See Mulching right for each plant!Straw is dead, but has its advantages. It is organic and does decompose in time. It gets fruits up off the ground and keeps soil from splashing up on lettuce leaves! If not too deep, straw can shade but allow airflow. Your soil is cool but if has fungi it is best to let the soil dry a bit. Straw mulch can help reduce cucumber beetles 3+ different ways. 1) Mulch might directly slow beetle movement from one plant to another. 2) The mulch provides refuge for wolf spiders, daddy long legs and other predators from hot and dry conditions, helping predator conservation. 3) The straw mulch is food for springtails and other insects that eat decaying plant material; these decomposers are important non-pest prey for spiders, helping to further build spider numbers! In addition, laid on an inch or less thick, it lets airflow dry out wilts fungi in soil. That’s why straw is good to use under tomatoes and cucumbers. With other plants, lay it on 3-6″ deep!Living Mulch, Self mulching, planting closely enough so your plants self shade, is a tasty and efficient use of your soil nutrients. It’s doubly efficient space use when you plant smaller companion food producing plants under, beside, among, around larger plants!Soil feeding Living Mulch You can up the amps by tossing a mix of legume seeds under your plants to feed your soil as well! You may decide to do both. Plant the small plants you need, grow legumes under the rest along with the right companion plants per the crop there.
- Sprinkle and pat on Mycorrhiza fungi right on the roots of your transplants when you put them in the ground. It increases uptake of nutrients, water, and phosphorus that helps roots and flowers grow and develop. Ask for it bulk at Island Seed & Feed in Goleta. (Brassicas don’t connect with it, so your over summering kale or broccoli doesn’t need it.)
- Dust Mulching, cultivation, weeding, is perfect to break up exposed soil surface. That keeps the water from wicking to the surface and evaporating. Do it especially after rains. If you use a hula hoe you do two things at once! Just a half to one inch depth cuts off weed sprouts that use water. Indeed, it turns the soil a tad, all that’s needed. More weeds will follow, but it’s quick and easy to repeat the process. Two, three times, a few days apart, and there will be few weeds after that for a while. Get ’em while they are small and easy to do. Smart gardening.
Plant Pollinator Food, Herbs and Flowers! Sow or transplant basil, borage, chervil, chamomile, chives, cilantro, comfrey, dill, fennel, lavender, marjoram, mint, oregano, rosemary, sage, savory, tarragon, and thyme. PURPLE is best for bees, blue next! Be mindful where you plant them… Mediterranean herbs from southern France, like lavender, marjoram, rosemary, sage, savory, and thyme, do well in hot summer sun and poor but well-drained soil with minimal fertilizer. On the other hand, basil, chives, coriander (cilantro), and parsley thrive in richer soil with more frequent watering. Wise planting puts chives by your broccoli, kale, but away from peas if you are still growing some. Cilantro, a carrot family workhorse, discourages harmful insects such as aphids, potato beetles and spider mites, attracts beneficial insects when in bloom. Dill is a natural right next to the cucumbers since you will use the dill if you make pickles. They mature about the same time. Let some of your arugula, carrots, lettuces, cilantro bloom! Bees, pollinators and insect eating birds and beneficial insects love them and you will get some seeds – some for the birds, some for you, some to share at the seed swap! Grow beauty – cosmos, marigolds, white sweet alyssum – all benefit your garden in their own way! See Grow a Pollinator Meadow at Home! Here are some special considerations – Courting Solitary Bees!
May your crops be abundant and your Spirit blessed!
March Cabbages, Kale, seedlings and flowers! Great Images at Rancheria Community Garden, Santa Barbara CA!
Updated annually
Check out the entire April 2023 Newsletter!
Designing Your Spring/Summer Veggie Garden!
Quick Guide to Summer Veggie Soil & Temp Preferences!
Seed Soaking/Presprouting Tips & Ideas! Part 1
Veg Gardening Changing Climate Survival Guide!
The Inspiring Permaculture Restoration of Mexico City’s Chinampas
Upcoming Gardener Events! Santa Cruz Permaculture 2023 Design Permaculture Course April-Sep, April 29-20 CEC’s 53rd Santa Barbara Earth Day Celebration! International Permaculture Day May 7! ADVANCE NOTICE NATIONAL HEIRLOOM EXPO Sep 2023!
Love your Mother! Plant bird & bee food! Think grey water! Grow organic! Bless you for being such a wonderful Earth Steward!
The Green Bean Connection started as correspondence for the Santa Barbara CA USA Pilgrim Terrace Community Garden. Both remaining Santa Barbara City’s community gardens are very coastal. Climate is changing, but it has been that during late spring/summer we are in a fog belt/marine layer area most years, locally referred to as the May grays, June glooms and August fogusts. Keep that in mind compared to the microclimate niche where your veggie garden is.
SUBSCRIBE to the entire newsletter! Friend on Facebook!
^Top
Feeling inspired? Get the word out! Sharing is caring ~
Posted in 2023, Amendment, April, Aspirin, Baking Soda, Basil, Bees, Beneficials, Biodiversity, Bone Meal, Brassicas, Bush, Chard, Cilantro, Cold tolerant, Community Garden, Companion, Compost, Cucumber, Design - Layout, Determinate, Disease, Disease Resistant, Drought Tolerant, Early, Eggplant, Foliar, Fungus, Fusarium Wilt, Garden, Green Manure, Guano, Harvest, Heat Tolerant, HOT, HOT Pepper, Indeterminate, Interplant, June, Legumes, Lettuce, Living Mulch, Manure, May, Mildew, Mulch, Nonfat Powdered Milk, Okra, Pests, Plant, Pollinator, Potato, Radish, Rancheria, Season, Seeds, Sidedress, Soil, Spring, Squash, Strawberries, Succession, Summer, Summer, Temperature, Tomato, Transplant, Understory, Varieties, Veggies, Verticillium Wilt, Waffle Garden, Water, Weather, Winged Bean, Winter, Worm Castings | Tagged 2023, Amendment, Aphid, Aphids, biodiversity, Bolt, Bolt Resistant, Brassica, broccoli, canning, carrots, cilantro, Companion, Companion Plant, Compost, Cornell, cucumber, cucumbers, Curtis Quam, DeannaCat, determinate, Disease Resistant, Early, Early Tomatoes, Earth Day, Foliar Feed, fungi, Garden, Garden Design, Garden Prep, Ground Temp, Harvest, Heat Lovers, Heirloom Expo, indeterminate, International Permaculture Day, leafminers, Living Mulch, March, mildew, Mother Earth News, Mulch, NATIONAL HEIRLOOM EXPO, Pest and Diseases, Pollinator, Rancheria Community Garden, Santa Barbara CA, seeds, SeedSaving, Short Season, Sidedressing, SoCal, Soil, Soil Prep, Soil Temp, straw, Succcessive, tomato, Varieties, Veggies, Watering, weather, whiteflies, Will Allen, wilts, Worm Castings | 2 Comments »
April 1, 2023 by Cerena Childress
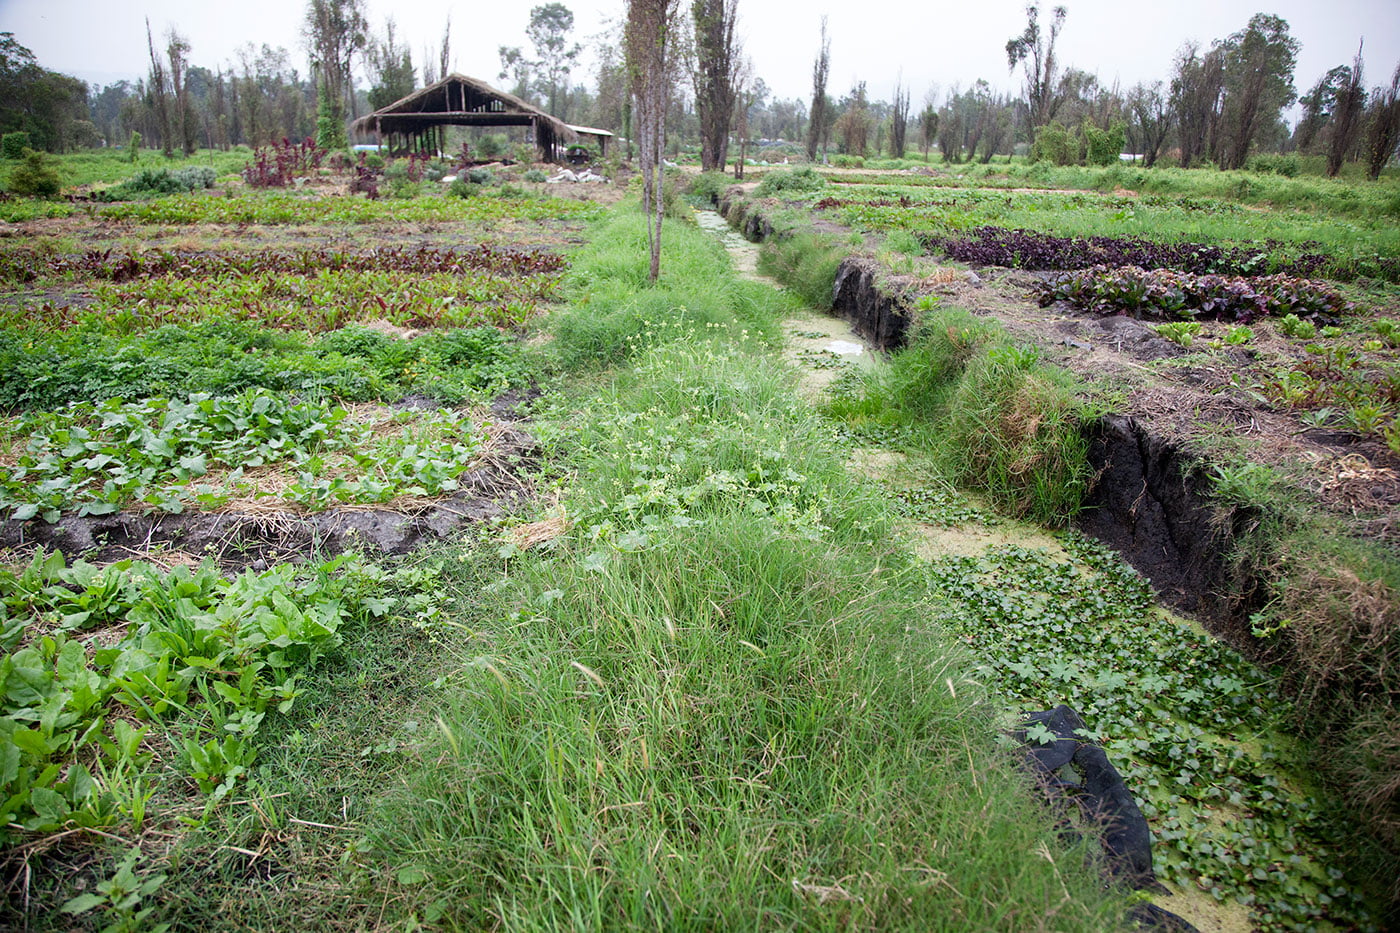
See fabulous images and details at New Worlder’s post The Chinampas of Xochimilco!
The Aztec Chinampas are so different than the indigenous Zuni waffle gardens of New Mexico! Each are water related. The Chinampas are floating mud gardens, while the Zuni need to conserve water.
O.S.U., Oregon State University, says Permaculture Professor, ‘Andrew Millison regularly gets over a million views on videos that are longer than 10 minutes which is extremely rare in today’s “instant-gratification culture”. Millison’s formula, unlike a catchy Tik Tok dance video, involves deep, meaningful, and inspiring content.
First of all he addresses environmental challenges that many of us have lost hope for. Today, and for decades, the climate movement and other pressing ecological issues are typically framed from a panic-perspective with scary facts and figures that leave people feeling depressed, overwhelmed and as if we are all doomed. Andrew breaks down these problems in easy-to-digest terms while presenting solutions that most individuals can grasp and begin practicing in their own community.’
This video is called: Chinampas of Mexico: Most Productive Agriculture EVER? It’s informally informative, worth every golden moment of your time. View it and the thankful and useful comments.
Commenter Asa DeWitt says:
I did some archaeological research on the collapse in Chinampa agriculture from the prosperous Aztec times to post-colonization times. One of my main findings was that the Chinampas system required a high degree of political orchestration to function. There is evidence for times of high and low use periods during Aztec power, and they can be correlated with times of strong and weak governance. When the Spanish came in, the Aztec governance system was of course decimated, and therefore the Chinampas system greatly receded. The reason they can be so product is from a highly organized and efficient labor system with a common goal and greater vision. The Area Tierra program seems to be filling in this gap, providing a modern and integrated structure for the Chinampas system to once again rise to prominence as an incredibly efficient, abundant, and ecologically diverse system that supplies food to the residents of Mexico City.
Commenter panda head asks:
I wonder if a derivative of this system could implemented in the Mississippi river valley as a way to exist with flooding in a controlled way
Andrew’s answer was Definitely!
There are several areas differently laid out throughout the Chinampas. Here’s a diagram of the basic system of the Aztec Chinampas by David Carrasco.
Today the Chinampas are simply beautiful. They bring many tourists just to see them, for their historical value, but also to be educated about working environmental solutions. Book your tour at Lokal Travel! There are many types available! Here’s one:
Xochimilco Canal and Local Food – Sunrise Tour
Ride a traditional trajinera, watch the sunrise, explore th chinampas, meet farmers and enjoy a delicious meal with locally grown ingredients. This tour is on hour longer than the day tour. Starts a 6 am. $185-490/person. (3.22.23)

In today’s world, the Chinampas a considered to be one of many formulas for success.
Thanks to Mr. Millison and Oregon State University Permaculture Design this information can be readily shared and enjoyed globally. Take some time to explore the many inspiring programs on Andrew Millison’s YouTube Channel and be sure to get your fingers in the dirt to be part of this global movement to heal our planet! See more of Millison’s videos for the US and other parts of the world! He currently has 255K subscribers! (3.22.23)
Together we can do this!
Updated 3.25.23
Love your Mother! Plant bird & bee food! Think grey water! Grow organic! Bless you for being such a wonderful Earth Steward!
The Green Bean Connection started as correspondence for the Santa Barbara CA USA Pilgrim Terrace Community Garden. Both remaining Santa Barbara City’s community gardens are very coastal. Climate is changing, but it has been that during late spring/summer we are in a fog belt/marine layer area most years, locally referred to as the May grays, June glooms and August fogusts. Keep that in mind compared to the microclimate niche where your veggie garden is.
SUBSCRIBE to the entire newsletter! Friend on Facebook!
^Top
Feeling inspired? Get the word out! Sharing is caring ~
Posted in Design - Layout, Flood, Garden, Permaculture, Remediation, Restoration, Waffle Garden, Water | Tagged Andrew Millison, Area Tierra program, Asa DeWitt, Aztec, Chinampas, Chinampas Diagram, David Carrasco, flooding, Indigenous, Lokal Travel, Mexico City, Mississippi river valley, Most Productive Agriculture EVER?, mud, Oregon State University, panda head, Permaculture, Permaculture Design, tour, Video, Water, Xochimilco, YouTube, Zuni Waffle Garden | Leave a Comment »
March 1, 2023 by Cerena Childress
Across-the-Plot Gardening Tips March 2023!
March Planting, Thoughtful Garden Design & Perfect Veggie Choices!

Last chance to design, make changes to your summer garden layout! March is often first plantings, if not, it is last soil preps before full on April plantings! See about wise Companion Planting for successful combinations!
Day lengths are still short. Feb 28 Soil Temps 10-11 AM were 50° in sun and shade. We want Night air temps steadily above 50 and soil temps 60 to 65 for starting our veggies well. Bell Peppers, especially need these warmer temps. They don’t like cold feet. They do best with nighttime temps above 55°F and soil temps above 65°F. Average March night temps are 46°F to 48°F.
MARCH through June Planting Timing
Start MORE seedlings indoors NOW for late April/early May plantings – eggplant, peppers, and more tomatoes for transplanting into the garden in late April or early May. Also sow cucumbers, squash and sweet potatoes. The beauty of seeds is you can plant exactly what and how many you want! If seeds and tending seedlings aren’t for you, get transplants and pop them in the ground per their right times! Plant Winter squash now so it will have a long enough season to harden for harvest and be done in time for early fall planting.
- APRIL is true heat lovers time! Eggplant, limas, melons, bell peppers, pumpkins and squash! Many wait until April, even May or June, to plant tomatoes. Wait until the soil has warmed to 70°F before planting squash and melons.
- Wait until MAY for cantaloupe, long red beans. Late May, even early June are best for tropical types like Winged Beans.
- Some gardeners wait until JUNE to plant okra. It really likes heat and grows quickly when happy. Choose early varieties like the standard Clemson Spineless, Annie Oakley F1, red Burgundy or Cajun Delight! Try the fabulous Heavy Hitter! Choose faster maturing varieties for cool coastal SoCal. If YOU anticipate a HOT summer, plant a tad earlier, but in Santa Barbara be prepared to deal with it if summer is overcast as often is the case after all.
With our warming temp trends be on the safe side. Get bolt resistant/slow bolt varieties, heat, and especially drought tolerant varieties of everything!
If your seeds that need Cold Stratification didn’t get cold during the winter, here’s what you can do now!
Right now plant bell pepper transplants (at the right temps) and cold tolerant, early varieties if available. If you love your peppers and want some early, or have a short growing season, next year order seeds for ones that mature quickly and are cool weather adapted! Plant those transplants in the ground first and others more heat tolerant soon after to carry the length of the season. For cold tolerant sweet bell peppers, get seed for Ace, Lady Bell or King of the North! Obriy Ukrainian sweet red pepper is both cold and heat tolerant! For hotties that don’t mind cold, order up Early Jalapeno, Hungarian Hot Wax or Anaheim. Rocoto stands some cold but not a hard freeze. Manzano are reported to survive at 20°! The extraordinary feature of these two peppers, Capsicum pubescens (hairy leaves), is they grow into four-meter woody plants relatively quickly, and live up to 15 years! Truly sustainable! Now we need a bell pepper that can do that! If cold weather can happen anytime where you live, grow your peppers in pots; take them inside when it gets cold. Keep them on a cart or put the pots on roller wheels.
Plant determinate quick maturing early varieties of tomatoes – start with small fruited varieties and cherry toms – for soonest tomatoes for your table! The coastal moist soil at Santa Barbara’s community gardens has residues of Verticillium and Fusarium wilts, so some gardeners wait until warmer drier June soil to plant tomatoes and other veggies, like cucumbers that are wilts susceptible – but remember, those fungi are also windborne. You can delay it, make it less, but not prevent or stop it. Cucumbers are especially susceptible and do quickly die from it, so if you love cukes, be prepared to plant 2nd and 3rd rounds, but do these successive rounds in different places! First, choose resistant varieties like Natsu Fushinari longs! See more about how to avoid or slow down wilt and fungi problems! See about using BLEACH! See more about selecting tomatoes!
Outdoors sow or transplant beets, carrots, celery, chard, cilantro, herbs, Jerusalem artichokes, kohlrabi, leeks, green onions, bulb onion seed and sets (be sure to get summer maturing varieties), parsley, peas (be sure to use the right inoculant with your seeds if your soil needs it), peanuts (they do grow here!), potatoes, radishes, shallots, spinach, strawberries, and turnips. Time for heat tolerant, bolt and tipburn resistant lettuces of all kinds! The fabulous Green Star, Sierra, Nevada, Jericho, Black Seeded Simpson are some. Tips for super Successful Transplanting!
This is the LAST MONTH to transplant artichokes, asparagus, broccoli, Brussels sprouts, cabbage, cauliflower, kale; also strawberry, blackberry, and raspberry roots so they’ll bear fruit well this year.
PLANT COMPANION PLANTS THAT REPEL PESTS, WARD OFF DISEASE IN ADVANCE SO THEY WILL BE UP AND WORKING WHEN YOUR SEEDLINGS COME UP OR YOU INSTALL YOUR TRANSPLANTS! Those are radish, cilantro, potatoes, Borage. The best kind of biodiversity is companion planting! See Super Spring & Summer Veggies Companion Planting Tips!
- Beans, Cukes, Dill, RADISH Combo! Depending on ground temps, tuck in some bean seeds where the peas are finishing, intermingled with cucumber seeds that will grow low along the trellis, below the beans, plus a few dill to go with the cukes! However, ONE healthy long cuke plant like Natsu Fushinari will easily take up a full 4’X7′ trellis all by itself! See more for bean/cuke planting tips. Plant radishes with the cukes to deter the Cucumber beetles. Borage repels tomato hornworm and is especially good with tomatoes, strawberries and squash!
- Tomato Tips: La Sumida has the largest tomato selection in the Santa Barbara area! Heirlooms are particularly susceptible to the wilts, Fusarium and Verticillium. Instead, get varieties that have VFN or VF on the tag at the nursery. The V is for Verticillium, the F Fusarium wilt, N nematodes. Ace, Early Girl, Champion, Celebrity, are some that are wilt resistant/tolerant. In drought conditions, consider getting only indeterminates.
See Cornell’s Veggies Disease Resistant List!
Succession planting makes such good sense. Put your seeds and transplants in at the same time. Seedlings will come along 6 to 8 weeks behind your transplants so you have a steady supply of yummy veggies! Otherwise, plant another round as frequently as you need for the table supply you need. But if tending seedlings isn’t your cup of tea, just leave space and put in more transplants in 6 to 8 weeks after your first planting.
It is perfect to put in fast growers like lettuce, beets, turnips, arugula, chard, to hold space until you are ready to plant bigger plants. When it’s time for the bigger ones, clear a space/harvest, pop in your seeds or transplants and let them grow up among the space holders. As the bigger plants start to shade out the littles, remove lower leaves so the littles get light too! The smaller plants act as living mulch under the bigger plants. No need to plant smaller plants separately in rows of their own. Think circles and understory! Plant them around, under, among the bigger plants! If you anticipate a HOT summer, plant heat sensitive littles only on the morning or shady side of larger plants. See Mulching ~ Why, When, With What, How Much?!
Put in borders of slow but low growers like carrots, mini cabbages, in more permanent places, like on what will become the morning side of taller backdrop plants like peppers and eggplant.
Depending on what legumes you choose, figure 3 1/2 +/- months to grow another round of green manure to enrich your soil Nitrogen. In warming weather and longer days, it grows faster. In 6 weeks to two months chop it down and chop up. Give it as close to 2 weeks as you can to decompose on the surface, keeping it moist. Add amendments, turn it all under at once, allow 3 weeks to a month for it to integrate with your soil, and the area will be ready to plant again. Or, dig your planting holes as soon as you turn it under, put in some fine compost, a smidge of manure, your other favorite amendments like worm castings, bone meal, guano high in P of the NPK for late blooming, a mineral mix, and plant! The rest of the area will take care of itself! See much more – Living Mulch/Green Manure!
Bolting, is a common issue when there are quick temp changes, and some plants, like arugula, chard, cilantro and lettuces are famous for bolting. See more about it and what you can do. See also about Photoperiodism, Short Day, Long Day, Day Neutral Plants!
Consider not growing kale or chard over summer. Kale will grow, but really is happiest in Winter. If you harvest a lot of your kale in summer, it often has smaller dry looking leaves growing at the top of a tortured spindly stalk. I’ve seen them over 5′ tall. The leaves get tough, lack robust flavor, and lack that cool weather vibrancy. Fertilizing, watering really don’t do much at this point because the plant is just trying to survive. The trunk has more volume than the leaves. A different strategy is to harvest a lot less early on, let your plant branch and become bushy! Then you can harvest at several points, and the plant provides its own living mulch. Huge difference. Or maybe you need to plant a lot more kales so you don’t over harvest individual plants!
This is ONE kale plant in the image below! It has made all these branches, multiple harvest points, by April at Pilgrim Terrace Community Garden! Look at that abundance! It thrives all summer!

Chard suffers in hot summers. It droops from midday heat, recovers, droops, recovers each day. That’s hard on a plant. It doesn’t produce much. Doesn’t seem reasonable to harvest when it is trying to stay alive. If you do choose to grow it, plant it where it will have a little shade in the hottest part of the day in summer or install some shade cloth for it. Give each plant plenty of room so they don’t suffer for lack of water and nutrients. Chard can be a big plant. Their growth is dependent on how much space they have. Plant shallow rooted living mulch plants around it. Keep it evenly moist. Flooding it isn’t what it needs when it droops from heat, and plants can literally drown. Chard is a fast grower. Why not do a final harvest mid to late spring? Plant something that will be more summer happy, then plant chard again in fall when things cool down and it thrives.
Broccoli, on the other hand, depending on the variety, produces side shoots like crazy all summer long! Just be sure to stake them if your plant gets large and top heavy! And feed it now and then. It’s working hard. Starting NOW, deeply mulch brocs you intend to over summer while it’s still cool to keep them cool. Brocs are naturally a winter plant. Or, instead of mulch, encircle them with quick growing shallow rooted living edible mulch plants – lettuce (repels Cabbage butterfly), beets, etc., that won’t interfere with your broccoli’s roots. When you harvest those quick growers, when you have access to the soil, feed your broc, and plant more living mulch! If you are using non living mulch, replenish it regularly – keep it two to three, four inches thick as needed.
Garden Design assures your veggies get the sunlight they need! Plant tall in the North, short South is the general rule. If you area is semi shaded or half day shaded, plant tall on the shady side, short where there is the most sun.
Tall: Indeterminate tomatoes in cages, pole beans in cages or on trellises. Basil is great with tomatoes, and a pack of culinary dandelions! Tall varieties of broccoli you keep for summer side shoots. Cucumbers are great on the trellis below the pole beans, or if a large variety of cucumbers, on their own trellis. Long beans! Tall varieties of okra.
Middle height: Determinate tomatoes, bush beans, okra, tall peppers like Big Jim Anaheim or Poblanos, zucchini. White potatoes with Zucchini to repel squash bugs. Radish with cukes and squashes to repel cucumber beetles, with cukes, squashes and eggplant to trap flea beetles! Large Winter Squash vines and pumpkins are middle height, while some mini melons would fall to the lower mid height zone. Put in zucchini and vines, sweet potatoes, to take up space if you don’t want to do a lot of tending, but do know, you must keep those zucchini picked! If your zucchini is dense, and you miss seeing it, an unpicked zuke can become a 6″ diameter 2′ long monster in as little as 5 hot days! Grow heat tolerant flat leaf kale like Thousand Headed Kale! It has many growing points instead of just one and self mulches!
Lower plants like eggplant, like a lot of heat. Put them on the sunny side, slightly in front of every other slightly taller plant. Leave a couple kale that will get taller. But, if they are leafless stalks with pom pom tops, they aren’t going to give any shade, nor are they going to produce much – kindly remove them? If you decide to keep them, since they are a winter plant, mulch them deeply or plant lettuces or leafy plants around their base as a living mulch and keep the soil there moist and cooler, and feed them.
Shorties & Littles: A lot of shorties will be in front of or be the understory of taller plants, in some instances a living mulch, so there is no need to allocate, use up separate space just for them. Your plants all help each other. When the bigger plant leaves start shading out the littles below, harvest strategic large lower leaves to allow light and airflow.
Put beets and carrots in the short zone, as an understory, between and among big plants. Bunch onions away from beans, great with other short rooted plants like lettuces that need to be kept moist. Summer small bulbed variety radishes, a super companion plant, give a great spike of hot flavor to a cool summer salad! Some delicious heat lover mini melons are quite small leaved and do best on hot unmulched ground. They are easily trellised, but put that trellis in a sunny hot spot because it is cooler up on a breezy open trellis.
Flowers & Seeds! Let arugula, cilantro, chamomile, a carrot or two, and a celery go to flower to bring bees, butterflies and beneficial insects – pollinators! Besides being beautiful and having lovely scents, let them seed out for seeds for next year’s plantings, to share at the seed swap, give as gifts! Carrots love being with cilantro and chamomile, and chamomile improves the flavor of and helps any neighboring herb. It is called the Plant Dr!
See Smart Garden Design Leads to Excellent Plant & Seed Selection! for more tips!
While you are thinking where to put things, select permanent spots for herbs, gateway points for flowers and edible flowers! Designate a permanent patch for all seasons flower habitat for bees. Cilantro is both tasty and has lovely feathery leaves and flowers, great pollinator food, living mulch. Chamomile is downright heady scented on a warm morning. Comfrey, Knitbone, is both healing (arthritis/bones) and speeds your compost, is high in soil nutrition. Humble white Sweet Alyssum is dainty and attracts smaller beneficial insects like hover flies that eat aphids! Calendula traps aphids, whiteflies, and thrips! Marigolds are brilliant and called the workhorse of pest deterrents! Cosmos is cosmic! Breadseed Poppies will literally have your bees rolling in pollen and supply your baking needs! See Stripes of Wildflowers! See Pollinator Meadow!
Finish your Summer Gardening preparations!
- Install a greywater, rain capture system
- Install gopher wire protection.
- Install pathways, berms.
- Waffle Garden, basins & windbreaks, a Water Garden. Excellent drought choices.
- Gather cages & trellises
- Terrace slopes – capture water runoff, prevent topsoil loss, mulch it, anchor the mulch
- Build creative raised beds, Efficient Keyhole Gardens, try Hugelkultur
- Get new containers, pallets, boards, tulle, net or wire for bird protection
- Organize where you will keep straw bales for summer mulch
- Setup compost and worm box areas
Complete your Soil Prep!
- Add compost, only 5 to 10%, & other amendments to your soil all at the same time.
- Add well aged manure as appropriate. Less in spring because you want fruit production, not leaf, unless it is a plant grown for its leaves, like lettuce, kale or cabbage! None for carrots, peas or beans.
- Add 25% worm castings. As little as 10% works. They are potent, help with seedling germination, boost immunities to disease, add water holding capacity.
- Bone Meal is a slow release fertilizer that becomes available to your plants over a 3-4 month period. It provides calcium (prevents blossom end rot) and phosphorous for blooms. See all about it!
- Adding bird guano high in P, Phosphorus, at planting time helps your plants continue to bloom LATE in the season! Its NPK ratio is 1-10-0.2, takes 4 months to become available to your plants.
- Sprinkle with a tad of coffee grounds to reduce wilts fungi. Add only a ½ a % to your soil or compost. A tiny bit goes a long way!
- Don’t cover with mulch yet unless you need it for erosion control. Consider planting a living mulch like White Clover instead. Covered soil is cooler. Let your winter cool soil warm up. The exceptions are broccoli, cabbage, chard, and kale! Mulch ASAP because they like/need cooler soil.
- Water your prepped areas when you water your veggies. Soil organisms need moist soil to thrive.
- Sidedressing! Hard working plants need fuel and water. As broccoli starts to head, give it a fish/kelp tonic! With many varieties, after the main head is cut, your side shoots will flourish!
Pests Reminders and Home Remedies!
- Before you put in seeds, sprinkle a bit of Sluggo type stuff around immediately to keep snails and slugs from vanishing upcoming seedlings overnight, making you think they never came up! No, they didn’t let you down. Killing off the creatures ahead of time saves the babies. It stops new transplants from being seriously damaged or entirely eaten while they are small. Do this a few times, to knock off the generations, and there will be no tiny vegetarian predators for quite a while.
- Pull away those blotchy sections the leafminers make on chard and beet leaves. Remove whole leaves that are too funky for rescue. Harvest the bigger outer lower leaves more often to stay ahead of the miners. Water a tad less so leaves are less soft and inviting. Plant further apart to decrease spread.
- Hose APHIDS off chard, kale, brocs, cabbages. Keep doing it for a few days to catch the ones you missed and new generations. Nearby, plant Calendula as a trap plant, radish to repel them. When you see unnaturally curled leaves, you will likely find aphids. Check both upper and undersides of the leaves and the tiny leaves at the central growth point.For hard to get at places, down the centers of chard, crinkly kale leaves, get out that spray bottle! Treat once, wait a couple days, treat the ones you missed, the ones that got away and newborns.I tried it, it WORKS! The simplest is to spray with 2 Parts alcohol, 2 parts water, 1 part soap. DO NOT use on seedlings, it will kill some of them. Spritz lightly rather than drenching or you may kill your bigger plant too! However. If the infestation is just over the top, with chard you can cut off the whole plant about 1 1/2″ above ground and simply let it regrow, though it may never be as healthy or lush as a newly grown plant. Sometimes it’s just better to start over, and not in the same place. Hose away any reappearing or lingering aphids post haste! Check out the ant situation. Ants like being near water. Water less? Get rid of the ants.
- Regularly and immediately remove any yellowing leaves, like from Brassicas, that attract whiteflies.
- Gophers You can still put in wire protective baskets or barriers, especially now while the soil is softer after any rains. If you see a fresh mound, trap immediately. Install prevention wire.
Prevention A frustrating typical disease is Powdery mildew. It’s common on Curly Leaf kales, squashes, beans, cucumbers. Select resistant varieties. Plant leaving plenty of space for air circulation. Apply your baking soda mix. Drench under and upper sides of the foliage of young plants to get them off to a great start! Do this the same or next day if transplanting. A super combo is 1 regular Aspirin dissolved, a 1/4 cup nonfat powdered milk, heaping tablespoon of baking soda, a half teaspoon liquid dish soap per gallon/watering can. Reapply every 10 days or so, and after significant rains. Not only is prevention so much better than after mildew has set in, but this mix stimulates your plant’s growth! See Aspirin Solution.
Do not compost diseased or infested leaves or plants. Bag it and trash it!
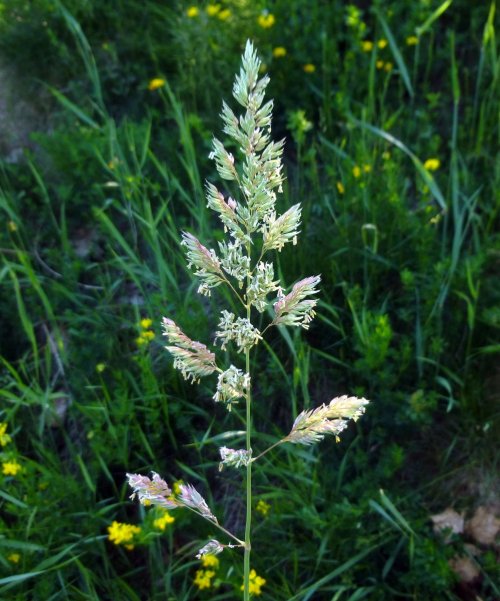 Watering & Weeding Wind and sun dry soil quickly and short rooted plants like peas, or seedlings, need to be kept evenly moist. That can mean every day to every other day watering, twice or more a day in summer heat.
Thinning is a form of weeding! Thin plants that need it, like beets and chard whose seeds start in foursomes! Thin plants you intentionally over planted – carrots, beets, turnips, kale, chard, radish, mustard! If you planted too close together, take out shorter, smaller weaker plants. They are all great in your salads along with small tender Brassica leaves. If you don’t thin, plants grown for their roots don’t have room or nutrition to grow that root. They are literally rootbound and starve each other out, are stunted. So thin sooner than later. If you miss the window, thin or not, you won’t get your root – beet, carrot, radish, etc. Keep thinning as they get older. At mature size their leaves shouldn’t touch each other. That helps keep pests and disease from spreading from one to the next.
When you are weeding, remove blooming or seeding plants first!!! When grass has those pretty frilly little green tops, it is blooming and seeding! Remove it ASAP. Better yet is to remove weeds before they seed! If at the seeding stage, gently pull, DO NOT shake the soil loose from the roots spreading seeds all over, and don’t put them in your compost! Bag and trash.
Dust Mulching, cultivation, is perfect to break up the soil surface, especially after a rain! That keeps the water from wicking to the surface and evaporating. If you use a hula hoe you do two things at once! Just a half to one inch depth cuts off weed sprouts. Indeed, it turns the soil a tad, all that’s needed. More weeds will follow, but it’s quick and easy to repeat the process. Two, three times, a few days apart and there will be few weeds after that for a while. Get ’em while they are small and easy to do. Smart gardening.
Keep COMPOSTING! Soil building is the single-most important thing you can do for your garden. Compost keeps your soil aerated, has great water holding capacity, feeds just perfectly! And if you made it, you know what’s in it! Make it HOT, Cold, or In place! Dry is dead, so be sure it is always slightly moist. Giving back to Mama Earth is nature’s natural way! And, like Will Allen says ….there is something very Spiritual about touching the soil, that’s where life begins.
The good work you do now will pay off with abundant summer harvests!
Hooray for the Santa Barbara rains and SNOW! See the wonderful February images at Santa Barbara’s Rancheria Community Garden! Winter gardens have their own special beauty!
Updated annually
Check out the entire March 2023 Newsletter!
Clever Seed Planting Tips for Indoors or Out!
Grow a Pollinator Meadow in Your Veg Garden!
Cucumbers! Personality and Pickles!
Grow Delicious, Amazing, Water Saving Edible Perennials!
Upcoming Gardener Events! Santa Cruz Permaculture 2023 Design Permaculture Course April-Sep, April 29-20 CEC’s 53rd Santa Barbara Earth Day Celebration! International Permaculture Day May 7! ADVANCE NOTICE NATIONAL HEIRLOOM EXPO Sep 2023!
Love your Mother! Plant bird & bee food! Think grey water! Grow organic! Bless you for being such a wonderful Earth Steward!
The Green Bean Connection started as correspondence for the Santa Barbara CA USA Pilgrim Terrace Community Garden. Both remaining Santa Barbara City’s community gardens are very coastal. Climate is changing, but it has been that during late spring/summer we are in a fog belt/marine layer area most years, locally referred to as the May grays, June glooms and August fogusts. Keep that in mind compared to the microclimate niche where your veggie garden is.
SUBSCRIBE to the entire newsletter! Friend on Facebook!
^Top
Feeling inspired? Get the word out! Sharing is caring ~
Posted in 2023, Amendment, Aphids, Aspirin, Baking Soda, Bees, Beneficials, Biodiversity, Bolt Resistant/Slow Bolting, Bolting, Bone Meal, Brassicas, Bush, Cabbage, Cabbage Butterfly, Chard, Cilantro, Cold tolerant, Community Garden, Companion, Compost, Cover crop, Cucumber Beetle, day length, Design - Layout, Determinate, Disease, Disease Resistant, Drought Tolerant, Early, Event!, Flea Beetles, Foliar, Fusarium Wilt, Garden, Green Manure, Guano, Harvest, HOT, HOT Pepper, Indeterminate, Interplant, Kale, Leafminer, Living Mulch, Manure, March, Mildew, Mosaic virus, Mulch, Nonfat Powdered Milk, Permaculture, Pests, Photoperiodism, Photoperiodism, Plant, Pollinator, Potato, Radish, Rancheria, Season, Seeds, Short Long Day, Sidedress, Snails & Slugs, SoCal, Soil, Spring, Stratification, Strawberries, Succession, Summer, Summer, Temperature, Tomato, Transplant, Understory, Varieties, Veggies, Verticillium Wilt, Water, Weather, White Fly, Winter, Worm Castings | Tagged 2023, Aphid, Aphids, Bolt, Bolt Resistant, Brassica, broccoli, canning, carrots, cilantro, Cold tolerant, Companion, Companion Plant, Compost, Cornell, Cover crop, cucumbers, determinate, Disease Resistant, Early, Early Tomatoes, Earth Day, Garden, Garden Design, Garden Prep, Green Manure, Ground Temp, Harvest, Heirloom Expo, indeterminate, International Permaculture Day, Kale, leafminers, March, mildew, Mulch, NATIONAL HEIRLOOM EXPO, Peas, Pest and Diseases, Photoperiodism, Plant, Pollinator, Pollinators, PreSprout, Rancheria Community Garden, Santa Barbara CA, seeds, SeedSaving, Short Season, Sidedressing, SoCal, Soil, Soil Prep, Soil Temp, Varieties, Veggies, Watering, weather, weeds, whiteflies, Winter, Worm Castings | Leave a Comment »
Older Posts »