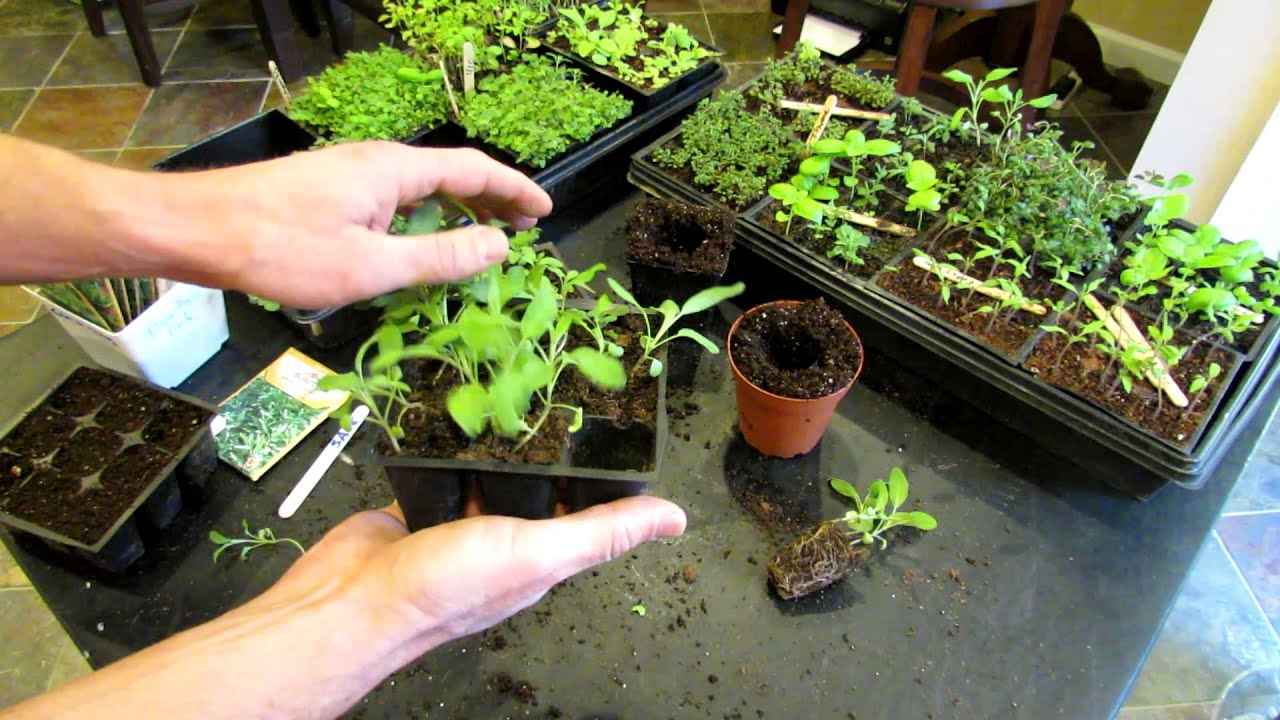
This small humble Nursery Patch was for starting Okra seedlings. Radish were started among them at the same time. By Cerena Childress, Rancheria Community Garden, Santa Barbara CA
If you plant from seeds as well as transplants and can’t, for whatever reason, grow them in home, an outdoor Nursery Patch is a terrific strategy! It can be a small area, as above, or whatever size you need! You can make more than one as space becomes free to use, and make them whenever you want for successive plantings!
Set aside a sunny location, or shady if you expect hot weather and the seedlings need some shelter. If you can’t get your seeds to start in a shady area, but they would do well there once growing, start them in sun, move them to shade! This is an ideal solution. When no area is yet available, like summer crops are still producing, yet the time has come to start early winter plants (SoCal!), a Nursery Patch is the ticket! It is convenient because all your seedlings are in one place, easy to care for, easy to cover on extra hot days, shelter from wind if necessary. You can use a Nursery Patch any time of year when there is a jam due to lack of space, but space will be available soon!
Spring planting time depends on soil temp, day length – photoperiodism, day and night temps – cold stratification, so the trick then is to start your seeds inside. But if it is late spring and you still have some winter plants doing well, a Nursery Patch works well then too!
In warm climates like SoCal, July, August is a great time for starting winter plants a tad early depending on your locality, the weather, available space, whether you decide to grow winter plants. As various plants finish – harvests/seedsaving, and you prep your soil, you can transplant seedlings to their new homes per your garden design plan. Choosing Summer Seeds Summer Design Winter Design – Think Big! More on Winter Design
You can plant a lot of seeds in a small space! Seed spacing is important for later transplanting. Six to eight, ten inches? I like a large thin bladed trowel that cuts into the soil with the least disturbance, gets deep enough to surely get below the roots, and to carry the soil the seedling is used to intact with the roots to its new planting hole. If you are transplanting a tiny lettuce seedling, you could probably get away with using a tablespoon! If you do it right, your seedling doesn’t know it was moved, doesn’t miss a beat in its growth! It is safe to plant a little further apart in case you get delayed by weather or a late season plant keeps on producing and doesn’t give up its space by the time you planned and you still want that harvest! Your seedling will get bigger than planned, so allow for Mother Nature!
Depending on the best window for your new plant, you may have to sacrifice a plant or two to make space to receive it! Some seedlings grow inordinately quickly if you hit their growing window just right. So your finishing plant gets done on time, but your seedling is happy to see you and waiting for no one! So leave a little more room between starts just in case they get a little bigger than anticipated!
Allow Space for Wise Companion Planting! If at all possible, plant companions before you plant your crop so the companions can help your main crop immediately upon arrival. Among the companions please add plants to attract beneficial insects and bees, butterflies. Provide habitat and food for them all year long! Super SoCal Fall, Winter Veggies Varieties, Smart Companion Plantings!
In your Nursery Patch, don’t forget to plant your plants’ companion plants together! Plant them together and transplant them together when their space becomes available! The exception is carrots. They grow long roots quickly, so better to plant them in a permanent location. Instead of a trowel, leave enough space between companion sets to safely lift them out with a small shovel! When ready, predig their new space for them, dig deeply so there is room for their roots to go straight down. Add amendments as needed and mix them into the soil. Water the hole just enough to moisten it. Dig deeply under your nursery plant companion set so not to cut their growing roots, and transfer them to their new planting hole. Immediately give them their first pest/mildew prevention treatments. Voilà! Happy plants! They will grow quickly, be strong and productive.
Winter plants that get a good start while there is still some heat, will be producing a lot sooner than plants started when it gets cooler. You will have a much earlier crop, plus time for a successive crop, maybe start another round in December! Be sure to leave space to plant additional rounds to keep a steady table supply, especially peas! You can plant the waiting to space to quick small growers for table variety. Just harvest them when you are ready to plant your second round.
SEED CHOICES
Make sure you are planting for the right time of year at your location when your plant will do its best.
Choose top quality from reputable seed houses.
Research plant strengths and weaknesses. That means resistance, tolerance of disease, pests, temperature – cold or hot, drought, whether it will do well in the type of soil you have. For strong mildew resistance, more, take a look at Cornell’s super plant by plant Veggies Disease Resistant List!
Know that some plants do better planted where they will be, don’t like transplanting! Carrots make long tiny roots asap! Root disturbance delays and stunts their growth, may kill them. Per UCANR: Root crops (carrots, beets, turnips, etc.) are not suited to transplants as the process will damage the root. Corn, cucurbits (squash, cucumbers, melons) and beans/peas don’t like to be transplanted but can be with care.
SEED PREP
- Cold Stratification – some seeds need a cold period or they won’t germinate. Generally this is NOT stated on the seed pack. See who needs what!
- Presoaking the right amount of time speeds up germination. See details!
- Presprouting assures you have a plant! No wasted time wondering if it will come up! You do have to be careful when planting them – they are fragile. See how
SOIL PREFERENCES
Prep your soil – alkaline or acid – for the type of seeds you will be planting. You can use potting soil, half potting/half soil! When making planting beds for the seedlings, use regular or acidic compost per your plants’ needs. Depending on the plant, you can plant straight in the ground if you wish. Besides any tasty amendments you might want to add, WORM CASTINGS would be Number One! Castings aid and speed germination, help with immunity and growth, and water holding capacity! If you have beds unprotected from digging predators like raccoons, avoid castings. Some plants like a lot of drainage, others like it a little on the soggy side. ‘Evenly moist’ means never dry and no floods!
Seed planting depth is essential. In summer heat some plant seeds can be planted a tad deeper so they don’t dry out. Their seedlings may take a bit longer to appear. Seeds that merely get sprinkled with soil, or are just patted on top of the soil, need extra attention. If you have a water wand, use the Mist setting. Gently misting them is best, may be required 3, 4 times a day or more. I say gently because you don’t want to uncover them or push more soil over them, making it too deep for them to get through the soil. It might be wise to plant them in shade to get them started, then transplant into full sun later. Plan on keeping all seeds moist all the time! Keeping the soil moist prevents a crust from forming that the tiny seedlings can’t get through. Once germination starts, if they dry, they die.
Perlite sprinkled on top can be helpful if you don’t want seeds to rot or seedlings to die from damping off, a sudden death from fungal disease.
Here are the Okras planted out with companions Basil and Lettuce. The red stems are Burgundy Okra, the shorter green stems are Annie Oakley F1. They are about to be thinned. The seeds were mixed last year, so it was random combinations.
 Cover if heat is too much for seedlings to emerge safely. Shade cloth comes in varying densities. Use row covers that you can water through. Movable canopies can be adjusted to follow the Sun’s path. While they are very short, you can use flats you get to carry plants at a nursery, the ones with a 1/4″ grid. Some plants like starting in mini trenches. An old farmers’ trick was to cover the length of the trench with a board. It keeps the trench dark and moist, but be sure to leave breathing access for air flow – no baking or steaming! Make the walls of your trench very low, not steep, to keep water from pushing soil down and covering the seeds too deeply.
Plant before a RAIN?! Sometimes that works, sometimes it doesn’t. If it is a heavy rain, some seeds, especially small ones, are likely to be washed away, pounded too deep. If you already sowed your seed and anticipate such a rain, get out there ahead of time to install covers, safely anchored! If that didn’t happen, scramble quickly to see if you can get a strong cover over them, taut, and well staked so it won’t be blown away, damaging the seedlings as it goes.
For planting seeds, it depends on whether it matters where they will end up. For example, a green manure cover crop (living mulch) needs no formal rows or placements. If you want a plant where you put it, might be good to wait until after the rain. Near-the-surface seeds, or small seeds, will likely rot if they get in a puddle. Some bean seeds can turn to mush in 6 hours, virtually dissolve. Plant delicate transplants ASAP just after rain or heavy drying wind. If it’s expected to be a heavy rain, wait, so your plants don’t literally drown. If heavy wind, delicate young plants can be broken. After wind and/or rain, the sun will warm up the soil and off they will go, safely!
Other times that rain is just perfect! I swear, rain water has vitamins all its own! Plants get a glorious start and thrive all season long! See special Rainy Day Tactics
PREDATORS PROTECTION!
Put down snail/slug stuff two or three times BEFORE you lay in your seeds. Slugs can mow them in one night. The seedling may come up in the afternoon, it is eaten at night, and you think it never came up.
Protect from birds that pluck tender seedlings the moment they come up, seed or plant! A small flock of hungry winter birds can take the whole lot in moments. Skunks, raccoons, etc, go for the worms. Cats dig holes. A well secured wire covering is good for a larger patch.


 Hardware cloth tunnels, top and top left, are great for rows! Bend them to about 8-10″ high sides. Make them as wide or narrow as you need. Hardware cloth doesn’t sag, depending on how big a patch size you need. You can always make 2 or 3 covers if needed. 8-10″ High gets you to transplant your seedlings to their permanent home soonest. You don’t want long roots that will get damaged when you transplant. A hardware cloth row cover can be made to the perfect size you need easily. They are easy to store and you can reuse them anytime you plant a new row of seeds.
In the top left image, note the bottle sleeves! The birds won’t go down inside them!
Small birds go right through chicken wire. At right, aviary wire has smaller openings, and is a lot more pliable than hardware cloth, can be flattened for storage. If it is what you have, a stick or two woven through is a trick to keep it from sagging!
Bottom left, 2″ wire is a simple remedy put together with items on hand. The advantage of this kind of wire is it rolls up easily and takes up a small storage footprint.
The advantage of wire without a covering is they are easy to water, get full sunlight and air circulation. The row cover above the wire keeps your plants cooler in hot temps or warmer in winter or early spring, keeps your soil from drying so much in windy conditions.
Be sure your covers are strongly secured so raccoons and skunks won’t dig under and flip them aside. They are attracted to manures, fish emulsion and worm castings! Stake things in place, leave no openings, put a heavy rock on top of your hardware cloth covers. Some large raccoons can roll stones away easily, flip boards up. 2″ thick square concrete stepping stones are heavy and harder for them to move. OR, don’t use manures, fish emulsion or worm castings when you start your seeds.
Once you do a few nurseries, you may accrue a few standard items, do the process without thinking.
The Burgundy Okras are quite taller now than in this image, close to 3′ and starting to flower! Some Garden Purslane, Verdolaga, a very special plant, have joined them. 9.8.21 Note: They are now 5’+ tall and making delicious Okra! 5′ is really good for our cool near-the-beach garden!

Wishing you well with your precious Nursery!
Updated 7.25.23
Love your Mother! Plant bird & bee food! Think grey water! Grow organic! Bless you for being such a wonderful Earth Steward!
The Green Bean Connection started as correspondence for the Santa Barbara CA USA Pilgrim Terrace Community Garden. Both of Santa Barbara City’s remaining community gardens are very coastal. During late spring/summer we are often in a fog belt/marine layer most years, locally referred to as the May grays, June glooms and August fogusts. In 2018 they lasted into September and October! Keep that in mind compared to the microclimate niche where your veggie garden is.


 Late July, gardeners are starting to want new ways to enjoy their Zucchini!


 Soil temp matters. Though the soil may become fairly warm quickly in days to come, day length is still important. No matter how early you plant some plants, they still won’t produce fruit until they have enough hours of sun, and for some, warmth including day and/or night and/or ground temps. If they miss their window, they may never produce at all…better to pull and replant. Keep growing those leafy producers – lettuce, chard, kale – in that space and plant the right plants at the right good time! See
  Beets, Chard and Spinach get Cercospora leaf spot – like the Chard at left. Sadly, no resistant cultivars of table beet are known. Late fall or early spring plantings are most likely to be affected. Late summer when conditions are favorable (high temperatures 75-85˚F, high humidity, long leaf wetness periods at night) is the worst. Beet roots fail to grow to full size when disease is severe. Successive plantings made close together can allow disease to move from one planting into the next. It grows on infected crop residues, so immediately remove leaves that collapse on the ground. It is spread by rain splash, wind, irrigation water, insects, gardeners, and equipment. This is one case where AM watering really makes sense to reduce humidity. UMASS Amherst recommends to ‘Avoid overhead irrigation if it will result in prolonged leaf wetness periods (e.g., through the night); irrigate mid-day when leaves will dry fully or use drip irrigation.’ If all that fails, use foliar fungicides. Plant less densely for more airflow, thinnings are tasty! In general, harvest more frequently so leaves don’t surpass their prime health. Planting only every 3 years in the same spot isn’t possible if there is too little garden space, so cultivating, turning and drying the soil between plantings is good.


 Hopefully, the weather will warm rapidly. It’s been COLD in Santa Barbara area! The January 30 9 AM ground temp at Rancheria was 48 degrees. Though the soil may become fairly warm quickly in days to come, day length is still important. No matter how early you plant some plants, they still won’t produce fruit until they have enough hours of sun, and for some, warmth including day and/or night and/or ground temps. If they miss their window, they may never produce at all…better to pull and replant. Keep growing those leafy producers – lettuce, chard, kale – in that space and plant the right plants at the right good time! See