Feeds:
Posts
Comments

Posts Tagged ‘wet’

SeedSaving Blessing Peru
Francisca Bayona Pacco, 37 at the time of this image, is Papa Arariwa, Guardian of the Potato, Paru Paru in Pisac, Cuzco, Peru. She brings a coca leaves offering to Pachamama (Mother Earth) asking protection from frost.

For some SeedSaving is a sacred event, ensuring survival, giving thanks, praying for future success. For others, these days and in times of commercial seed companies, it may be more like dancing by the light of the Harvest Moon!

SeedSaving SeedSavers Exchange - Passing on Our Garden Heritage

Founded in 1975, non-profit organization Seed Savers Exchange was a pioneer in the heirloom seed movement.

In the days before seed companies, saving seeds was done without a thought, a fundamental garden practice. If you didn’t save seeds, you had none to plant the next year. If there was a weather disaster and you lost your crop, trading for seeds became vital. Seeds were traded with newcomers, travelers, and at markets. It was the earliest form of commodities trading! When people moved off farms into the cities, they still wanted to grow veggies, but didn’t have room or time to let the plants seed out. That’s when seed companies came into being in the 1860s. Today there are Seed Banks and ONLINE seed sharing to preserve our heritage seeds!

Things to know before you plant! Many plants hybridize all by themselves! Brassicas and Cucurbits – squashes, cucumbers, have a great time in the garden cross pollinating! VARIETIES of the same plant need to be planted a mile or more apart to assure pure seed. If you don’t mind sometimes odd results, go ahead and experiment. If you give those seeds away, label them plainly for the recipient. Many Brassicas are mostly self-infertile. For seedsaving purposes they need to be planted in groups of at least 10 or more. Biennials, like Brassicas, don’t make seeds until their second year unless weather causes them to bolt prematurely in their first year. Bolting, AKA, Running to Seed!

To avoid hybridizing, find the safe distance needed for the specific plant you want to save seeds of. Check to see if your nearby neighbors are planting a different variety than you are! If they aren’t, if you are planting fast growers like radishes, you are good to go, meaning, plant one of your two or more varieties and let it make its seeds. Plant your second variety after the first, at a time so it won’t flower near the time the first one does! Not flowering at the same time assures no cross pollination. Or, simply plant only one variety. With long cycled plants be sure of your maturity dates. You could plant every 3 months. You will need to clearly label where each variety is. If weather changes delay the first planting then later warm weather speeds up your second planting, they could flower at the same time and you may not be able to get pure seeds of either variety that year unless you sacrifice one of the varieties.

Your SECOND HARVEST is SEEDS! In JULY you can tell which plants are your winners! It is the important time of deciding which plants are prime producers having maximum health to pass on to future generations. Some gardeners tie a bright ribbon on selected plants, at top and bottom, so they don’t accidently harvest it or pull that plant in a flurry of virtuous weed pulling or a fall garden clearing frenzy! Once you have selected your Saver plants, know they will take the time it takes, depending on weather, for their seeds to fully mature and dry. Leaving your seeds on the Mother Plant ensures maximum possible nutrition is attained in the seeds.

Once your plants are selected, at a certain point, you may decide to stop watering some of them. That’s how it would be in Nature. Some seeds need to harden, so let them. I stop watering seeding cilantro. If you want more Lettuces right now, they will self seed where they stand if you keep the area where they are falling moist. Tip the plant, pull some of the seeds, let them fall, or let the birds do it for you! Or, collect them to plant later or next spring. Or do a bit of both! Read on below for how to save different kinds of seeds.

As summer, or ‘winter,’ in SoCal finish, let your very best plants produce but don’t harvest those fruits! Beans get lumpy with seeds and will dry completely. Let a cucumber yellow and dry. Let the corn cob dry and the kernels get hard. Cukes, peppers, melons, okra and squash seeds are easy to process. Just remove the seeds and let them dry. Uh, do label the drying trays! Tomatoes are a tiny bit of a process but not hard at all. See below!

Save enough seeds for your own planting, for several rounds of planting across next year’s season, for replanting when there are losses, and some to give away or share at the seed swap. Keep the local race going.

Saving Seeds is Easy!

1. Simple Gathering ~ Beets, Carrot, Cilantro, Dill, Fennel, Onion
Let the seeds mature and dry on the Mother plant, just like in nature, for maximum fertility. Into a bag, shake them loose or roll them between your fingers to remove them. Separate the seed from any chaff with rolling pins, sieves, colanders! After gathering your ‘dry’ seeds, let them dry some more, out of the sun. Store them, but check on them a week or two later to be sure no insects have emerged.

Leeks & Fennel

Seeds - Gathering Fernleaf Dill is easy!Seeds Gathering Fernleaf Dill

2. Removing from pods ~ Arugula, Basil, Beans, Broccoli, Fava, Okra, Peas, Radish ~ is super simple! Know that Brassicas like Brocs, Kale, Cauliflower, cabbage and Brussels sprouts, are Biennials and seed their second year, unless there are weather changes, hot/cold/hot, and they bolt in their first year. Then you can get seeds from them their first year.

Beans & Radish

Seeds - Remove Beans from their Pods is super simple!Fat Radish seed pods!

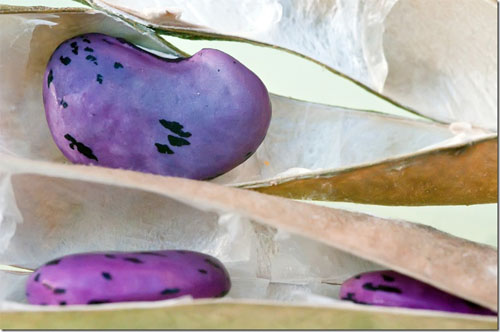
3. Removing & Drying – Cukes, Eggplant, Melon, Pepper, Squash, Tomatoes, Zukes. Let them mature fully on the plant so the seeds get all the nutrition they can from the Mother plant.

Cucumber & Cantaloupe

Cucumber Yellow, Ready for SeedSavingSeeds Remove Dry Melon

Tomatoes, a wet fruit, require a wee bit of processing and tad of time, but it’s easy! Heirlooms are true, some hybrids are true, others are unpredictable but fun. Put the little seeds in water, let sit no more than 2 days. Recent studies show tomato seed germination is best when seeds are soaked for only one to two days before they are rinsed and dried. Fermentation times longer than three days substantially lower the germination rate from 96% to only 74% on the 4th day! Word. Scrape the scum off. Rinse, add water, do it again, until you have clean seed. Dry. See all the tips and details!

Seeds Remove Process Dry Tomato

Remember! Potatoes are ‘seeds’ in themselves. Set some of your favorites aside for your next planting. When the eyes sprout, pop them in the ground. Remember to save seeds of your best herbs for scents to ward off insects you don’t want, for you to grow for flavorings or medicinal purposes. Save seeds of your healthiest flower companion plants that make your garden beautiful, widen your heart, and bring pollinators.

Storage ~ Each year keep your best! Scatter some about, called broadcasting, if they would grow successfully now or later when they want to! Store your keepers in a cool dry place for next year’s better than ever plantings. Airtight Canisters, Jars, Plastic Containers, Baggies. Or in envelopes just like at your nursery. Out of the light. Freeze if you want. Label them with their name/variety, date/year harvested, where collected, any important notes.

Scatter self seeders that need cold stratification now and let them over winter in the soil just like they would in nature. Some seeds ‘store’ and grow all by themselves and we’re not talking bird drop volunteers! BreadSeed Poppies are an example! Broadcast them if you will, or let Nature do that by letting your dead plant fall to the ground letting the seeds spill from the dry pods! In spite of being the tiniest seed, they survive until just the right time next spring. They know the soil temp they need, the day length, moisture, and they come up right where they like it best! In SoCal, plant your winter garden as usual. Don’t worry about the seeds. They WILL come up! If you haven’t had poppies before, and decide to ‘plant’ some, do it very early. In coastal Santa Barbara our Breadseed Poppies start in March (in 2022 they started in February). Sprinkle your seeds in December-January. They know what to do. Sprinkle them, where the ground might stay moist, or you will keep it moist. Cordon off the area so you don’t step on it and bury the seeds too deep, then simply wait.

Viability Seeds vary greatly in their length of time of viability.

• The drier the seeds, the longer they will store.

• The harder the seeds, the longer they will store.

Veggie Seeds Viability varies by Years!

YOU can learn LOTS more about SeedSaving! Each year in late July Seed Savers Exchange hosts an intimate gathering of leaders in the seed and garden movement at Heritage Farm in Decorah, IA.

Start a Seed Swap in Your Area! In Santa Barbara CA we had our 15th Annual Seed Swap in January 2023, sponsored by our local Permaculturists. If there are no Swaps where you live, if you are willing, please, please, please, contact local permaculturists, garden groups/clubs, master gardeners, to see about starting one! Or invite your neighbors and just do it in your own back or front yard! See more!

Special 2020 Note! As your plants come into seeding time, consider sharing them as soon as possible! “Little Free Seed Libraries” are Sprouting Up to Help Gardeners Share Seeds in Troubled Times. Take a look at some very clever and loving ideas! Here we are in 2023 and it’s still a good idea!

In 1981, the nonprofit seed conservation organization Native Seed/SEARCH hosted the first national grassroots seed conference in Tucson, Arizona, to better meet the community’s need for access to quality seeds. Forty two years later, ensuring community access to seeds remains a vital issue, perhaps now more than ever. In order to promote further dialog and cooperative action, in 2015 Tucson hosted the first International Seed Library Forum!

The Svalbard Global Seed Vault is a secure seed bank on the Norwegian island of Spitsbergen near Longyearbyen in the remote Arctic Svalbard archipelago, about 1,300 kilometres (810 mi) from the North Pole. Conservationist Cary Fowler, in association with the Consultative Group on International Agricultural Research (CGIAR), started the vault to preserve a wide variety of plant seeds that are duplicate samples, or “spare” copies, of seeds held in gene banks worldwide. The seed vault is an attempt to ensure against the loss of seeds in other gene banks during large-scale regional or global crises.

Remember, your seeds are adapted to you and your locality. If you are willing, take your extras to a local Seed Bank or Seed Library! While you are there, pick up some of your favorites and some new ones to try out! Santa Barbara’s FoodBank used to have a Seed Library at their warehouse, and taught recipients how to grow their own food. The seeds were free!  

Unregulated Biodiversity is Key, essential, so our agriculture remains adaptable to climate change, new pests and diseases. Heirloom seeds are vital to our continued nutritious future, and for our children’s healthy futures! And, as Ashley Glenn says…gardens have potential far beyond the plants in the ground. They are ancient classrooms, innovative laboratories….

We give thanks for Plants, Seeds, Food, Beauty, and Being Here Today Together.

Updated 6.26.23

See also Veggie Seed Saving Plant by Plant!


Love your Mother! Plant bird & bee food! Think grey water! Grow organic! Bless you for being such a wonderful Earth Steward!

The Green Bean Connection started as correspondence for the Santa Barbara CA USA Pilgrim Terrace Community Garden. Both Santa Barbara City’s remaining community gardens are very coastal. During late spring/summer we are often in a fog belt/marine layer most years, locally referred to as the May grays, June glooms and August fogusts. Keep that in mind compared to the microclimate niche where your veggie garden is.

Top^

Read Full Post »

Time to start compost for spring planting!   

Did you make rich fall soil?  If so, your bin and sheet composting is really paying off now!  If you have more compost available now, incorporate it with the soil in your new planting places, and plant another round!  Keep ‘em coming!  Now it is time to start the cycle again for your spring garden – start some more fat compost!  SOIL!  I’m always talking with you about soil because it’s the legs of your horse!  Can’t run without it!

When you restore, recondition soil, you can imagine how much the ground must be welcoming you, screaming up to you in its own way, how grateful it is to be so lovingly fed, organically to boot!!!  You are going to have wonderful soil, and very soon!  Just the act of planting adds life, the plant roots busting through, little creaturelets thriving!

There are so many ways to build wonderful soil!

  • Tuck kitchen trim in the top 6” of your soil, where the microbes and buglets are hard at work!
  • Make piles and fill bins with compost from kitchen trim, cuttings, leaves, straw for aeration.  Whack it up!  Smaller pieces, thinner layers decompose faster and fluffier.  Dry brown on the bottom, then up and up, alternating layers.  1 green wet, 2 dry brown, 1 green wet….
  • Sheet composting – build your compost in place, no moving later!  Lay down straw, cover with green and wet waste like kitchen trim, cover with straw.  That would be the simplest of all.  If you can, keep layering, up to 18” deep if you are starting raised beds, because you know that stuff is gonna sink down!  2 brown dry to 1 green wet is the formula.  Inoculate it with soil microorganisms by flinging a few handfuls of nearby soil onto it every couple of layers.  If you have them, put some red wriggler surface feeding worms in there.  They will chomp about and add their castings for free!  If you are seaside, chop up some seaweed for trace minerals!
  • Plant Nitrogen fixers – fava, peas, beans, clovers and other ground cover legumes.  At home plant Leucaena trees!  Not only do they fix N, and are drought tolerant, but the young pods are edible!  Be warned though, they grow FAST, and can be invasive – if you aren’t ready for that, like burning them for firewood, not a good choice.
  • Let your local livestock, goats, chickens, bunnies add their part!  Horse manure has more N than cow manure.  For excellent info and fun reading, check out the scoop on poop, Manure Matters! by Marion Owen, Co-author of Chicken Soup for the Gardener’s Soul.

Margaret Frane, President of the California Rare Fruit Growers, reminds us, ‘FEED THE SOIL, AND THE PLANT!  When planting a garden, especially a fruit garden, don’t just focus on individual plants; remember the importance of looking after your soil.’  She further says, ‘…let the soil provide the nutrients. Don’t fertilize your plant; feed the soil and the soil will feed the plant. And for the most part, everything you need to feed your soil is already on your property!’

Frane says:  Trees benefit most from the nutrients available in their own leaves. Most leaves beat manure for mineral content; when incorporated into the soil, they add nutrients, improve aeration and soil structure and encourage earthworms. So don’t rake leaves up and throw them away! Leaves are not garbage, they are an important food for your soil!

Planting immediately and directly in your sheet composting, lasagna layers?  Of course!

Are you doing seeds? Ok, a little preparation is needed.  Time for a little potting soil.  It’s good to get the seedlings started – it has the water holding capacity they need – just like the little transplants you get at the nursery, which they feed, probably daily, kelp, fish emulsion mix, other concoctions.  After that, seedlings have to hit something with real nutrition in it, like a mix of compost and soil.  Most seeds are planted directly in soil, just like Mother Nature does the job.  That’s where they immediately get the most nutrition.  I would get a deep bowl, a bucket, put in ½ soil, then compost, mix it up.  Put the mix in the planting hole, make a little hole for the potting soil, and put your seeds in that.  No more potting soil than if you were filling up one of the little transplant containers.  Obviously, not a lot would be needed.  To keep the soil from falling through the lasagna layers below, you could line the hole with two or three sheets of newspaper, saturate them.  That will keep things where you want them until it all decomposes together, the newspaper, the lasagna.  It won’t hurt your drainage, and little roots will poke right through!  And you are only going to lightly sprinkle, water, your seeded areas, right?  You don’t want your seeds to wash away, get buried too deep or uncovered.  It’s a good thing to check seedlings after a rain.  Recover or rebury anyone who needs it.  If you are doing transplants, you just won’t need any potting soil.  Make your compost/soil mix and pop your cute little transplant right in there!

In the biggest sense, “We are part of the earth and it is part of us … What befalls the earth befalls all the sons of the earth.” — Chief Seattle, 1852

Take good care of yourself…and your soil.

Read Full Post »

SeedSaving Biodiversity Heritage

Beautiful image from Thomas Rainer’s Landscape of Meaning Blogspot

Seed saving is really a no-nonsense game! It’s important right at home because the plant that grew best does well at your location! It’s important to our world community, as Thomas Rainer says, to preserve our garden heritage & biodiversity! Besides, it’s fun!

Did you let a couple of your carrots become full grown plants with elegant flowers that brought bees and pollinators?! If so, clip off some of those dry seeded heads, let them dry some more, then bag and tie with a ribbon to give as gifts to other gardeners! Or put the seeds in a snazzy little jar, label with year and name/variety and tie a ribbon on it! And, of course, store some for your future plantings! Any extra, share at your annual Seed Swap! That plant has done well in your microclimate niche and will make tons of more healthy carrots for you! Fennel is much like carrots, and has a lovely scent. I use it to flavor my rice, and they say it aids digestion! Parsley is a biennial, seeds in its 2nd year.

Per goingtoseed.wordpress.com all Brassicas can be grown as biennials (planted in late summer and overwintered to produce seed in their second year). If you want seed the same year, the trick is planting early enough for seed to mature or, in this case, you want dramatic temp changes so it will bolt! Bolting, AKA, Running to Seed!

Lettuce seeds are very tiny and take some patience. Put a bag under the tufted seed heads, pull them off into the bag. Later, sit down and separate the seeds from the tufts. Don’t keep the tufts because they can rot. Since there are so many seeds, it won’t take long to gather a year’s supply. You really need to record your lettuce varieties, so if you plant from 6 packs, keep those name tags! Important: some lettuce seeds are surface planted, barely patted into the soil, others need to be planted a 1/4” deep. Be sure to record the variety and planting depth on your saved seed packets, especially if you will be sharing them at a Seed Swap.

Onions, chives, garlic and leek are pretty and fun! You’ll see the black seed dots all over the drying flower head. Put a bag over it, tilt down and shake it, Baby! If you want them anywhere and everywhere throughout your garden, fling a few far and wide! They will come up where and when conditions are right for them, and adorn that spot. Or simply clip off and lay a seeded head where you would like a patch to grow. The head provides natural habitat just like it does in nature, protecting the seeds and keeping them moist. Cilantro is so pretty and fragrant, repels cabbage butterflies! I let it grow randomly, flinging some of its seeds across my garden aiming for spots that will stay a bit moist or shaded. I can always transplant seedlings if I need one/some in another area. As seed it is called coriander. Let it dry completely on the plant if you want to jar it for gifts or storage for cooking or future planting. And if you love basil, gather ye basil seeds! 

Arugula and other Brassicas like broccoli, kale, and cauliflower come neatly in little pointy pods! Let them dry on the plant and they are yours if you get them before the birds do! You can fling them too, but the plant has a pretty big 1 ½ to 2’ footprint and some height if you let it grow fully, plus they like a lot of water. So I’m a little more careful where I dribble those seeds. Okra comes in big fancy dress-up pods! Let them dry on the plant then, over a bag or bowl, break open the pod to collect those awesome black seeds!

Here’s a clever tip for home growers from the UK Real Seed Catalogue! Many of the brassicas (cabbages, cauliflowers etc) love to cross with each other. Right. So only let one kind flower each year: you don’t really want to end up with some sort of sprouting-cabbage, or Brussels-kale. But that’s ok – the seed keeps for years and years – so you simply let only one kind of Brassica flower each year and not worry about cross pollination. You can still grow all the others – radish, Mizuna, turnips, arugula – to eat of course, just don’t let them flower.

Now if you are in a community garden or have nearby neighbors’ with flowering plants, this might not work. It is recommended to separate different varieties at least 1000 feet for satisfactory results or at least 1 mile for purity.

Let beans grow to full mature fat pods and dry on the vine for full nutrition from their mother plant. If it is July, even August, if you’re having a hot summer, tuck a few into the soil for another round.  Otherwise, pop your bean seeds out of the pod and store for next spring’s planting.

Seed Pods Brassica Immature MatureWhen are seeds mature? Seeds that dry on the vine may turn black in pods as Brassicas often do, as shown in the image. They may become brown in the air like beet or cilantro seeds. After lettuces flower they sprout little tufts. Below and attached to the tufts, are the tiny seeds, white, gray, brown or black. Be sure the seeds are dry when you pull the tufts. Bean seeds rock! They dry to many colors, some are speckled! Wet seeds are as you see them.

Dry seeds are easy to harvest, what about WET seeds, like tomatoes? No problem. Heirlooms are true, some hybrids are true, but most hybrids are unpredictable. There are three seed saving possibilities per Robert Pavlis, Garden Myths ~ Use the fermentation technique, rubbing, do nothing! Here are his thoughts on when to use which and why!

The method we hear about the most is fermentation. Put the little guys in water, let sit no more than two days. GrowVeg.com says: Recent studies (no link) show tomato seed germination is best when seeds are soaked for only one to two days before they are rinsed and dried. Fermentation times longer than three days substantially lower the germination rate from 96% to only 74% on the 4th day! Word. Scrape off any scum that has formed. Rinse, add water, do it again, until you have clean seed. Dry. See all the tips and details!

Other seeds, like in mature cukes, melons, peppers (different varieties need to be 500’ apart to prevent hybridizing) and squashes, are so simple. Let a cucumber yellow and dry. Just take the seeds out of an over mature fruit, clean, rinse, and spread them in a single layer on a screen, coffee filter or piece of newspaper, or a paper plate to dry. No ceramic or plastic. You want the water to wick away. They will stick to paper towels. Use a little dishwashing soap to remove sugar from watermelon seeds.  Pepper seeds are dry when they break rather than bend.  Oh, and melons, pumpkins, cucumbers, and squash need even more personal space – at least a half-mile is required to prevent hybridization.

Eggplant takes a little more work. Wait until it’s dull and shrivels on the plant. Cube it, mash the seeds out. Put them in water, toss the ones that float. Dry for 2 to 3 days, a week or more if your weather is damp.

Corn will hybridize. If you want what you want, then don’t save, buy new seed each year. Here are  important details for corn and other plants at Native Seeds!

Know that many hybrids will have mixed results, usually not true to the parent plants. Just saying.

Label everything with name, variety, year and location grown at! For example, beet and chard seed are virtually indistinguishable. Arugula seeds look a lot like broc seeds. They do. Both are Brassicas.

Store in airtight jars except legumes (beans & peas), which store best in breathable bags. To keep them dry, put a small cloth bag with about one-half cup dried powdered milk beneath the seed packets. Let them languish in a cool, dark, dry place like the fridge. Avoid opening the container until you are ready to plant. Check them occasionally for insect infestations. Remove seeds with bore holes and pray for the rest.

Stored seeds will retain their viability for different lengths of time depending on the type of seed, when harvested, how harvested and how you store it. You will see different lengths of time online. Here is a general guide:

Veggie Seeds Viability varies by Years!

Closing thoughts ~ When NOT to save seeds! Is there a possibility your plant has hybridized? Plants have different distances when this can occur. If in your yard, or you are growing closely in a community garden, what are your neighbors planting? What is your purpose for saving your seeds? Will you be giving some as gifts, sharing at a Seed Swap? If so, distance is crucial. To prevent hybridizing, some veggies need to be separated at least 5 miles, others less. A 5 miles radius is tough to check out in an urban neighborhood!

If distance is not a problem, one sure way to avoid hybridizing is, for example, to plant only one type of squash. Another way is to stagger planting, with plenty of time between, when other varieties of the same plant are/will not be in pollination also. If you are giving seeds away, will they be used as cooking flavoring, a healing remedy, or to grow new plants? Since most hybrids are unpredictable, at times the results can be disappointing, costing you time and possibly having no crop at all. If you are in doubt, or don’t know, don’t save or plant or give those seeds away. More info from Texas A&M! Who knows?! You may become a plant breeder!

Technically Inbreeding Depression is the decline in fitness and vigor with decreased heterozygosity. Inbreeding also reduces the reproductive ability. Both plants that reproduce either by self-pollination OR cross-pollination process can have the problem. The pea family and carrots are high in inbreeding. Corn is medium. Onion, squash, pumpkin, sunflower are a few examples of plants showing low inbreeding depression.

So if you have a small growing space, and are given some home grown seeds or are at a seed swap, ask questions. If any doubt, pass or thank and don’t plant. Get your seeds from a reliable seed house.

Thanks for your special care in saving and sharing your seeds. We are looking to pass along high quality seeds and successful growing of the best possible crops. We are sowing the future.

May you and your plants be happy and your seeds very healthy!

Updated 6.27.23

See also SeedSaving! A Beautiful Annual Ritual & Celebration!

Top^


Love your Mother! Plant bird & bee food! Think grey water! Grow organic! Bless you for being such a wonderful Earth Steward!

The Green Bean Connection started as correspondence for the Santa Barbara CA USA Pilgrim Terrace Community Garden. Both Santa Barbara City’s remaining community gardens are very coastal. During late spring/summer we are often in a fog belt/marine layer most years, locally referred to as the May grays, June glooms and August fogusts. Keep that in mind compared to the microclimate niche where your veggie garden is.

Read Full Post »

I love Val Webb’s image and she and I both love COMPOST!  She says:  There’s an irresistible alchemy involved when you can start with garbage and end up with a wildly nutrient-rich substance that has been likened to Ghirardelli chocolate for earthworms.

Composting is EASY! Start Now!  Get your soil fat!  The sooner you plant, and plant in tasty soil, the sooner you get a great harvest!

There’s compost and vermicompost, hot and cold compost, compost in place, trenching, to name a few.  You have options!

Compost is decayed organic matter – poops – that’s manures, dry leaves and straw/alfalfa, wet grasses and kitchen wastes. Compost has a variable amount of Nitrogen in it depending on what has been composted and how the compost was made. Some studies show unturned compost has more Nitrogen than turned compost. Homemade compost can be up to 4 N, as is fish emulsion and chicken manure. Steer is 2, horse 1.7. If you need a quick boost for a yellowing N starved plant, go for bat guano, or easily assimilable blood meal, both at 10 N! Be careful with that bat guano, it’s hot and can burn your plants. And both are pricey. Get just the amount you need at Island Seed and Feed’s bulk bins.

Vermicompost is worm poop. Politely, worm castings. Simple as that. Red wriggler worms are easy to raise, will eat lots of things but do best with tender stuff, your green kitchen waste. They love cantaloupe and melon rinds, nesting in avocado shells, egg shells keep their pH neutral. Wrigglers are surface feeders not earthworms. If you put wrigglers in the soil, they die. Worm castings (vermicompost) have negligible N, about .05, are NOT A FERTILIZER, but do a lot of other good things for your plants. Highly recommended.

Hot compost has to be made carefully, have just the right mix, be tended like a baby, and defies many attempts to get it hot! If you don’t get the combo of your materials right, you are cold composting. The advantage of hot composting is it is fast, kills bad creatures and weed seeds. Also kills the good guys. But. Only in the parts of the pile that actually get that hot. The whole pile never gets that hot, like the outside of the pile. Even if you turn it so the outside goes inside, it’s hard to guarantee it will all get that hot, so be advised. It’s pretty cute to see all those little plants that spring up in the pile….

Cold compost is just throwing your done plants or trim, preferably not diseased or pest infested, into a pile or your compost enclosure, layering with some wet or dry material as needed. It might get hot, it likely won’t. It will decompose if you keep it moist. If not you have dead dry stuff, no nutrients.  Some studies have shown that cold compost is more nutritious than hot compost.  Makes sense since you aren’t burning off Nitrogen and other goodies including beneficial insects and microorganisms.  If your stuff doesn’t turn black and fluffy and smell good when it is decomposed to unrecognizable pieces, you don’t have compost. Perhaps you could use it as mulch?

Composting in place, sheet composting, Lasagna Gardening, is a time saver, no moving later. Chop and drop on the spot, add dry/wet materials as needed, amendments, red wrigglers, let nature do the work.  Especially add some chicken manure before you add your layers, because decomposition uses Nitrogen!  If you are starting on top of turf, using cardboard as your bottom layer, be sure to SATURATE the cardboard.  Don’t rush this part.  Really saturate it.  You want it to last long enough for the grass underneath it to die, to keep the grass from growing up through your pile; you also want your cardboard to decompose so your plants’ roots can grow through it when your pile sinks as the pile decomposes.

Trenching kitchen trim is traditional – cover it and forget it! Crushed eggshells, torn tea bags, coffee grounds. Six inches deep is all you need to do. Cover with the soil, water as usual, your stuff will disappear in about a week! Don’t put in meats or oils that attract digging predators, or grains or cereals that will attract mice. Leave out citruses and spicy foods.

Start Now! 10 Easy Steps to Make RICH COMPOST!

Make the most out of your finished plants or trim; use them for compost, organic fertilizer! A compost enclosure is a fine garden investment! Keep it humming! Dig your compost in around your plants, plant IN your new compost! Surface compost Nitrogen just off gases, so put a layer of soil over your compost to keep the Nitrogen right where you need it, in the soil feeding your plants.

1. Get or make your enclosure, a good working size for you, then layer, layer, layer! Half inch layers are ideal, but do what you can.  A pile 3′ by 3′ is your best minimum if you want a hot pile.  Enclosures can be free pallets on Craigs List tied together, plastic beehive types to keep the rats and mice out, the circular hard black rubber kind, to expensive rolling types, garbage cans with bottoms removed, holes made in their sides!  Do what works for you!
2. Dry stuff first so it will get wet from the stuff you put on top.  That’s ‘brown’ – dry ingredients such as dead leaves, wetted newspaper or cardboard, alfalfa/straw.  The formula is 2 dry, brown to 1 wet, ‘green.’
3. Layer up with your kitchen waste you saved, undiseased green waste from your garden or greens recycle bin. Avoid hard woody stems and seeding weed plants. Cut up large items, halve whole items like apples, potatoes. Tear teabags, crush eggshells.
4. Lay in a few yarrow leaves to speed decomposition. Grow yarrow by your composter for handy use.
5. Inoculate with a sprinkle of soil, living micro organisms, that multiply, munch and speed composting.
6. Sprinkle your layers with aged manure (keep a bucketful next to your composter) to enrich it.
7. Keep layering up to 3’ high or until you run out of materials.
8. Keep your composting materials moist, to keep them live and decomposing.  Don’t let them dry out – dry is dead, nothing happens, nutrients are lost, time and space wasted.
9. Cover with a large piece of *folded heavy mil black plastic to keep your compost moist, and dark so any worms that take up residence work up through the whole pile, to the top .
10. Keep adding to it, stir or turn often to oxygenate, weekly if you can.  Composting organisms need lots of air to operate.  Keep it moist but not drippy and drowning.  Some studies show compost is more Nitrogen rich if you DON’T turn it!  Hmm…read on.

If you are not able to do that much heavy turning or don’t want to take the time, simply, push a long stick into your compost, several times, in different places, to let oxygen in.  Or, if you are inclined, at intervals in your pile, as you build it, you can insert, horizontally or vertically, 2″ PVC pipes, that have had holes drilled in them every 6″ for aeration.  If you are going to insert horizontally, make your holes on one side only; put the holes side down to keep them from clogging.  Make sure both ends stick out so there is air flow through the pipes.  If you insert vertically, drill holes all around the pipe.  If you use a larger diameter, line it with wire mesh to keep it from filling with debris.  Once made, you can use your PVC over and over.  Other alternatives are to make wire mesh cylinders or tie a bundle of twigs together.

Your compost is finished when you no longer recognize the individual materials that went into it. If you are have a small compost batch, when ready, lay out your *folded plastic cover, pitchfork the still decomposing stuff on top of your pile onto your plastic.  Use that good stuff at the bottom where you want it. Or plant in the nutrient rich spot where your composter was!  Put your composter in a new spot, fork the stuff still decomposing back in, add new materials, recover, do it again!  The process slows down in winter, speeds up in summer, generally you have some compost in 6 to 8 weeks.

If you have time, throw a cup or so of compost in a bucket, fill with water, let sit overnight, voila, compost tea! Soak your seeds in it before planting!  Pour it round your plants or use your watering can to spray it on their leaves, both tops and bottoms – foliar feeding.  Your veggies will thrive!  If you have a lawn, make aeration holes with your spade fork and pour the tea down them.  You soil will start to live again!

Your soil and your plants thank you!

Back to top

Read Full Post »

Food Not Lawns is all about raising veggies not grass.  Studies show they both take about the same amount of water, but veggies pay back sustainably with fresh highly nutritious food on your table and no-food-miles or pollution.  Plus they make seeds for their next generation, adapting to your microclimate niche!  http://www.sbfoodnotlawns.org

  • Do I have to rip up my lawn?  You can do lasagna gardening/sheet composting right on top, start with cardboard/newspaper. 
  • Do I have to do a major portion of my lawn?  You can do any part you want, big or small, your call!
  • But I don’t want to do my front lawn.  You don’t have to!  It’s yours, do what makes you happy!  You only need 6 to 8 hours of sun to grow veggies, any space, corridor that has that, works.
  • Is it really hard work?  Using the lasagna/sheet composting method is no harder than gathering the materials to do it!  There is NO DIGGING!  And you don’t have to build raised beds.  Building soil on top of your lawn can make a lovely undulating landscape.  Frameless raised beds have plantable sloped sides!  
  • Is it ugly?   Could be, but how you do it is up to you!  It can be integrated along/among border landscaping plants, you don’t have to have raised beds at all.  If you want to though, you can make really attractive raised beds with beautiful materials, ie a lovely rock wall, terracing.  You can  cover an unsightly area like the edge under a south facing deck.  There are so many lovely options! 
  • I don’t want to wait months before I can plant!  You can plant the same day!  Just pull back a planting hole,  throw in compost, bought or made by you, plus any amendments you want, just like usual, and plant NOW!  No waiting at all!

                            Sheet Compost/Lasagna Garden Layers                           

Mulch or Tarp or not
Optional – Compost, Sprinkled Soil
Repeat layers until 18” to 2’ deep
Greens – Garden chop & drop
Browns – twice as deep as greens
Greens/Wet – kitchen veggie scraps, garden trimmings, grass, manure
Browns/Dry – leaves, straw for air circulation, alfalfa for Nitrogen
Well wetted Cardboard/Newspaper
Existing surface – Lawn

Wet green layers go above dry browns so the juicy decomposing stuff seeps down, keeping the brown stuff moist!  Straw is good in a brown/dry layer because air can pass through it, keeping the pile aerated!  Throw in some red wriggler worms to work the pile, make castings!  Maybe toss in some soil to ‘innoculate’ the pile with soil organisms.

Don’t worry overmuch about exactness of ingredients in your layers as you chop and drop greens from your garden/yard.  In fact, you can mix them up!  But do put in manures for Nitrogen (N).  Decomposing plants use N to decompose, so add a little so your growing plants will have an adequate supply.

If you can, make your pile at least 18” high; it is going to sink down as it decomposes.  Thinner layers, or layers that have been mixed, and smaller pieces, decompose faster.

If you like, cover the whole pile with some pretty mulch when you are done!  Or tarp it to keep things moist until ready for use.

When you plant, especially in ‘new’ soil, sprinkle the roots of your transplants with mycorrhizal fungi!  The fungi make micro filaments throughout your soil that increase your plants’ uptake of minerals, especially phosphorus that builds strong roots and increases blooming, fruiting!

Anybody can lasagna garden/sheet compost in any garden, any part of a garden, any or all the time!  It’s a time honored soil building/restoration technique!  Happy planting!

Read Full Post »

Gorgeous Scarlet Runner Beans!

Beautiful Scarlet Runner Bean Seeds!

General rule of thumb for summer planting is to start your seeds 6 weeks before the last frost date – eggplant, limas, melons, okra, peppers, pumpkins and tomatoes! Start another round later for succession planting!

When you start them, for your sanity, label your seedlings with their name and date! Additionally, the # of days to germinate helps a lot to track their progress.   

Hmph.  How hard could it be, soaking seeds?! It isn’t, but it turns out there are lots of options and some specifics for better results!

Whether you only soak your seeds, or go on to presprouting, is your choice. For me, I found once they started sprouting, growth was rapid! At that stage, they can’t dry out or be too wet and rot, so you have to be ready to plant! Also, it is more difficult to very carefully plant sprouted seeds. They are delicate! So if you are at all bull-in-the-China-shop like I am, it may pay to only presoak!

The main arguments for seed soaking are not only for a speedier garden, but also for more complete germination of all seeds planted. You can get germination results in 3 to 4 days, while without pre-soaking it may take 2 weeks of unfavorable germinating conditions, and you may get none. Plus, sprouted seed will grow in soils too cool for germination. YES! Whether you plant directly in the ground, or for those of you planning on using a greenhouse, here is some very useful info on seed soaking! 

Soaking seeds, and preSprouting makes a lot of sense. Advantages of seed soaking are you don’t have to water so many days daily until germination, and with some plants that can mean weeks sooner! Your seeds germinate more quickly. PreSprouting, your plants have already germinated and you plant only the good ones! There is no waiting and guessing if you will get any. Add worm castings to your soil for faster germination, improved nutrient uptake and seedling growth rate, to boost immunity and for additional water holding capacity! Be sure your seed is fresh to get a high % of germination! Some seeds are hard, so if you don’t at least presoak, figure on extra days of keeping them moist in the garden before and if they germinate.

PreSoaking is easy. Pop the number of seeds you want to grow, with a few extra for whatever might happen to them, in a cup of warm water, soak overnight. On a raised edge plate, lay them on one side of half a folded paper towel. Lay the other half over and pat dry. Easy peasy! Weather tip: Don’t soak your seeds the night before a rain is expected. Wait for good planting conditions. Rain compacts the soil, making it harder for tiny sprouts to break through, and seeds might be washed away or covered too deeply with soil. Tiny sprouts may be broken if sprouting seeds are shifted in wet soil. After the rain, get your three pronged mini fork and rough up, fluff the soil that got compacted. A finer texture is easier for seedlings to break through.

PreSprouting is devilishly clever! Sprouted seed will grow in soils too cool for germination! You take only the sprouted seed to plant into the garden – that’s a form of 100% germination! Grab a raised edge plate, lay a paper towel on it. Depending on size, spread your seeds out a 1/2 to an inch apart, so there is room for their sprouts. Spritz them with good water. Lay another paper towel over them and dampen it too. Put the plate in a clear plastic bag, tie it, keep moist until they germinate! I don’t use the plastic bag. I like being able to easily peek under the paper towel. Germination time will vary per moisture and ambient temperature where they are kept and what kind of seeds they are.

Just before planting time, put them on a dry paper towel and let them drain if needed. Grab some tweezers and plant very carefully immediately. The sprout is the root, so it goes down. Not to worry if they just plop in the planting hole any which way. They know what to do and will find their way, but the seed itself needs to be at the right planting depth so the little leaves can get up. Since some seeds are tiny, this reduces waste of your seeds, and no time is lost later thinning these tiny plants! If there are failures, presprout immediately again and replant in the empty spaces.

From The Harrowsmith Country Life Book of Garden Secrets, by Dorothy Hinshaw Patent & Diane E. Bilberback, April 1 1991:

The seed coat that surrounds the living seed sometimes does more than just protect it. The seed coats of many plants contain chemicals that inhibit germination of the seeds. This keeps them from germinating too early or when only briefly exposed to moisture. Some gardeners who are interested in rapid germination soak and wash their seeds to get around these germination inhibitors.

Some types of peppers, such as jalapenos, may germinate more rapidly if soaked in a couple of changes of lukewarm water before planting.

Beet and chard seeds also have a germination inhibitor; these strange-looking lumpy “seeds” are not really seeds at all but dried-up fruits of the plant, each of which contains several seeds. (That’s why beets and chard always need to be thinned.) The hard fruit covering contains a germination inhibitor, but if you soak the seed (fruit) overnight, it will absorb too much water, and you will still have poor germination. [An answer at an online thread says: ‘Growing Swiss chard from seed is very easy and germination rates are usually fairly high. You can get your seeds to perform even better, however, by soaking them in water for 15 minutes [in warm water for 10 min] immediately before sowing in rich, loosened, moist soil.’] Seed coats play other important roles in the lives of plants. They regulate how much oxygen, water, and light the seeds receive.

You may have planted beans or corn in soil that was very moist but cool and were dismayed by subsequent poor germination. The seed coats of these crops can allow water to rush into the seeds too quickly, as with beets. This rapid water uptake can damage the tender cell membranes, permanently harming a young seedling so it grows slowly or preventing germination altogether. This process has been termed imbibitional shock, or soaking injury. Soaking injury can occur at any time with some crops, but cold temperatures make it worse. To avoid soaking injury, you can allow the seeds of sensitive crops such as beans, beets, and corn to soak up water gradually before planting them in the garden. This method is called seed moisturization.

One way to do this is to place them in moist vermiculite for eight to sixteen hours before planting. An easier method for most home gardeners is to place damp paper towels on a sheet of wax paper, sprinkle on the seeds you want to hydrate, and roll up the towels with the wax paper on the outside. Leave the seeds inside the paper for eight to sixteen hours at room temperature. Don’t let them sit for more than nineteen hours, or the delicate seedling root may begin to penetrate the seed coat, and you could damage it during planting. 

Things to know plucked from the web….  

Start with viable seed. Check the date on the seed pack to see when it was packaged for.

TEMPERATURES! It won’t do you a bit of good, for example, to presoak lettuce seeds and expect them to germinate in a soil temp of 87 degrees, as they prefer a cooler temperature. So start your pre-soaked seeds at the temperature and time you generally plant. Pre-soaking just gives you faster performance under normal conditions.

There are huge variations in the length of time people soak their seeds!

  1. Tomato and Pepper seeds are soaked 6 hours, no more than that because they can suffocate from lack of air.
  2. overnight in tepid water. That is water that is warm, but not hot. I make sure that the seeds are covered at least twice their size with water. I don’t add anything to the water, but when planting them, I do water them in with manure tea.
  3. Soak them for 12 hours in compost tea, then rinse & drain. Rinse & drain each day, keeps the seeds moist until you have roots. With beans, the roots emerge from the scar. Plant the seed end wise, the root pointing down. Plant roots and shoots at the soil surface, the bulk of the seed below the soil mix surface. Keep moist.
  4. Soaked in tepid well water for six hours. The water was then poured off and the seeds were rinsed a couple times a day with some misting in between. The seeds were planted once they had visible roots.
  5. 12 hours in water, then drain and leave for 12 hours, then keep repeating the process until they split their skins and start showing a root. It normally only takes 2 or 3 days and then I plant out.
  6. Bean seeds may split if soaked for more than an hour or two. However, even this short soak will speed up germination
  7. When legume (peas/beans) seed coats split, the seeds may lose vital nutrients and fall prey to disease fungi when planted. Drain them after they have been submerged for an hour.
  8. I do think I’ve oversoaked bean and pea seeds in the past, almost to the point where they are falling apart, and that it has weakened them. The soak time would depend on the size of the seed I would think, but never more than a few hours.
  9. I let them soak ‘til they are big and full, or ‘til they start to sprout a small root. Corn, beans, peas, squash (some) and pumpkins. Then I gently place them in the ground.  [Tweezers, please?!]
  10. OKRA !!!! (48 hours)  Or… I presoak my okra seed in 1 pint of warm water containing 1 tablespoon of household bleach to pre-soften the seed for 24 hours before planting. [Okra must vary a LOT! I soaked some less than 12 hours and they had already started sprouting!!!]
  11. Cucurbita (cukes, luffas, melons, squash) seeds only needs to be soaked to loosen up the shell. Gourd seeds in particular are very tough and some people even scratch the sides of tips (scarify) to make it easier to germinate. I soaked them a little and also wrap them in wet toilet tissue before planting. This will help to keep them moist.

The soaking solution varies…see compost tea, manure tea above. And what about worm tea?!

  1. Last year I soaked my bean seeds in a kelp solution before planting and they sprouted in about 2 days.
  2. I would never use bleach in the soaking solution. If you are worried about contamination, try soaking in chamomile tea or 3% hydrogen peroxide instead. If the seed is purchased, I wouldn’t bother.
  3. Hydrogen peroxide, both in soak and rinse solutions:1 oz. of  3% H²O² to 1 pint of water. Sprouts come up faster. Some people have reported 3/4″ sprouts in 24 hours.  

When you plant the seedlings dig the hole and spray it with peroxide. Wet it good and then wet the roots of the seedlings or small plant.   

The vegetable that gave me a problem was the cabbage. I was determined to conquer the cabbageworm. Years ago I sprayed the cabbage plants with peroxide to no avail. This year I soaked the cabbage seeds before planting them. There were no signs of the bug until the cabbage plants were almost full grown, then I poured about a quarter of cup of 8% peroxide over the cabbage, letting it flow down into the layers of the leaves. That stopped the cabbage bugs.  

Please see more tips… Part 2!  Scarifying your seed, how to plant wet seed, better hot weather germination, water tricks! See also Cold Stratification for Some of Your Seeds Important tips about when to plant your seeds: Short Day, Long Day, Day Neutral Plants – Photoperiodism!

Here’s to speedy harvests and healthy eating!

Updated 3.25.23


Love your Mother! Plant bird & pollinator food! Think grey water! Grow organic! Bless you for being such a wonderful Earth Steward!

The Green Bean Connection started as correspondence for the Santa Barbara CA USA Pilgrim Terrace Community Garden. Both of Santa Barbara City’s remaining community gardens are very coastal. During late spring/summer we are often in a fog belt/marine layer most years, locally referred to as the May grays, June glooms and August fogusts. Keep that in mind compared to the microclimate niche where your veggie garden is. Bless you for being such a wonderful Earth Steward!

^Top

Read Full Post »

Have you already seen Part 1?  Why soak or presprout, all about seeds, how seed coats function; soaking times, seed soaking solutions.

Scarify Seeds  Scarify pea seeds to speed up absorption of water, and therefore, germination.  Rub them between sheets of coarse sandpaper, or clip them with a nail clipper by making a slice through the seed coat, not the seed, with a nail clipper [not removing a chunk]! This happens naturally in nature when a mouse with muchies comes along and nibbles seeds.

EZ Planting Techniques! 

1.  You will find that small wet seeds do not sow as well as dry seeds. They cling to your fingers, and tend to drop in gobs. This can easily be remedied by laying the seed on a paper towel for a little while. Not only will they be really easy to see, but the surface water will be drawn off, and the shell of the seed will continue to remain soft and moist until you have time to plant them.  They germinate in 2 days usually!

2.  Nutsy but fun!  With smaller seeds, you can make seed tapes if you plant in rows or if you plant in blocks, you can even just glue them to a thin paper napkin with some Elmers glue (the white, water soluble kind) to ensure the spacing you want without having to thin them. Purely optional though.  Maybe the kids could do it for you, or as a class project?!

3.  Carl Wilson, Denver County Cooperative Extension Agent, Horticulture says pre-germinating seed indoors is helpful in early spring because sprouted seed will grow in soils too cool for germination. It’s easy to sprout seeds on moistened paper towels sealed in a plastic bag for a few days. The difficult part is to sow fragile young seedlings without injury to them. The solution is sowing in a fluid gel, called fluid seeding.

To make a gel for planting seeds, add one tablespoon cornstarch to one cup of water and bring to a boil. Cool the starch mixture to room temperature before pouring it into a plastic sandwich bag. Gently ease your germinated seeds into the gel and close the bag with a twist tie. If the weather is not right for planting, store the gel bags in the refrigerator for a few days until conditions improve. To plant, snip the corner off the plastic bag and squeeze the gel and seedlings into the planting furrow as you would toothpaste from a tube.  [Great for carrot seeds!]

4.  The easiest method for sowing seeds after soaking is to put them in a plastic squeeze bottle along with some water. If you keep swishing the solution in the bottle as you hold it in an upturned position, you can get an even distribution of seeds. This, of course, is for fine seeds such as parsley, onion, celery, asparagus, and carrots.

Hot weather seed tricks:  Water furrow deeply before planting. After planting, place a board over it to keep soil moist and cooler. Requires regular peeking for signs of germination. Presoak your seeds. Plant deeper. Space farther apart.

You can plant carrots, parsley, celery, lettuce, coriander, etc. in 100-degree temperatures. Keep the soil cool, reduce light intensity and maintain soil moisture. Add humus to soil first.

Carrots, parsnips, peas don’t like recently manured ground but the cabbage family, fennel, onions, lettuce and late squash and corn love it.

Water the garden area thoroughly the day before planting. Moist seeds, moist soil = quicker germination. After that, you have to watch your seedlings and make sure they don’t dry out or that they are not drowned by over-enthusiastic watering.  [Practice until you get it right.  Don’t give up if you don’t get any seedlings the first time, even the first few times you try – be sure your seeds are viable.]

Au Naturel!  From Glib at iVillage Garden Web:  In my view, a better technique involves watching the weather forecast at the appropriate time of the year. When 80%+ rain is forecast, abandon any other project and seed the hell out of the garden. There are a few windows of opportunity during the year when direct seeding is easy.  Part of the art is knowing when the time is right for direct seeding. It is not just the rain but also the overcast skies that help.

This works well in spring and early summer around here (Michigan). Rains are fairly frequent, and seedlings “know” that if they emerge and the air temp is a bit low they should stick close to the ground for a while. There will be no transplant shock, and the workload is truly minimal (minimal work is always interesting to me). When the temps increase, they are 100% ready and take off.

In August this does not work so well, if you have to plant your kale for Fall and winter. Then soaking, followed by twice a day misting, is the least worst technique. Still, if you have your seedlings coming up under a searing sun it is not good. You still want to look at the forecast and see if you can catch a cloudy day or two. Lacking that, keep those Ikea cardboard boxes around, opened flat. They can cover a bed in mid day if needed.  [Or pole up some garden shade cloth, or prop up some of those latticed plastic flats, the ones with the 1/4” lattice.]

There you have it!  Take your pick or don’t!  If you do, let me know your successes…and failures.

Please also see Part 1! Why soak or presprout, all about seeds, how seed coats function; soaking times, seed soaking solutions.

Updated annually


Love your Mother! Plant bird & bee food! Think grey water! Grow organic! Bless you for being such a wonderful Earth Steward!

The Green Bean Connection started as correspondence for the Santa Barbara CA USA Pilgrim Terrace Community Garden. Both of Santa Barbara’s remaining city community gardens are very coastal. During late spring/summer we are often in a fog belt/marine layer most years, locally referred to as the May grays, June glooms and August fogusts. Keep that in mind compared to the microclimate niche where your veggie garden is. Bless you for being such a wonderful Earth Steward!

^Top

Read Full Post »

DSC00723 Lettuce Frost Hard Freeze
Chilly 2012 Winter Solstice morning, Pilgrim Terrace Community Garden, Santa Barbara CA

Cold season things to know about your veggies!

  • Fertilize.  Healthy plants can withstand more cold. But. From August on, if you anticipate a cold winter, avoid applying fertilizer with Nitrogen, apply at half your summer rate, until after the last frost, to prevent a flush of tender growth that can be damaged by the cold.
  • Cool season crops, such as broccoli, cabbage, peas, and onions, originated in northern areas, and can tolerate frost and light freezes of short durations with little damage, plant cold hardy varieties. But other tender morsels often die literal black deaths from killing freezes. Lettuces, marigolds, your fragrant basil, and peppers are usually the first to go.
  • Better taste! Cool-season vegetables, such as carrots, broccoli, cauliflower, and Brussels sprouts, produce their best flavor when they mature during cool weather. They react to cold conditions and frost by producing sugars, making them taste sweet, especially Brussels sprouts and kale, but also parsnips and leeks! Ask the folks at the farmer’s market stands if their farms have gotten a frost yet – farms in the country often get frost long before the cities.
  • When there are several days at low temps, cole crops (cabbage, broccoli, and cauliflower) and onion sets, produce a seed stalk, called bolting. Unless you want to save seeds, at that point, harvest good leaves for greens, give the remaining plant to your compost.
  • Early spring planting! I’ve often said, ‘Who can resist early planting?!’ Cold spells do come after last average freeze dates. Most of our plants will be fine, but some plants are really sensitive. Bell peppers don’t like cold. If you have them as transplants, keep them inside for the duration. Many seeds may not germinate during this period. Water them sparingly so they don’t rot. Early planted Beans, Cucumbers and Zucchinis may not make it. Early variety tomatoes should be fine. If your lettuce gets frosty, not to worry. They amazingly usually make it ok. Good luck to you and your planties!

Frost we understand, but what’s a Hard Freeze?! When temperatures drop below 32° Fahrenheit (0° Centigrade) and remain there for several hours, even only 2 hours will do it, typically killing seasonal vegetation. Several hours at 25 to 28 degrees, ice crystals form not only on your plant, but in your plant, damaging the cell walls. The coldest time of day is just before daybreak. Clouds at night can absorb and reflect heat back to the earth. Wind can mix the ascending warm air with the descending cold air. Calm, clear nights pose the greatest danger of frost. WIND:  If it is windy, less worryCold air must settle to form frost and any wind will usually prevent this. Or, a wind may dry your plants, making them more susceptible to freezing!

Floating Row Cover, Winter Frost Blanket, over Tomato Cages – see how they are staked in place by the cages? One gardener calls these Plant Pajamas!

Frost or freeze survival….

Before!

  • Watch your weather forecast religiously! Weather has no mercy.
  • Water early in the dayWet soil insulates and protects roots. The water warms up during the day and releases heat slowly during the night. The upper part of a plant may die, but the roots may be strong enough to push up new growth!
  • Move frost tender plants under eaves, a spreading tree, into greenhouses, garage. Key word here is UNDER.
  • Haunt yard sales, the thrift shop, for old bed sheets, blankets, tablecloths, curtains, towels, shower curtains, burlap sacks, tarps – many of these end their lives covering garden plants for frost protection! Use newspaper with clothes pins so it won’t blow around. Plastic can be worse than nothing if it touches the plant. Prop up an unused trellis, get creative! Use those wire tomato cages to support your covers! Lay them down among short plants, stand them around taller plants. At home you can lay out a folding chaise lounge chair, or lawn chairs, and cover them!! Secure the edges with stakes, rocks, bricks, or cover with soil. You can use upside down plant pots only if they are large enough that the plants they will cover don’t touch the pot. Put a rock on top to keep them from blowing over! That’s called a hot-cap! The beauty of floating row covers (see image), also called frost or winter blankets, is they can be left in place during the day! Cover the plants mid- to late-afternoon if possible, before temperatures start to drop.
  • What you can’t cover, that is not frost hardy, harvest. Root crops such as carrots and radishes should be harvested or mulched heavily before a hard freeze.
  • Depending on your situation, set up windbreaks.

After! 

  • If you didn’t cover, wash your plants off before the sun gets on them. Sometimes that will counteract the freeze burn.
  • If you did cover, take the covers off, before the sun hits the beds, so everybody can get their sun quotient for the day! Winter days are short!
  • Dry out your covers, keep them handy.
  • Damaged leaves appear dark green and water soaked at first, later becoming black. If your plant is totally gone, it’s compost, replace your plant. Except potatoes! They will resprout, give ‘em 10 to 14 days!
  • Should you trim the ugly damaged stuff off and give your plant a lot of fertilizer to help it? Whoa, Nelly! That’s a NO! The damaged part is protecting the now undamaged part. If you trim and add a lot of fertilizer, tender new growth will form, and that will be toast if there is another frost or freeze. Wait to trim until no more frost is predicted, feed lightly.

Was that groaning, whining I heard? Stop it. Just go out there and cover your plants, no fooling around, you hear?! You will be glad you did, it’s your plants’ lives you are saving! Besides, reviving is harder than covering, and regrowing takes all that time all over again. Also, many will be well past the window for replanting, so cover, cover, cover! Better to have a yard full of ghosts (sheet covers) and look silly, than lose your plants.

Repeat, Religion! Watch WEATHER reports in case of freezes, heavy winds, rain. Santa Barbara’s average First Frost (fall) date AT THE AIRPORT is December 19, Last Frost (spring) date is (was?) January 22. That can vary from the coastal areas to the foothills, and our climate is changing generally to warmer, so these dates may not be viable guides much longer, if even now….

Keep watch and good luck!

^Top

Updated 10.25.21


Love your Mother! Plant bird & bee food! Think grey water! Grow organic! Bless you for being such a wonderful Earth Steward!

The Green Bean Connection started as correspondence for the Santa Barbara CA USA Pilgrim Terrace Community Garden. All three of Santa Barbara’s community gardens are very coastal. During late spring/summer we are often in a fog belt/marine layer most years, locally referred to as the May grays, June glooms and August fogusts. Keep that in mind compared to the microclimate niche where your veggie garden is. Bless you for being such a wonderful Earth Steward!

SUBSCRIBE to the entire newsletter!    Friend on Facebook! 

Read Full Post »

A wet winter?  Dry winter?

If you think that might happen, excellent time to establish native plants and ground covers in your landscape, make raised beds in your veggie garden!  They don’t have to have a frame, in fact, you can ‘make more space’ by planting on the sloped sides, preventing erosion!  The plants that don’t like soggy feet, or would simply drown from too much water, will have excellent drainage.  You can make your ‘bed’ as small as a furrowed area, or make it two feet wide.  Either way, same result, drainage, less water molds and fungi, keeps oxygen your plants need in the soil.  Put a thick layer of pine needles, leaves, straw, something that will feed the soil, in the pathways.  That’s sustainable and your shoes won’t get muddy.  Re-layer as needed.    

Powdery Mildew is creeping right along…. 

Powdery Mildew on Peas

Hmph.  Powdery Mildew is windborne, and UC Davis IPM (Integrated Pest Management) says ‘Powdery mildews generally do not require moist conditions to establish and grow, and normally do well under warm conditions.  Good thing it’s getting cooler.  Ok.  So prevention, prevention, prevention.  A general home recipe is baking soda (sodium bicarbonate, 1 Tablespoon to a gallon, ¼ cup nonfat powdered milk, 1 teaspoon cooking oil (canola, soya, whatever), a drop or two of dishwash or soft soap (to disperse the oil and make it stick).  Spray or use a watering can whose spout can be turned so the water goes UP under the leaves.  Drench your plant, top to bottom so those inner bottom leaves get plenty of chances to get soaked.  The drips go into your soil, helping from there as well.  Do it on a sunny morning so your plants can dry well during the day. 

Please!  Be a good neighbor.  Prevent this common fungus, don’t let it blow into your neighbor’s veggies! 

Read Full Post »

What’s happening with my tomatoes?! 

Early BlightFusarium Wilt, Verticillium WiltLate Blight

Tomato – Healthy SunGold!

Tomato – Verticillium Wilt, Yellow Flag effect

This?!                                                 Or this?

This is bar none, the most common summer question I get asked! Potatoes, tomatoes, and the various forms of lettuce are the top three favorite vegetables in the US, so you can see why this is THE question! Since fungi spread as simply as by the wind, I will be campaigning for more tomato plant care, starting with what people can do now to keep the fungi from overwintering, then in the spring to lessen its chances. There are more things that can be done than I knew! Read on!

About Fungi  To emphasize the potency of these fungi: Late Blight of potatoes and tomatoes, the disease that was responsible for the Irish potato famine in the mid-nineteenth century, is caused by the fungus-like oomycete pathogen Phytophthora infestans. It can infect and destroy the leaves, stems, fruits, and tubers of potato and tomato plants. Before the disease appeared in Ireland it caused a devastating epidemic in the early 1840s in the northeastern United States. Not only do the fungi feed on your tomato plants, but take a look at your potatoes, peppers, eggplant, cucumbers and beans! See those yellowing leaves? Remove and dispose of them ASAP! That removes zillions of spores so they can’t spread. The wilts and blights also affect trees! Sadly, not only do your plants look depressing, production is zilch, they die an unnatural death. Remove, replace. Be happy.

How do fungi work?  Spores are spread by rain/watering splash, insects, and wind, and through our hands and tools (wash your hands and tools after handling infected plants) and through these mediums, can travel distances. That’s why it is so important, in our community garden, to tend our plants, so our neighbors’ plants won’t also be infected.  Educate your plot neighbors, better yet, send this to them! Spore spread is most rapid during conditions of high moisture, marine layer days, and moderate temperatures (60°-80°F). Once established, the fungi can over winter in your garden on debris and weeds.

What they look like on your plant: 

Tomato – Early Blight

15 Fungi Preventions!

Cultural control practices alone won’t prevent disease during seasons with wet, cool weather. However, the following measures will improve your chances of raising a successful crop.

Things you can still do this season!** Things you can do now to prepare for next season!**
  1. Buy toms that are tagged VFN, or just VF – that’s Verticillium Wilt and Fusarium resistant or tolerant. Varieties that set fruit early, at lower temps, are Early Girl Improved, Fourth of July, Enchantment. Excellent resistant varieties are Champion, Husky Red, Better Boy, Ace Hybrid, Celebrity.  
  2. Plant only healthy-appearing tomato transplants. Check to make sure plants are free of dark lesions on leaves or stems. If starting transplants from seed, air-dry freshly harvested seed at least 3 days.
  3. Plant cukes and toms on a special raised mound/basin with the bottom of the basin above the regular soil level. See more on this page in the section, Special Planting and Growing Tips!
  4. Remove volunteer tomatoes and potatoes.  If they are a not a resistant or tolerant variety, when they get sick, they increase the chances of your resistant varieties having to fight harder to live, and your good plants may not win the battle.  Do not let volunteers grow, even on compost piles, cute as they are. Infected tomato refuse should be put in the trash, NOT in green waste or your compost.  
  5. **Create a soil barrier, mulch! Newspaper/cardboard covered with mulch or grass clippings doesn’t let the soil dry out. Moist soil is fungi habitat – we want that soil to dry. Use no more than one inch of straw. It is easy to lay on and allows light to get through and air to flow and dry the soil, stops the splash factor. Above all, you don’t want wet soil to contact your plant’s leaves. When that straw gets tired and flattens, trash it and replace with new clean light fluffy straw.   
  6. **Avoid wetting foliage when watering, especially in late afternoon and evening. Water at ground level! Watering the leaves creates a humid micro climate; the fungus produces spores. Dry leaves. Dry leaves. Dry leaves. No moisture, no spores.  
  7. **Air circulation, plant staking and no touching. Air circulation allows the wind to blow through your plants. This allows the timely drying of leaves and it helps break up micro climates. If your plants are packed too tightly together, they themselves become barriers to drying. Staking your plants to poles and using cages helps them grow upright and it creates gaps between the tomato plants. You want wind and sun to reach through and around your plants. And getting more sun, your toms will ripen sooner! Moisture is needed for fungi to spread. Dry is good. Tomatoes should be planted with enough distance that only minor pruning is needed to keep them from touching each other. In the case of tomatoes, scattered interplanting, biodiversity, is always a better choice than row planting where disease easily spreads from plant to plant.  
  8. **Spray proactively. Wettable sulfur works. It is acceptable as an organic pesticide/fungicide, is a broad spectrum poison, follow the precautions. It creates an environment on the leaves the spores don’t like. The key to spraying with wettable sulfur is to do it weekly BEFORE signs of the disease shows. Other products also help stop the spread. Whatever you select, the key is to spray early and regularly.  
  9. **When your toms are about a foot tall, water neighboring plants, but not your toms. Plant water loving companion plants, like Basil or the Plant Dr Chamomile, next to your toms; water them all you want! Make a basin around your toms to keep water OUT! That keeps the soil drier near your plant, so the fungi can’t thrive there. Your tomatoes will get plenty of water by their deep roots.  
  10. **Remove bottom leaves, again, no touching (the ground), and prune your plants. Barbara Pleasant at Mother Earth News says, ‘When the lowest leaves are removed just as the first leaf spots appear, you also remove millions (zillions) of spores. And, because the bases of pruned plants dry quickly, the spread of the disease is slowed because early blight fungi need damp leaves in order to germinate and grow.’ Create an 18 to 24 inch barrier gap or safe space between your garden soil or mulch and the first leaves of the tomato plant. If the spores can’t splash upwards and reach the leaves, they can’t take hold. The stem usually isn’t a place for the spores, though it can be. Best is to remove the bottom leaves before the spores start!
    .
    If you have large plants, you might consider thinning some branches to let the sun and wind blow through the main body of your tomato plant. But, some gardeners don’t recommend pruning or snipping the suckers, the mini branches formed between the trunk and branches, because spores can enter through these cuts. If you decide to prune, the less cuts the better. Prune on hot, dry, unwindy days, mid morning to midday, after dew has dried, so cuts can dry and heal with less chance of airborne fungi getting into them. Try not to touch the cuts after they have been made. Use clippers for a clean cut. Wash your hands, in a rinse of water & alcohol, frequently so you don’t further infect healthy parts of your plant.  
  11. **Remove infected leaves immediately. A leaf should be completely green. Look for brown spots or yellow spots or distress. Remove leaves and prune when it is dry and sunny, not windy. Wash your tools and hands often.  
  12. After the tomatoes set, add some nitrogen. A healthy plant tends to fight off the spores. You don’t want to add too much nitrogen to your tomatoes before they set fruit. Too much nitrogen before fruiting leads to more leaves and less fruit. Add N only once.  
  13. **Rotate your crop if possible. Because fungi also affect other plants, rotation in small gardens isn’t practical or even possible. But if you have the room, move your tomatoes to areas that are fungi free.  
  14. ****At the end of the season remove & trash, don’t compost or put in green waste, all infected debris and surrounding debris. Pull all the weeds because spores can over winter on weed hosts. You want to reduce the number of spores laying in wait.  
  15. **The spores aren’t super spores. During our winter season, turn your soil about 10 inches, burying the spores helps remove them, and it also exposes snail eggs to die.

Preventive Foliar Mix that does wonders! 

Apply every 2 to 3 weeks, so new growth will be covered.  Wet under and over the leaves.  Per gallon add:

  • One crushed regular strength aspirin
  • 1/4 Cup nonfat powdered milk
  • Heaping tablespoon baking soda
  • 1/2 Teaspoon mild liquid dish soap

Water your plants with an aspirin?!  Salicylic acid, in aspirin, triggers a defense response in tomatoes and other plants as well! Adapted from eHow:  The main benefit of aspirin in planting involves aspirin’s ability to fend off potential plant diseases.

  1. Purchase regular strength aspirin. The brand does not matter; purchase the cheapest brand that is available.
  2. Mix together one aspirin with one gallon of water. Combine the ingredients well, so that the aspirin is distributed evenly throughout the liquid.
  3. Add a half teaspoon of mild liquid soap to the mixture. This is used as a way to help the aspirin water stick better to the tomato plants. Once the soap is added, attach a spray nozzle to the gallon jug and it is ready to use.
  4. Spray the tomatoes when you first set them in the ground. Aspirin sprayed directly on seeds improves germination, on plants it stimulates the growing process. There is no need to soak the area. A light and gentle spray will suffice.
  5. Continue to spray the aspirin mixture on the tomato plants every 2 to 3 weeks. You are going to notice that the plants stay healthier and attract fewer insects.

Per a comment by Leroy Cheuvront at Heavy Petal blog:  I have had the blight and have stopped it from destroying my tomato plants. All you have to do is mix 1/4 cup of bleach to a gallon of water and drown the plant from top to bottom, it will not kill the plant. I do it every seven days and the blight has not returned.  — June 18, 2010. It sounds scary, but I bet it works! I would test this principle on ONE plant to be sure it is safe to use.

The summer of 2019 I finally got up the courage to try Leroy’s Bleach mix! IT WORKED! I started after my plants were showing wilts signs, figured I had nothing to lose ~ totally scared it would kill my tom I tried it on first. Just like Leroy says, it will not kill the plant! Whew! I wasn’t religious with the weekly treatment but my plants vastly improved and lasted months longer than usual.

Solarization  In the past ten years, some enterprising Israelis came up with solarizing. Moist soil is covered with transparent plastic film for four to six/eight weeks in the summer. It takes that long to heat the soil to a temperature and depth that will kill harmful fungi, bacteria, nematodes, weeds, and certain insects in the soil. Some gardeners won’t use solarizing because it kills beneficial soil organisms too… Solarization can be a useful soil disinfestation method in regions with full sun and high temperatures, but it is not effective where lower temperatures, clouds, or fog limit soil heating. Solarization stimulates the release of nutrients from organic matter present in the soil.

Solarization

Solarization also kills grass by heating up the soil when daily temperatures exceed 80°F. Weed eat or mow the area as short as possible. Moisten the soil and cover the area in clear plastic for 10-14 days, until the grass is dead. Although cloudy weather will slow things down by cooling the soil under the film, a few weeks of sunshine will improve your soil dramatically, easily, and inexpensively. If you live in an area with cool or cloudy summers, or if you just don’t want to wait all season, you can speed up the process by adding a second sheet of plastic. Using the hoops commonly used to elevate row covers or bird netting, raise the second sheet of plastic over the ground-level sheet. The airspace between acts as a temperature buffer zone during cloudy weather and the combination of the two sheets of plastic serves to raise the soil temperature an additional 6 degrees. The goal is to raise and maintain temperatures in the top 6 inches of soil to a level between 110 to 125 degrees F. After several days of sunshine, soil temperatures rise to as high as 140 degrees at the surface and well over 100 degrees as far down as 18 inches. Do not mix untreated soil into the solarized bed!

And please, do NOT compost diseased tomatoes, infected trimmings or removed leaves, or any other diseased plant. That’s how you spread soil borne fungi, let alone that they are also spread by wind, are airborne. Put them in the trash, not green waste. If your neighbor has a diseased plant, don’t be shy to respectfully and gently ask them to remove it. Remember, they raised that child. How hard was it for you to give up your plant? Especially the first time. See? They may not even know about wilts. Educate them if possible. Tell them how you learned about it. Offer to send them the link to this page.

Biofumigation  Biofumigation is a sustainable strategy to manage soil-borne pathogens, nematodes, insects, and weeds. Initially it was defined as the pest suppressive action of decomposing Brassica tissues, but it was later expanded to include animal and plant residues. 

Other Tomato Questions & Cures – Holes, spots, brown areas?  Here is an IPM (Integrated Pest Management) image page from UC Davis that is likely to answer your question! It includes diseases and pests. Do take a good look at it!

To the fattest, bestest tomatoes ever!!!! 

Back to Top

Updated 6.11.19


The Green Bean Connection newsletter started as correspondence for the Santa Barbara CA USA, Pilgrim Terrace Community Garden. All three of Santa Barbara city community gardens are very coastal. During late spring/summer we are in a fog belt/marine layer area most years, locally referred to as the May grays, June glooms and August fogusts. Keep that in mind compared to the microclimate niche where your veggie garden is. Bless you for being such a wonderful Earth Steward!

Love your Mother! Plant bird & bee food! Think grey water! Grow organic!

Read Full Post »