Feeds:
Posts
Comments

Archive for the ‘Pallet’ Category

Mulch Types make a difference!
Mulch is what covers the soil. Compost goes in the soil and feeds it.

According to Texas A&M University, a well-mulched garden can yield 50% more vegetables than an unmulched garden space! Mulching brings soil organisms to enrich the top of your soil, where the plant’s feeder roots are! And, oh, yay, prevents light germinating hungry weed seeds from sprouting! Less time weeding! Healthy soil suppresses diseases! In addition to that, mulching cools your soil, keeps plant roots functioning optimally when it’s hot, keeps moisture in. Even only a two-to-four inch layer of mulch decreases evaporation from the soil by 70 percent or more! Water well before applying your mulch, or you will insulate dry soil rather than moist soil. Mulch prevents erosion, keeps your crop clean above the soil and above the soil predator zone, and in the long-term, if biodegradable, feeds your soil! Gardeners.com says University field tests have shown that mulch can increase (or decrease) yields by as much as 30 percent.’ Either way, 30% or 50% on the plus side is a significant amount!

I used to be a total indiscriminate mulcher, covered my whole veggie garden. I’ve adjusted my coastal SoCal mulch thinking to match the plant and the season! Here are important considerations about mulching that make a difference!

If you are north or at high elevation mountainous terrain, you mulch in winter and maybe summer depending on how hot things are where you live. In cold, cold winters, you use mulch like a blanket to keep the soil as warm as possible, maybe prevent it from freezing, extend your season, keep plants from freezing. And maybe it will all freeze anyway!

In SoCal, south, in our ‘winter’ rainy season, pull mulch away to let the sun warm the soil, reduce moist slug and snail habitat, let soil dry so fungi die, to remove pest habitat. Gardeners generally start mulching late April, May, in summer for sure, unless you are super coastal cool, or your garden is shaded. Then you mulch a little later, if at all. Mulching for us is to keep the soil cooler, keep it moist/use less water, keep roots from burning or drying out, reduce weeds.

The first plant you mulch in spring, well before May, is any Brassica – broccoli, kale – that you will be over summering. Brassicas like cool soil, so pile your mulch on good and deep, 4 to 6″! Sweet Peppers are quite the reverse, the last plants you mulch. They like soil temps above 65. Mulch keeps the soil cooler, so use your soil thermometer to see if your soil is up to that happy 65 yet. Mulch may be too cooling for your peppers, slowing their growth.

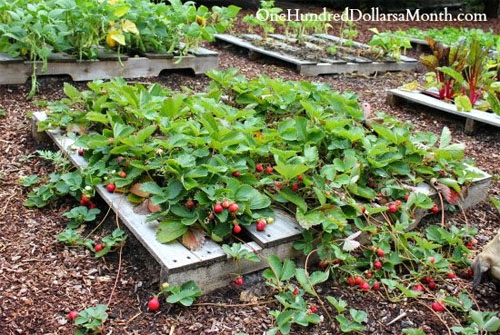
Beans and plants that have short roots that need to stay moist, you mulch. Strawberries get big pretty quickly and self mulch pretty soon though you could mulch them just enough to keep the berries clean and above the ground level predator zone. Chard likes moist and much cooler, so mulch. Zucchini, doesn’t care. They are a huge leaved plant, greedy sun lovers, that are self mulching.

Special mulch rules for Tomatoes and Cucumbers! If your garden has the blights or wilts, use an open mulch like loose straw only 1″ deep to allow airflow. You want light and air circulation, for the soil to warm and dry some. Washington State Extension says: Straw mulch can help reduce cucumber beetle problems in at least 3 different ways! See more!

Some like it HOT! Fact is, some veggies/fruits do better with no mulch at all! If you are coastal SoCal, in the marine layer zone, your mulch, or composting in place, may be slowing things down a lot more than you realize. The biggest most abundant melons I’ve ever seen grown at cool & coastal Pilgrim Terrace Community Garden were on bare hot dry soil in a plot that had a lower soil level than most of the other plots. The perimeter boards diverted any wind right over the top of the area, the soil got hot! It was like an oven! So, let it be bare! No mulch under melons, your winter squash, pumpkins except under the fruits to keep them off the ground up from insect predators, clean. Winter squash needs a full hot season to get their full growth and develop that protective hard shell.

With these huge vines it is a good water saving practice to plant them in basins like the Zuni desert waffle gardens technique. You don’t need to make berms, just dig a basin lower than the surrounding soil. Plant, water well, then top the basin only with substantial mulch! All the water you deliver goes to your plant’s roots, less moisture is lost to evaporative wind that goes across the top of the basin, less water is needed less often. Moisture seeps to the lowest level and that area stays more moist.

Make your basin big enough to accommodate feeder roots to the drip line of the main area of the roots. Save more water by putting a tall stake at the center of the basin so you can see where to water when the leaves get big and cover the area! Water the roots only; don’t water the rest of the area that doesn’t need it and that watering would cool the plant and ground.

The big vines need plenty of water to support quick vine growth in early summer! The rule of thumb is a minimum of 1-inch of water a week, 2 inches is likely better. Raised beds and some containers also need more water since the beds are hotter. Mulch them generously since that is where the roots are. Lots of water leaches the soil nutrients away, so you will need to feed, sidedress, those plants during the season.

Let jicama get hot! Eggplant is a Mediterranean heat lover, does well in the desert! Okra is full sun Southern hot happy plant!

Mulch can be many different materials as you can see in the image above. Keep them an inch away from your plant’s stem to avoid rot and fungal problems. Be garden smart! When possible, use an organic degradable mulch that feeds your soil too!

Biodegradable, soil building!

  • Straw is one of the simplest, fastest, easiest to use, readily available – some feed stores will let you sweep it up for free! It allows air circulation, water to get through. Apply 4″ deep or more, enough to keep the light from getting through to light germinating weed seeds, or if you want your soil to stay quite cool and damp underneath. Be sure it is the seed free kind!!!

    1″ Deep is good where you want no splash, like on lettuce, or to avoid soil splash on fungi susceptible leaves of tomatoes and cucumbers. Straw is the best choice for them because it allows air to circulate, letting the soil dry and the fungi die! For cucumbers, research shows straw might slow cucumber beetle movement from one plant to another! Plus, it is great shelter for wolf spiders, daddy long legs and other predators, helping predator conservation. The more spidies, the healthier your garden! More about successfully growing Tomatoes!

    It’s important to remove, throw away, not compost, tired mulch from under disease susceptible plants like tomatoes and cucumbers, then replace with fresh uninfected straw. Keeping it moist creates habitat the fungi do well in. If you keep forgetting to replace it, just remove it entirely and let that soil dry. As best you can, remove any soil-touching drooping leaves like religion!

  • Grass clippings need to be dried before use so they don’t form an impervious slimy mat. Spread them out, run a rake through them a few times. 24 hours and you’re in business. Once they are brown, the Nitrogen is gone, so they are no longer food, just mulch. Be sure no herbicides have been used on the grass.
  • Pine needles, deep downed leaves gathered after a windstorm. Use only leaves that have been aged at least nine months. This allows the growth-inhibiting phenols to be leached out. Run over the leaves with a mower or stomp them in a bag to break them down so they will be at soil level, available to the soil, and not blow away. See more! Know that pine needles can make your soil acidic over time.
  • A thick layer of compost is often used as mulch though when it is used it is usually covered with straw to keep it from totally drying out, off gassing Nitrogen, nutrients lost. Why waste any of it? Dig it into the soil. It has excellent water holding capacity.
  • Simple chop and drop! As you are gardening, have your clippers handy to cut up discarded disease and seed and pest free green waste. It can be mulch, or pull back your mulch, chop in your stuff, pull your mulch back over to cover it. If you have time, use your spade fork to put holes in the soil. Insert the fork, rock it back and forth a bit. Spread very well-aged manures. Cover with your chop and drop to compost in place. It acts as mulch while they decompose. When you water, it’s like compost or manure tea to the ground underneath. If you don’t like the look of that, cover it with some pretty purchased undyed mulch you like. Let it feed your soil.
  • LIVING MULCH, SELF MULCHING is triple productive! It mulches, provides companion plant advantages, and is a crop all at the same time! Closely planted beets, carrots, garden purslane – a halophyte, radish, strawberries, turnips act as living mulch to themselves and when used as an understory they are living mulch for the bigger plants too! The dense canopy their leaves make lets little light in, keeps things moist. Thin them out as they get larger. Eat the tasty tinys! Put plants like these, on the sunny side, around the bases of larger plants – even some lettuces don’t mind the heat! Two crops from the same space!
  • Living Mulch Legume soil feeding understory! Aka cover crop, green manure! Fling a legume seed mix, treated with their right inoculant, about under your taller plants, peppers, eggplant, broccoli, kale and let it grow. As some of the plants die, the Nitrogen in the nodules they form on their roots become available to your soil. At the end of the season, cut the plants down and leave them on the ground as mulch. For 2-3 weeks, let the roots in the ground release the Nitrogen after the plants die. You can turn it under for a super feed – add some manure if you wish, but not much is needed. OR, you can clear spots to plant more large plants of the next season! Just slice in a hole through the legume roots, pop in your plant and you’re off! FREE except for the cost of the seeds and inoculant! In SoCal White Clover is a good choice under summer plants. Be sure to plant companion plants that help your plants before you plant the plant you want to be helped. Add the Clover to fill in; it grows quickly and isn’t too tall.
  • Sawdust, Shavings, Wood bark/chips from disease and pesticide free trees. Ask a trustworthy arborist to deliver chips only from healthy trees. Specify the size of chips you want. They save dump fees. If you are growing organically avoid dyed materials. Generally chips, especially large chips, and bark, called perpetual mulches, are used for pathways rather than on veggie beds.What you don’t see in the image at top is large bark chips. Yes, larger pieces decompose more slowly, and use up Nitrogen as they decompose. This is not so good in a veggie garden since that decomp uses the Nitrogen veggies need. Same problem when we do continuous sheet composting/lasagna gardening. The process takes N from the soil; our plants may not thrive the first year or so until a soil base is established unless you add a good bit of compost and manure in your basins and  planting holes. If you are using chips from your local arborist, know that oaks have tannins, and eucalyptus and tea trees have aromatic oils that inhibit plant growth. Be careful how you use those chips, even in your landscaping, especially if you want to introduce veggies among your ornamentals. Check to see what is in bagged commercial mulches, how they have been processed and if they are dyed.Redwood fiber is acidic, good for shade plants, but you need acidic compost IN the soil for acid loving vegetable plants like  celery and beans. Please use redwood fiber as a last resort. Please save our beautiful trees. They take a long time to grow.
  • If you are using found manures as mulch, check if animals have been fed hormones, eat pesticide sprayed hays, or pesticides have been sprayed on the manures to reduce flies. It is much safer to get nursery bought bagged manures from a reputable nursery and a reputable brand.
  • Cardboard or simple overlapped sheets of newspaper…about 6 will do the job of suppressing light germinating seeds.
  • Strawberries Board Mulch
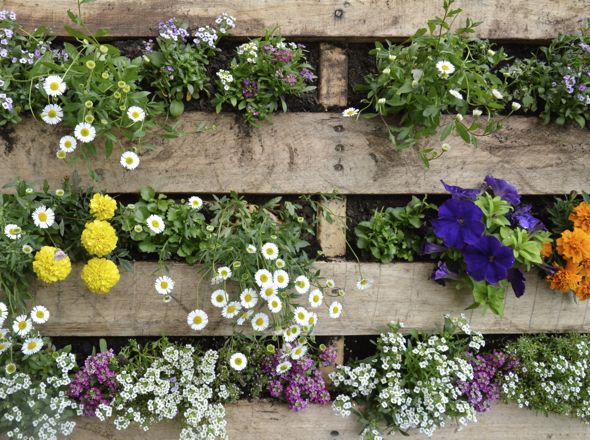
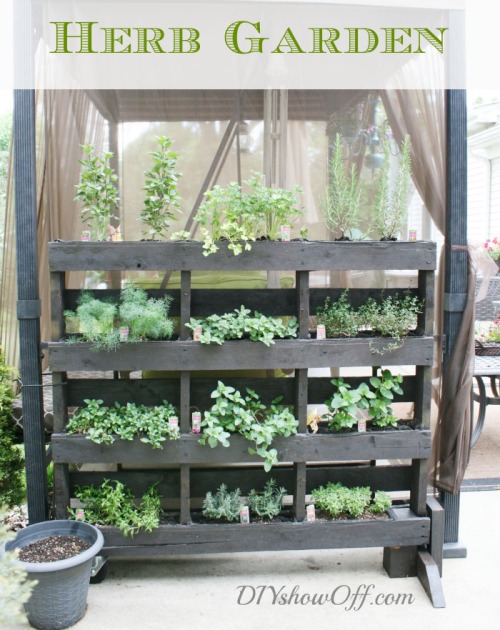
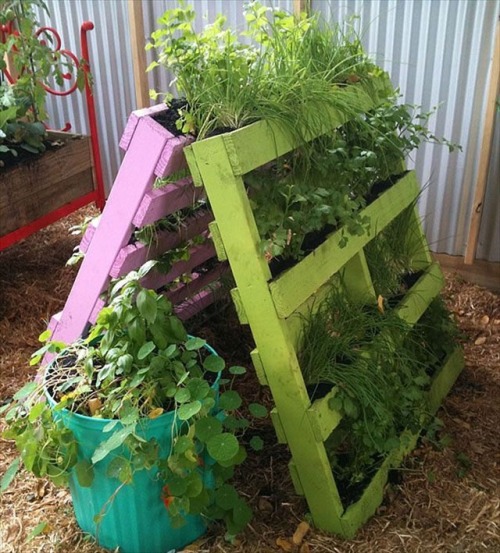
Untreated Boards as mulch! Your strawberries like slightly acidic soil, and acidic mulch – redwood or pine needles. Also, you can lay down boards between mini rows of strawberries to keep the soil moist under the boards, the soil between the rows that the berry roots have access to. It’s a variation on pallet gardening. The advantages of using boards are you can space or remove your boards so you can easily access the soil to weed or add amendments, you can add or remove boards to make a bigger or smaller patch, you can make the boards the length you need or want, space them as needed per the plant. Planting between boards can be used for lots of other plants too if you won’t be planting an understory! As for your strawberries, they leaf out and get bigger, and in addition to the boards, they quickly become living mulch for themselves!
  • Grow your own organic mulch! Comfrey is a great choice! It has abundant large leaves, and you can spread them about by your tomatoes and peppers. Chop and drop covered with another kind of mulch lets more of the comfrey goodness to permeate your soil. Comfrey has lovely blue flowers for pollinators, other beneficial insects, and hummingbirds. It’s best use, however, is as a compost nutrient and speeder upper! Turn in a few chopped leaves!

Not Biodegradable but still good!

  • Gravel, Rocks of a size and color that pleases you, though this would be easier to use for permanent landscaping rather than veggies that change seasonally. But if it’s all you have…it works. If you live in a windy or desert area, your garden is on a slope, rocks might be best. Rocks were used in Zuni, Hopi and Navajo waffle gardens.
  • Plastic. It works, a lot of commercial growers use it, but it doesn’t feed your soil. There are reasons to use different colors for specific crops, ie red works best with tomatoes! In an urban yard garden there might not be enough of that crop to warrant its use. You must put in a drip system underneath it; rainwater can’t get into the soil. It might work best in a windy area, on a hillside, where other mulch would be blown or washed away. Be careful with it because it is also used in the solarization process to heat the soil to kill weeds, read also the roots of your plants. The biggest negative is it also kills beneficial soil organisms like worms. If it works for your situation, secure it with garden staples.

Other than rocks, too much mulch would be hard to do. Too little doesn’t do the job. Replenish thinning late summer mulch. Deep mulch really protects the soil and brings soil organisms to the surface where the mulch layer meets the earth. Worms thrive in moist cool soil. Deep mulch feeds the soil and decomposes within the pile too.

If you are going to mulch, do it justice. Put on 4 to 6 inches minimum. Less than that may be cheaper and pretty, but simply makes great habitat for those little grass and weed seeds! Mulch makes moist soil, where a rich multitude of soil organisms can thrive, including great fat vigorous earthworms if you keep your soil consistently moist enough! You see them, you know your soil is well aerated, doing great!

COMPOSTING IN PLACE!  One of the nifty tricks of using deeply mulched areas is to build soil right where you need it! Tuck kitchen waste out of sight under your mulch, where you will plant next or simply to feed the soil there! Sprinkle with a little healthy soil if you have some to spare. That inoculates your pile with soil organisms; pour on some compost tea to add some more! Throw on some red wriggler surface feeder worms. Grow yarrow or Russian comfrey (Syphytum x uplandicum) for leaves to put down first, then add your kitchen stuff. Comfrey speeds decomposition. What you put under your mulch will compost quickly, no smells, feeds your soil excellently! If you keep doing it in one place, a nice raised bed will be built there with little effort!

Mulch Straw, Plant Now!Deepest mulch can act like a compost pile that heats up. It can extend your growing season. By installing it early you may be able to plant earlier. You don’t have to wait to plant! Just make an opening, add finished compost, amendments of your choice, and plant! There are two schools of thinking about fall mulch. 1) As fall cools, mulch keeps the soil insulated, warmer longer, extending your fall growing as well! 2) Or, late summer, as cooling starts, you may find removing mulch is better so the soil is again warmed by the Sun. Get out your soil thermometer and test it for yourself.

Mulching is double good on slopes and hillsides. Make your rock lined water-slowing ‘S’ terrace walk ways snaking along down the hillside. Cover your berms well and deeply to prevent erosion and to hold moisture when there are drying winds. Use a mulch that won’t blow away or be sure to cover or anchor it in windy areas – plastic or netting, rebar, remesh. Biodegradable anchor stakes and ‘extra tall’ stakes are available. Carolyn Csanyi has some clever ideas on how to keep your mulch on a slope. Plant fruit trees, your veggies on the sunny side under them, on the uphill side of your berms. Make your terrace wide enough so you don’t degrade the berms by walking on them when you harvest.

Keep your Mulch topped! Cover bare spots and replenish where your mulch is getting thin. 4 -6″ is a good depth. Preferably use light colored mulches, like straw, that reflect the sunlight. If your mulch has meshed into a tight layer, use a watering spike so water gets to the roots of your plants or make holes with your spade fork. Insert it, rock it back and forth, water. Straw, rather than a meshing mulch, is better for your veggies.

Remove, bag and trash mulch where plants have had pests or disease; replace with clean mulch. Do NOT compost it or put it in green waste for city pickup. In general, remove overwintering pest habitat – old straw, weeds and piles of debris.

Any organic mulch will decompose. It really becomes sheet composting or composting in place! An 18″ deep pile becomes about 9″ high in 3 days to a week depending on temps, how moist it is, what kinds and sizes of pieces are used! Such a grand deep pile of mulch can easily become a super nutritious raised bed!

A variation of that is to first plant green manure, a legume and oat mix, let it grow, cut it down at first bloom, chop into pieces, let it sit on top 3 weeks, turn under with other amendments you want, then cover that with deep mulch and let it be. If you have them, add some surface feeding worms, red wigglers. Your soil is fed, soil organisms are enriching it, excellent soil structure is being created. In a warm SoCal ‘winter’ you can do this anytime. The whole process can take 3.5 months depending on which plants you choose to grow. See more!

End of Season 

Soil resting and restoration! At the end of summer, depending on the type of materials you used, and if your soil has no disease fungi, the mulch was not under a plant that had pest infestations or disease, you can rest and feed that area of your soil by simply turning your old mulch in. Cover that area with a good deep layer of new mulch, or put on layers of materials and compost in place! Let the soil organisms party out. Leave it alone until your next planting time. It will become living vigorous nutritious soil!

It there have been pests or disease, trash that mulch, literally. Again, Do NOT compost it or put it in green waste for city pickup. In general, remove overwintering pest habitat – old straw, weeds and piles of debris.

So, you see, there are times to mulch and times not to mulch. Using less saves money, saves work. Using it well gives you a better crop!

Mulch is magic when done right! Enjoy that 30 to 50% increased yield!

Updated 4.27.23


Love your Mother! Plant bird & bee food! Think grey water! Grow organic! Bless you for being such a wonderful Earth Steward!

The Green Bean Connection started as correspondence for the Santa Barbara CA USA Pilgrim Terrace Community Garden. Both of Santa Barbara City’s remaining community gardens are very coastal. During late spring/summer we are often in a fog belt/marine layer most years, locally referred to as the May grays, June glooms and August fogusts. Keep that in mind compared to the microclimate niche where your veggie garden is. Bless you for being such a wonderful Earth Steward!

Top^

Read Full Post »

Garden Design, Labyrinth - Pastor Craig Goodwin author Year of Plenty, Spokane WA

Impressive Garden Design, Labyrinth or Keyhole – Pastor Craig Goodwin, author Year of Plenty, Spokane WA. Another fun form of Food Not Lawns!

Choose your plants well and place them wisely!

Plant to Plant Locations!

North most taller plants and plants on tall trellises

Few summer plants like much shade, so plant tall to the North, short to the South. That puts tall trellises and cages to the north, or to the East so plant get the most heat they can from the afternoon sun. Pole beans, Lemon cucumbers, indeterminate tomatoes like SunGold, cherry toms, tall peppers. If your soil has wilts diseases, leave plenty of space between tomatoes so their leaves don’t touch. Though the fungi are also windborne, it slows it down if tomatoes are planted apart rather than the disease going right down the row.

Depending on access to light, interplant cucumber vines low on a trellis with your pole beans. After the cukes get up a bit, over plant fast growing WHITE radishes and WHITE potatoes as well to ward off cucumber beetles. Though cute, the beetles carry deadly wilt diseases plant to plant. Eat some of the radishes, leave the rest. Radishes let to grow get 3′ tall, would shade out your cukes. Let them flop down or remove lower leaves so your cukes get sun they need. Ideally, as with tomatoes, you would plant cucumbers, a very wilt vulnerable plant, separately from each other.

Medium height  

Squash need space, lots of space! Allow plenty for that gorgeous non-stop Zucchini or get dwarf varieties that you can keep up with! Even with dwarf varieties, healthy leaves on stems can be almost 3′ tall, easily a foot wide! Cute little Patty Pans are great and they get big too! Healthy Winter Squash can easily grow 40′ vines and produce many squash! Put them along a border or a sunny fence line if you have that space. Keep them on the ground rather than trellising. The ground is hotter than a breezy trellis, and Winter Squash needs a long hot season to grow and harden. They are shorter than zucchini, but know that the leaves also get a foot across!

Next put in your determinate tomatoes and bush beans, mingled with medium height peppers, eggplant in front, then tallish onions. Also plant radishes with eggplants as a trap plant for flea beetles. Flea beetle damage, little pin holes, seems so less severe, but it slows the growth of your plant way down, and there is little production. Pretty basils are perfect beside toms. It smells good, wards off evil insects, and needs full sun. If you are going to dry farm your tomatoes put the basil somewhere else because it needs plenty of water.

Depending on which size you choose, and you have the heat to grow them, pumpkins and melons might be next in height. Again, you need room unless you are coastal cooler and choose small varieties. You can trellis small varieties if your area is hot and sheltered; just be prepared to support the fruits.

South most Shorties!

Put taller Romaine lettuce, arugula, feathery cilantro, to the back. Let your arugula and cilantro grow out for flowers for bees, and seed for next year’s plantings. Stir in some pretty beets, turnips, radishes for eating. Last, very south most, plant pretty patches of low summer lettuce varieties, bunch onions, mingled with strawberries! Arrange comfortable harvest access to your strawberries.

An efficient space saving way to place littles and shorties is to comingle them among larger plants. If they need a little shade, put them on the morning side of larger plants. If your rows are East to West, full sun works best for them, put the shorties on the sunny South side of the row so they get sun all day! As larger plants get big, remove lower leaves so understory plants along them get the sun they need too.

If you are planting in trenches to save water, make your rows North to South to take advantage of the trench sides shading the soil in mornings and afternoons. Plant shorties that need some shade on the morning side. Plant heat lovers on the afternoon west sides.

Either way, the little plants act as living mulch, keeping the soil moist and cooler. You might plant them a little more densely, so they shade each other sooner. No need to allocate separate space for them in your garden!

Design Patterns!

Now, blend those delicious plant choices into Patterns! Put them all in rows, circles, squares, diagonal rays, or have no plan at all, go jungle or Food Forest style! That’s a plan too, right?! Whether your space is small or large, you can make pretty with it!

If you plant in rows, alternate and interplant different types of plants as well as different varieties of the same plant. This confuses pests and stops disease from spreading. Plant green alternated with purple basils. Different varieties come in at different times, attractive to an insect at one time but not another. Add helpful companion plants between and among, underneath on the sunny sides of taller plants! Breaking the pattern of same plant to same plant stops insect pests from making a slurping beeline down the row of your plants. Biodiversity is great! Exactly what Mama Nature does.

Circles can become graceful ‘S curves’ with lovely taller plants, maybe tomato cages in the center of the circle, with stepping stones for harvest access, or plant something special in the inside of each of the ‘S’ curves. Or make a labyrinth! Very attractive. Your S could be the continuous perimeter of your circle each instep like a keyhole area! Curves all the way around. See more about moisture preserving efficient Keyhole Gardening!

Veggie Garden Designs, Circles, S Curves, Squares, Keyholes

Squares are absolutely divine! Your whole garden can be planted to it, or just a section or have several, each featuring something special! Put contrasting color plants in lines crossing corner to corner, like an X, or put in a 5-pointed star inside your square! Alternating colors in same length rows might make your square.

Diagonal rays can be corner to corner side by side, or put in a Sunrise/Sunset ray pattern with pinks, Marigolds in yellow or orange to set the pattern.

Favorite perennial herbs can be heady scenty lovely corner accents! Or put them at welcoming entrance points for easy harvest access, near the kitchen for quick access! Lavender, culinary sage, dwarf rosemary, thyme, Italian oregano. Put them in the ground or raised up in colorful containers to keep them from being invasive and so they can be easily replaced when they age.

Healing herbs like the Plant Dr chamomile, bright yellow/orange calendula, and striking blue borage with star flowers! They adorn and are terrific companion plants that help your veggies. They are generally mid height. Don’t forget other edible flowers, that double as pollinator food, like chives, cilantro, clover, fennel, Johnny Jump Ups, marigolds, Society garlic, nasturtiums, and all-time favorite, rose petals! Bury-your-nose-in-it Mint is so pungent, wonderful tea. Needs lots of water and a container. Very invasive. How about some medicinal aloe next to your old unused terracotta chiminea?

Other Epic Thoughtful Choices! Importantly, note how these techniques affect your SOIL!

You and the Creator can collaborate. This is called playing with your food!

Updated 3.23.23


Love your Mother! Plant bird & pollinator food! Think grey water! Grow organic! Bless you for being such a wonderful Earth Steward!

The Green Bean Connection newsletter started as correspondence for the Santa Barbara CA USA, Pilgrim Terrace Community Garden. Both of Santa Barbara City’s remaining community gardens are very coastal. During late spring/summer we are in a fog belt/marine layer area most years, locally referred to as the May grays, June glooms and August fogusts. Keep that in mind compared to the microclimate niche where your veggie garden is.

^Top

Read Full Post »

Pallet Garden Flowers
Sam West’s flower Pallet Garden in Sydney Australia

Pretty! If you are facing having little space and lots of desire for some, or more, plants, Pallets could be one of your answers! Make the most of your vertical space! For us veggie gardeners, best plants are dwarf or bush varieties of vegetables and herbs, compact fruits like strawberries, patio/container types, determinate tomatoes – especially cherry tomatoes! Plants that produce many fruits or flowers per plant are ideal. Little flowers get planted tight and snuggly. Veggies need more room between, access to more soil, to grow bigger and fruit well.

Where will your pallet live? Be sure balconies are safe for the wet weight and your neighbors won’t be bothered by your dripping! If you are a renter be sure it’s allowed, or that your owner association approves. All the better at your small community garden space! Free Standing can go anywhere! Put some feet on it. Make an L shape that supports 2 or more pallets zig zag style.

WHY Pallet Garden?! 

Pros:
Space saver if used vertically, more production per space available
Avoids soil diseases
Schools, apt dwellers with only a balcony, everyday gardeners with limited budgets and/or space can grow pallet gardens!
No expensive lumber costs because pallets are usually free!

On-the-ground version saves water, keeps plants moist, protects roots, holds soil in place, weeds out.

Cons:
There are start up costs. Sometimes the pallet. Landscaping cloth, staple gun/staples, maybe other tools. The best potting mixes and plants.
Maintenance can be intensive. Watering, replacing soil, feeding dense plantings. Deadheading, clean up, plant replacement to keep it filled and fresh looking.
.

Pallet Garden organization

.

Flowers or Veggies, vertical pallets need a little organization!

Tall plants on top.
Vining types like lemon cucumbers, mini melons, at the bottom! If you aren’t doing veggies, put sprawling crawling creeper ground cover types at the bottom.

Joe Lamp’l’s Garden Pallet at Cityline
.

Pallet Garden Heat Treated HT

.

.

Choose it to use it! Upcycle! HT, Heat Treated (not chemical,) pallets are the ones you want.

Pallets come in different sizes, weights and variable construction! They can be rectangular or square, long and narrow, small or large.

If you get your pallet from a company, ask if it is ok to take it. Some pay a deposit and can only get it back when the pallet is returned. Check out your local recycling center, organic garden supply, Craig’s list.

If you will be growing edibles, fruits, veggies and herbs, be sure your pallet is food friendly. What was it used for? Is it imported? Chemical treatments to avoid bacteria and molds, prevent insects and fungi, aren’t good. Pallets made of wood dust and composite wood block contain formaldehyde, a carcinogen. Avoid stained pallets. When in doubt, don’t!

Pallet Worm WalkwaiyPathways with Purpose! This size, long skinny pallets with wide spacing, are great for pathways with a worm farm underneath! The wide spacings allow you to give the worms food. Next season you can plant directly in the space that was previously your walkway or move the rich soil where you want it and/or do another path where you will plant next! Great for muddy terrain. If deeper mud, just lay pallets on pallets to get the height you want!

Be creative! Think how you might use some pallets!

Chris Cano’s Worm Walkway in Gainesville FL
Pallet Garden Vertical


Vertical gives more space!
Safe from bunnies but easy munchies for deer! Secure your vertical pallets so a strong wind won’t down them. Add T feet. In the ground use star pickets or strong stakes. Zip tie to your balcony.
.

bSq Design manages & revitalizes the life cycle of humble pallets!

Successful Pallet Garden Veggie Varieties per Level!

Top 

Determinate Tomatoes: Celebrity, Fresh Salsa, SuperTasty, Tiny Tim, Small Fry, Patio Hybrid and Toy Boy are all great selections! Prolific Cherry tomatoes are practically decorative as well as edible!
Peppers: Sweet Heat, Great Stuff, or Baby Belle. Candlelight hot peppers
Eggplant with smaller fruits, Okra
Bush beans or peas
Cabbage
Onions

Middle 

Lettuce mix: Healing Hands, Alfresco, or City Garden Mix. Spinach.
Strawberries
Herbs: Red Rubin or Genovese basil, sage, spearmint, rosemary, oregano, thyme, and cilantro

Bottom

Summer squash: Saffron or Dwarf Summer Crookneck, bush varieties
Cucumbers: Bush Champio, Salad Bush, or Spacemaster
Watermelons: Bush Sugar Baby or Golden Midget. Any mini melons.

And, of course, it can be lovely to mix your favorite veggies, herbs and flowers! Dwarf nasturtiums at the bottom?

A big thank you to Growing a Greener World’s  Joe Lamp’l for a lot of these suggestions!


Herb Garden! Of all the pallet herb gardens I like this one the best. It looks good. It has a dual purpose. Behind it is a bug proof curtained patio sleeping/reading area. Imagine a summer afternoon gentle breeze, the heavenly scents….while you are snoozing. It is conveniently placed right outside the doorway to the kitchen area. It is attractive enough it could be indoors in a well lighted area.

Pallet Garden Herbs DIYShowOff

.

.

The tall herbs are to the top. There is a goodly variety of herbs ~ basil, parsley, rosemary, dill, oregano, thyme, peppermint, chocolate mint, spearmint, tarragon, lavender, plus another type of spicy globe basil.  Boards have been removed so they all have room to grow well. The garden has sturdy feet. This page DIYshowOff.com has the tutorial.

.

.

.

Pallet Garden A-Frame

Pallet Garden Wall

.

.

.

.

The standing, movable A-Frame! Some pallets are smaller, more lightly planted, less heavy, easier to move. Don’t water right before moving!

.

.

.

.

The ultimate space saver, the Wall or hang them on your fence or let them BE a fence! If you are growing veggies, be sure they are conveniently reachable for tending and harvesting! They are great snuggled on the end walls of balconies or against balcony dividers between apartments for more privacy!

Pallet Garden stained strawberries verticalPaint ‘em or stain ‘em! This Pocket Pallet Garden of Strawberries is attractively stained and vertical. It is not needing to be tightly planted because the soil is safely held in the pockets! Each plant has plenty of soil. If you need more plants/berries, bind two pallets back to back, plant both sides, double your production! Place lengthwise north to south so each side gets plenty of sun. Feed lightly about once a week during production.

Let’s Plant These Babies!

Pallet Garden Potting Soil

Get out your gloves! Nail bites and splinters are no fun. Hose down your pallet, maybe give it a scrub, with bleach to kill cooties or if you would like it a bit lighter color. Let it dry. Make any needed repairs, hammer nails down flush. Sandpaper where/if needed.

6 to 8 hours are enough, but veggies do best in full sun! Make your pallet garden very near or at where it will live. They are heavy, especially when laden with wet soil!

Choose your method! There are many online tutorials, so enjoy yourself, gather up ideas from experienced aficionados!

  • Make pockets out of landscape fabric. That leaves space for air flow between rows.
  • Cover the pallet back with single or doubled landscaping fabric or shade cloth. Leave a longer length at the bottom so you can fold it up around the bottom like wrapping a present ~ to keep the soil from falling out the bottom. Staple the fabric to any place it touches wood to keep the soil where you want it. Plant tight to hold the soil in place.
  • Some don’t trust staples and fabric, so nail plywood on the back.
  • If you are planting veggies, you need more space between plants, won’t be planting tight to hold soil. You could use a second pallet for parts, and build wooden pockets that won’t fail and allow air flow! Drill drain holes in the bottom pieces.
  • If you are doing a lay-on-the-ground pallet garden, staple landscape cloth around the sides to hold the soil in, weeds out. Lay it down, fill it with your soil and plant!

Choose the very best organic potting mix enriched with tasty nutrients and that has good water holding capacity. Super ones oriented to container gardens will do the job!

If you made pockets, stand up your pallet and plant away. Otherwise, the easy way to plant is just lay the pallet on the ground and plant into it as usual. Fill it with premoistened potting soil, install your plants. Starting at the bottom, lift and shake a bit at each layer to settle the soil. Make sure soil is firmly packed as you move up. Fill in spots that settle.

Get out your staple gun again, and staple landscape fabric over the top of the pallet. This lets you fill the pallet completely with soil. It keeps the soil from falling out each time you water, and prevents weeds from growing around the plants in the top section of the pallet garden. Cut X holes where you will plant the top plants and plant them.

If you aren’t using pockets, leave your planted pallet laying on the ground for three or four days. 2 to 3 weeks is much better though, to let the plants get established and hold the soil in place. Depends on you, your plants, your pallet, space available and patience!

Carefully and slowly, gently water so soil doesn’t wash away. Add more soil where there is settling or roots get uncovered.

You can run a drip system through the planter if you like, especially if you planted densely. Water won’t get from the top to the bottom of a densely planted pallet. You can put the drip in at any time, but it’s easier before you plant. Just drill holes in the side and run your line through side to side. One way or the other, water thoroughly. Check the bottom rows to be sure they are moist.

Water as needed. If you planted densely to prevent soil loss, there are a LOT of thirsty roots all packed together. Water frequently. And all those roots are hungry! Feed them regularly with liquid fertilizer, right? But not so much they grow crazy! You will learn the right amounts for your particular plants, soil and location from experience.

Mavis Butterfield's Pallet Garden of Strawberries!

Mavis Butterfield loves her pallet gardens and they love her!

Lay-down pallets! Rather than going vertical, many gardeners lay their pallets right on the ground! Strawberries and lettuce worked best for this gardener! And strawberries and lettuce are great companions! The boards act as mulch, keep the soil moist and protect the roots from losing their surrounding soil. There’s less weeding! When you are done at that location, pick up your pallet, give it a shake and move on! Start again with new vibrant soil! Make a strawberry pallet planter, or chard, or lettuce or mix them all up together! Spring is good to plant your berries, or in SoCal, the first week of January bareroot!

Love carrots?! They are not good in vertical gardens, but great in lay-down versions! Make a frame the size of your pallet, and lay your pallet on top of that! Then your root vegetables will have plenty of space to grow deep.

Pallet Garden Raised Bed

.

.

Save-your-back raised bed pallet! Ideal for growing gourmet Mesclun mixes to mow and munch!

.

.

Pallet Garden Green Bee Education

.

.

.

.

.

.

Make a statement, tell a story! Leaning learning pallets! This one features bee friendly plants!

Pallet gardens are as beautiful and variable as the creativity of the Gardener! Pallets can be used as privacy walls, to create patio enclosures, as windbreaks, fences, borders, dividers, compost enclosures, garden furniture, a potting bench, tool rack/holder, to build structures like sheds, greenhouses, decks, outdoor rooms! They enhance the art of gardening and can be garden art!

.This beautiful pallet garden was at the 2012 Canada Blooms National Home Show!.

Pallet Garden BSq Structure Canada Blooms 2012
bSq Design manages & revitalizes the life cycle of humble pallets!

Updated 9.25.20

Back to top!


Love your Mother! Plant bird & bee food! Think grey water! Grow organic! Bless you for being such a wonderful Earth Steward!

The Green Bean Connection newsletter started as correspondence for the Santa Barbara CA USA, Pilgrim Terrace Community Garden. All three of Santa Barbara city community gardens are very coastal. During late spring/summer we are in a fog belt/marine layer area most years, locally referred to as the May grays, June glooms and August fogusts. Keep that in mind compared to the microclimate niche where your veggie garden is.

Read Full Post »

I used to be a total mulcher, covered my whole veggie garden. I’ve adjusted my coastal SoCal mulch* thinking to match the plant! Same goes for composting in place. That’s a good idea for some areas of your garden, other areas not at all!

If you are coastal SoCal, in the marine layer zone, your mulch, or composting in place, may be slowing things down a lot more than you realize. The best melons I’ve ever seen grown at Pilgrim Terrace Community Garden were on bare hot dry soil in a plot that had a lower soil level than most of the other plots. The perimeter boards diverted any wind right over the top of the area, the soil got hot!  It was like an oven! So, let it be bare! No mulch under melons, your winter squash, pumpkins except under the fruits to keep them off the ground, clean, above soil level insects.

For more heat, put up a low wind barrier – straw bales, a perimeter of densely foliated plants, a big downed log, be creative. Permeable shrubs are the most effective wind barriers. Let your peppers and jicama get hot! Eggplant are Mediterranean heat lovers! Okra is Southern, hot.

Tomatoes need dryer soil to avoid the verticillium and fusarium wilt fungi, no more than an inch of loose straw to allow airflow at soil level but keep heat down. Let ‘em dry nearby; water a foot or more away from the central stem. Let that tap-root do its job, get the water below the fungi, wilt/blight zone, the top 6 to 8 inches. Drier soil is not comfy for slugs.

Get cucumbers up on a trellis, then you won’t need mulch to keep the cukes clean and bug free, but rather because they have short roots. Preplant radish to repel cucumber beetles when your cukes bloom. The radish will provide a living mulch as their leaves shade the cuke roots. Eat a few radish, but let the rest grow out to keep repelling the beetles. In time you can gather their seeds. Plant heat tolerant lettuces at their feet to act as living mulch. They both like plenty of water to keep them growing fast and sweet, so they are great companions. Slugs and snails like peas and lettuce. You will need to use a little Sluggo or its equivalent if you feel comfortable to use it.

Clearly, no mulch, more heat, equals more water needed. In drought areas, plant in basins below the main soil level. Use your long low flow water wand to water only in the basin at the roots of your plant. Fuzzy leaved plants, tomatoes and eggplant, prefer not being watered on their leaves anyway. Since there is no raised mound, there is no maintenance needed for berms surrounding the basin, but you will need to keep the basin from filling in. Plant companion littles and fillers in the basin around the base of bigger plants. They will enjoy the cooler damper soil and provide living mulch to keep that soil more cool!

LIVING MULCH  is triple productive! It mulches, provides companion plant advantages, and is a crop all at the same time! Closely planted beets, carrots, garden purslane, radish, turnips act as living mulch to themselves and bigger companion plants you plant them by. The dense canopy their leaves make lets little light in, keeps things moist. Cucumbers under broccoli are living mulch while the brocs repel cucumber beetles! If you cage or trellis your beans, most of the plant is up getting air circulation, keeping them dryer, more mildew free, if you don’t plant too densely. They, cucumbers and strawberries, also have short feet that need to stay moist, so do mulch them – your beans and cukes with clean chop and drop, straw or purchased mulch.

Zucchini, doesn’t care. They are a huge leaved plant, greedy sun lovers, that are self mulching. But, you can feed their vine up through the largest tomato cages, cut off the lower leaves and plant a family of lettuces, carrots, onions, salad bowl fixin’s or basil on the sunny side underneath! Especially preplant radish to repel cucumber beetles! All of them like plenty of water, so everyone is happy.

Cooler crops, over summering Broccoli, Kale, Chard like moist and cooler, so mulch deeply very early in spring.

Pallet Garden Strawberries Boards as MulchBoards as mulch! Your strawberries like slightly acidic soil, and acidic mulch – redwood or pine needles. Also, you can lay down boards between mini rows of strawberries to keep the soil moist under the boards, the soil between the rows that the berry roots have access to. It’s a variation on pallet gardening. The advantages of using boards are you can space or remove your boards so you can easily access the soil to add amendments, you can add or remove boards to make a bigger or smaller patch, you can make the boards the length you need or want, space them as needed per the plant. Planting between boards can be used for lots of other plants too if you won’t be planting an understory! As for your strawberries, as they leaf out and get bigger, in addition to the boards, they will be living mulch for themselves!

If you are going to mulch, do it justice. Besides wanting to cool your soil, keep moisture in, prevent erosion, keep your crop off the soil and away from bugs, and in the long-term, feed your soil, mulching is also to prevent light germinating weed seeds from sprouting. Put on 4 to 6 inches minimum, tomatoes being the exception. Less than that may be pretty, but simply make great habitat for those little grass and weed seeds! Mulch makes moist soil, where a rich multitude of soil organisms can thrive, including great fat vigorous earthworms! You see them, you know your soil is well aerated, balanced, doing great!

Mulching is double good on slopes and hillsides. Make rock lined water-slowing ‘S’ terrace walk ways snaking along down the hillside. Cover your berms well and deeply to prevent erosion and to hold moisture when there are drying winds. Be sure to anchor your mulch in windy areas -biodegradable anchor stakes are available.  has some clever ideas on how to keep your mulch on a slope. Plant fruit trees, your veggies on the sunny side under them, on the uphill side of your berms. Make your terrace wide enough so you don’t degrade the berms by walking on them when you harvest.

If you mulch, make it count!  Mulch with an organic degradable mulch. Chop and drop disease and pest free plants to compost in place, spread dry leaves. Spread very well aged manures. When you water, it’s like compost or manure tea to the ground underneath. Lay out some seed free straw – some feed stores will let you sweep it up for free! If you don’t like the look of that, cover it with some pretty purchased mulch you like. Use redwood fiber only in areas you want to be slightly acidic, like for strawberries or blueberries.

COMPOSTING IN PLACE  Build soil right where you need it. Tuck green kitchen waste out of sight under your mulch, where you will plant next. Sprinkle with a little soil if you have some to spare, that inoculates your pile with soil organisms; pour on some compost tea to add some more! Throw on some red wriggler surface feeder worms. Grow yarrow or Russian comfrey (Syphytum x uplandicum) near your compost area so you can conveniently add a few sprigs to your pile to speed decomposition. It will compost quickly, no smells, feeding your soil excellently! If you keep doing it in one place, a nice raised bed will be built there with little effort!

Mulch Straw Plant Now!

You don’t have to wait to plant! Pull back a planting space, add compost you have on hand or purchased, maybe mix in a little aged manure mix, worm castings, your favorite plant specific amendments. Sprinkle some mycorrhizal fungi on your transplant’s roots (exception is Brassicas), and plant! Yes!

*Mulch is when you can see distinct pieces of the original materials. Finished compost is when there are no distinct pieces left, the material is black and fluffy and smells good.

Mulch is magic when done right!

Back to top


The Green Bean Connection started as correspondence for the Santa Barbara CA USA Pilgrim Terrace Community Garden. All three of Santa Barbara’s community gardens are very coastal. During late spring/summer we are often in a fog belt/marine layer most years, locally referred to as the May grays, June glooms and August fogusts. Keep that in mind compared to the microclimate niche where your veggie garden is. Bless you for being such a wonderful Earth Steward!

Love your Mother! Plant bird & bee food! Think grey water! Grow organic!

Read Full Post »