Feeds:
Posts
Comments

Archive for the ‘Potting Soil’ Category

Container Laura Gasparrini creative bag garden quick easy

Many thanks to gardener Laura Gasparrini who shared her photos and inspired me to write this post!

Smart Gardening! If you are just beginning, or are experienced but have little time, your soil is bad ie hardpan or contaminated, or you don’t have a soil area, just get a bag of compost, garden soil, raised bed & potting mix. Choose the best your budget can afford per the ingredients! Plant roots do best in a mixture of soil and organic matter compared to organic matter alone. Then go for it!

No worries about sorting out your soil, no weeding, no digging! The bags can be different sizes as your design needs. If you already have raised beds, just plop the bags on top. Don’t dig them in! Use that 100% great ‘soil’ in the bags! No digging is good, height is good, less bending that is hard on your back and knees. If you are putting them on the ground, lay down some newspaper or cardboard to stop weeds between your bags. Make a dozen or more drainage holes (screwdriver) in what will be the bottom of your bag, and additional holes around the lower sides in case of heavy rains and your bags flood. As well as drainage, roots of some of the plants will grow through the holes and on into the soil below, but most veggie annuals don’t need more depth than a deep blocky bag of garden soil. Cut out a rectangular area on the top leaving a 2″ border. You’re in biz!

Better than Raised Beds! Raised beds are notorious for being warmer, dry out sooner, then you water and water and the soil is leached of nutrients, the soil is compacted, the soil level significantly lowers, and the plants use it up. With the heavy plastic bags, the soil is intact, more moist, needs less water, more nutrients remain. Why mix good soil that is full of fresh nutrients with depleted soil and deplete the nutrients overall? Often deep raised beds have soil all the way to the bottom of the container. It would take a lot of amending to make all that soil better. As said above, most veggie annual roots don’t need more depth than a blocky deep bag of garden soil!

Amending a whole raise bed is a lot of unneeded labor. In fact, you might need to remove some of the raised bed soil to be able to add enough better soil to make a difference. That’s another reason why so many raised beds fail as the years go on. The soil gets poorer and poorer. What is often unsaid about raised beds is that most gardeners replace all the soil in them every year! That’s a lot of work. With the vibrant nutrition in the bag you will get a sooner, better crop. As I walk my neighborhood with my dog I often see raised beds abandoned in only one year, dry and dead. And there they sit, often for years. Especially sad to see when growing in bags is such a simple solution.

Laura’s bags lasted THREE years! Depending on the condition of your bags, at the end of the season, work what’s left into more permanent beds if you wish, use it as mulch in your landscaping, or simply get more bags when you are ready to plant again!

In summer heat, Mulch your bags after you have planted. Keep them moist, the soil cooler, less watering, save money! The gardener of the images covers them deeply with straw. There are some exceptions — see more!

You can get as many bags as you wish and put them wherever you want, in any configuration! Raised beds can be moved, but it is a lot of work. If you are on a balcony, or don’t want raised beds, you have ultimate flexibility! Put your containers, bags, few or many, just as you wish! If on a balcony, be sure your balcony supports the wet weight, and check with your downstairs neighbor regarding drippings. If you have a lot of space and little time, no inclination or physical ability to dig, this is the ticket to ride! Get out paper and pencil and design your garden. You already have the size of the bags. You could cut little bags out to scale and just move them around until you are happy. Include comfortably spaced planting, tending and harvesting pathways. Summer Design  Winter Design

Planting in bags is a form of container gardening. Clearly, you will replace the bags more frequently than containers, especially depending on whether you have desert heat that degrades the plastic or cool coastal moistures. The convenience, of course, is there is no need to consider digging, amending the tired soil in a raised bed, a big container, or repotting! See more at Container Gardening, Garden Anywhere!

Sun is always the important first consideration. 6 – 8 hours is the standard. If your area is big enough but shady, you might put your bags on those flat dollies and move them with the Sun’s path during the day.

Container Laura Gasparrini Bags single plant - fencing

That little fencing in the foreground might be to keep raccoons and skunks, kitties and doggies out. Don’t you love the ‘vertebrae’ stones in the back?! Laura Gasparrini photo.

What to plant is up to you with some limitations! There is a huge difference between a mature artichoke plant, 6′ diameter or more, and a head of lettuce, and artichokes have deep roots! Except for container varieties, tomatoes have deep roots. Perennials, plants that grow year after year, like a lot of herbs, have deep roots. But most garden veggies are annuals with 6 to 8″ deep roots. Bush beans and peas and cucumbers can have short 3″ roots, and that’s it. You do have to keep them steadily moist. You can see in the images you can get sixes of some plants in your bags. Others, like zucchini, above right, want a bag of their own!
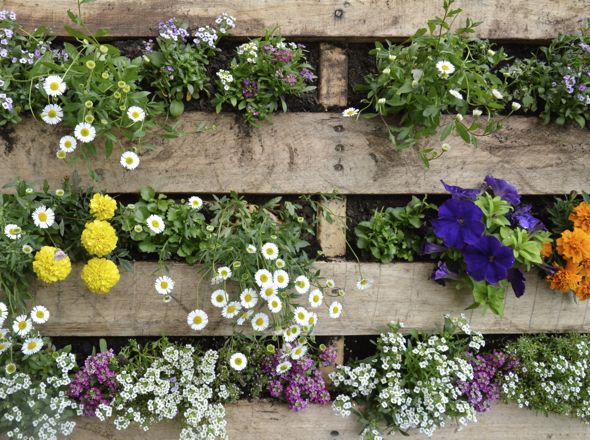
❤ If you are savvy to Companion Planting, Biodiversity, consider mixing in plants that repel pests and reduce diseases. Mix the type of plants in one bag! Spread them out across your whole garden – two here, two there, and so on. Comingle flowering plants of all seasons to bring and feed pollinators like hummingbirds, bees and feed hoverflies that eat aphids!

Container Laura Gasparrini hybrid system bags and in the ground

Laura Gasparrini photo.

Your garden design might also allow for in-the-ground plantings of the deep rooted or permanent perennials or like the handsome red stemmed Chard in the image above. It would be a flexible hybrid system that allows the happiness of tomatoes in cages. Remember, vertical gardening, gives you much more available ground space! Cages, trellises and arches get beans, peas, cucumbers, squash vines and indeterminate vining tomatoes off the ground, giving room for more other plants! See Vertical Gardening! If you don’t have that extra room, grow bush beans and peas and determinate, bush tomatoes, container varieties.

Container Bag on end deep rooted plants tomato jaz@octoberfarmThe other option, especially for deep rooted tomatoes, is to put your bag on end! Make drainage holes at the bottom. Push two strong stakes down through the bag a foot deep into the garden to hold the bag upright. One plant per bag. You can choose long stakes so 3 – 4′ are above the top of the bag, then slip a tomato cage in the bag to hold the tomato up. This will work well for less tall determinate tomatoes but not for vining indeterminate tomatoes. Please see some other great instructions at CA Grown! Do what works for you! Terrific image by jaz@octoberfarm

Otherwise, select container tomato varieties that have the shortest roots, least height, are compact. Some of them are amazing little producers and may give you all you need.

However, another option, if you don’t have hardpan or contaminated soil, is to just grow large vining indeterminate tomatoes in your flat bag! Julianne, commenter online, grows them successfully in the larger bags. She cuts a big X across the bottom and the top. The plants get off to a great start with the super medium in the bag! First the roots spread through the entire bag, then, when they discover the X, they grow right on down into your soil! Put a tall enough cage over it that fits over the bag. The cage holds your plant upright, saves space, you have cleaner fruit and more veggies per square foot! Stake the cage securely in place. When your plant gets big, the cage will have a lot to support in a strong wind.

Depending on your overall space, you could use container variety plants to great advantage. Their names often indicate their suitability for container planting: dwarf, patio, tiny, pixie, little, mini, container. There are short carrots like Little Fingers, mini melon vines like Sugar Baby Watermelons with much smaller leaves, small tomato bushes that produce like crazy, bush zucchini, mini eggplant and cucumbers. Many peppers love growing in containers! Some container varieties are bred to produce so much in a small space, gardeners should consider growing them in their non container gardens, replacing varieties with much larger footprints! Since container varieties are smaller in stature, they produce sooner too, even sooner than some early varieties!

What to plant?! Some gardeners plant for the return they get per the plant’s footprint. Others consider the costs. Should you grow inexpensive common veggies like carrots or potatoes? Some veggies are not available at the store or are very expensive. Grow your own from seed! Other gardeners plant for nutrition, plants high in vitamins or antioxidants, for example Garden Purslane. Maybe you choose a plant because it is your sweetie’s favorite or your grandma grew it and it’s a tradition!

How many to plant is sometimes decided by how productive it is, how many fruits you and your family will eat. Zucchini, tomatoes, beans and chard give big returns.

If you have time and love growing from seed, don’t mind extra waterings and tending, plant seeds! Be sure to label them so you will know what to expect – date planted, name, number of days to germination/maturity! If you don’t have that time or inclination, nursery transplants per the season are perfect for you!

Get the right kind of soil bags for your plants that prefer acidic soil – blueberries, cranberries, beans, cucumber, eggplant, parsley, parsnips, pepper, radish, rhubarb, rutabaga, sweet potatoes, and tomatoes. Another site says: Chicory, eggplant, endive, potato, rhubarb, shallot, sorrel, sweet potato. SFGate says ‘Vegetable plants that do best in mildly acidic soil include carrots, cauliflower, celery, cucumbers, garlic, sweet peppers, pumpkins, winter squash and tomatoes. Another site says: Bean, Brussels sprouts, carrot, chive, collard, corn, cucumber, garlic, kale, kohlrabi, mustard, parsley, pea, pepper, pumpkin, radish, rutabaga, squash, sunflower, tomato, turnip, watermelon. Get a soil test kit or use your intuition. You can see there are differences of opinion among the ‘experts!’ Woody mulches help maintain acidic soil pH. Specific info about soil pH for veggies

Before you plant, loosen the ‘soil’ in the bag. If it was in a stack at the nursery it may be quite compressed. Turn it, roll it, shake it, squeeze it, pummel it a bit, work it until the stuff in the bag is loosened. Young roots will find it easier to make their way through it to feed.

Put your bag(s) where they will live; on a dolly if they will be moved. Gardener, Amelia Allonsy, recommends 40 lb bags, and to add 1 cup of 5-10-10 fertilizer for every 2 1/2 cubic feet of potting soil. One 40-pound bag of potting soil is roughly 3/4 cubic foot, so this amount works for approximately three 40-pound bags of potting soil. Your plants will need those high 10-10 counts later to produce blooms and function well. I add a handful of bonemeal in the planting holes of plants that produce by blooms. Plant your plants. Water gently. Some say water first, plant second. Do what you think will be best. Transplanting Tips!

During the season you may want to do some easy amending. Like strawberries love fish emulsion feeds every two weeks. For other veggies, at bloom time there are liquid feeds of fertilizers high in Phosphorus, for more blooms! Your nursery person can help you. These are super easy to apply with your watering can. If you get more into it, see also Veggie Feeding Schedule for Your Summer Favorites!

The one thing you need to do is water frequently. Some do once a day for small plants just starting. In hot weather seedlings may need water three times a day. Water lightly. You don’t want to wash seedlings or soil away, or waterlog and rot your soil. If things get smelly, you need to add more holes and/or water less frequently or more lightly or all of these. Jut like with raised beds, too much watering leaches nutrients away. We want even moisture for most veggies.

One of the most wonderful advantages of growing veg in these bags is there are no soil pests or diseases, no weeds! In short, little maintenance.

Growing in bags in the UK is so popular companies vie for the best planter bags even developing their own special ingredients to please the gardeners! These long 3-Plant Levington bags are at the Cardwell Garden Centre. Bags vary a lot in size; some are 34″ long by 10″ wide. They say: ‘Levington Tomorite Giant Grow Bag is ideal for growing tomato plants and other fruit vegetable and salad crops. This bag is enriched with Tomorite plant food and has added seaweed to give full flavoured tomatoes.’ Just a few other brands are Miracle-Gro, 4 Plant by Evergreen, Incredicrop and Forker and Clover! It’s big business there!

Container UK Levington Tomorite Giant Grow Bag

Grow your own terrific veggies, 100% fresh & ORGANIC!

Updated


Love your Mother! Plant bird & bee food! Think grey water! Grow organic! Bless you for being such a wonderful Earth Steward!

The Green Bean Connection started as correspondence for the Santa Barbara CA USA Pilgrim Terrace Community Garden. All three of Santa Barbara’s community gardens are very coastal. During late spring/summer we are often in a fog belt/marine layer most years, locally referred to as the May grays, June glooms and August fogusts. In 2018 they lasted into September and October! Keep that in mind compared to the microclimate niche where your veggie garden is.

Back to top

Read Full Post »

Seed Starting Soil Mix


Starting Seeds!
Simplest is right in the ground where you want your seeds to live when they grow up! It’s easy to make special soil for indoor seed starting. If they need a little tlc who says you can’t put this mix in a little planting hole or trench and start your seeds right where you want them in the ground?! Transplant your indoor seedlings when they and the temps are ready or the right space opens up. Or ditch the mix and just buy a bag of great starter ‘soil.’ Starting your seeds indoors and early gets your plants in the ground SIX WEEKS sooner!

Starting Seedlings is a sacred art all its own! It starts with the ‘soil’ they are planted in.

Number 1 is in the Earth herself!

Whether as is, or amended, planting in the ground, in good loose loamy soil, is just about as nutritious as it gets! The soil organisms, mycorrhizal fungi, oxygen, moisture, bird, animal poop and worm castings, and decayed leaves/plants, minerals, create a rich humus. Humus holds water. Tiny roots find their way through and a thriving plant is born.

Worm castings are a special addition because they help with immunity and, they speed germination!

The advantage of starting seeds in the earth is they don’t have to be transplanted later. Some seedlings have super delicate root systems, others, like carrots and cilantro, put down tap roots instantly and transplanting can damage those important roots. In the case of carrots, that quick root IS the carrot!

You need to wait until the last average frost date, and start them when both air and soil temps are right for that plant. You can always take a chance and plant earlier in the ground, that there won’t be a stretch of exceptionally cold weather and no freezes. Of course when we say ‘average,’ you are still taking a chance. If there is a late freeze, you either start all over again or head to your local nursery for transplants. Some gardeners, who especially want that particular variety (that they can’t get at nurseries) plant another round in a few days or a week or two, do additional backup indoor starts just in case this very thing happens.

DIY Seed Starting Mixes

You get a 6 to 8 weeks’ time advantage by starting seedlings earlier indoors or in greenhouses before the last average frost date. If the plant is frost tolerant, like Brassicas, you can start even earlier and plant when the ground temp hits 50°. It is important to get indoor early-started seedlings in the ground when they are mature enough and ground and air temps are right. One way to cover that problem is to plant two or three rounds. One will be right when conditions outdoors are right.

Start with peat moss or coir. Blend it with treated compost that has been heated to 150 degrees to kill off pathogens/weed seeds. Add worm castings, no more than 10% by volume.

Damping off, kinda like crib death, is a sad foe of seedlings. No fix, no cure. The baby just topples overnight and it’s over. A 2005 North Carolina State University study found it’s not the mixture but what’s on top of the soil that counts most. Damping off differences almost disappeared between commercial organic seed-starting mixtures and various homemade mixtures after all of the seeds were covered with vermiculite instead of a planting medium.

What is Vermiculite?! It is composed of two natural minerals, absorbs and retains several times its own weight in moisture while still holding some oxygen.

Cinnamon for Seedling Damping Off Disease Prevention!

The super simplest home prevention is Cinnamon! Just sprinkle it on the soil! Sprinkle on plant injuries and they will heal. It is a rooting hormone. Mildew, mold, fungal diseases? Mix 4 tablespoons cinnamon in a half gallon warm water, shake it vigorously, steep overnight. Strain through a sieve or coffee filter and put it in a spray bottle. Add ¼ teaspoon liquid dish soap as a surfactant, lightly spritz your plants, undersides and tops of leaves! (In Santa Barbara area buy powdered cinnamon in big containers at Smart & Final.) Also, it repels ants!

Rodale’s April Johnson says seedlings need a loose, well-drained fine medium. Don’t use potting soil – often, it’s too rich, doesn’t drain well enough. April, who has experimented many years, prefers this mix:

4 parts screened compost
1 part perlite
1 part vermiculite
2 parts coir

Barb Fick, consumer horticulturist with the Oregon State University Extension Service, explains that our typical backyard soil is too compacted, full of weed seeds and it is not pasteurized, causing seedling diseases and death, often doesn’t drain as well as seedling mixes. It can develop a crust that prevents seedlings from pushing through the soil. Barb’s recipe is

one-third pasteurized soil or finished compost
one-third sand, vermiculite or perlite
one-third peat moss

Or, just use half peat moss and half perlite, vermiculite or sand.

You can see from this last combination, that soil or compost is not needed to get a seed started! However, if you don’t use compost, when your seedling gets true leaves (the first two after the cotyledons), it gets hungry as the nutrition in the seed is used up! Give it a spritz of half strength fish emulsion. Some nurseries lace their planting mixes with those little tiny fertilizer pellets. Your baby plant gets nutrition when it needs it.

Before planting, clean your pots, trays and flats. Rinse them in one part chlorine bleach to 10 parts water solution to kill plant disease microorganisms that could weaken or kill your tender young seedlings.

Wet your soil before you plant. Keep adding your starter mix until you get the level you want. Leave enough room to add a thin layer of vermiculite on top after you plant your seeds.

Chopsticks can be used in a couple helpful ways. Mark one of them at 1/4, 1/2, and 1″ on the stick. That way you can get your seeds at the right planting depth. Using your marked stick keeps you mindful; planting goes faster with less wondering! Seeds planted too shallow can dry out, too deep they take longer or never come up – they can use up all their nutrients before they make it.

If you are installing delicate sprouts, make a planting hole, and if you are good with chopsticks, grasp the sprout gently, carefully place it. Smooth the soil, water gently. Check out Seed Soaking/Presprouting Tips & Ideas!

Rather than top watering, causing your seeds to be washed, bunched to the side, buried too deep, or uncovered, or tiny just-starting seedlings to be damaged, you can put your planting containers in a tray with water in it and let the water wick up into your seedling mix. Wicking is good; all the soil gets wetted. Keep a spray bottle handy for any top watering you think they need. Set it on mist to start.

Here are another couple recipes!

4 parts fine compost
2 parts coir or peat moss
1 part vermiculite
1/2 part perlite

If you don’t want to sift compost:

3 parts peat moss or coir
1 part vermiculite
1/2 part perlite
1/4 tsp lime/gallon peat moss (don’t add if using coir)

You see gardeners have their preferences, even the pros differ! Go by your own intuition. Maybe you will use one mix for some plants, another mix for others. Your own mix might be different than any of these. Experiment, but maybe try an old standard at the same time just in case your mix doesn’t work. Might take you a few seasons to find what works best for the particular plants you grow.

Readymade Seed Starting Mix

Pre-made mixes have advantages! First, mainly that they are premade, second, they are timesaving! Just go get ’em! But, just in case, do read the ingredients list. They come in small or large bags. The mix is pasteurized. Some of them have wetting agents. Yes! Others have lime for pH balance to stop damping off. Instead of buying all kinds of bags of component materials, then storing all the extra leftover stuff, you use what you use, store the one bag, and that’s it! Unless you have a large scale operation and have specific needs, premade mixes can be perfect!

Have fun raising your baby plants!

Updated 12.29.21

Top^


Love your Mother! Plant bird & bee food! Think grey water! Grow organic! Bless you for being such a wonderful Earth Steward!

The Green Bean Connection started as correspondence for the Santa Barbara CA USA, Pilgrim Terrace Community Garden. Both of Santa Barbara’s community gardens are very coastal. During late spring/summer we are in a fog belt/marine layer area most years, locally referred to as the May grays, June glooms and August fogusts. Keep that in mind compared to the microclimate niche where your veggie garden is.

Read Full Post »

Pallet Garden Flowers
Sam West’s flower Pallet Garden in Sydney Australia

Pretty! If you are facing having little space and lots of desire for some, or more, plants, Pallets could be one of your answers! Make the most of your vertical space! For us veggie gardeners, best plants are dwarf or bush varieties of vegetables and herbs, compact fruits like strawberries, patio/container types, determinate tomatoes – especially cherry tomatoes! Plants that produce many fruits or flowers per plant are ideal. Little flowers get planted tight and snuggly. Veggies need more room between, access to more soil, to grow bigger and fruit well.

Where will your pallet live? Be sure balconies are safe for the wet weight and your neighbors won’t be bothered by your dripping! If you are a renter be sure it’s allowed, or that your owner association approves. All the better at your small community garden space! Free Standing can go anywhere! Put some feet on it. Make an L shape that supports 2 or more pallets zig zag style.

WHY Pallet Garden?! 

Pros:
Space saver if used vertically, more production per space available
Avoids soil diseases
Schools, apt dwellers with only a balcony, everyday gardeners with limited budgets and/or space can grow pallet gardens!
No expensive lumber costs because pallets are usually free!

On-the-ground version saves water, keeps plants moist, protects roots, holds soil in place, weeds out.

Cons:
There are start up costs. Sometimes the pallet. Landscaping cloth, staple gun/staples, maybe other tools. The best potting mixes and plants.
Maintenance can be intensive. Watering, replacing soil, feeding dense plantings. Deadheading, clean up, plant replacement to keep it filled and fresh looking.
.

Pallet Garden organization

.

Flowers or Veggies, vertical pallets need a little organization!

Tall plants on top.
Vining types like lemon cucumbers, mini melons, at the bottom! If you aren’t doing veggies, put sprawling crawling creeper ground cover types at the bottom.

Joe Lamp’l’s Garden Pallet at Cityline
.

Pallet Garden Heat Treated HT

.

.

Choose it to use it! Upcycle! HT, Heat Treated (not chemical,) pallets are the ones you want.

Pallets come in different sizes, weights and variable construction! They can be rectangular or square, long and narrow, small or large.

If you get your pallet from a company, ask if it is ok to take it. Some pay a deposit and can only get it back when the pallet is returned. Check out your local recycling center, organic garden supply, Craig’s list.

If you will be growing edibles, fruits, veggies and herbs, be sure your pallet is food friendly. What was it used for? Is it imported? Chemical treatments to avoid bacteria and molds, prevent insects and fungi, aren’t good. Pallets made of wood dust and composite wood block contain formaldehyde, a carcinogen. Avoid stained pallets. When in doubt, don’t!

Pallet Worm WalkwaiyPathways with Purpose! This size, long skinny pallets with wide spacing, are great for pathways with a worm farm underneath! The wide spacings allow you to give the worms food. Next season you can plant directly in the space that was previously your walkway or move the rich soil where you want it and/or do another path where you will plant next! Great for muddy terrain. If deeper mud, just lay pallets on pallets to get the height you want!

Be creative! Think how you might use some pallets!

Chris Cano’s Worm Walkway in Gainesville FL
Pallet Garden Vertical


Vertical gives more space!
Safe from bunnies but easy munchies for deer! Secure your vertical pallets so a strong wind won’t down them. Add T feet. In the ground use star pickets or strong stakes. Zip tie to your balcony.
.

bSq Design manages & revitalizes the life cycle of humble pallets!

Successful Pallet Garden Veggie Varieties per Level!

Top 

Determinate Tomatoes: Celebrity, Fresh Salsa, SuperTasty, Tiny Tim, Small Fry, Patio Hybrid and Toy Boy are all great selections! Prolific Cherry tomatoes are practically decorative as well as edible!
Peppers: Sweet Heat, Great Stuff, or Baby Belle. Candlelight hot peppers
Eggplant with smaller fruits, Okra
Bush beans or peas
Cabbage
Onions

Middle 

Lettuce mix: Healing Hands, Alfresco, or City Garden Mix. Spinach.
Strawberries
Herbs: Red Rubin or Genovese basil, sage, spearmint, rosemary, oregano, thyme, and cilantro

Bottom

Summer squash: Saffron or Dwarf Summer Crookneck, bush varieties
Cucumbers: Bush Champio, Salad Bush, or Spacemaster
Watermelons: Bush Sugar Baby or Golden Midget. Any mini melons.

And, of course, it can be lovely to mix your favorite veggies, herbs and flowers! Dwarf nasturtiums at the bottom?

A big thank you to Growing a Greener World’s  Joe Lamp’l for a lot of these suggestions!


Herb Garden! Of all the pallet herb gardens I like this one the best. It looks good. It has a dual purpose. Behind it is a bug proof curtained patio sleeping/reading area. Imagine a summer afternoon gentle breeze, the heavenly scents….while you are snoozing. It is conveniently placed right outside the doorway to the kitchen area. It is attractive enough it could be indoors in a well lighted area.

Pallet Garden Herbs DIYShowOff

.

.

The tall herbs are to the top. There is a goodly variety of herbs ~ basil, parsley, rosemary, dill, oregano, thyme, peppermint, chocolate mint, spearmint, tarragon, lavender, plus another type of spicy globe basil.  Boards have been removed so they all have room to grow well. The garden has sturdy feet. This page DIYshowOff.com has the tutorial.

.

.

.

Pallet Garden A-Frame

Pallet Garden Wall

.

.

.

.

The standing, movable A-Frame! Some pallets are smaller, more lightly planted, less heavy, easier to move. Don’t water right before moving!

.

.

.

.

The ultimate space saver, the Wall or hang them on your fence or let them BE a fence! If you are growing veggies, be sure they are conveniently reachable for tending and harvesting! They are great snuggled on the end walls of balconies or against balcony dividers between apartments for more privacy!

Pallet Garden stained strawberries verticalPaint ‘em or stain ‘em! This Pocket Pallet Garden of Strawberries is attractively stained and vertical. It is not needing to be tightly planted because the soil is safely held in the pockets! Each plant has plenty of soil. If you need more plants/berries, bind two pallets back to back, plant both sides, double your production! Place lengthwise north to south so each side gets plenty of sun. Feed lightly about once a week during production.

Let’s Plant These Babies!

Pallet Garden Potting Soil

Get out your gloves! Nail bites and splinters are no fun. Hose down your pallet, maybe give it a scrub, with bleach to kill cooties or if you would like it a bit lighter color. Let it dry. Make any needed repairs, hammer nails down flush. Sandpaper where/if needed.

6 to 8 hours are enough, but veggies do best in full sun! Make your pallet garden very near or at where it will live. They are heavy, especially when laden with wet soil!

Choose your method! There are many online tutorials, so enjoy yourself, gather up ideas from experienced aficionados!

  • Make pockets out of landscape fabric. That leaves space for air flow between rows.
  • Cover the pallet back with single or doubled landscaping fabric or shade cloth. Leave a longer length at the bottom so you can fold it up around the bottom like wrapping a present ~ to keep the soil from falling out the bottom. Staple the fabric to any place it touches wood to keep the soil where you want it. Plant tight to hold the soil in place.
  • Some don’t trust staples and fabric, so nail plywood on the back.
  • If you are planting veggies, you need more space between plants, won’t be planting tight to hold soil. You could use a second pallet for parts, and build wooden pockets that won’t fail and allow air flow! Drill drain holes in the bottom pieces.
  • If you are doing a lay-on-the-ground pallet garden, staple landscape cloth around the sides to hold the soil in, weeds out. Lay it down, fill it with your soil and plant!

Choose the very best organic potting mix enriched with tasty nutrients and that has good water holding capacity. Super ones oriented to container gardens will do the job!

If you made pockets, stand up your pallet and plant away. Otherwise, the easy way to plant is just lay the pallet on the ground and plant into it as usual. Fill it with premoistened potting soil, install your plants. Starting at the bottom, lift and shake a bit at each layer to settle the soil. Make sure soil is firmly packed as you move up. Fill in spots that settle.

Get out your staple gun again, and staple landscape fabric over the top of the pallet. This lets you fill the pallet completely with soil. It keeps the soil from falling out each time you water, and prevents weeds from growing around the plants in the top section of the pallet garden. Cut X holes where you will plant the top plants and plant them.

If you aren’t using pockets, leave your planted pallet laying on the ground for three or four days. 2 to 3 weeks is much better though, to let the plants get established and hold the soil in place. Depends on you, your plants, your pallet, space available and patience!

Carefully and slowly, gently water so soil doesn’t wash away. Add more soil where there is settling or roots get uncovered.

You can run a drip system through the planter if you like, especially if you planted densely. Water won’t get from the top to the bottom of a densely planted pallet. You can put the drip in at any time, but it’s easier before you plant. Just drill holes in the side and run your line through side to side. One way or the other, water thoroughly. Check the bottom rows to be sure they are moist.

Water as needed. If you planted densely to prevent soil loss, there are a LOT of thirsty roots all packed together. Water frequently. And all those roots are hungry! Feed them regularly with liquid fertilizer, right? But not so much they grow crazy! You will learn the right amounts for your particular plants, soil and location from experience.

Mavis Butterfield's Pallet Garden of Strawberries!

Mavis Butterfield loves her pallet gardens and they love her!

Lay-down pallets! Rather than going vertical, many gardeners lay their pallets right on the ground! Strawberries and lettuce worked best for this gardener! And strawberries and lettuce are great companions! The boards act as mulch, keep the soil moist and protect the roots from losing their surrounding soil. There’s less weeding! When you are done at that location, pick up your pallet, give it a shake and move on! Start again with new vibrant soil! Make a strawberry pallet planter, or chard, or lettuce or mix them all up together! Spring is good to plant your berries, or in SoCal, the first week of January bareroot!

Love carrots?! They are not good in vertical gardens, but great in lay-down versions! Make a frame the size of your pallet, and lay your pallet on top of that! Then your root vegetables will have plenty of space to grow deep.

Pallet Garden Raised Bed

.

.

Save-your-back raised bed pallet! Ideal for growing gourmet Mesclun mixes to mow and munch!

.

.

Pallet Garden Green Bee Education

.

.

.

.

.

.

Make a statement, tell a story! Leaning learning pallets! This one features bee friendly plants!

Pallet gardens are as beautiful and variable as the creativity of the Gardener! Pallets can be used as privacy walls, to create patio enclosures, as windbreaks, fences, borders, dividers, compost enclosures, garden furniture, a potting bench, tool rack/holder, to build structures like sheds, greenhouses, decks, outdoor rooms! They enhance the art of gardening and can be garden art!

.This beautiful pallet garden was at the 2012 Canada Blooms National Home Show!.

Pallet Garden BSq Structure Canada Blooms 2012
bSq Design manages & revitalizes the life cycle of humble pallets!

Updated 9.25.20

Back to top!


Love your Mother! Plant bird & bee food! Think grey water! Grow organic! Bless you for being such a wonderful Earth Steward!

The Green Bean Connection newsletter started as correspondence for the Santa Barbara CA USA, Pilgrim Terrace Community Garden. All three of Santa Barbara city community gardens are very coastal. During late spring/summer we are in a fog belt/marine layer area most years, locally referred to as the May grays, June glooms and August fogusts. Keep that in mind compared to the microclimate niche where your veggie garden is.

Read Full Post »