
Melons are total beauty queens! Their outsides are marvelous, no two alike! You can grow minis to monsters! The insides are beautiful colors! If you couldn’t see in color, their tastes would make up for it! Textures are plentiful! Some of them slither, others crunch! Warm and drizzly down your chin at the garden, ice cold on a hot day! Fruit salsa! You can cut them in a thousand ways, from cubes to balls, slices, astonishing intricate veggie art! They can be eaten with your fingers, put in smoothies, as part of creamy ambrosia. Sprinkle with spices, like chili pepper or cinnamon, toss with mint. Add coconut or walnuts! Make popsicles!
Besides all these delightful features, Melons are good for you!
CANTALOUPE (American) – 100% of Vitamin A, and 24% of Vitamin C
HONEYDEW – 53% of Vitamin C
Melons, like pumpkins, need heat! Melons are native to Africa, and the trick to getting the best-quality fruit in cooler climates is to duplicate the continent’s hot sun and sandy soil as best you can. Light, fluffy soils warm faster than do clay ones, and melons love loose, well-drained dirt! Amend with compost or leaf mold. Ideally, you would wait to sow seed until the soil has warmed to 70°F before planting squash and melons, but SoCal hits 60+ degree soil in April and you can plant transplants successfully then! Get out your soil thermometer and check the soil temp where you garden! Start seedlings indoors to get the soonest start, but don’t start the seedlings too soon! They grow quickly!
Pourous Windbreaks can do three things! You in cooler coastal areas really need the heat. Naked unmulched soil heated by hot sun does the job! No trellises for you. It’s several degrees cooler up in the air. Plant your melons in an area where they are sheltered or there is a windbreak so they get good and hot! Remember, a 50% porous windbreak works best. Dwarf fruit trees interplanted with maybe berry producing shrubs, like blueberries, can reduce cooling and drying winds, allowing the warmth of a food forest! Windbreaks of food producing trees, shrubs or tall plants do triple duty – give heat, save water by reducing drying winds, give food production!

Use clear or black plastic to heat up the ground. They absorb heat, warm the soil early, conserve moisture, control weeds, keep some pests and diseases away, and make harvesting a whole lot easier and cleaner. Or, use black landscape cloth instead of black plastic! The cloth allows the soil to breathe and water to pass through. Combine that with spun polyester row covers over transplants to give them a fast start. They increase the temperature by 5 to 8 degrees, and conserve moisture. Spun polyester is also handy because you can water straight through it. Or you can use a clear plastic film over seeds or young plants to generate more heat, and late melons can be ripened under plastic, too. Row covers must be removed when plants start to bloom so pollinating insects can reach the flowers.
If you choose the black plastic, and you don’t garden over winter, lay it over the future melon garden in late winter to start warming the soil. Weigh down the edges so it doesn’t take flight. When you are ready to plant, make five-inch, x-line cuts at least four feet apart on 6 to 8 foot centers depending on the size of the melon you are growing – if you are growing several plants in rows. If you commingle edibles and ornamentals, allow at least three feet in all directions around the cut-plastic x. Pull the plastic back and create a hill of soil (amended with lots of organic matter).
Green plastic film mulch For your consideration, green mulch is to melons, cucumbers, peppers, pumpkins and squash what red plastic film mulch is to tomatoes. According to reports of research trials in the Northeast and Oregon, cooler areas, it stimulates earlier and heavier yields of fruits. One person reported the green film was very thin. As a deterrent to weeds, it didn’t come close to black plastic. And at the end of the season it wasn’t reusable, so they had to discard it. Maybe things have changed since then or it comes in different weights.
If you have super good heat, keep your melons off the ground with super thick mulch and even then, put them up on sturdy upside down containers. You want them out of the munching bug and soil diseases zone. They will color up more evenly, consistently, and you can save space, if grown on trellises, making little slings to hold the fruits up. But if your area doesn’t get super hot, on the ground is better than up on a cooling wind exposed trellis.
Fabulous varieties!
In cooler coastal areas consider growing mini melons that don’t take as long to mature, or early melons, container varieties, that mature in 85 days or less. Consider growing spicy sweet Green Nutmeg, which has been around more than 150 years. Jenny Lind is another green-fleshed cantaloupe that weighs about a pound, 70 days. Early varieties have compact foliage. Vines and the distance between leaves (nodes) are shorter than larger, long-season melons. They flower early and have smaller fruits.
Heat and drought tolerant varieties per Southern Exposure Seed Exchange are:
Melons: Top Mark, Sweet Passion, and Kansas all have extra disease and/or pest tolerances. Edisto 47 is particularly recommended for hot, humid summers where fungal disease is an issue. Missouri Gold produces well through droughty conditions. If you live in SoCal coastal foothills, plant away. If you are in the cooler beach areas, if you think we will have a HOT summer, take a chance, plant if you have room! It’s recommended to wait until May to plant cantaloupe.
Watermelon: Crimson Sweet and Strawberry watermelon are good choices where heat and humidity make fungal diseases a problem.
**A clever strategy for instant succession planting, if you have space, is to plant melons that mature at different times. Growing small fast maturing melons AND late large melons = 2 harvests!
Soil Slightly acid light, sandy loam with a pH between 6.0 and 6.5 is preferred. You might guess melons are very heavy feeders, they are making a lot of plant and a large fruit! Before planting, add in a little extra compost, and leaf mold, some well rotted manure, cow manure if you can get it. Put bonemeal in at planting time so it will decompose for uptake by when your plant starts to flower! Also add guano at planting time. It takes 4 months to decompose for uptake, helps your plants continue to bloom late in the season! Be sure it is the kind high in P – phosphorus (blooms) 1-10-0.2.
Plant! Seed soaking and presprouting definitely speed up germination! Plant three to five seeds two inches apart and about one inch deep. Keep them moist and watch them grow! Once the vines have two sets of true leaves, thin out the smaller or weaker vines, leaving the two strongest to grow on.
Male flowers come first so they can pollinate the females when they arrive! Not to worry if you don’t get fruit set at first. But if your weather has been overcast or it is unseasonably cool, or there are few pollinators about, hand pollination is needed. It’s easy to do, just takes a bit of time.
Valuable Companions At the same time you plant your melons, put in radish, marigold, maybe nasturtium to repel Cucumber and flea beetles, squash bugs. Nasturtium can harbor snails, and spreads quickly, so you are warned….
Water! You are going to see a lot of recommendations to plant in basins on mounds. Here in Santa Barbara CA when we are in drought conditions or you need to save water, I recommend to plant in basins like the Zuni desert waffle gardens technique. You don’t need to make berms, just dig a basin lower than the surrounding soil. All the water goes to your plant, less is lost to evaporative wind that goes across the top of the basin, less water is needed less often. Moisture seeps to the lowest level and that area stays more moist.
Whether you mound or dig a basin down, make your basin big enough to accommodate feeder roots to the drip line of the main area of the roots. Melons like to be kept moist. Save more water by putting a tall stake at the center of the basin so you can see where to water when the leaves get big and cover the area! Water the roots only; don’t water the rest of the area that doesn’t need it and that watering would cool the plant and ground.
Melons need plenty of water to support quick vine growth in early summer! The rule of thumb is a minimum of 1-inch of water a week, 2 inches is likely better. If you use plastic mulch, it will retain moisture so check the soil under the plastic to see when watering is really required. Once the first fruit ripens, stop all watering. Too much water at ripening time dilutes the fruit’s sugars and ruins the sweet flavor. The melons don’t need the water because they develop a deep root system soon after they start to flower.
Sidedressing Melons are a lot of plant and hungry! Fertilize every two to three weeks, using an organic all-purpose 5-5-5 fertilizer. In the root zone, put some spade fork holes around your plant. Add several inches of compost to root areas monthly. Water it in and it’s like giving your plant compost tea as the water and compost drizzle down into the holes! Especially sidedress melons when blooming starts and every 6 weeks after.
Diseases
- Fungus diseases, include Alternaria leaf spot, powdery mildew, anthracnose, and downy mildew. Water melons in the morning, ideally at soil level, so leaves dry before evening, preventing fungal diseases.
- Apply the home remedy Mildew mix! As soon as your little plants are up about 3″ or you put transplants in the ground, mix a heaping tablespoon of Baking Soda, 1/4 cup non-fat powdered milk, 1 regular aspirin, 1 teaspoon liquid dish soap in a watering can. Apply foliarly, both under and on top of leaves. The main ingredient is the bicarbonate of soda! It makes the leaf surface alkaline and this inhibits the germination of fungal spores. Baking soda prevents and reduces Powdery Mildew, and many other diseases on veggies, roses, and other plants! It kills PM within minutes. It can be used on roses every 3 to 4 days, but do your veggie plants every 5 to 10 days, or after significant rains, as the plant grows, because new plant tissues are not yet protected by your fungicide. See more details!
- To prevent powdery mildew, spray the leaves with wettable sulphur during late summer when the nights begin to cool down.
- At the first sign of disease, remove infected parts; remove and discard the mulch around the plant and replace it with fresh, clean mulch.
Pests Spun polyester row covers are excellent for controlling cucumber beetles and vine borers. Vine borers are the worst melon pest in some states, but not in California. Check the IPM at the ag university nearest to your location. Though it may be written with squash in mind, just think melon, another cucurbit, as you read it. Remember, row covers must be removed when plants start to bloom so pollinating insects can reach the flowers. Once the row covers are removed, sprinkle diatomaceous earth on the leaves to protect the plants from cucumber beetles. Plant Radish with eggplant, cukes & zukes, and melons to repel wilt-carrying spotted or striped cucumber beetles. Eat some of the radishes, but leave others to grow full size. Plant your radish before you plant your susceptible plants so the radish will be up when you put your susceptible plants in.
Maturity, When and How to Harvest
Harvesting your cantaloupe at the right time is important!
Unlike other fruits, melons, cantaloupe don’t get sweeter once off the vine. Color and texture may change, but the taste won’t. When the skin color changes from green to gold, keep watch. When a crack forms at the junction of the melon and where the stem attaches, just pressure from your thumb should loosen it to harvest. It ‘slips’ from the vine. Don’t wait, take it then! If the melon falls off the vine on its own, it has likely become overripe, and both the taste and texture will be distorted as a result.
On very hot days melons can over ripen on the vine, giving them a waterlogged appearance. Most summer melons are fragrant when ripe. Sniff the skin; if you smell the flavor of the melon (the senses of smell and taste are interrelated), it is ripe for the picking.
Honeydew, crenshaw, and other winter melons are ready to harvest when they turn completely white or yellow, and the blossom end is slightly soft to touch. Since they do not slip, cut the melons from the vine. They will continue to ripen for several days at room temperature once they are picked.
The sweetest and most flavorful melons are those picked ripe from the vine and eaten right away. They may not be icy cold, but the fresh flavor and perfume more than make up for the temperature difference. Go ahead, open a melon and eat it right in the garden—without utensils—and let the sweet nectar run down your chin. That’s the true taste of summer!
Poor Flavor? It may be the weather: cloudy during ripening, too hot, too much or too little water, it rained a lot before harvest, or a combination of factors.
Saving Seeds is easy! When you save and store seeds, you help to continue the genetic line of plant varieties, leading to greater biodiversity in garden plants and preventing extinction of different varieties. A word to the wise! Like other cucurbits, melons easily crossbreed, so allow a ½ mile for reliable distance isolation between different types or cultivars. To be completely safe from any accidental cross-pollination, keep them away from other melons or family members including cucumbers, squash, and pumpkins. Baker Creek Heirlooms says: To ensure pure seed, isolate different melon varieties by 1⁄2 mile or try caging and hand pollinating.
- Pick melons for seed saving when the tendril nearest the melon is completely dried, then store the harvested melon intact for another 3 weeks before removing and cleaning the seeds. Scoop out the seeds, put them into a wire mesh sieve, then with running water over the seeds rub them gently against the mesh, using it to loosen and remove the stringy fibers. The final test: Healthy seeds will sink to the bottom of a bowl of water, while dead seeds and most of the pulp will float. Get your seeds as clean as possible to keep them from sticking to whatever surface you dry them on.
- Drain them in a strainer. Pat the bottom of the strainer with a cloth towel to pull extra water from the seeds after they have drained. Spread them on a piece of glass or a shiny ceramic plate to dry (they will stick to paper, even waxed paper). Place the glass or ceramic plate in a cool, dry shady spot for several days. After the seeds are dry, they can be carefully removed from the glass or plate and final-dried before being stored in jars.
- Your seeds will keep for up to 5 years if stored in a cool dry place, however, the shorter the storage time, the better. Date and Name your seed jar. Dry seeds well to avoid mildew. Fluctuation in temperature or moisture levels of stored seeds lowers their longevity significantly. Prevent insect infestations by adding diatomaceous earth, it’s non toxic, to the stored seeds in their jars. Add a few pinches to the seeds in a bowl and gently stir to thoroughly cover each seed.
All melons are flavorful enough on their own, yet you can enhance them with a sprinkle of ginger or salt. A squirt of lemon or lime juice will bring out the melon’s sweetness.
A popular treat offered by Los Angeles push cart vendors is fresh fruit sprinkled with salt, chili powder and a squeeze of fresh lime juice! It makes a quick, healthy snack or a vibrant side for a barbecue!
Mexican Fruit Salad with Chili Powder

Choose 1, 2, 3 or more fruits and/or vegetables—here are some that work well:
- mango
- pineapple
- watermelon
- cantaloupe or other melon
- cucumber or fresh pickles
- jicama
lime juice
chili powder
salt, to taste or not at all! If you use salt, assemble your salad at the last minute—the salt begins leeching juice from the fruit right away.
May your life be sweet and spicy, and melon juice drizzle down your chin!
Updated 4.25.23
Love your Mother! Plant bird & bee food! Think grey water! Grow organic! Bless you for being such a wonderful Earth Steward!
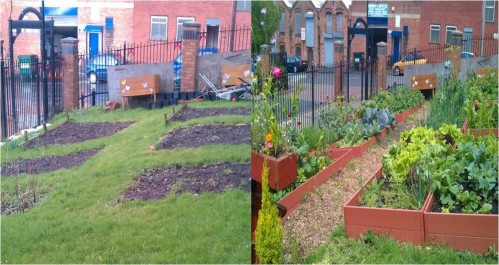
The Green Bean Connection started as correspondence for the Santa Barbara CA USA Pilgrim Terrace Community Garden. Both of Santa Barbara City’s remaining community gardens are very coastal. During late spring/summer we are often in a fog belt/marine layer most years, locally referred to as the May grays, June glooms and August fogusts. Keep that in mind compared to the microclimate niche where your veggie garden is.
Top^
Feeling inspired? Get the word out! Sharing is caring ~
Read Full Post »


 x
x x
x x
x x
x


 It’s important we do the same! SeedSaving is as simple as collecting seeds from your best plants. Over the fence seed trading has always been done. These days it can be buying from online seed houses, seed exchanges, like Southern Exposure that intend to preserve heirloom plants. You might trade seeds online like at Seed Exchange – GardenWeb! You may want to contribute to a Seed Library
 SAN FRANCISCO PERMACULTURE GUILD BLOG


